M&S Systems dmc1 Instructions Manual
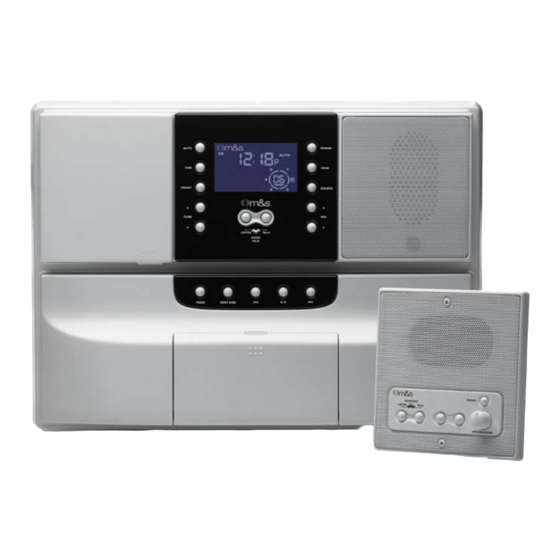
Whole-house music communications system
Hide thumbs
Also See for dmc1:
- Owner's manual (24 pages) ,
- Instructions manual (17 pages) ,
- Rough-in instructions (8 pages)
Advertisement
Quick Links
Download this manual
See also:
Owner's Manual
Advertisement

Related Manuals for M&S Systems dmc1


Summary of Contents for M&S Systems dmc1
- Page 1 Rough-In Instructions 2861 Congressman Lane | Dallas, Texas 75220 | 800.877.6631 | www.mssystems.com Page 1...
- Page 2 Introduction Designed for installation in new home, the dmc1 is a whole-house music communications system. It is designed to provide years of enjoyment and service to the homeowner. M&S audio products are backed with more than 50 years of experience in the design and manufacture of precision acoustical equipment for the home.
- Page 3 Instructions READ ALL INSTRUCTIONS CAREFULLY BEFORE INSTALLING OR USING THE DMC1 SYSTEM THE dmc1 MUST BE INSTALLED BY A M&S SYSTEMS DEALER OR INSTALLERS, AND MUST CONFORM TO ALL LOCAL BUILDING AND ELECTRICAL CODES. Warning: always follow these safety instructions.
- Page 4 Locate the system away from heat sources such as radiators, heat • registers, stoves, or other heat producing products. Do not locate the dmc1 master or room stations in an outside wall. • Do Not expose the dmc1 to moisture. Doing so can create fire or •...
- Page 5 Cautions: Wiring • A qualified electrician must run a 120V AC line to the dmc1 transformers. • USE CAT-5 wire for all DMC1 wire runs excluding the door stations runs. For the door stations we recommend the use of M&S Systems Brand MS4DCXSC wire.
- Page 6 DO NOT install room stations within 10 feet of other room stations • or the dmc1 master unit. This will cause acoustical feedback. DO NOT install room stations in stud cavities with other room •...
-
Page 7: Rough-In Instructions
Rough-In Instructions The rough-in should be made during new construction prior to the application of wall covering material. Rough-in boxes are provided for the dmc1 master, door stations and the room stations. • Tools required: • Power drill with 1" auger •... - Page 8 Have a qualified electrician run a dedicated 120VAC/60Hz line with ground connection from the power panel to the wall housing as show in figure 3. The dmc1 requires a dedicated power source to assure no interference from other equipment caused by looped power circuits.
- Page 9 To install the ferrite bead on the antenna, leave 41” of AM antenna wire in the wall housing. Open the ferrite bead. Grasp wire approximately 1” from the end of the wire. Wrap wire around the bead a minimum of 6 times.
-
Page 10: Door Stations
Choose a location for the AWP that will be easily accessible to the sources that are to be connected to the system (close to the receiver, TV or DVD player for example). Note the external source wire run to the dmc1 must not exceed 50 feet 2861 Congressman Lane | Dallas, Texas 75220 | 800.877.6631 |... - Page 11 MS5XSC cables from the volume controls to the remote amplifier’s 2-gang box. Figure 12 - Power Run the MS7XSC cable from the dmc1 to the remote amp installation amplifier’s 1-gang box. The remote amplifier is designed to mount over the 1-gang and 2-gang boxes on a single stud. Note: The speaker cables CANNOT be located in the same gang box used for 120VAC wiring.
- Page 12 Door Release Options The door release option is a dry contact closure provided by the dmc1 master. This dry contact is rated 24V at 4 Amps. The sample applications below represent some uses of this option. However, only one application can be used in any dmc1 system at a time.
- Page 13 (Refer to programming procedures accompanying the security panel). Label and secure cables at the DMC1H or DMC1HC housing. Have a certified security installer hook the dmc1 up to the alarm system. 2861 Congressman Lane | Dallas, Texas 75220 | 800.877.6631 | www.mssystems.com...
- Page 14 Notes 2861 Congressman Lane | Dallas, Texas 75220 | 800.877.6631 | www.mssystems.com Page 14...
-
Page 15: M&S Systems 2-Year Warranty
M&S Systems 2-Year Warranty M&S Systems warrants its products to be free of defects for 2 years. Except for the AirVac Gold power units. The warranty period begins on either (a) the date of purchase or installation date of this product or (b) the date of closing on a new residence in which this product was originally installed. - Page 16 115996 2861 Congressman Lane | Dallas, Texas 75220 | 800.877.6631 | www.mssystems.com Page 16...
Need help?
Do you have a question about the dmc1 and is the answer not in the manual?
Questions and answers