Table of Contents
Advertisement
Advertisement
Table of Contents

Related Manuals for Marco Polo ETP-LOC-01

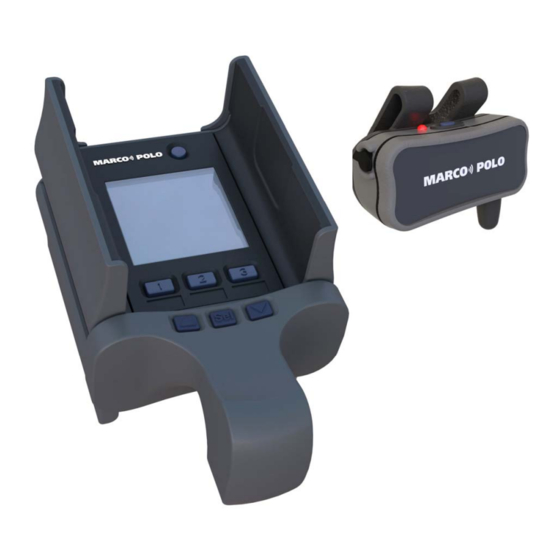
Summary of Contents for Marco Polo ETP-LOC-01
-
Page 1: Operating Instructions
Operating Instructions Locator Model ETP-LOC-01 Tag Model ETP-TAG-01... - Page 2 This device complies with Part 15 of the FCC Rules. Operation is subject to the following two conditions: (1) this device may not cause harmful interference, and (2) this device must accept any interference received, including interference that may cause undesired operation. Changes or modifications not expressly approved by the party responsible for compliance could void the user’s authority to operate the equipment.
- Page 3 Marco Polo Operating Instructions Limitation of Liability The Marco Polo system (the Product) is designed and manufactured with the intended use as a pet tracking assistant. The Product is a supplement to the normal precautions a reasonable pet owner would take to ensure the safety and confinement of their pet.
-
Page 4: Table Of Contents
Marco Polo Operating Instructions Contents Introduction ................1 User Controls and Displays ........... 2 System Setup ................. 3 Battery Charging .............. 3 Tag Attachment..............4 Powering On the Locator and Tag ........5 Pairing a Tag and Locator ..........6 Labeling the Pet Buttons .......... -
Page 5: Introduction
“Where are you?” The tag on your pet answers back, “Here I am!” This allows Marco Polo to keep track of your pet, even when you are not around. If your pet wanders, Marco Polo’s tracking feature allows you to quickly find their location and bring them safely back home. -
Page 6: User Controls And Displays
User Controls and Displays Power Pet Buttons Button 1 2 3 Power Status Button Light Down Select Tag: Locator: Power Button – Hold down Power Button – Turns the Locator on and off. to turn power On/Off. Pet Buttons – One button for each of up to 3 Status Light –... -
Page 7: System Setup
System Setup Battery Charging The Marco Polo pet monitoring and tracking system consists of two parts: a handheld “Locator” unit and up to three “Tag” units that can be attached to your pet’s collar. Prior to first use, the internal lithium-ion rechargeable batteries must be charged with the included battery charger adapter. -
Page 8: Tag Attachment
Charging Jacks Figure 3 Location of Charging Jacks Charging the Tag - press and hold the power button on the tag until the red light begins to flash. The tag’s status light will flash until the charge cycle is complete and then the light will go off. -
Page 9: Powering On The Locator And Tag
Figure 4 Attaching the Tag to a Collar When attaching the tag to a collar, always select the side of the collar’s buckle that is way from the D-ring for holding license and ID tags. The best arrangement is to have the D-ring on the left, buckle in the center and the Marco Polo tag on the right (turn the collar over if necessary to get this arrangement.) If the collar is an adjustable type then the side away from the D-ring may have two thicknesses of material, if this is the case then slip the tag’s collar clip over just... -
Page 10: Pairing A Tag And Locator
When the tag is on the light will flash briefly once every 10 seconds. Pairing a Tag and Locator If you purchase the Marco Polo locator with one included tag then no pairing operation is needed and you may proceed directly to the “Tracking a Pet” section below. -
Page 11: Labeling The Pet Buttons
Labeling the Pet Buttons To help remember which pets are assigned to which of the three Pet buttons on the locator, you may fill in the included pet button labels and place them in the label wells under each button. You may wish to abbreviate the pet’s name or just use the first letter of the name to write on the label. -
Page 12: Tracking A Pet
Tracking a Pet Searching Once your Marco Polo tag is turned on and placed on the pet’s collar you may track their whereabouts at any time. To do this, simply turn the locator on and press the Pet button over the name or initial of the pet you wish to track. When you do this the Track icon will begin to flash as shown in Figure 6. -
Page 13: Tracking
This searching transmission will continue until one of these events has occurred: 1. The tag responds 2. The operation is canceled as described below 3. Two minutes have elapsed without a response from the tag The first time you attempt to search for your pet’s tag do so with the pet nearby, somewhere in your house or yard where you know the signal will be received. - Page 14 When the tracking mode is activated the locator communicates with your pet’s tag about once every 4 seconds. When your pet’s tag responds, the following information is updated on the display: The “tag” icon flashes to show that your pet’s tag responded to the locator.
-
Page 15: Exiting Searching/Track Mode
Tag Icon Does Not No Signal Flash Received from Tag Unable to Calculate a Direction Figure 9 Tracking Error Messages No Signal - If a signal is not received back from the tag the tag icon does not flash and the No Signal message is displayed, this condition can occur from time to time under normal conditions and is not a malfunction. -
Page 16: Tracking Tips
off to exit either mode, it is never necessary to change anything on your pet’s tag; it says on all the time and changes modes automatically. Tracking Tips If you are out in an open area with few houses or hills and your pet is within range of the locator then tracking is easy –... - Page 17 now turn 90 degrees and check to see if the arrow still points in the same general direction. If it does then that direction is correct. If the arrow now points in the opposite direction of what it did originally, turn your body to face that direction, if the arrow confirms that direction then it is the correct path to your pet.
-
Page 18: Monitoring A Pet
Monitoring a Pet One of the most unique and powerful features of your Marco Polo system is the ability to monitor your pets 24 hours a day to ensure that they have not left your yard or other designated area. - Page 19 Flashing Figure 11 Setting Alarm Mode for Pet 1 Press the Down Arrow button to cycle through the alarm mode selections: On - When the pet is found outside of the designated area for 2 consecutive monitoring checks (about a minute and a half) an audible tone is generated by the locator.
- Page 20 Flashing Figure 12 Setting Monitor Boundary for Pet 1 Press the Down Arrow button to cycle though the boundary selections. In general, you want to choose the smallest boundary area that does not generate false alarms as your pet moves about. These are the available boundary selections: Near - Used when the pet is intended to be very close to the locator at all times.
-
Page 21: Monitoring A Single Pet
Monitoring a Single Pet To begin monitoring your pet and receive alarm notifications if they move outside of your selected boundary area, press the Pet button over the pet’s name twice. This will cause the word Monitor to flash. You can press Select to start monitor mode immediately or simply wait 5 seconds and the locator will enter monitoring mode automatically. - Page 22 In monitor mode three things are different from tracking mode: 1. The locator only communicates with the tag once every 40 seconds rather than once every 4 seconds. 2. The direction information is not calculated or displayed by the locator. 3.
-
Page 23: Monitoring Multiple Pets
“Searching”. Monitoring Multiple Pets The Marco Polo system can monitor up to three pets at one time. To do this you simply repeat the process of placing each tag into monitor mode one at a time by pressing the Pet button twice for each tag to be monitored. -
Page 24: Switching Between Modes
Figure 17 Monitoring 3 Pets Pets 1 and 2 in Alarm Switching Between Modes You can transition a pet’s tag directly from one mode to another by pressing its pet button until the mode you want (Track, Monitor or Idle) is indicated and then press select. -
Page 25: Troubleshooting
Troubleshooting Problem Solution Tag or locator will not turn on. - Connect battery charger. - Hold power button for 3 seconds. Tag will not respond to locator in - Check that tag is turned on. searching mode when close to the - Wait 2 minutes for tag to return to locator. -
Page 26: Specifications
Specifications Locator Specifications Size 6”h x 3 ½”w x 1 ½”d Weight 10 oz. Battery Type Rechargeable Li-ion Battery Life Searching Mode - 8 Hours Tracking Mode - 3 Days Monitor Mode - 3 Days Range Up to 2 Miles Line-of-Sight Number of Pets Up to 3 Alarms... -
Page 27: Warranty
Warranty 90-Day Limited Warranty Eureka Technology Partners, LLC warrants the enclosed product against defects in materials and workmanship under normal use and service for 90 days provided it is returned in accordance with this warranty. If defective, the product will be repaired or replaced at Eureka’s option, at no charge, with dated proof of purchase.
Need help?
Do you have a question about the ETP-LOC-01 and is the answer not in the manual?
Questions and answers