Table of Contents
Advertisement
Available languages
Available languages
Advertisement
Table of Contents
Troubleshooting

Summary of Contents for Gym Master GM97816
- Page 1 INSTRUCTION MANUAL MOTORIZED TREADMILL MODEL: GM97816...
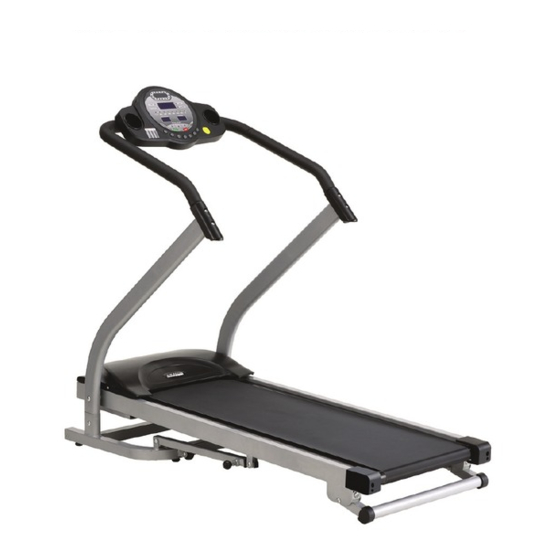
- Page 2 INTRODUCTION Console with LED windows Handle pulse sensors Safety key Upright posts Motor cover Running belt Bottom frame Extension tube Rear covers CAUTION! BEFORE BEGINNING ANY EXERCISE PROGRAM, ALWAYS CONSULT YOUR PHYSICIAN. IF YOU FEEL CHEST PAINS, NAUSEA, DIZZINESS OR SHORTNESS OF BREATH, STOP EXERCISE AND CONSULT YOUR PHYSICIAN BEFORE CONTINUING.
-
Page 3: Key Features
KEY FEATURES Congratulations on choosing this treadmill. You have taken the first step to a healthier and more rewarding lifestyle. This treadmill is especially designed to give you reliable performance and enjoyable workout in the comforts of your home. Please find below the features and benefits of this treadmill. Manual incline can meet your different requirement, jogging, running, walking. -
Page 4: Important Safety Precautions
IMPORTANT SAFETY PRECAUTIONS When using an electrical product, basic precautions should always be followed. Read all instructions before using this treadmill. GROUNDING INSTRUCTIONS This product must be grounded! If treadmill should malfunction or breakdown, grounding provides a path of least resistance for electrical current to reduce the risk of electrical shock. The product is equipped with a cord having an equipment-grounding conductor and a grounding lug. -
Page 5: Mechanical Safety
MECHANICAL SAFETY Before you start to exercise, make sure the unit functions correctly. To maintain the safety level of the exercise equipment does not use a faulty device. Replace defective components immediately and/or keep the equipment out of use until repair. Inspect the equipment prior to exercising to ensure that all nuts and bolts are fully tightened before each use. -
Page 6: Assembly Instructions
ASSEMBLY INSTRUCTIONS ASSEMBLY TREADMILL 1/ ASSEMBLE THE UPRIGHT POSTS (as picture 1) Connect the wires before you assembly the upright posts. Fix each upright post and base frame with 4pcs bolts (M8X15) for each side. Do not tighten these bolts until the console frame have been tightened. -
Page 7: Setting Up Your Treadmill
SETTING UP YOUR TREADMILL PLACEMENT IN YOUR HOME To make exercise a desirable daily activity for you, the treadmill should be placed in a comfortable and attractive setting. This treadmill is designed to use minimal floor space and to go nicely in your home. -
Page 8: Getting Started
GETTING STARTED TURN POWER ON The On/Off switch for the treadmill is located next to the power supply cord at the back of the motor cover. Flip this switch to the “ON” position. SAFETY TETHER KEY AND CLIP The safety key is designed to cut the main power to the treadmill should your fall. Therefore, the safety key is designed to bring the treadmill to an immediate stop. -
Page 9: Handling Your Treadmill
HANDLING YOUR TREADMILL LIFT THE TREADMILL Use the manual incline to incline the treadmill. FOLDING THE TREADMILL Folding and unfolding of this treadmill is made easy with the assistance of extension tube. ( the picture below) After the treadmill has come to a complete stop, unplug the treadmill from the power source, fold up the deck slowly with both hands. -
Page 10: Operating The Console
OPERATING THE CONSOLE 1.DISPLAY AND KEY FUNCTION: Instructions about the console window 1.Display windows :three Windows and a runway light: A: The left side window display: Heart range data. B: The right side window display: Speed range data. C: In the center the window display: Time , distance, calories, runway. When show a certain data correspond of LED light would be flicker. - Page 11 Program Instruction 1:A PO manual program including: normal mode, time countdown, distance countdown, calorie countdown mode 2 6 set programs P1,P2,P3,P4,P5,P6. 3. a program of body fat faction Start instructions 1 Put the safety key on computer board, open the power supply, all the functions of the window will show 2 seconds and the buzzer will give off a “beep”...
- Page 12 Program mode 1: the original time is designed to 30 minutes. You can just set time between 8:00 to 99:00.Press “+””-“ can adjust the set parameter. 2: press start/pause key, the motor start function according to the program. 3:Press “stop”key, the speed will slow down until the machine stops. 4.Press + or can adjust the running speed.
- Page 13 IX:the display range of numerical value original Designed range Display range Designed original value Time(minute:second) 0:00 30:00 8:00-99:00 0:00~99:59 speed(km/h) 1.0 12.0 Heart rate 40-199 1.00 distance(km) 0.00 1.00 99.00 0.0 99.99 calorie(term) 10 9990 0 9999 I: program speed diagram: Program Speed section...
- Page 14 TARGET HEART RATE The most common method for calculating your target heart rate is to find your maximum heart rate. The standard formula for this is: 220 - your age = maximum heart rate. You DO NOT want to workout at your maximum heart rate. You want to workout in your target heart rate zone.
-
Page 15: Exercise Tips And Guidelines
EXERCISE TIPS AND GUIDELINES STRETCH Stretching prior to exercise will improve flexibility and reduce chances of exercise related injury. Ease into each of these stretches with a slow gentle motion. Hold for a count of ten. Do not bounce. Repeat the stretch exercises again after the cool down will help to loosen and relax your muscles to prevent soreness. -
Page 16: Maintenance
MAINTENANCE CLEANING Remove dust on the treadmill with vacuum or slightly damp cloth. Fold up the deck and clean the floor with vacuum periodically will help to prolong the treadmill product life. Never use solvents on the deck or running belt. Use of solvents can reduce critical lubrication of the deck and belt. -
Page 17: Lubricating The Deck
DRIVE BELT TENSIONING ADJUSTMENT If you have tensioned the running belt and are still experiencing a slipping sensation, call your dealer. Only an authorized dealer should perform tensioning of the drive belt. LUBRICATING THE DECK A well-lubricated deck will ensure high performance of your treadmill and reduce the level of normal war and tear to important components. - Page 18 THE ADJUSTMENT OF THE MOTOR BELT Before all the machine leaving the factory, it’s in the best position, but after a period running, the belt may become loose. Adjust the step: Adjust Screw Use the wrench adjust electrical engineering stud bolt the agreeable hour hand turns to move.
-
Page 19: Troubleshooting
TROUBLE SHOOTING WHEN TO CALL FOR HELP This treadmill is designed with user safety as the number one priority. In the event of electrical failure, the treadmill will shut off automatically to prevent user injury and to prevent damage to expensive components such as the motor. -
Page 20: Troubleshooting Guide
TROUBLE SHOOTING GUIDE Problem Potential Cause Corrections Treadmill will not Not plugged in Plug into grounded outlet. start Safety tether not inserted Insert safety tether into monitor. House circuit breaker tripped Reset or replace fuse. Treadmill circuit breaker tripped Lubricate treadmill deck and On/Off switch on OFF reset. -
Page 21: Exploded Drawing
EXPLODED DRAWING Owner’s Manual... - Page 22 ASSEMBLE PARTS Owner’s Manual...
-
Page 23: Part List
PART LIST QUANTIT NAME SPECIFICATION Base Frame Main Frame Upright post weldment Handle bar weldment Rear bumper bracket Outer extension tube weldment Inner extension tube Weldment of the motor mounting plate Running broad Front roller Rear roller Motor Console Controller Transformer Switch Fuse seat... - Page 24 Distance sleeve 20.4X 16.4X 10 Rear cushion 44X38X30 33X30X30 Rear cushion Rear Feet Running board cushion 30X 9X15 Foot mat M8X 28X31 Loop 36X 24X10 Foam 28X 36X700 Quick Pin 1set M10X75 45mm Inside 6Corner Screw M10X50 Inside 6Corner Screw M8X75 Inside 6Corner Screw M8X60...
-
Page 25: Manual Del Usuario
MANUAL DEL USUARIO TROTADORA DE MOTOR MODELO: GM97816... - Page 26 INTRODUCCIÓN INTRODUCTION Consola con pantallas LED Console with LED windows Sensores de pulso manuales Handle pulse sensors Llave de Seguridad Safety key Postes Verticales Upright posts Cubierta del Motor Motor cover Faja para Trotar Running belt Armazón Inferior Bottom frame Tubo de extensión Extension tube Rear covers...
-
Page 27: Características Principales
CARACTERÍSTICAS PRINCIPALES Felicitaciones por haber escogido esta trotadora. Usted ha tomado el primer paso hacia un estilo de vida más saludable y reconfortante. Esta trotadora está especialmente diseñada para ofrecerle un funcionamiento confi- able y programa de ejercicios que se puede disfrutar en la comodidad de su hogar. Abajo encontrará... -
Page 28: Precauciones De Seguridad Importantes
PRECAUCIONES DE SEGURIDAD IMPORTANTES Al momento de utilizar cualquier producto eléctrico, se debe tomar siempre ciertas pre- cauciones básicas. Lea todas las instrucciones antes de utilizar esta trotadora. INSTRUCCIONES DE CONEXIÓN A TIERRA ¡Este producto debe contar con conexión a tierra! Si la tratadora presenta un desper- fecto o daño, la conexión a tierra ofrece un camino de resistencia para la corriente eléctrica reduciendo el riesgo de una descarga. - Page 29 SEGURIDAD MECÁNICA •Antes de comenzar a hacer ejercicios, asegúrese de que el equipo funcione cor- rectamente. Para mantener su nivel de seguridad, no utilice el equipo si se encuentra defectuoso. •Reemplace las piezas defectuosas inmediatamente y/o mantenga el equipo fuera de uso hasta que sea reparado.
-
Page 30: Instrucciones De Ensamblaje
INSTRUCCIONES DE ENSAMBLAJE ASSEMBLY INSTRUCTIONS Ensamblaje de la Trotadora ASSEMBLY TREADMILL 1.Arme los postes verticales (Véase la figura 1) 1/ ASSEMBLE THE UPRIGHT POSTS (as picture 1) Conecte los cables antes de ensamblar los postes verticales. Fije cada poste vertical y el armazón Connect the wires before you assembly the upright posts. - Page 31 INSTALACIÓN DE SU TROTADORA Ubicación en el hogar Para que los ejercicios sean una actividad diaria en usted disfrute, la trotadora debe colocarse en un lugar cómodo y atractivo. Esta trotadora está diseñada para utilizar un mínimo de espacio y para verse bien en su hogar. -No coloque la trotadora al aire libre.
-
Page 32: Cómo Comenzar
CÓMO COMENZAR Encendido El encendido de la trotadora se encuentra ubicado al lado del cordón de alimentación en la parte posterior de la cubierta del motor. Coloque el botón que la posición “ON”. Botón de traba y broche de seguridad El botón de seguridad está... - Page 33 HANDLING YOUR TREADMILL CÓMO MANIPULAR LA TROTADORA LIFT THE TREADMILL Cómo levantar la trotadora Use the manual incline to incline the treadmill. Utilice el inclinador manual para inclinar el equipo. FOLDING THE TREADMILL Cómo plegar la trotadora Folding and unfolding of this treadmill is made easy with the assistance of extension tube. Plegar y desplegar la trotadora se hace fácil con la ayuda del tubo de extensión.
- Page 34 CÓMO UTILIZAR LA CONSOLA OPERATING THE CONSOLE 1.Funciones de la pantalla y de los botones 1.DISPLAY AND KEY FUNCTION: I.Instrucciones acerca de la pantalla de la consola. Instructions about the console window 1.Pantallas: tres ventanas y luz corrediza 1.Display windows :three Windows and a runway light: A.Ventana de la pantalla izquierda: Información del ritmo cardiaco.
- Page 35 II.Programas 1.Un programa manual PO que incluye: opción normal, conteo regresivo de tiempo, con- teo regresivo de distancia, conteo regresivo de calorías. 2.6 programas predeterminados: P1, P2, P3, P4, P5, P6 3.Un programa de reducción de grasa corporal. III.Instrucciones de inicio 1.Coloque el botón de seguridad en el tablero de la computadora.
- Page 36 E07 y se emitirá un sonido “beep” (la información de las otras pantallas permanecerá intacta). F.Bajo la opción de conteo regresivo, cuando el tiempo llegue a 0, la velocidad dis- minuye hasta finalmente detenerse. Se emitirá un sonido 5 veces, uno por segundo. Presione el botón “start/pause”...
- Page 37 muestra 01, esto indica que se ha seleccionado el género “masculino”. Presione el botón “Mode”. La pantalla de velocidad mostrará 02 y mostrará la edad predeterminada, veinticinco años de edad. Presione “+” o “-“ para seleccionar la edad (el rango es de 1-99). Presione el botón “Mode”...
- Page 38 Ritmo cardiaco objetivo El método más común de calcular su ritmo cardiaco objetivo es encontrar su ritmo car- diaco máximo. La fórmula estándar para esto es: 220 – su edad = ritmo cardiaco máximo NO se debe hacer ejercicios al nivel máximo de ritmo cardiaco. Se debe hacer ejercicios al nivel del rango de su ritmo cardiaco objetivo.
- Page 39 CONSEJOS Y PAUTAS PARA EL EJERCICIO Estiramiento El estiramiento antes de llevar a cabo el ejercicio mejora su flexibilidad y reduce las posibilidades de lesiones. Comience los ejercicios de estiramiento con un movimiento lento y suave. Mantenga la posición durante diez segundos. No se balancee. Repita los ejercicios de estiramiento al final para enfriarse y ayudar a relajar los músculos y así...
-
Page 40: Mantenimiento
MANTENIMIENTO Limpieza Retire el polvo del equipo utilizando una aspiradora o un paño ligeramente húmedo. Plieg- ue la base y limpie el piso con una aspiradora de manera periódica con el fin de prolongar la vida útil de la trotadora. Nunca utilice solventes para limpiar ni la base ni la faja para correr. - Page 41 Ajuste de la tensión de la faja Si al momento de colocar sus pies sobre la faja, se siente la sensación de resbalarse, esto quiere decir que la faja se ha estirado y se está deslizando entre los rodillos. Todas las fajas se estiran con el tiempo. Esto es normal y es común llevar a cabo el ajuste en cualquier trotadora.
- Page 42 ¡PRECAUCIÓN! Si se ajusta demasiado, se puede acortar significativamente la vida de la faja y causar otros daños a otros componentes. NOTA: Una base bien lubricada le asegura una mayor duración de su equipo además de ofrecerle un óptimo rendimiento. ¡PELIGRO! Con el fin de reducir el riesgo de una descarga eléctrica, siempre desenchufe el equipo inmediatamente después de utilizarlo y antes de proceder a limpiar.
-
Page 43: Solución De Problemas
SOLUCIÓN DE PROBLEMAS Cuándo solicitar asistencia Este equipo ha sido diseñado para la seguridad del usuario como primera prioridad. En caso de falla eléctrica, el equipo se apagará automáticamente para evitar lesiones al usu- ario y para prevenir daños a los componentes como por ejemplo el motor. Si se experimenta un funcionamiento inusual del equipo, apáguelo y enciendalo de nuevo como para reiniciarlo. -
Page 44: Guía De Solución De Problemas
GUÍA DE SOLUCIÓN DE PROBLEMAS Problema Causa Potencial Correcciones El equipo no se 1. No está enchufado 1. Conectelo a un enciende tomacorriente 2. El botón de seguridad 2. Inserte el botón no está insertado de seguridad en el monitor 3. - Page 45 DIAGRAMA EXPLODED DRAWING Owner’s Manual...
- Page 46 PIEZAS DE ENSAMBLAJE ASSEMBLE PARTS Owner’s Manual...
- Page 47 LISTA DE PIEZAS Artículo Nombre Especificaciones Cantidad Armazón base Armazón principal Unión del poste vertical Barra del mango Protector trasero Tubo de extensión externo Tubo de extensión interno Placa de ensamblaje del motor Tablero para correr Rodillo delantero Rodillo trasero Motor Consola Controlador...
- Page 48 Manga de distancia 20.4x16.4x10 Cojín trasero I 44x38x30 Cojín trasero II 33x30x30 Patas traseras Cojín de la tabla para 30x9x15 correr Tapete M8x28x31 Esfera 36x24x10 Espuma 28x36x700 Clavija 1 juego Tornillo plano interno M10x75(45mm) Tornillo plano interno M10x50 Tornillo plano interno M8x75 Tornillo plano interno M8x60...
Need help?
Do you have a question about the GM97816 and is the answer not in the manual?
Questions and answers