Table of Contents
Advertisement
260Z
M
P
E
G
4
4
C
H
D
V
R
M
P
E
G
4
4
C
H
D
V
R
M
A
N
U
A
L
M
A
N
U
A
L
REC
PLA Y
P A US E
S T OP
RE W
F F
HD D
HD D Fu ll
ALAR M
TIME R
PL AY
RE C
MENU
ENTER
LIS T
SLOW
ZOOM
SEQ
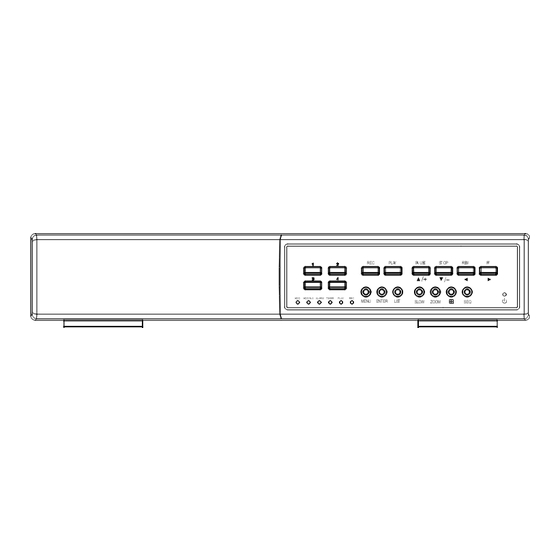
Please read instructions thoroughly before operation and retain it for future reference.
The image shown above may differ from the actual product appearance.
DR040_Manual_V1.0
Advertisement
Table of Contents

Summary of Contents for AV Tech MPEG4
- Page 1 260Z PLA Y P A US E S T OP RE W HD D HD D Fu ll ALAR M TIME R PL AY RE C MENU ENTER LIS T SLOW ZOOM Please read instructions thoroughly before operation and retain it for future reference. The image shown above may differ from the actual product appearance.
- Page 2 ENCODED BY A CONSUMER ENGAGED IN A PERSONAL AND NON-COMMERCIAL ACTIVITY AND/OR WAS OBTAINED FROM A VIDEO PROVIDER LICENSED BY MPEG LA TO PROVIDE MPEG-4 VIDEO. NO LICENSE IS GRANTED OR SHALL BE IMPLIED FOR ANY OTHER USE. ADDITIONAL INFORMATION INCLUDING THAT RELATING TO PROMOTIONAL INTERNAL AND COMMERCIAL USES AND LICENSING MAY BE OBTAINED FROM MPEG LA, LLC.
-
Page 3: Table Of Contents
TABLE OF CONTENTS 1. OVERVIEW..........................1 1.1 Product Description ............................1 1.2 Features................................1 1.3 Package Contents ............................1 1.4 Specifications..............................2 2. FRONT AND REAR PANELS ....................3 2.1 Front Panel ..............................3 2.2 Rear Panel...............................5 3. CONNECTIONS AND SETUP....................6 3.1 HDD Installation ...............................6 3.2 Camera Connection............................6 3.3 Power Setup ..............................6 3.4 Date and Time Setting .............................6... - Page 4 8.1.2 General AP Operation..........................26 Record..............................26 Playback..............................27 Network Backup ............................28 8.1.3 AP Control Panel ..........................28 8.1.4 AP Functions............................30 Image Display............................30 Address Book ............................30 Miscellaneous Control ...........................32 Information ............................49 DVR Control ............................49 8.2 IE Web Browser .............................51 8.3 QuickTime Player............................52 APPENDIX 1 COMPATIBLE USB FLASH DRIVE BRAND............53 APPENDIX 2 COMPATIBLE HDD BRAND................
-
Page 5: Overview
OVERVIEW 1. OVERVIEW 1.1 Product Description This MPEG4 multiplex network DVR series combines remote surveillance, burglar prevention, and evidentiary recording features and is designed to become a simple entry-level system with all necessary functions. 1.2 Features MPEG4 Network Transmission ‧ MPEG4 web transmitting for faster transmission and clearer images via network Simplex / Duplex Operation ‧... -
Page 6: Specifications
MODEL DR040 Video System NTSC / PAL (auto detection) Video Compression Format MPEG4 Video Input (Composite video signal 1 Vp-p 75Ω BNC) 4 Channels Video Output Composite video signal 1 Vp-p 75Ω BNC Simplex Mode: 360×240 pixels with 120 IPS <NTSC> / 360×288 pixels with 100 IPS <PAL>... -
Page 7: Front And Rear Panels
FRONT AND REAR PANELS 2. FRONT AND REAR PANELS PLA Y S T OP RE W P A US E HD D HD D Fu ll ALAR M TIME R PL AY RE C MENU ENTER LIS T SLOW ZOOM 2.1 Front Panel LED Indication The following LEDs will be on when:... - Page 8 FRONT AND REAR PANELS LIST (Event List Search) To quick search the recorded files by event list, press this button to show all types of the event lists. Select one of the event list and press “ENTER” button to playback the selected file. MANUAL: List the information of the manual-recorded files.
-
Page 9: Rear Panel
CONNECTIONS AND SETUP 2.2 Rear Panel RISKOF ELECTRIC SHOC K DO NOT OPEN WARNI N G : T O RED U CE T HE RI S K O F EL EC TR IC SH O CK, DO N OT R E M O V E CO V ER (O R BA CK ). NO USER -SE R VIC E ABL E PA RT S INSI D E. -
Page 10: Connections And Setup
CONNECTIONS AND SETUP 3. CONNECTIONS AND SETUP 3.1 HDD Installation The HDD must be installed before the DVR is turned on. Step 1: Loose the screws on the upper cover and open the upper cover of the DVR. Step 2: Remove the HDD bracket. Step 3: Get a suitable brand HDD and set the HDD mode to “Master”... - Page 11 CONNECTIONS AND SETUP ADVANCE SYSTEM CAMERA PASSWORD XXXX DETECTION RESET DEFAULT RESET DISPLAY CLEAR HDD HDD-MASTER-1 ALERT UPGRADE START SYSTEM AUTO KEYLOCK NEVER NETWORK LANGUAGE ENGLISH BACKUP VIDEO FORMAT NTSC HDD INFO VERSION 1167-1012-1022-1017...
-
Page 12: Basic Operation
BASIC OPERATION 4. BASIC OPERATION 4.1 Live Page In this live page of the DVR, you can see the following icons: Icon Function Icon Function Icon Function Icon Function live audio Key lock Key unlock Digital zoom mode channel Digital zoom Timer recording Motion Recording... -
Page 13: Key Lock And Unlock
BASIC OPERATION Slow Playback Press “SLOW” button to get 1/4X speed playback and press twice to get 1/8X speed playback. Audio Playback Use these two buttons to select the live or playback sound of the audio channels. Icon “ ” means: Live audio of the 1 audio channel / Icon “... -
Page 14: Search
BASIC OPERATION 4.6 Search Search by List Press “LIST” button on the DVR control panel to show the list for all types of the recorded files. Choose the list you want to view and press “ENTER” button to start playback. MANUAL List the information of the manual-recorded files. -
Page 15: Menu Configuration
MAIN MENU 5. MENU CONFIGURATION DATE QUICK SEARCH SEARCH HDD IMAGE SIZE QUALITY MANUAL RECORD ENABLE EVENT REOCRD ENABLE RECORD TIMER RECORD ENABLE MULTIPLEX MODE MAIN MENU MANUAL RECORD IPS EVENT RECORD IPS TIMER RECORD IPS RECORD TIMER TIMER DETECTION TIMER DATE DATE FORMAT... -
Page 16: Quick Start Menu
QUICK START MENU 6. QUICK START MENU Press the “MENU” button and enter the password to go to the quick-start menu list. The default admin password is 0000. Users can change the password later. Please refer to “SYSTEM” at page 19. ITEM FUNCTION Enter / exit the quick start menu... - Page 17 QUICK START MENU RECORD IMAGE SIZE MENU QUALITY BEST QUICK SEARCH MANUAL RECORD ENABLE RECORD EVENT RECORD ENABLE TIMER TIMER RECORD ENABLE DATE MULTIPLEX MODE ADVANCE REMOTE VIEW MANUAL RECORD IPS EVENT RECORD IPS TIMER RECORD IPS PLEASE CONSULT YOUR INSTALLER FOR ADVANCE SETTING SELECT BACK NEXT...
-
Page 18: Timer
ADVANCED MENU 6.2 TIMER Press “MENU” button on the front panel to enter the main menu list. Move the cursor to “TIMER”, and press ”ENTER”. Select to enable (ON) or disable (OFF) the recorder timer and / or detection timer functions. TIMER RECORD TIMER DETECTION TIMER... -
Page 19: Advanced Menu
ADVANCED MENU 7. ADVANCED MENU Press “MENU” button on the front panel to enter the main menu list. Move the cursor to “ADVANCE”, and press ”ENTER”. The screen will show the following options. ADVANCE CAMERA DETECTION MENU DISPLAY QUICK SEARCH ALERT RECORD SYSTEM... -
Page 20: Detection
ADVANCED MENU 7.2 DETECTION In this submenu, you can set up detection-related functions: DETECTION SETUP and DETECTION TIMER. Move the cursor to “DETECTION”, and press ”ENTER”. The screen will show the following options. ADVANCE DETECTION CAMERA DETECTION SETUP DETECTION TIMER DETECTION DISPLAY ALERT... -
Page 21: Detection Timer
ADVANCED MENU Press “ENTER” to Press “UP” or “DOWN” to choose Press “LEFT” or “RIGHT” to confirm the start area. the height of the area, and press choose the width of the area “ENTER” again to confirm. Press “+” to set the whole You can also up set up Press “-”... -
Page 22: Display
ADVANCED MENU 7.3 DISPLAY In this menu list, you can check and change some display settings. Move the cursor to “DISPLAY”, and press ”ENTER”. You will see a similar screen as the following: ADVANCE DISPLAY FULL SCREEN DWELL DURATION (SEC) CAMERA DETECTION CHANNEL TITLE... -
Page 23: System
ADVANCED MENU MOTION BUZZER Select to enable or disable the sound when any motion alarm is triggered (ON / OFF). ALARM DURATION (SEC) Press “ENTER” or “+” / “-” button to set the duration time of alarm recording in second (5 / 10 / 20 / 40). 7.5 SYSTEM In this menu list, you can check or change some system settings. -
Page 24: Network
ADVANCED MENU VERSION Here shows the firmware version information. 7.6 NETWORK In this menu list, you can set up the network. Move the cursor to “NETWORK”, and press ”ENTER”. You will see a similar screen as the following: ADVANCE NETWORK CAMERA NETWORK TYPE STATIC... - Page 25 ADVANCED MENU ‧ PPPOE NETWORK TYPE Select the network type as PPPOE. USER NAME / PASSWORD Set the “username” and “password” subscribed from your ISP supplier DNS (PRIMARY DNS / SECONDARY DNS) Key in the IP address of the domain name server obtained from your ISP (Internet Service Provider). PORT The valid number ranges from 1 to 9999.
-
Page 26: Backup
ADVANCED MENU DHCP NETWORK TYPE DHCP 000 . 000 . 000 . 000 GATEWAY 000 . 000 . 000 . 000 NETMASK 000 . 000 . 000 . 000 PRIMARY DNS 168 . 095 . 001 . 001 SECONDARY DNS 139 . -
Page 27: Hdd Info
ADVANCED MENU Move the cursor to “BACKUP”, and press ”ENTER”. You will see a similar screen as the following: BACKUP USB BACKUP USB BACKUP START TIME 2006 – 12 – 01 21 : 35 : 00 END TIME 2006 – 12 – 01 21 : 45 : 00 AVAILABLE SIZE 1.460 GB HDD NUM... -
Page 28: Event Log
ADVANCED MENU 7.9 EVENT LOG In this menu list, you can view all the event information (event type, time and channel) or clear all log records. Move the cursor to “EVENT LOG”, and press ”ENTER”. You will see the following options: ADVANCE EVENT LOG CAMERA... -
Page 29: Remote Operation
REMOTE OPERATION 8. REMOTE OPERATION You can also control the DVR remotely via the supplied licensed software AP (hereafter called the “AP”), IE web browser, and Apple’s QuickTime player. 8.1 Supplied Licensed Software AP 8.1.1 Installation & Network Connection Install the software Place the supplied CD-ROM into your DVD- / CD-ROM drive. -
Page 30: General Ap Operation
REMOTE OPERATION The default DVR values are as follows: Item Default Value IP address 192.168.1.10 User name admin Password admin Port Click (Search) (Refresh) to search the available IP address(es) of other ” ” ” ” DVR(s) under the same domain as your PC’s IP address. The found address(es) will be listed, and can be added into the address book by clicking (Add into address book). -
Page 31: Playback
REMOTE OPERATION If “Manual” is checked, click “ ” (Record) on the main control panel to start the manual recording immediately, and the recordings will be saved in the specified location. The red text indication “REC” will be shown at the top left corner of the image display view. -
Page 32: Network Backup
REMOTE OPERATION For the playback control panel details, please see “Playback Screen” at page 48. Network Backup Click “ ” (Miscellaneous Control) → “ ” (Backup) to go into the “Download” page as follows, and you can select a specific time range or event to make a video backup remotely. For details, please see “Backup” at page 33. 8.1.3 AP Control Panel After setting up the network information, login user name and password, double-click “... - Page 33 REMOTE OPERATION Button Function Description The place where the images are displayed. Image Display For details, please see “8.1.4 AP Functions” at page 30. Click to show the predefined IP address(es). You can add, remove or search the IP address to log in the DVR remotely. Address Book Two sub-functions are available for this button: Address Book and Search.
-
Page 34: Ap Functions
REMOTE OPERATION 8.1.4 AP Functions Image Display Button Function Description Image View Tab Click the tab to select the view you want.. To see all views in the image display area if you have many views and do not want to switch each view by clicking the blue tab described above, click to choose a proper split view (1-cut / 4-cut / 9-cut / 16-cut) which Expand All Views best suits your needs. - Page 35 REMOTE OPERATION Click to view the pre-defined DVR access details. To log in, choose one IP address from the address list, and click the address twice; to log out, click the connected IP address twice. Tip: You can also click “ ”...
-
Page 36: Miscellaneous Control
REMOTE OPERATION address to add into the address book, edit the details, or update the address list. Button Function Description Select from the available IP address list, and click this button to add the Add into address selected address to the address book. book Setting Select from the available IP address list, and click this button to edit the setting. - Page 37 REMOTE OPERATION Choose the desired channel from the drop-down list, and click and drag the slider to make adjustment. Click “ ” to apply the change to the selected channel, or “ ” to apply to all channels. To return to the default values, click “ ”...
- Page 38 REMOTE OPERATION Function Description click “Prev. Page” or “Next Page”. ‧To refresh the event list, click “Reload”. File Path Assign the location where the backup files are saved. Simultaneously Playback To view the backup images simultaneously when the download process is in progress, select the checkbox “Simultaneously Playback”.
- Page 39 REMOTE OPERATION Weekly Click “Weekly” tab, and you will see a weekly time table indicating the week days (Mon ~ Sun) and hours (0 ~ 24), similar to the figure below: X axis: 0 ~ 24 hours. Each time interval within a square is 15 minutes. Y axis: Monday ~ Sunday.
- Page 40 REMOTE OPERATION How to modify / delete a current time setting: 1. Select the schedule setting you want to modify from the schedule table. The setting will be displayed in the left setting panel. 2. Modify the setting in the left setting panel, and click “Update”. 3.
- Page 41 REMOTE OPERATION In “General”, you will see the following items: Item Description Firmware Version Display the current firmware version of your DVR. MAC Address Display the MAC address. Title Provide a title for this DVR. Only 15 characters are allowed. Logs Click “...
- Page 42 REMOTE OPERATION Supervisor Power User Normal User Guest Address Book ● ● ● ● Miscellaneous Control Color Setting ● Backup ● Record Setting ● ● ● ● Server Setting ● Tools ● Status List ● ● ● ● Record ● ●...
-
Page 43: Function Description
REMOTE OPERATION Select the network type you will be using for DVR connection. There are 3 network connection types: Static IP, PPPOE and DHCP. Note: PPPOE and DHCP network connection types are required to apply the DDNS service to get a “Hostname”... - Page 44 REMOTE OPERATION DDNS Apply: a). Go to a website which provide the free DDNS service, for example, http://www.dyndns.org. b). Create an account in DynDNS. c). After creating one account, users will receive a confirmation E-mail within a few minutes. To complete the registration, please follow the instructions received.
- Page 45 REMOTE OPERATION MAIL Click “ ” (Miscellaneous Control) → “ ” (Server Setting) → “Network” → “MAIL” to go into the “MAIL” page. Enter the detailed E-mail information and press “Apply” to confirm. The information you set here will be applied when the function of E-mail notification is enabled in the "Alert" menu. Function Description Server...
- Page 46 REMOTE OPERATION Function Description MPEG Choose the image size (4CIF / CIF) and picture quality (BEST / HIGH / NORMAL / BASIC) when the web transmission format is MPEG. FrameRate Choose the frame rate for transmitting (FULL / HALF / ONE THIRD / QUARTER / FIFTH). In “Dvr”...
- Page 47 REMOTE OPERATION Camera In “Dvr” → “Camera”, you can specify a channel to enable the recording function by selecting the check box “Record”, choose to activate the “Covert Recording” function by selecting the check box “Cover”, and rename the channel title which will be displayed in the live view screen by double-clicking the channel title.
- Page 48 REMOTE OPERATION Function Description detection. The highest sensitivity setting is 0, and the lowest sensitivity setting is 15. The default setting is 2. “Reference”, is to set a reference for detection. The default value is 10, which means the DVR will compare 10 continuous images at one time according to the sensitivity of LS, SS, TS simultaneously.
- Page 49 REMOTE OPERATION Function Description Title Select to display the channel title in the live view. Event Select to display the event symbol in the live view. Full Sequence Duration Set the time-out in seconds (3 / 5 / 10 / 15) after which the channel display will be switched by one channel (Full Sequence Duration).
- Page 50 REMOTE OPERATION ‧Firmware To upgrade your DVR firmware remotely, click “Firmware” tab, and follow the steps below: a). In the “Firmware” section, you will see the current firmware version. To upgrade the firmware version of your DVR, click “Add” to locate and select the firmware file. The file will be shown in the firmware list.
- Page 51 REMOTE OPERATION a). Prepare a graphic file in the “BMP” format for replacement. Note: Use the image software to set the image size to 320 * 240, and save the image as an 8-bit (64-color) image in the "BMP" format. b) Click “Add”...
-
Page 52: Button Description
REMOTE OPERATION Button Description Time Range To find the specific logs, set the time range (From / To), and the range unit here. Record Type Select the record type you want to search (User / Alarm / Motion / RETR). Query Click to start sorting the logs specified. -
Page 53: Information
REMOTE OPERATION Function Description Playback / Download This area shows the detailed playback / download information, such as the file name, Info Display record date and time, and the speed, etc. Playback Progress Bar This area shows the playback progress and the progress percentage. Playback Operation This area is enabled only when the playback is started. - Page 54 REMOTE OPERATION Function Description Channel Click the channel No. (CH1 ~ CH4) to see the live view of the selected channel. Selection 4-Cut Image This 4-cut view button is disabled because this DVR doesn’t support this button. Display Key Lock Click to enable the DVR key lock function.
-
Page 55: Ie Web Browser
Web Transmission Format Main Menu Select the web transmission format: MPEG4 or Quick Time. QuickTime is Apple Inc.’s multimedia software. You need to have QuickTime installed in you operation system first. When “QuickTime” is selected, you will be promoted to enter the user name and password to access the server of the DVR. -
Page 56: Quicktime Player
Step 2: Open your QuickTime player. Select “File” → “Open URL”, and key in the URL address. The URL format is “rtsp://ipaddress/live/mpeg4” (For example, “rtsp://59.124.231.75/live/mpeg4”). Click “OK” to continue. Step 3: A pop-up window will appear and prompt you to enter the authentication information. Key in the user name and password for accessing your DVR. -
Page 57: Appendix 1 Compatible Usb Flash Drive Brand
APPENDIX 1 COMPATIBLE USB FLASH DRIVE BRAND APPENDIX 1 COMPATIBLE USB FLASH DRIVE BRAND Please upgrade the firmware of the DVR to the latest version to ensure the accuracy of the following table. If the USB flash drive is not supported by the DVR, the "USB ERROR" message will be shown on the screen. Note: Please use your PC to format the USB flash drive as "FAT32". -
Page 58: Appendix 2 Compatible Hdd Brand
APPENDIX 2 COMPATIBLE HDD BRAND APPENDIX 2 COMPATIBLE HDD BRAND Please upgrade the firmware of the DVR to the latest version to ensure the accuracy of the following table. MANUFACTURER MODEL CAPACITY ROTATION Deskstar 7K250, HDS722516VLAT20 160GB 7200 rpm HDS722516VLAT80 160GB 7200 rpm HITACHI... -
Page 59: Appendix 3 Troubleshooting
APPENDIX 2 COMPATIBLE HDD BRAND APPENDIX 3 TROUBLESHOOTING Please refer to the table below for easy troubleshooting. The table describes some typical problems and also their solutions. Please check them before calling your DVR dealer. ‧ FAQ (Frequently ask question) Questions Solutions No power... -
Page 60: Appendix 4 Default Value
APPENDIX 4 DEFAULT VALUE APPENDIX 4 DEFAULT VALUE ‧ Default Value Items Default Value ‧ DVR Side: ADMIN Password 0000 Channel Title Display Event Status Display Image Size Record Timer Detection Timer Date Format Y/M/D Daylight Saving Camera – BRIG (Brightness) Camera –...
Need help?
Do you have a question about the MPEG4 and is the answer not in the manual?
Questions and answers