Table of Contents
Advertisement
Available languages
Available languages
Quick Links
www.statewaterheaters.com
ALL TECHNICAL AND WARRANTY QUESTIONS: SHOULD BE DIRECTED TO THE LOCAL DEALER FROM WHOM THE WATER HEATER WAS
PURCHASED. IF YOU ARE UNSUCCESSFUL, PLEASE WRITE TO THE COMPANY LISTED ON THE RATING PLATE ON THE WATER HEATER.
PRINTED 0108
RESIDENTIAL GAS WATER HEATERS
KEEP THIS MANUAL IN THE POCKET ON HEATER FOR FUTURE REFERENCE
WHENEVER MAINTENANCE ADJUSTMENT OR SERVICE IS REQUIRED.
POWER VENTED GAS MODELS W/HOT SURFACE IGNITION
NOT FOR USE IN MANUFACTURED (MOBILE) HOMES
•
For Your Safety
AN ODORANT IS ADDED TO THE GAS USED
BY THIS WATER HEATER.
1
Instruction Manual
•
197481-002
Advertisement
Chapters
Table of Contents

Subscribe to Our Youtube Channel
Related Manuals for State Water Heaters GP650YTVIT


Summary of Contents for State Water Heaters GP650YTVIT
-
Page 1: Instruction Manual
Instruction Manual RESIDENTIAL GAS WATER HEATERS POWER VENTED GAS MODELS W/HOT SURFACE IGNITION NOT FOR USE IN MANUFACTURED (MOBILE) HOMES www.statewaterheaters.com • • For Your Safety AN ODORANT IS ADDED TO THE GAS USED BY THIS WATER HEATER. ALL TECHNICAL AND WARRANTY QUESTIONS: SHOULD BE DIRECTED TO THE LOCAL DEALER FROM WHOM THE WATER HEATER WAS PURCHASED. -
Page 2: Safe Installation, Use And Service
SAFE INSTALLATION, USE AND SERVICE Your safety and the safety of others is extremely important in the installation, use and servicing of this water heater. Many safety-related messages and instructions have been provided in this manual and on your own water heater to warn you and others of a potential injury hazard. -
Page 3: General Safety
GENERAL SAFETY... -
Page 4: General Safety
GENERAL SAFETY... -
Page 5: Table Of Contents
TABLE OF CONTENTS SAFE INSTALLATION, USE AND SERVICE ......2 Vent Attenuation Assembly Installation Instructions ..21-22 GENERAL SAFETY ............. 3-4 Vent Pipe Preparation ..........23-24 TABLE OF CONTENTS ............5 LIGHTING & OPERATING LABEL ........25 INTRODUCTION ..............5 TEMPERATURE REGULATION .......... -
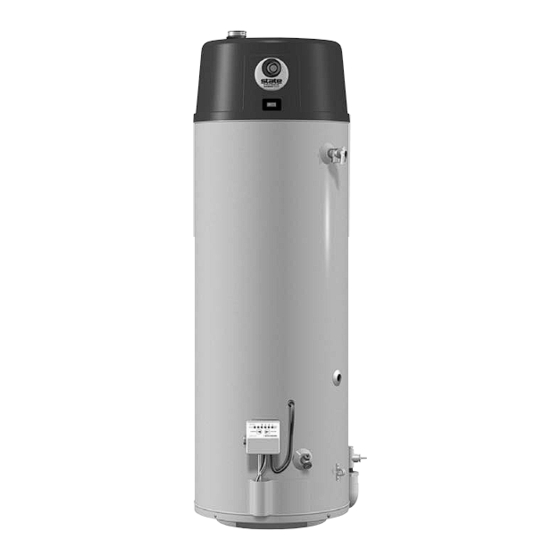
Page 6: Typical Installation
TYPICAL INSTALLATION GET TO KNOW YOUR WATER HEATER - GAS MODELS Bushing A Vent Pipe Q Rating Plate II Nipple B Anode R Insulation Condensate Tee C Hot Water Outlet Vent Terminal Drain Valve Hose Barb D Outlet (120 VAC) F Gas Supply Igniter And Main Burner LL Plug... - Page 7 TYPICAL INSTALLATION CONDENSATE HOSE AND DRAIN PAN * Note: Condensate Trap Loops must be oriented in a vertical plane as shown. The traps also must be primed by filling half of the loop with water prior to operating the water heater. Carefully plan the location of the loops and straight sections of hose prior to cutting hoses.
- Page 8 TYPICAL INSTALLATION MIXING VALVE USAGE FIGURE 2. This appliance has been design certified as complying with American HOTTER WATER CAN SCALD: National Standard/CSA Standard for water heaters and is considered suitable for: Water heaters are intended to produce hot water. Water heated to a temperature which will satisfy space heating, clothes washing, dish Water (Potable) Heating and Space Heating: All models are considered suitable for water (potable) heating and space heating.
-
Page 9: Locating The New Water Heater
LOCATING THE NEW WATER HEATER FACTS TO CONSIDER ABOUT THE LOCATION Carefully choose an indoor location for the new water heater, because the placement is a very important consideration for the safety of the occupants in the building and for the most economical use of the appliance. -
Page 10: Insulation Blankets
in an alcove or closet, the entire floor must be covered by the panel. If this water heater will be used in beauty shops, barber shops, cleaning establishments, or self-service laundries with dry cleaning equipment, Failure to heed this warning may result in a fire hazard. it is imperative that the water heater or water heaters be installed so that combustion and ventilation air be taken from outside these areas. - Page 11 of one square inch per 1000 Btu/hr (22 cm /kW) of the total input of all appliances in the enclosure, but not less than 100 square inches (645 cm If the confined space is within a building of tight construction, air for combustion and ventilation must be obtained from outdoors.
-
Page 12: Installing The Water Heater
INSTALLING THE NEW WATER HEATER Water supply systems may, because of such events as high line pressure, CHEMICAL VAPOR CORROSION frequent cut-offs, the effects of water hammer among others, have installed devices such as pressure reducing valves, check valves, back CORROSION OF THE FLUEWAYS AND VENT SYSTEM MAY OCCUR IF flow preventers, etc. -
Page 13: Temperature-Pressure Relief Valve
Figure 10 shows the typical attachment of the water piping to the The valve must be marked with a maximum set pressure not to exceed water heater. The water heater is equipped with 3/4 inch NPT the marked hydrostatic working pressure of the water heater water connections. -
Page 14: Gas Piping
GAS PIPING This heater is approved for operation up to 5,300 feet (1,615 m) without alteration. High altitude models are available from the factory for elevations between 5,300 feet (1,615 m) and 10,100 feet (3,079 m). For elevations above 10,100 feet (3,079 m) the input rating should be reduced at the rate of 4 percent for each 1,000 feet (305 meters) above sea level which requires replacement of the burner orifice in accordance with National Fuel Gas Code (ANSI Z223.1/NFPA 54) or the Natural Gas and Propane Installation Code... -
Page 15: Sediment Traps
Never use this water heater unless it is completely full of water. To prevent SEDIMENT TRAPS damage to the tank, the tank must be filled with water. Water must flow from the hot water faucet before turning “ON” gas to the water heater. To fill the water heater with water: 1. -
Page 16: Vent Pipe Termination
U.S. HORIZONTAL VENT CLEARANCES WARNING VENT HOOD(S) MAY BE EXTREMELY HOT DURING OPERATION. CANADIAN HORIZONTAL VENT CLEARANCES FIGURE 15 Instructions on proper installation through a sidewall are provided VENT PIPE TERMINATION in Figure 15. Plan the vent system layout so that proper clearances are The first step is to determine where the vent pipe will terminate. -
Page 17: Planning The Vent System
a special fitting that must be used with this appliance. Any outlet PLANNING THE VENT SYSTEM piping, fittings and glue used to vent this appliance that is not supplied by the manufacturer must comply with the ULC S636 requirements. Plan the route of the vent system from the discharge of the blower to the planned location of the vent terminal. -
Page 18: Blower Assembly Installation
The condensate trap may be primed by filling the CONDENSATE U- 6. Make sure the ON/OFF switch is in the OFF position and that the ASSEMBLY with tap water using the supplied hose while the water outer harness is connected from the blower control box to the heater is not operating. - Page 19 2. If the Vent Terminal is being installed on the outside of a finished wall, it the wall plate over the pipe to stop against the vent terminal. Place a bead of may be easier to mark both the inside and outside wall. Align the holes caulking (not supplied) around the gap between the pipe and cover plate.
- Page 20 INSTALLATION OF VENT SYSTEM, SIDEWALL Provide support for all pipe protruding through the roof. All piping should be properly secured. The vent system piping should be With the route of the venting system and selection of materials completed, supported every 5 feet (1.5 m) of vertical run and every 3 feet (91 as discussed in the section of this manual titled PLANNING THE VENT cm) of horizontal run.
-
Page 21: Vent Attenuation Assembly Installation Instructions
VENT ATTENUATION ASSEMBLY kit) that may be found at a local hardware store. Failure to properly support the VAA and the surrounding vent pipe could create a INSTALLATION INSTRUCTIONS hazardous situation. DO NOT puncture any surface of the VAA. The Vent Attenuation Assembly (VAA) is designed to provide a reduction in fan noise created in the blower wheel. - Page 22 8. Take the end of the tube at the bottom of the floor and route it to a suitable drain. This will provide an area where the condensate can drain without affecting the area around the appliance. 9. Once installed along with the rest of the vent configuration, make sure to operate the unit through at least one heat up cycle to ensure there is no leakage around the hose barb or any joints of the VAA or vent pipe system.
-
Page 23: Vent Pipe Preparation
PRIMER VENT PIPE PREPARATION It is recommended that Tetrahydrofuran (THF) be used to prepare 1. INITIAL PREPARATION the surfaces of pipe and fittings for solvent welding. Do not use water, rags, gasoline or any other substitutes for cleaning PVC or Make sure the solvent cement you are planning to use is CPVC surfaces. - Page 24 B. Deburring Use a knife, plastic pipe deburring tool, or file to remove burrs from the end of small diameter pipe. Be sure to remove all burrs from around the inside as well as the outside of the pipe. A slight chamfer (bevel) of about 10°-15°...
-
Page 25: For Your Safety Read Before Operating
FOR YOUR SAFETY READ BEFORE OPERATING WARNING: If you do not follow these instructions exactly, a fire or explosion may result causing property damage, personal injury or loss of life. BEFORE OPERATING: ENTIRE SYSTEM MUST BE FILLED WITH WATER AND AIR PURGED FROM ALL LINES. A. -
Page 26: Temperature Regulation
TEMPERATURE REGULATION It is recommended that lower water temperatures be used to avoid the To avoid any unintentional changes in water temperature settings, the risk of scalding. It is further recommended, in all cases, that the water control has a tamper resistant feature for changing the temperature temperature be set for the lowest temperature which satisfies your setting. -
Page 27: For Your Information
FOR YOUR INFORMATION START UP CONDITIONS conditions will cause a reaction between this rod and the water. The most common complaint associated with the anode rod is one of a “rotten egg smell” in the hot water. The smell is a result of four factors SMOKE/ODOR which must all be present for the odor to develop: It is not uncommon to experience a small amount of smoke and... -
Page 28: Periodic Maintenance
PERIODIC MAINTENANCE VENTING SYSTEM INSPECTION characteristics and ignition sequences. This can be done by removing the Outer Door and viewing the main burner operation through the Viewport on the Inner Door, see Figure 1. The main burner should provide complete combustion of gas, ignite rapidly, give reasonably quiet operation, and cause no excessive flame lifting from the burner ports. -
Page 29: Anode Rod Inspection
INSTALLED IN SUITABLE AREA: To insure sufficient ventilation and When checking the temperature-pressure relief valve operation, combustion air supply, proper clearances from the water heater must make sure that (1) no one is in front of or around the outlet of the be maintained. -
Page 30: Service
SERVICE If you are not thoroughly familiar with gas codes, your water heater, and safety practices, contact your gas supplier or qualified installer If a condition persists or you are uncertain about the operation of to check the water heater. the water heater contact a service agency. -
Page 31: Repair Parts
REPAIR PARTS LIST Key No. Part Description Outer Door Aluminum Anode Intellivent Control Plastic Top Blower Assembly Switch and Harness Assembly T&P Valve Drain Valve Wiring Harness Aluminum Anode Outlet Vent Pipe Assembly #1 Vent Pipe Assembly #2 Vent Pipe Assembly #3 Inlet Tube Pipe Nipple Burner Tube Assembly... -
Page 32: Troubleshooting
TROUBLESHOOTING GUIDELINES TROUBLESHOOTING GUIDELINES TROUBLE SHOOTING Please check guidelines below. For your safety, water heater service should be performed only by a qualified service technician. Read the GENERAL SAFETY INFORMATION section first. INTELLI-VENT TROUBLESHOOTING CHART - RESIDENTIAL CONTROL LED STATUS PROBLEM SOLUTION A B C... - Page 33 TROUBLESHOOTING GUIDELINES TROUBLE SHOOTING Please check guidelines below. For your safety, water heater service should be performed only by a qualified service technician. Read the GENERAL SAFETY INFORMATION section first. INTELLI-VENT TROUBLESHOOTING CHART - RESIDENTIAL CONTROL LED STATUS PROBLEM SOLUTION Ignition/flame failure.
- Page 34 TROUBLESHOOTING GUIDELINES TROUBLESHOOTING GUIDELINES These guidelines should be utilized by a qualified service agent.
-
Page 35: Warranty
Product Line TANK PARTS sold the heater, or with any other dealer handling the warrantor’s products. GP650YTVIT 6 YEARS 6 YEARS The warrantor will only honor replacement with identical or similar water heater or parts thereof which are manufactured or distributed When the water heater has been used for other than single family by the warrantor. - Page 37 Manuel d’instructions CHAUFFE-EAU AU GAZ POUR USAGE DOMESTIQUE MODÈLES À VENTILATION FORCÉE AVEC ALLUMEUR ÉLECTRONIQUE NE CONVIENNENT PAS AUX MAISONS PRÉFABRIQUÉES (MOBILES). www.statewaterheaters.com AVERTISSEMENT : Bien suivre les instructions du présent manuel pour éviter les risques d’incendie ou d’explosion, qui pourraient causer des dommages matériels, des blessures ou la mort.
- Page 38 INSTALLATION, UTILISATION ET ENTRETIEN SÉCURITAIRES SÉCURITAIRES Il est très important de veiller à votre sécurité et à celle des autres durant l’installation, l’utilisation et l’entretien du chauffe-eau. De nombreux messages et consignes de sécurité sont indiqués dans le manuel et sur le chauffe-eau pour mettre en garde les installateurs, utilisateurs et réparateurs du chauffe-eau contre les risques de blessures.
- Page 39 SÉCURITÉ GÉNÉRALE...
- Page 40 SÉCURITÉ GÉNÉRALE...
- Page 41 TABLE DES MATIÈRES INSTALLATION, UTILISATION ET ENTRETIEN SÉCURITAIRES ..2 Préparation des tuyaux de ventilation ......23-24 SÉCURITÉ GÉNÉRALE ............3-4 ÉTIQUETTE D’ALLUMAGE ET DE MISE EN MARCHE ..25 TABLE DES MATIÈRES .............. 5 RÉGLAGE DE LA TEMPÉRATURE ........26 INTRODUCTION .................
-
Page 42: Installation Type
INSTALLATION TYPE DESCRIPTION DU CHAUFFE-EAU AU GAZ Réduction A Tuyau d’évent Q Plaque signalétique II Mamelon B Anode R Isolant Té pour condensat C Sortie d’eau chaude S Bouche de ventilation T Robinet de vidange Raccord cannelé, tuyau souple D Sortie (120 V c.a.) F Entrée de gaz U Allumeur et brûleur principal LL Bouchon... - Page 43 INSTALLATION TYPE TUYAUX DE CONDENSAT ET BAC D’ÉVACUATION * Remarque : Les boucles formées dans les tuyaux de condensat doivent être à la verticale, tel qu’illustré. Elles doivent aussi être remplies à moitié d’eau avant la mise en marche du chauffe-eau.
- Page 44 INSTALLATION TYPE UTILISATION D’UNE VANNE DE MÉLANGE FIGURE 2 L’appareil est de conception certifiée conforme à la norme ANSI/CSA L’EAU TRÈS CHAUDE PEUT OCCASIONNER DES BRÛLURES. (édition courante) visant les chauffe-eau au gaz. Il convient aux applications suivantes : Les chauffe-eau produisent de l’eau chaude. Or le contact avec l’eau chauffée à...
-
Page 45: Choix De L'emplacement Du Chauffe-Eau
CHOIX DE L’EMPLACEMENT DU CHAUFFE-EAU POINTS À CONSIDÉRER DANS LE CHOIX DE L’EMPLACEMENT Il convient de choisir avec soin l’emplacement du chauffe-eau pour assurer la sécurité des occupants du bâtiment et maximiser le rendement énergétique de l’appareil. Le chauffe-eau visé par le présent manuel n’est pas conçu pour être installé... -
Page 46: Revêtements Isolants
Toute négligence à tenir compte de cet avertissement entraîne un Si l’appareil est installé dans un salon de beauté, un salon de coiffure, risque d’incendie. une entreprise de nettoyage ou une laveries contenant du matériel de nettoyage à sec, il est impératif que l’air de combustion et l’air de ventilation soit prélevé... - Page 47 AU PLUS 12 po (30 cm) DE LA PARTIE INFÉRIEURE. Chaque orifice doit avoir une surface libre de 1 po par 1 000 Btu/h (22 cm /kW) du débit calorifique total de tous les appareils se trouvant dans l’espace clos. Celle-ci ne doit pas être inférieure à 100 po (645 cm Si l’espace clos se trouve dans un bâtiment étanche à...
-
Page 48: Installation Du Chauffe-Eau
INSTALLATION DU CHAUFFE-EAU équipé de dispositifs de protection tels que détendeurs de pression, CORROSION DUE AUX VAPEURS CHIMIQUES clapets de retenue et dispositifs antirefoulement entre la canalisation publique et l’entrée du chauffe-eau. Si ces dispositifs ne possèdent LA CORROSION DES ÉVENTS ET DES CONDUITS DE FUMÉE PEUT SE pas de dérivation interne et si aucune mesure corrective n’est prise le PRODUIRE LORSQUE L’AIR DE COMBUSTION CONTIENT CERTAINES cas échéant, le système d’alimentation en eau chaude risque de se... -
Page 49: Soupape De Décharge À Sécurité Thermique
La figure 10 présente le raccordement type de la tuyauterie d’eau au chauffe-eau (150 lb/po = 1 035 kPa). De plus, le débit d’évacuation de chauffe-eau. Le chauffe-eau est équipé de raccords 3/4 po NPT. la soupape ne doit pas être inférieur au débit d’entrée d’eau du chauffe- eau indiqué... -
Page 50: Tuyauterie De Gaz
Ce chauffe-eau est conçu pour fonctionner à une altitude inférieure TUYAUTERIE DE GAZ à 5 300 pi (1 615 m). Des modèles haute altitude sont offerts pour l’installation entre 5 300 et 10 100 pi (entre 1 615 et 3 079 m). Si l’appareil est installé... -
Page 51: Collecteurs D'impuretés
Ne jamais utiliser le chauffe-eau sans qu’il soit complètement rempli COLLECTEURS D’IMPURETÉS d’eau, sinon le réservoir risque d’être endommagé. Avant d’ouvrir l’arrivée de gaz, l’eau doit s’écouler des robinets d’eau chaude. Pour remplir le chauffe-eau : 1. Fermer le robinet de vidange du chauffe-eau en tournant la manette à... -
Page 52: Bouche De Ventilation
DÉGAGEMENTS – VENTILATION HORIZONTALE AUX ÉTATS-UNIS AVERTISSEMENT LA BOUCHE DE VENTILATION PEUT ÊTRE TRÈS CHAUDE LORSQUE LE CHAUFFE-EAU EST EN MARCHE. DÉGAGEMENTS – VENTILATION HORIZONTALE AU CANADA FIGURE 15 BOUCHE DE VENTILATION Des directives pour l’installation au travers d’un mur sont fournies à la figure 15. -
Page 53: Planification Du Système De Ventilation
eau, soit le coude de 22,5° de 2 po de diamètre, doit être utilisé. Les PLANIFICATION DU SYSTÈME DE VENTILATION tuyaux, raccords et colles utilisés pour la sortie d’air de l’appareil et non fournis par le fabricant doivent satisfaire à la norme ULC S636. Planifier la disposition du système de ventilation en partant de la sortie du ventilateur vers l’emplacement prévu de la bouche de ventilation. -
Page 54: Installation Du Ventilateur
Avant la mise en marche du chauffe-eau, amorcer le SIPHON U DE 6. S’assurer que l’interrupteur marche/arrêt est à la position OFF, et CONDENSAT en le remplissant d’eau du robinet à l’aide du tuyau que le faisceau de fils allant de la boîte de commande du ventilateur fourni. - Page 55 2. Marquer les deux côtés du mur facilite l’opération lorsque la bouche tuyau jusqu’à la bouche de ventilation. Appliquer un produit de de ventilation est installée sur un mur extérieur fini. Aligner les calfeutrage (non fourni) sur le vide entre le tuyau et la plaque murale. trous en perçant un trou au centre du gabarit de l’intérieur vers En appliquer suffisamment pour combler le vide;...
- Page 56 Tous les tuyaux qui passent à travers le toit doivent être bien soutenus. INSTALLATION DU SYSTÈME DE VENTILATION – MUR Les tuyaux de ventilation doivent être soutenus tous les 5 pi (1,5 m) à la verticale et tous les 3 pi (91 cm) à l’horizontale. Tous les tuyaux et Une fois le trajet du système de ventilation et le choix du matériel établis, raccords doivent être fixés selon les procédures décrites à...
-
Page 57: Instructions D'installation Du Silencieux
INSTRUCTIONS D’INSTALLATION DU SILENCIEUX soutenir le silencieux et l’évent peut créer une situation dangereuse. NE PAS perforer le silencieux. Le silencieux est conçu pour atténuer le bruit causé par la roue du 5. S’assurer que le bouchon hexagonal est bien installé dans le ventilateur. - Page 58 8. Faire descendre le tuyau jusqu’au plancher, puis en diriger l’extrémité jusqu’à un drain adéquat, où le condensat pourra être évacué sans présenter de danger dans la zone avoisinante du chauffe-eau. 9. Lorsque l’ensemble de l’évent est installé, faire fonctionner l’appa- reil pendant au moins un cycle de chauffe pour s’assurer que le raccord cannelé...
-
Page 59: Préparation Des Tuyaux De Ventilation
APPRÊT PRÉPARATION DES TUYAUX DE VENTILATION Il est recommandé d’enduire de tétrahydrofurane la surface des tuyaux 1. PRÉPARATION INITIALE et des raccords pour la préparer au soudage par solvant. Ne pas utiliser d’eau, de chiffon, d’essence ni aucun autre substitut pour S’assurer que la colle à... - Page 60 B. Ébavurage Utiliser un couteau, un outil d’ébavurage pour tuyaux de plastique ou une lime pour ébavurer l’extrémité des tuyaux de petit diamètre. Bien ébavurer tant l’intérieur que l’extérieur des tuyaux. Un chanfrein léger (biseau) de 10 à 15° peut être pratiqué au bout du tuyau pour faciliter son insertion dans le raccord, à...
- Page 61 CONSIGNES À LIRE AVANT LA MISE EN MARCHE AVERTISSEMENT : Quiconque ne respecte pas à la lettre les présentes instructions risque de déclencher un incendie ou une explosion entraînant des dommages matériels, des blessures ou la mort. AVANT LA MISE EN MARCHE : REMPLIR ENTIÈREMENT LE SYSTÈME D’EAU ET PURGER TOUTES LES CONDUITES POUR ÉVACUER L’AIR.
-
Page 62: Réglage De La Température
RÉGLAGE DE LA TEMPÉRATURE Il est recommandé d’ajuster le thermostat au point de consigne le plus Le régulateur de température du chauffe-eau est muni d’un dispositif bas possible pour éviter les risques de brûlures. Par ailleurs, il est de protection qui empêche les changements involontaires de la recommandé, dans tous les cas, de régler la température à... -
Page 63: Autres Renseignements
AUTRES RENSEIGNEMENTS SITUATIONS POUVANT SE PRODUIRE contre la corrosion. Selon la composition de l’eau, une réaction chimique peut se produire entre l’eau et la tige d’anode. La plainte la À LA MISE EN SERVICE plus fréquente associée à la tige d’anode est le dégagement par l’eau chaude d’une odeur d’œufs pourris. -
Page 64: Entretien Périodique
ENTRETIEN PÉRIODIQUE INSPECTION DU SYSTÈME DE VENTILATION d’allumage sont correctes. Pour ce faire, enlever la porte d’accès externe et observer le fonctionnement du brûleur principal par le hublot de la porte d’accès interne (fig. 1). Le brûleur principal doit s’allumer rapidement, permettre la combustion complète du gaz, faire peu de bruit et n’entraîner aucun soulèvement excessif de la flamme aux orifices. -
Page 65: Inspection De La Tige D'anode
Avant la vérification manuelle de la soupape de décharge, s’assurer VÉRIFIER L’EMPLACEMENT DU CHAUFFE-EAU : Pour assurer une que personne ne se trouve devant la sortie de la conduite d’évacua- ventilation et un apport d’air de combustion adéquats, il faut respecter tion ou à... -
Page 66: Service
SERVICE En cas de connaissance limitée du chauffe-eau, des codes d’installation des appareils au gaz et des mesures de sécurité, faire vérifier le chauffe-eau par le fournisseur de gaz local ou par un Si le problème persiste ou en cas de doute quant au bon installateur qualifié. -
Page 67: Pièces De Rechange
LISTE DES PIÈCES DE RECHANGE Description de la pièce Porte d’accès externe Anode d’aluminium Commande Intelli-Vent Couvercle en plastique Ventilateur Interrupteur et faisceau de fils Soupape de décharge à sécurité thermique Robinet de vidange Faisceau de fils Sortie, anode en aluminium Ensemble tuyau d’évent n Ensemble tuyau d’évent n Ensemble tuyau d’évent n... -
Page 68: Dépannage
GUIDE DE DÉPANNAGE DÉPANNAGE Consulter les directives ci-dessous. Par mesure de sécurité, l’entretien du chauffe-eau doit toujours être effectué par un technicien de service qualifié. Lire d’abord la section CONSIGNES GÉNÉRALES DE SÉCURITÉ. GUIDE DE DÉPANNAGE – COMMANDE RÉSIDENTIELLE INTELLI-VENT ÉTAT DES VOYANTS PROBLÈME SOLUTION... - Page 69 GUIDE DE DÉPANNAGE DÉPANNAGE Consulter les directives ci-dessous. Par mesure de sécurité, l’entretien du chauffe-eau doit toujours être effectué par un technicien de service qualifié. Lire d’abord la section CONSIGNES GÉNÉRALES DE SÉCURITÉ. GUIDE DE DÉPANNAGE – COMMANDE RÉSIDENTIELLE INTELLI-VENT ÉTAT DES VOYANTS PROBLÈME SOLUTION...
- Page 70 TROUBLESHOOTING GUIDELINES GUIDE DE DÉPANNAGE Le guide ci-dessous est destiné aux techniciens de service qualifiés. PROBLÈME CAUSE SOLUTION 1.) Panne du ventilateur. a. Interrupteur marche-arrêt à la position OFF. Mettre l’interrupteur à la position ON. b. Ventilateur débranché. Rebrancher le ventilateur sur la prise 115 V c.a. c.
-
Page 71: Garantie
PIÈCES Toute demande de réparation ou de remplacement en vertu de la présente garantie doit être adressée au fournisseur du chauffe-eau ou à tout autre GP650YTVIT 6 ANS 6 ANS détaillant chargé de la vente ou de l’entretien des produits du garant.
Need help?
Do you have a question about the GP650YTVIT and is the answer not in the manual?
Questions and answers