Table of Contents
Advertisement
Advertisement
Table of Contents
Troubleshooting

Subscribe to Our Youtube Channel
Related Manuals for Pacific Scientific Redi-Line DA12A

Summary of Contents for Pacific Scientific Redi-Line DA12A
- Page 1 INSTALLATION AND SERVICE MANUAL Models DA12A DA12L DA24A DA24L DA36A DA36L...
-
Page 2: Warranty Policy
Pacific Scientific within two (2) years after the date of the product date code that is affixed to the product, and within thirty (30) days from the date any such defect is first discovered. -
Page 3: Table Of Contents
5. INSTALLATION ..........................19 ......................19 EFORE EGINNING NSTALLATION ..............................19 OUNTING ......................20 NSTALLATION NTERCONNECTION ........................23 NSTALLATION HECKOUT 6. MAINTENANCE ..........................24 ..............................24 LEANING ..................24 OUNTING AND LECTRICAL ONNECTIONS ..............................24 RUSHES ............................24 OMMUTATORS Pacific Scientific REDI-LINE Generators... - Page 4 NITS DC B ..................... 57 RUSH EMOVAL AND EPLACEMENT ........................58 HECKOUT AFTER EPAIR 10. PARTS LISTS ............................. 59 ............................ 59 ODELS OVERED ........................59 ARTS ONVENTIONS 11. TECHNICAL DATA .......................... 92 ........................... 92 ERFORMANCE URVES Pacific Scientific REDI-LINE Generators...
-
Page 5: About This Manual
ABOUT THIS MANUAL The purpose of this manual is twofold: first, to provide comprehensive installation instructions for Pacific Scientific REDI-LINE generators; and second, to provide comprehensive maintenance, troubleshooting, and repair procedures. It is imperative that the installation instructions be followed closely. Successful installation depends upon a number of factors, and ignoring any one factor can lead to major problems with the unit. -
Page 6: Description And Operation
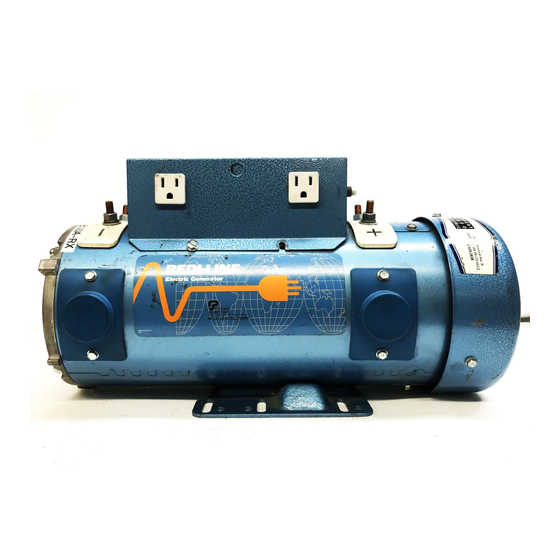
Easily delivers peak output currents up to 1.5 times the continuous output rating for extra starting power. • Conveniently mounts in any position in a minimum of space. • True sine-wave output. • Optional GFI outlet. • Operates in ambient temperatures from -30°F to 104°F Pacific Scientific REDI-LINE Generators... -
Page 7: General Specifications
** Variance from output voltage and frequency is dependent on load size and the DC input voltage. Typical voltage tolerance is ±15%. Typical frequency tolerance is ±5%. Carefully monitor any equipment that is sensitive to fluctuations in either voltage or frequency. Pacific Scientific REDI-LINE Generators... -
Page 8: Unpacking
Inspect the unit for any damage that may have been sustained during shipment. If you find damage, contact the shipper immediately to file a claim. Pacific Scientific REDI-LINE Generators... -
Page 9: Preparation For Installation
Allow at least 2 inches of free air space around the REDI-LINE generator. Do not obstruct the ventilation as it can cause the generator to overheat. Install the battery system in an area that is ventilated, so that battery fumes can be readily dissipated. Pacific Scientific REDI-LINE Generators... -
Page 10: Determining Installation Requirements
Determine how frequently and at what loads you plan to use your generator. Find the Redi-Line generator series you purchased and choose the correct installation diagram based on your usage and loads. Use this diagram as a guide when it comes time to do the system installation. Pacific Scientific REDI-LINE Generators... - Page 11 This will ensure the vehicle battery is always charged and you will be able to start your vehicle. Figure 4-1. Infrequent Use with Varying Loads *Use fuse size recommended by isolator manufacturer Figure 4-2. Frequent Use with Varying Loads Pacific Scientific REDI-LINE Generators...
- Page 12 This will ensure the vehicle battery is always charged and you will be able to start your vehicle. Figure 4-3. Infrequent Use with Varying Loads Figure 4-4. Frequent Use with Varying Loads Pacific Scientific REDI-LINE Generators...
- Page 13 This will ensure the vehicle battery is always charged and you will be able to start your vehicle. Figure 4-5. Infrequent Use with Varying Loads Figure 4-6. Frequent Use with Varying Loads Pacific Scientific REDI-LINE Generators...
- Page 14 This will ensure the vehicle battery is always charged and you will be able to start your Figure 4-7. Infrequent Use with Varying Loads Figure 4-8. Frequent Use with Varying Loads Pacific Scientific REDI-LINE Generators...
- Page 15 This will ensure the vehicle battery is always charged and you will be able to start your vehicle. Figure 4-9: Infrequent Use with Varying Loads Figure 4-10. Frequent Use with Varying Loads Pacific Scientific REDI-LINE Generators...
- Page 16 This will ensure the vehicle battery is always charged and you will be able to start your vehicle. Figure 4-11. Infrequent Use with Varying Loads Figure 4-12. Frequent Use with Varying Loads Pacific Scientific REDI-LINE Generators...
-
Page 17: Battery Selection
If the charging system is not powerful enough, the batteries may still ultimately become discharged after a long operating time. If that is the case, you may need to install a larger alternator in your vehicle. Consult your REDI-LINE distributor for more information Pacific Scientific REDI-LINE Generators... -
Page 18: Wiring Considerations
Installation and wiring must conform to all applicable codes, including the National Electric Code, state and local, or other codes in effect at the time of installation. Pacific Scientific recommends that the REDI-LINE Generator always be installed using proper fuses or circuit breakers. Refer to the appropriate Installation figure (Figures 4-1 through 4-12) for fuse sizes and locations. -
Page 19: Installation
If you have questions on installation or operation of the generator, contact your REDI-LINE distributor for assistance. If you do not have a distributor contact, call Pacific Scientific direct at (815) 226-3100. -
Page 20: Installation Interconnection
Cable, connectors, fuses and isolators may be available from your authorized REDI-LINE distributor. Many also provide complete installation services. NOTE: When attaching power cables to the generator; a spark at the connection may occur. This is normal and does not mean the generator is defective. Pacific Scientific REDI-LINE Generators... - Page 21 Instruction and Service Manual Installation Figure 5-1. Mounting Template for Small Frame Generators Pacific Scientific REDI-LINE Generators...
- Page 22 Installation Instruction and Service Manual Figure 5-2. Mounting Template for Large Frame Generators Pacific Scientific REDI-LINE Generators...
-
Page 23: Installation Checkout
If it does not, refer to the field troubleshooting procedure in Section 7. 11. Remove the load. The generator should stop within 10 seconds. If it does not, refer to the field troubleshooting procedure in Section 7. Pacific Scientific REDI-LINE Generators... -
Page 24: Maintenance
Return your unit to the distributor or factory for service. . Usually three sets of brushes can be worn out before it is necessary to turn the commutators. Pacific Scientific REDI-LINE Generators... -
Page 25: Field Troubleshooting
Field Troubleshooting 7. FIELD TROUBLESHOOTING Field Service Pacific Scientific recommends that field troubleshooting be performed whenever a problem is encountered with the REDI-LINE generator, to correct or eliminate problems caused by faulty installation or load changes, and thereby avoid unnecessary returns. -
Page 26: Should You Need To Return The Unit
Should You Need to Return the Unit Before returning any products for repair, authorization must first be received from your dealer. Dealer requirements may vary, so contact your dealer for instructions before returning a unit to him. Pacific Scientific REDI-LINE Generators... -
Page 27: Field Troubleshooting Checklist Form
Instruction and Service Manual Field Troubleshooting Field Troubleshooting Checklist Form We have performed the following troubleshooting checks: And the results were: Customer Name:________________________________________________________________________ Street Address:__________________________________________________________________________ City:_______________________________________________State:___________________Zip:_________ By:____________________________________________ Position:________________________________________ Phone:_________________________________________ Fax:___________________________________________ e-mail:_________________________________________ Pacific Scientific REDI-LINE Generators... -
Page 28: Troubleshooting Flow Charts
See Figure 7-7 This Section See Figure 7-5 This Section This Section Battery Generator runs discharges all the time too quickly See Figure 7-9 See Figure 7-10 This Section This Section TSFSTART Figure 7-1. Identifying Symptoms Pacific Scientific REDI-LINE Generators... - Page 29 Okay Check cable size from battery to generator. See Cable Sizing, Section 4, Preparation for Installation. Install correctly Return for Return to Okay sized cables Repair Service TSFSPEED Figure 7-2: Generator Running at an Incorrect Speed Pacific Scientific REDI-LINE Generators...
- Page 30 Check to see that both sets of DC input terminals are connected to batteries. See Installation Interconnection, Section 5, Installation Connect DC Input Return for Return to okay Cables Correctly Repair Service TSFAVFHL Figure 7-3: Generator Output Voltage or Frequency Incorrect Pacific Scientific REDI-LINE Generators...
- Page 31 No Load Check with 100 watt light bulb Increase load Return Okay to service on generator Return for Repair TSFACON Figure 7-4. Generator Does not Start When Connected to Battery Pacific Scientific REDI-LINE Generators...
- Page 32 Equipment Starting Load Requirements Return to Service Return to Service NOTE: The Redi-Line Generator can provide 1.5 TSFALOAD times its rated capacity for starting motors and loads. Figure 7-5: Generator Runs but does not Start Equipment Pacific Scientific REDI-LINE Generators...
- Page 33 DA12A 80294 Connect load DA12L 81221 Connect DC Input ground directly DA24A 79632 Cables Correctly to battery DA24L 79203 DA36A 79632 DA36L Return Return to to service Service TSFPERF Figure 7-6. Generator Does Not Start Automatically Pacific Scientific REDI-LINE Generators...
- Page 34 Okay Restart This Section Return to Okay Increase load Service on generator Return Install Larger to service Reduce Load Generator Return to Service TSFALOD2 Figure 7-7. Generator Starts With Load, But Stops After A Few Seconds Pacific Scientific REDI-LINE Generators...
- Page 35 Load is too light Check with 100 watt light bulb Return for Okay Repair Increase load on generator Return to service TSFACYCL Figure 7-8. Generator Cycles On And Off Every Few Seconds Pacific Scientific REDI-LINE Generators...
- Page 36 Check to see that deep cycle batteries are being used Replace batteries Okay with deep cycle type Return to Service Check battery condition Replace with Okay new batteries Upgrade vehicle charging system TSFAQDIS Figure 7-9. Battery Discharges Too Quickly Pacific Scientific REDI-LINE Generators...
- Page 37 Note: Power strips with ON indicator lamps, equipment with POWER CONNECTED indicator lamps, or similar devices can place enough load on the generator to cause it to run, even though the intended load has been removed. Figure 7-10. Generator Runs All The Time Pacific Scientific REDI-LINE Generators...
-
Page 38: Other Troubleshooting Checks
Checking Voltage or Frequency Use a true RMS voltmeter to check voltage or frequency. Many voltmeters will not give accurate readings, and Pacific Scientific recommends using a Fluke Model, 87, Model 8060, Model 8062, or equivalent. Connect the voltmeter leads to the power output points on the generator to take a reading. -
Page 39: Bench Troubleshooting
Be sure to follow individual disassembly and assembly procedures given in Section 9, Repair Procedures, when performing these steps. Pacific Scientific REDI-LINE Generators... -
Page 40: Troubleshooting Flowcharts
Replace Armature Replace Brushes See Armature See Brush Okay Replacement, Replacement, Section 9, Section 9, Repair Procedures Repair Procedures Replace Bearings See Bearing Replacement Section 9, Repair Procedures Return to Service TSBNOISE Figure 8-1. Generator Is Noisy Pacific Scientific REDI-LINE Generators... - Page 41 Repair Procedures Replace Armature Replace See Armature Bearings Replacement, See Bearing Section 9, Replacement Repair Procedures Section 9, Repair Procedures Return to Service TSBSPEED Figure 8-2. Generator Speed, Voltage, or Frequency Too High or Too Low Pacific Scientific REDI-LINE Generators...
- Page 42 79632 DA24L 79203 Version* DA36A 79632 Replace PC Board. DA36L See PC Board Replacement, Okay Section 9. TSBANOST Repair Procedures Figure 8-3. Generator Does Not Start When Connected to the Battery or Does Not Start Automatically Pacific Scientific REDI-LINE Generators...
- Page 43 See PC Board Model Serial Number Replacement, Break Section 9 DA12A 80294 Repair Procedures TSBACYCL DA12L 81221 DA24A 79632 DA24L 79203 DA36A 79632 DA36L Return to Service Figure 8-4. Generator Cycles On and Off Every Few Seconds Pacific Scientific REDI-LINE Generators...
-
Page 44: Troubleshooting Checkout Procedures
When removing or assembling components and subassemblies to perform checkout procedures, refer to the detailed disassembly and assembly instructions contained in Section 9, Repair Procedures. Failure to do so may result in improper disassembly or assembly. Pacific Scientific REDI-LINE Generators... - Page 45 3. Burnishing of the brush faces is acceptable, but if pitting or damage is discovered, replace both brushes in the pair. Inspect the armature commutator for damage. 4. If either brush is too short, replace both brushes in the pair. Pacific Scientific REDI-LINE Generators...
- Page 46 3. Burnishing of the brush faces is acceptable, but if pitting or damage is discovered, replace both brushes in the pair. Inspect the armature commutator for damage. 4. If either brush is too short, replace both brushes in the pair. Pacific Scientific REDI-LINE Generators...
- Page 47 If any damage is found, replace the armature. NOTE: A damaged commutator may be resurfaced and undercut if facilities and skills are available to do so. However, it is recommended that any armature with commutator damage be replaced. Pacific Scientific REDI-LINE Generators...
- Page 48 3. If there is measurable but inconsistent resistance between adjacent bars of the DC windings, remove any dirt or foreign metal pieces which may have created a bridge between the bars. Recheck the resistance. If it is still inconsistent, replace the armature. Pacific Scientific REDI-LINE Generators...
- Page 49 Instruction and Service Manual Bench Troubleshooting Procedure No. 6: Solenoid Test NOTE: This test does to apply to a DA12A-500A. This generator does not have a solenoid. Procedure: 1. Disconnect the battery from the generator. 2. Remove the electrical assembly cover from the generator but do not disconnect any electrical wires.
- Page 50 Resistance between the circuit breaker terminals should be less than 1 ohm. Disposition: 1. If resistance is greater than 1 ohm, replace the circuit breaker. 2. If resistance is less than 1 ohm, the circuit breaker is good. Pacific Scientific REDI-LINE Generators...
- Page 51 Instruction and Service Manual Bench Troubleshooting Procedure No. 8: Diode Test NOTE: This test does not apply to Redi-Line Generator models DA12L-1600A and DA12A- 500A. Procedure: 1. Remove any electrical connections to the generator. 2. If checking a small frame generator, separate but do not disconnect the electrical assembly cover from the generator…...
-
Page 52: Repair Procedures
2. Battery cable, at least #4 gauge, preferably #2 gauge. The exact length of cable needed depends upon the set-up of the test bench. Terminals used on the battery cable should be copper. Pacific Scientific REDI-LINE Generators... -
Page 53: Disassembly Of Small Frame Units
8. If armature (39) is to be replaced, separate bearing (35) from front end bell (30) end bell with a rubber hammer (the bearing is bonded to the end bell). Pacific Scientific REDI-LINE Generators... -
Page 54: Re-Assembly Of Small Frame Units
This retains the brush in the holder during installation. Remove the retaining wire after the assembly is secured. Pacific Scientific REDI-LINE Generators... -
Page 55: Disassembly Of Large Frame Units
13. If armature (39, 43, 44, or 48) is to be replaced, separate bearing (36, 40, 41 or 45) from front end bell (25 or 29) end bell with a rubber hammer (the bearing is bonded to the end bell). Pacific Scientific REDI-LINE Generators... -
Page 56: Re-Assembly Of Large Frame Units
12. Install the electrical components inside solenoid cover (1). Make sure wire routing and electrical connections are properly made. Install solenoid cover on housing and secure with screws (2). Pacific Scientific REDI-LINE Generators... -
Page 57: Dc Brush Removal And Replacement
2. Install the spring assembly so that the bottom of the brush ramp is closest to the spring assembly. 3. Press on the spring assembly to ensure the hook on the end of the spring engages with the brush holder. 4. Connect the brush shunts. Figure 9-1. Brush Removal and Installation Pacific Scientific REDI-LINE Generators... -
Page 58: Checkout After Repair
Checking Voltage or Frequency Use a true RMS voltmeter to check voltage or frequency. Many voltmeters will not give accurate readings, and Pacific Scientific recommends using a Fluke Model, 87, Model 8060, Model 8062, or equivalent. Connect the voltmeter leads to the power output points on the generator to take a reading. -
Page 59: Parts Lists
The part number column provides the Pacific Scientific part number; this part number is to be used when ordering the item from Pacific Scientific or your local dealer. The description column identifies assemblies and assembly parts through the use of dots preceding the item description. - Page 60 Parts Lists Instruction and Service Manual Figure 10-1: Small Frame Generators Pacific Scientific REDI-LINE Generators...
- Page 61 NOT USED NOT USED . Printed Circuit Board AVAILABLE NO LONGER NOT USED NOT USED . Nut AVAILABLE NO LONGER NOT USED NOT USED . Nut AVAILABLE NO LONGER NOT USED NOT USED . Washer AVAILABLE continued….. Pacific Scientific REDI-LINE Generators...
- Page 62 Parts Lists Instruction and Service Manual Figure 10-1: Small Frame Generators, continued Pacific Scientific REDI-LINE Generators...
- Page 63 . Shell Assembly, 24 Volt AVAILABLE NO LONGER YH83053 YH83053 . Shell Assembly, 36 Volt AVAILABLE YP80007 YP80007 YP80007 . Foot Mount YK11231 YK11231 YK11231 . Screw, Hex Head, ¼-20 X 9/16 YP00987 YP00987 YP00987 . Plug Pacific Scientific REDI-LINE Generators...
- Page 64 Parts Lists Instruction and Service Manual Figure 10-2. End Bell for Earlier Small Frame Generators Pacific Scientific REDI-LINE Generators...
- Page 65 . Insulator YP02103 . Power Terminal YK10027 . Nut, Std. Hex, ¼-20 NO LONGER AVAILABLE . Diode, 25 Amp X 800 Volt, Black (negative) NO LONGER AVAILABLE . Diode, 25 Amp X 800 Volt, Red (positive) Pacific Scientific REDI-LINE Generators...
- Page 66 Parts Lists Instruction and Service Manual Figure 10-3. End Bell for Current Small Frame Generators Pacific Scientific REDI-LINE Generators...
- Page 67 End Bell Assembly YR20193 . End Bell YP00351 . Brush YP00872 . Brush Spring YP02246 . Insulator, Brush YP02103 . Power Terminal YK10027 . Nut, Std. Hex, ¼-20 YK10384 . Washer YK10027 . Nut, Std. Hex, ¼-20 Pacific Scientific REDI-LINE Generators...
- Page 68 Parts Lists Instruction and Service Manual Figure 10-4: 12 Volt Large Frame Generator, Earliest Version Pacific Scientific REDI-LINE Generators...
- Page 69 . Nut, 5/16 YK10960 . Nut, 5/16 YP80105 . End Cover (Shroud) YK11230 . Screw, Slotted, Pan Hd YP01581 . Fan Impeller YK11134 . C-Ring YR70150 . Bell Assembly, Front End, (opposite fan shroud end) Continued….. Pacific Scientific REDI-LINE Generators...
- Page 70 Parts Lists Instruction and Service Manual Figure 10-4: 12-Volt Large Frame Generator, Earliest Version, continued Pacific Scientific REDI-LINE Generators...
- Page 71 . Terminal, Positive, with lead wire YP02237 . Insulator YK11424 . Washer HB623SL . Bearing, 6203, double sealed HB623SL , Bearing, 6203, double sealed YK10199 . C-Ring NO LONGER AVAILABLE . Armature NO LONGER AVAILABLE . Housing Pacific Scientific REDI-LINE Generators...
- Page 72 Parts Lists Instruction and Service Manual Figure 10-5: 12-Volt Large Frame Generator, Interim Version Pacific Scientific REDI-LINE Generators...
- Page 73 . End Cover, (Shroud) YK11230 . Screw, Slotted, Pan Hd YP01581 . Fan Impeller YK11134 . C-Ring YR70150 . Bell Assembly, Front End, (Opposite Fan Shroud) YR70215 . Bell Assembly, Rear End, (Fan Shroud End) Continued….. Pacific Scientific REDI-LINE Generators...
- Page 74 Parts Lists Instruction and Service Manual Figure 10-5: 12-Volt Large Frame Generator, Interim Version, continued Pacific Scientific REDI-LINE Generators...
- Page 75 . Washer YL35532 . Terminal, Positive, with lead wire YP02237 . Insulator YK11424 . Washer HB623SL . Bearing, 6203, double sealed HB623SL . Bearing, 6203, double sealed YK11722 . C-Ring YAA5170 . Armature YH84277 . Housing Pacific Scientific REDI-LINE Generators...
- Page 76 Parts Lists Instruction and Service Manual Figure 10-6: 12-Volt Large Frame Generator, Current Version Pacific Scientific REDI-LINE Generators...
- Page 77 . C-Ring YR70150 . Bell Assembly, Front End (opposite fan shroud end) YR70215 . Bell Assembly, Rear End (fan shroud end) YJ11240 . Tie Rod YK11322 . Nut, Acorn, 10-32 YK10960 . Nut, Lock, 10-32 Continued….. Pacific Scientific REDI-LINE Generators...
- Page 78 Parts Lists Instruction and Service Manual Figure 10-6: 12-Volt Large Frame Generator, Current Version, continued Pacific Scientific REDI-LINE Generators...
- Page 79 . Washer YP02237 . Terminal, Positive, with lead wire YP02237 . Insulator YK11424 . Washer HB623SL . Bearing, 6203, double sealed HB623SL . Bearing, 6203, double sealed YK11722 . C-Ring YAA5170 . Armature YH84277 . Housing Pacific Scientific REDI-LINE Generators...
- Page 80 Parts Lists Instruction and Service Manual Figure 10-7: 24-Volt Large Frame Generator, Earlier Version Pacific Scientific REDI-LINE Generators...
- Page 81 . End Cover, (Shroud) YK11230 . Screw, Slotted, Pan Hd YP01581 . Fan Impeller YK11134 . C-Ring YR70226 . Bell Assembly, Front End (opposite fan shroud end) NO LONGER AVAILABLE . Bell Assembly, Rear End (fan shroud end) Continued….. Pacific Scientific REDI-LINE Generators...
- Page 82 Parts Lists Instruction and Service Manual Figure 10-7: 24-Volt Large Frame Generator, Earlier Version, continued Pacific Scientific REDI-LINE Generators...
- Page 83 . Terminal, Positive, with lead wire YP02237 . Insulator YK11424 . Washer YP02237 . Insulator YK11424 . Washer HB623SL . Bearing, 6203, double sealed HB623SL . Bearing, 6203, double sealed YK11722 . C-Ring YAA5168 . Armature Assembly YH84279 . Housing Pacific Scientific REDI-LINE Generators...
- Page 84 Parts Lists Instruction and Service Manual Figure 10-8: 24-Volt Large Frame Generator, Current Version Pacific Scientific REDI-LINE Generators...
- Page 85 . Bell Assembly, Front End (opposite fan shroud end) YR70226 . Bell Assembly, Rear End (fan shroud end) YJ11212 . Tie Rod YK11322 . Nut, Acorn, 10-32 YK10960 . Nut, Lock, 10-32 YP03151 . Washer, Wavy Spring Continued….. Pacific Scientific REDI-LINE Generators...
- Page 86 Parts Lists Instruction and Service Manual 33 31 Figure 10-8: 24-Volt Large Frame Generator, Current Version, continued Pacific Scientific REDI-LINE Generators...
- Page 87 . Terminal, Positive, with lead wire YP02237 . Insulator YK11424 . Washer YP02237 . Insulator YK11424 . Washer HB623SL . Bearing, 6203, double sealed HB623SL . Bearing, 6203, double sealed YK11722 . C-Ring YAA5168 . Armature YH84279 . Housing Pacific Scientific REDI-LINE Generators...
- Page 88 Parts Lists Instruction and Service Manual Figure 10-9: End Bell for Large Frame Generators, Earlier Version Pacific Scientific REDI-LINE Generators...
- Page 89 NO LONGER AVAILABLE . Diodes Bracket Assembly NO LONGER AVAILABLE . Screw, Socket Head, 10-32 X 2 YP00372 . Brush YP00886 . Brush Spring YK10398 . Screw, Std Hex Hd, 10-32 X 3/8 YK10343 . Washer, No. 10 Pacific Scientific REDI-LINE Generators...
- Page 90 Parts Lists Instruction and Service Manual Figure 10-10: End Bell for Large Frame Generators, Current Version Pacific Scientific REDI-LINE Generators...
- Page 91 . Left Hand Brush Holder Assembly YK11738 . Screw, Socket Head, 10-32 X 2 YP00372 . Brush YP00886 . Brush Spring YK10398 . Screw, Std Hex Hd, 10-32 X 3/8 YK10343 . Washer, No. 10 YP02985 . Standoff Pacific Scientific REDI-LINE Generators...
-
Page 92: Technical Data
Figures 11-1 through 11-5 are performance curves, and should be used only by repair technicians who can apply it properly to generator performance during the course of bench analysis and repair. It is not of use to the generator user. Pacific Scientific REDI-LINE Generators... - Page 93 11.6 Vdc Output Power (Watts) 13.6 Vdc 12.6 Vdc 11.6 Vdc Output Power (Watts) 12.6 Vdc Output Power (Watts) 12.6 Vdc Output Power (Watts) 12.6 Vdc Output Power (Watts) Figure 11-1: Performance Curves for DA12A-500A Redi-Line Generators Pacific Scientific REDI-LINE Generators...
- Page 94 1600 1800 2000 Output Power (Watts) 13.6 Vdc 1000 1200 1400 1600 1800 2000 Output Power (Watts) 12.6 Vdc 1000 1200 1400 1600 1800 2000 Output Power (Watts) Figure 11-2: Performance Curves for DA12L-1600A Redi-Line Generators Pacific Scientific REDI-LINE Generators...
- Page 95 27.2 Vdc 25.2 Vdc 23.2 Vdc 1000 Output Power (Watts) 25.2 Vdc 1000 Output Power (Watts) 25.2 Vdc 1000 Output Power (Watts) 25.2 Vdc 1000 Output Power (Watts) Figure 11-3: Performance Curves for DA24A-800A Redi-Line Generators Pacific Scientific REDI-LINE Generators...
- Page 96 1600 1800 2000 Output Power (Watts) 25.2 Vdc 1000 1200 1400 1600 1800 2000 Output Power (Watts) 25.2 Vdc 1000 1200 1400 1600 1800 2000 Output Power (Watts) Figure 11-4: Performance Curves for DA24L-1600A Redi-Line Generators Pacific Scientific REDI-LINE Generators...
- Page 97 34.8 Vdc 1000 1100 Output Power (Watts) 37.8 Vdc 1000 1100 Output Power (Watts) 37.8 Vdc 1000 1100 Output Power (Watts) 37.8 Vdc 1000 1100 Output Power (Watts) Figure 11-5: Performance Curves for DA36A-900A Redi-Line Generators Pacific Scientific REDI-LINE Generators...
Need help?
Do you have a question about the Redi-Line DA12A and is the answer not in the manual?
Questions and answers