Table of Contents
Advertisement
Advertisement
Table of Contents

Related Manuals for TAG Heuer Link


Summary of Contents for TAG Heuer Link
- Page 1 English English...
- Page 2 English English...
- Page 5 This device features Android Operating System, 2.2. Android software and works with the Android Market on which you have access to more than 250 000 applications. Every new Tag Heuer product is put through countless reliability and quality tests prior to launch to ensure performance and reliability.
-
Page 7: Table Of Contents
TABLE OF CONTENTs Packaging content..................10 Guidelines for safe and efficient use............11 • Precautions when using batteries..................11 • Product care........................12 • Radio frequency energy....................13 • Electronic devices......................14 • Potentially explosive atmospheres..................14 • Respect Special Regulations..................14 • Pacemaker........................14 • Driving........................15 • Hearing aids........................15 • Aircraft........................16 • Use properly your phone....................16 • Emergency calls.......................16 Getting to know your phone and accessories........17 • Installing the SIM card and the SD memory card............17 • The battery........................18 • The stereo headset......................20... - Page 8 Phone and status notifications..............30 • Status bar.........................30 • Status icons........................31 • Notifications panel......................32 Settings......................33 • Adjusting phone settings....................33 • Adjusting the volume.......................35 • Using the onscreen keyboard..................36 Using phone features and managing contacts........41 • Making calls........................41 • Answering or rejecting calls.....................43 • Managing multiple calls....................46 • Set up a conference call....................46 • Using the call log......................48 • To add a new phone number to contacts................49 Adjusting call settings.................50...
- Page 9 • Manage messages and message threads..............65 • Using Emails........................69 • Manage emails on your external email account............71 • Add more email accounts.....................72 • Getting connected to internet..................72 • Adjust Browser settings....................78 Entertaining through multimedia functions..........83 • Using camera and camcorder..................83 • U sing gallery........................86 • Using music........................92 Managing your phone................96 • Changing basic settings....................96 • Synchronizing your data....................99 • Protecting your phone and personal data..............100...
-
Page 10: Packaging Content
English English PACKAGING CONTENT • 1 TAG Heuer phone • 1 International warranty card • 1 User guide • 1 CD-ROM ( including user guides in all languages and the Data Suite to synchronize your contacts, email, music, etc. ) • 1 Recommendation of Applications leafl et • 1 International charger with 5 plugs • 1 USB data cable • 1 Cleaning cloth • 1 Pouch • 1 Stereo headset • 1 Extractor tool Note : • The items supplied with your phone and the accessories available at your dealer may vary, depending on your country or service provider. -
Page 11: Guidelines For Safe And Efficient Use
The TAG Heuer LINK is approved for use on GSM 900, DCS 1800, GSM 850, PCS 1900 and W-CDMA 850, 1900 and 2100 (i.e. bands I, II and V) networks. Contact your service provider for more information about networks. -
Page 12: Product Care
English English • To avoid a reduction in battery capacity; do not leave the battery in hot or cold places, such as in a car in summer or winter conditions. Li-ion batteries are particularly affected by temperatures below 0°C ( 32°F ). •... -
Page 13: Radio Frequency Energy
• The radio wave exposure guidelines employ a unit of measurement known as the Specifi c Absorption Rate, or SAR. Tests for SAR are conducted using standardised methods with the phone transmitting at its highest certifi ed power level in all used frequency bands. • While there may be differences between the SAR levels of various TAG Heuer LINK mobile phones, they are all designed to meet the relevant guidelines for exposure to radio waves. • The SAR limit recommended by the International Commission on Non-Ionizing Radiation Protection ( ICNIRP ) is 2W/kg averaged over 10 g of tissue. -
Page 14: Electronic Devices
English English Electronic devices Most modern electronic equipment is shielded from RF energy. However, certain electronic equipment may not be shielded against the RF signals from your wireless phone, therefore : • Do not use your phone near medical equipment without requesting permission. Potentially explosive atmospheres Switch off your phone when in any area with a potentially explosive atmosphere and obey all signs and instructions. It is rare, but your phone or its accessories could generate sparks. Sparks in such areas could cause an explosion or fi... -
Page 15: Driving
research by and recommendations of Wireless Technology Research. Persons with pacemakers: • Should always keep the phone more than 20 cm ( 6 inches ) from their pacemaker when the phone is switched on. • Should not carry the phone in a breast pocket. • Should use the ear opposite the pacemaker to minimize the potential for interference. • If you have any reason to suspect that interference is taking place, switch off your phone immediately. Driving Check the laws and regulations on the use of phones in the areas where you drive. If you are going to use your phone while driving, please : • Give full attention to driving • Use hands free. The law in many countries requires that the use of phones in vehicles while driving ... -
Page 16: Aircraft
English English Aircraft • Turn off or activate fl ight mode of your mobile phone before boarding any aircraft. • Do not use it on the ground without crew permission To prevent interference with communication systems, you must not use your phone while the plane is in the air. Use properly your phone Use only in the normal position ( hold to the ear ). Avoid unnecessary contact with the antenna when the phone is switched on. Emergency calls When you want to make an emergency call, please ensure that the phone is switched on and is in service. ... -
Page 17: Getting To Know Your Phone And Accessories
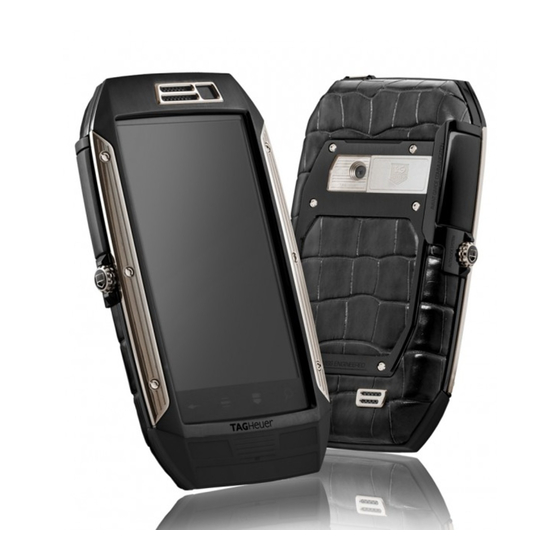
GETTING TO KNOW YOUR PHONE AND ACCEssORIEs Power on/off key Receiver 5MP auto focus camera SIM card / SD Volume key memory card & USB connector 3.5” 480x800 pixel TFT display Microphone Loud speaker Installing the SIM Card and the SD Memory Card SIM card The SIM card contains your service details and your phone book / message memory. - Page 18 English To remove the SIM card 1. Make sure the phone is turned off or in fl ight mode. 2. Use the appropriate extractor to push the SIM card out of the slot. 3. Close the door. SD memory card To store your pictures, music, and applications, the TAG Heuer LINK is sold with an 8GB SD Memory card already pre-installed into your phone. This phone can support up to 16GB of memory. ( SD memory card ) To install the storage card 1. Make sure the phone is turned off. 2. Using the tool supplied, insert the SD Memory card into its cavity ( situated just above the SIM card ) with the gold contacts facing down.
-
Page 19: The Battery
The battery Your phone comes with a rechargeable Lithium-ion battery (1400mAh ) and is designed to use only manufacturer-specifi ed original batteries and accessories. Battery performance depends on many factors, including network confi guration, signal strength, the temperature of the environment in which you operate your phone, the features and/or settings you select and use, items attached to connecting ports, and your voice, data, and other program usage patterns. Battery autonomy Talk time •... -
Page 20: The Stereo Headset
To listen to music, video or FM radio, you might use the dedicated stereo headset which comes with the TAG Heuer LINK. To insert the stereo headset, rotate the crown situated on the left hand side of your mobile and insert the dedicated headset into the same cavity as for the charger beside the SIM card and the SD Memory card cavities. -
Page 21: Enter The Pin Code
To turn off the phone 1. Press and hold 3 seconds the POWER on / off key until the options menu opens. 2. On the options menu, you can put your mobile phone in silent mode, Airplane mode and power off your phone. - Page 22 English English Turn off the screen when your phone is not in use To save battery power, the phone automatically turns off the screen when you leave it idle after a certain period of time. You will still be able to receive messages and calls while the phone’s screen is off. If you want to set up your screen timeout, enter in the settings menu and then select “...
-
Page 23: Phone Controls
PHONE CONTROLs Soft Key functions Function HOME HOME While on any application or screen, touch to return the main Home screen While on any application or screen, touch to return the main Home screen Touch and hold to open the recent-used applications window Touch and hold to open the recent-used applications window MENU ... -
Page 24: Quick Keys Tab
When you want to type using the onscreen keyboard, select items onscreen such as application and settings icons and touch them with your fi nger. Touch and hold To open the available options for an item ( for example, contact or link in a webpage ) simply touch and hold the item. Swipe or slide To swipe or slide means to quickly move your finger vertically or horizontally across the screen. -
Page 25: Home Screen
Rotate For most screens, you can automatically change the screen orientation from portrait ( vertical ) to landscape ( horizontal ) by turning the phone sideways. When entering text, you can turn the phone sideways to bring up a bigger keyboard. Home screen The Home screen is your starting point for using the applications on your phone. - Page 26 English English Extended Home screens The Home screen extends beyond the screen width to provide more space for adding icons, widgets, and more. Slide your finger horizontally across the screen to go to the left or right side of the extended Home screen, then press Home key to back the main screen. To quick switch to certain home screen extend 1.
- Page 27 Tip : To quickly add an application shortcut that is in the Top Menu to the Home screen, touch and hold an application icon. When the phone vibrates, release the icon on an empty area on the Home screen. • Widgets. Add a wireless manager, profile mode, clock, Facebook, weather, music player, FM player, a picture frame, the Google Search bar, power control, or a calendar that shows upcoming appointments.
- Page 28 English English To drag an Home screen item 1. Touch and hold the item on the screen you want to drag to activate Move mode. Note: When Move mode is activated, the item magnifies and the phone vibrates. 2. Drag the icon to the Quick Keys tab ( the Quick Keys tab will changes to red ).
- Page 29 To access the items inside a folder, touch the folder to open it and then touch the icon of the application or shortcut you want to open. Tip : To delete a folder, follow the same procedure when you want to remove a Home screen item.
-
Page 30: Phone And Status Notifications
English English PHONE sTATUs AND NOTIFICATIONs Status bar On the top of the phone screen is situated the status bar. The left side of the status bar displays notifi cation icons while the right side of the status bar displays the phone status. The bar can be pull down to indicate information, including call log, messages info, ongoing event or The bar can be pull down to indicate information, including call log, messages info, ongoing event or notifi... -
Page 31: Status Icons
Status icons These are the icons that may appear in the status bar : GPRS connected GPRS connected Roaming Roaming GPRS in use GPRS in use GPRS in use No signal No signal No signal EDGE connected EDGE connected EDGE connected ... -
Page 32: Notifications Panel
English English Notifi cations panel Notifi cation icons report the arrival of new messages, calendar events, alarms set and ongoing settings such as when call forwarding is on or the current call status. You can open the notifi cations panel to open the message, reminder, or event notifi cation and see the service provider name. To open the notifications panel When a new notifi... -
Page 33: Settings
sETTINGs Control and customize phone settings on the settings screen. To open the settings screen, you can choose between the two following options : • Press • Press • Press , then press , then press , then press and touch Settings. and touch Settings. - Page 34 English English Accounts & sync To synchronize your data with Google services. SD memory card & phone storage Check the available storage card and phone memory, reset the phone to its factory default settings, or format the SD card. Language & keyboard Set the operating system language and region. You can also set onscreen keyboard options. Voice input &...
-
Page 35: Adjusting The Volume
Adjusting the volume Adjusting the ringer volume changes the volume level of the phone ring tone, whereas adjusting the Media volume changes the volume level of sound notifi cations and music or video playback. The ringer volume and media volume can be adjusted separately. Adjust the ringer volume Two different ways are proposed to adjust the ringer volume of your phone. -
Page 36: Using The Onscreen Keyboard
English English display the volume level. You can also adjust the media volume on the Settings screen. You can also adjust the media volume on the Settings screen. You can also adjust the media volume on the Settings screen. 1. Press , then press , and then touch the Settings icon. - Page 37 Touch and hold to access more punctuation marks. Touch and hold to access more face Touch and hold to access the keyboard symbols. settings or switch input methods. Tips : • When you do not need the keyboard, you can close it by pressing .
- Page 38 English English Adjusting Android default keyboard settings Set onscreen keyboard options such as vibrate and/or emit a sound when you touch a key, auto- capitalization, auto-complete, and more. To set onscreen keyboard options To set onscreen keyboard options To set onscreen keyboard options 1.
- Page 39 Using XT9 input method XT9 is a multi-mode text input tool, and it provides you predictive text input and handwriting mode. Select the input method Go to XT9 text input To set XT9 options To set XT9 options 1. Press , then press , and then touch Settings >...
- Page 40 English English To set the phone’s SD Memory card as a USB drive 1.Connect the phone to the computer using the USB cable. A notification icon appears in the status bar. 2. Then, PC and phone will be automatically connected. Note : You will not be able to use some of the phone’s applications such as Camera.
-
Page 41: Using Phone Features And Managing Contacts
UsING PHONE FEATUREs AND MANAGING CONTACTs Making calls Use the dialer to enter and call a phone number. To open the dialer • On the Home screen, touch • Between the different sections, select To make a call on the Dialer 1. - Page 42 English English To make an international call 1. Touch and hold the number 0 key on the Dialer tab until the plus (+) sign appears. The plus (+) sign replaces the international prefix of the country that you wish to call or you are calling from. 2.
-
Page 43: Answering Or Rejecting Calls
3. Do one of the following : • Touch a favorite contact to access the contact details. Navigate to the Dial number section, and then touch a phone number that you want to call. • Touch and hold the favorite contact you want to call and then from the options menu, touch Call Mobile, Call Work, or Call Home to make the call. - Page 44 English English To answer or reject a call To answer or reject a call • Drag to the right • Drag to the right to answer the call. • Drag to the left to reject the call and redirect the caller to your voice mail. Call Options When a call is in progress, press to open the call options.
- Page 45 Warning ! To avoid damage to your hearing, do not hold your phone against your ear when the speakerphone is turned on. To transfer the call to a Bluetooth headset ® When a Bluetooth headset is paired and connected to your phone, you can receive all incoming ®...
-
Page 46: Managing Multiple Calls
English English To end a call When a call is in progress, you can do one of the following to hang up : 1. Press key to end call. 2. If you are using the provided stereo headset, press and hold the key to end the call. Managing multiple calls Your phone notifi... - Page 47 number area. Or touch the Call log, Contacts, or Favorites tab and then select the next conference call participant from the list. 4. The first call is automatically put on hold. 5. When connected to the second conference call participant, then touch Merge calls to begin the conference call.
-
Page 48: Using The Call Log
English English Using the call log The call log tab lists all missed calls, dialed numbers, and received calls. To use the call log tab To use the call log tab 1. Press , touch the Dialer tab, and then touch the Call log section. 2. -
Page 49: To Add A New Phone Number To Contacts
To add a new phone number to contacts If the phone number of a person who called is not in your contacts list, you can choose to save the number after you hang up. number after you hang up. 1. Press , touch the Dialer tab, and then touch the Call log tab. -
Page 50: Adjusting Call Settings
English English ADJUsTING CALL sETTINGs You can adjust the phone settings of your phone such as your voicemail number, or enable additional call services from your service provider. To open the Call settings screen, press > , then touch Settings > Call settings. Options Description Fixed Dialing Numbers... -
Page 51: Turning The Phone Function On/Off
Turning the phone function On/Off In many countries, you are required by law to turn off the phone while on board an aircraft. A way to turn off the phone network functions is to switch your phone to Airplane mode. In Airplane mode, all wireless radios on your phone are turned off, including the phone network, Bluetooth , and Wifi... - Page 52 English English Tip: When you reply to or forward an email message to an email address that is not in Contacts, the email address is automatically added to your contacts list. Add a new contact To add a new contact 1.
- Page 53 Note : If you want all calls from this contact to go directly to your voicemail, select the Incoming calls check box. 3. When fi nished, press and then touch Done. To import contacts from the SIM card & SD card You can add contacts saved on your SIM card to your phone’s contacts list.
- Page 54 English English To view favorite contacts Press , touch the Dialer icon, and then touch the Favorites tab. You can also see your frequently called contacts or numbers on the Favorites tab. To remove a contact from the Favorites tab 1.
- Page 55 However, to view all the information you have stored for a contact, and to initiate other types of communication with that contact, open the contact details screen. To open the contact’s details Touch the contact's name in the contacts list to read the contact’s detail information. To call a contact Touch the contact’s name in the contacts list to open the contact details screen, then touch a phone number.
- Page 56 English English 2. When the contact details screen opens, touch Email home, Email work, or another email option. A compose screen opens for your new email. Notes : • If you have more than one email account set up on your phone, you will be prompted to select which account to use to send the message.
-
Page 57: Managing Your Time
MANAGING YOUR TIME Using the clock You can set Clock as a desktop theme. Turn Alarm on or off Return to Clock Go to Alarm To open the Alarm, do as follows : To open the Alarm, do as follows : 1. - Page 58 English English Note : Touch Vibrate if you want the phone to also vibrate when the alarm goes off. 4. Touch Repeat to select the days you want the alarm to sound, and then touch OK. Note: If you do not select any days for the alarm, the word “Never” will show which means that your alarm will only go off once.
- Page 59 Delete an alarm 1. On the Alarm Clock screen, touch the alarm you want to delete. 1. On the Alarm Clock screen, touch the alarm you want to delete. 2. On the Set alarm screen, press and then touch Delete alarm. Put in silence all alarms You can set whether alarms sound even when your phone is in Silent mode.
-
Page 60: Sending Sms And Mms Messages
English English Sending SMS and MMS messages Messaging lets you compose and send text (SMS) and multimedia messages (MMS) to other phones. List of messages you have Touch to create a new text or received picture message. Touch to open the message or message thread and read the text or Open Messaging Open Messaging... - Page 61 number, matching contacts will appear on the screen. Touch a recipient or continue entering the recipient’s phone number. Enter the text message Enter a name to look up a contact or touch to enter a phone number Touch to send the message Touch to automatically enter the phone number of the matched contact...
- Page 62 English English Create and send a multimedia (MMS) message 1. In the Messaging screen, touch “ New message ”. The “ Compose ” screen opens. 2. Enter the phone number or email address of your message recipients in the “To” field. As you enter the phone number or email address, matching contacts will appear on the screen.
- Page 63 Volume meter Recording duration Playback control • Slideshow. Touch to open the Edit slideshow screen. Touch Add slide to create a new slide. Touch the created slide (for example, Slide 1), touch Add picture, then select the picture you want to add to the slide.
- Page 64 English English 6. When you are finished composing the multimedia message, touch Send. The send progress is displayed at the right side of the message in the message thread or in the message list. Note : To receive delivery reports and know when a picture message is received, in the message Note : To receive delivery reports and know when a picture message is received, in the message list, press , then touch Settings.
-
Page 65: Manage Messages And Message Threads
Receive text and multimedia messages Depending on your notifi cation settings, the phone will play a ring tone, vibrate, or display the message briefly in the status bar when you receive a new text or multimedia message. To change the notification for new text and multimedia messages, refer to “... - Page 66 View message details. • If a message contains a link to a web page, touch the link to open Browser and view the web page. If a message contains a phone number, touch the message to open Dialer so you can call the number.
- Page 67 Tip: To reply a text message with a multimedia message, open the text message, press then touch Add subject, or Attach. The text message is automatically converted into a multimedia message. Delete a message or a message thread 1. In the message list, touch the message thread that you want to delete. 2.
- Page 68 English English Read reports Select this option if you want to receive a report whether eachrecipient has read or has deleted the message without reading it. Auto-retrieve Select this option to automatically retrieve all your MMS messages completely. When selected, the MMS message header plus the message body and attachments will automatically download to your phone.
-
Page 69: Using Emails
Using Email The Email application comes with an email wizard that lets you add external POP3, IMAP or exchange email accounts from popular web-based email service providers such as Hotmail, Gmail, Yahoo! ® Mail Plus, AOL, and more, on your phone. Note : If you want to set up specific account such as a Yahoo! email account, you need first to ®... - Page 70 English English If you want to create manually your email account, you will have to select between the type of emails accounts you want to set up such as POP or IMAP or Exchange. With the POP protocol, your email account connects itself to the email server; it copies new messa- ges on your computer internal device and erases the messages from the server.
-
Page 71: Manage Emails On Your External Email Account
Compose and send emails Compose and send emails 1. Press , then touch , and then touch the Email icon. 2. In the screen called “Your Accounts”, touch the email account you want to use. 2. In the screen called “Your Accounts”, touch the email account you want to use. 3. -
Page 72: Add More Email Accounts
English English Add more email accounts On the “ Your accounts screen ”, press and then touch Add account. Using Gmail Google mail is the web-based e-mail service which you may check the email box directly without log-in your mail account every time from web site. Create and send a mail with a Gmail account 1. - Page 73 Save when you fi nish setting up the new APN. Note : Your phone will synchronize automatically with Google service. If you do not want to link the data service, please turn of the selection of Data enabled.
- Page 74 English English Set your home page Set your home page 1. Press and then touch More > Settings > Set home page. 2. Enter the URL of the web site you want to use as your home page and then touch OK. Navigate in the web Browser offers a host of features that let you view web pages just like on a desktop computer.
- Page 75 To switch between browser windows 1. On a browser window, press and then touch Windows. 2. On the current windows screen, touch the link you want to view. 3. You may also close the browser window by touching to close the selected browser window.
- Page 76 English English To copy text on a web page Copy text from web pages and then paste them on emails or your SMS / MMS messages. 1. Open the web page where you want to copy text. 2. Locate the text you want to copy and then press 2.
- Page 77 1. Press , then press , and then touch Settings > Applications. 2. Select the Unknown sources check box. 3. When the Attention dialog box opens, touch OK. Notes : • All downloaded applications are saved to the storage card. Before you download an application from the web, make sure that you have installed a storage card on your phone.
-
Page 78: Adjust Browser Settings
English English 4. Edit the bookmark Name if needed and then touch OK. To open a bookmark 1. On the Browser screen, press and then touch Bookmarks. 2. On the Bookmarks tab, do one of the following: • Touch the bookmark you want to open. •... - Page 79 1. Press , then press , and then touch Settings. 2. Touch Wireless & networks, then select the Wifi check box to turn on Wifi in the Wifi Settings. When on, the Wifi icon appears in the status bar. 3. Several access points will be showed and displayed in the list under the section of Wifi network. 4.
- Page 80 English English wireless networks. EAP methods can provide a secure authentication mechanism, and in between the user and the network access server to provide a secure PMK. 1. Press , then press , and then touch Settings. 2. Touch Wireless & networks, go to Wifi ( WLAN ) Settings and touch the specifi c access point you have linked.
- Page 81 The phone name identifies your phone in a Bluetooth network. It is set up by default under the ® following name: “ TAG Heuer LINK ”. If you want to rename your phone, proceed as follows: 1. Make sure that you have turned Bluetooth ®...
- Page 82 English English Note: For some Bluetooth devices, you need to enter a password to pair with the Bluetooth ® ® device. You can try “ 0000 ” as the password. If that does not work, please check your Bluetooth device for password information. 4.
-
Page 83: Entertaining Through Multimedia Functions
ENTERTAINING THROUGH MULTIMEDIA FUNCTIONs Using camera and camcorder Your phone is designed with 5 megapixel camera with an auto-focus feature allowing you to take pictures and videos. Before starting to use the camera, please note that you must insert a storage card before using the Camera or Camcorder. -
Page 84: Menu Function
English English Take pictures Take pictures 1. Press , touch and then touch Camera. If you are in Camcorder, switch to camera. 2. Frame your subject on the screen. 3. This camera is designed to support 5 Megapixel camera which can support many functions described in the below. - Page 85 4. Press the camera key to take the picture. Note : The zoom mode is not supported for pictures of 5 Megapixel. Shoot videos 1. Press , touch and then touch Camcorder or if you are in Camera, switch to video. 2.
-
Page 86: Using Gallery
English English 4. Press the camera key to start capturing video. Touch the onscreen or press camera key again to stop capturing video. Post capture After capturing, the image you just took appears in the preview zoom shown on the bottom left corner. - Page 87 • While on the Camera screen, touch Gallery icon. If you stored your fi les in folders ( directories ) on the storage card, Gallery will display these folders as separate albums. The top left album contains all the pictures in the storage card. Note : Depending on the number of pictures stored on the storage card, it may take few seconds to load all your photos on the screen.
- Page 88 English English To close the gallery While in the Gallery screen, press to close the application. Note If you opened Gallery from the Camera application, the screen returns to the Camera screen Note If you opened Gallery from the Camera application, the screen returns to the Camera screen when you press Touch to select either view by thumbnail or sort by date...
- Page 89 To zoom in or out on a picture Do one of following to zoom in or out the picture: • Touch the screen to activate the zoom in/out bar. • Use your fingers to zoom in / out by multitouch feature. To view a picture in landscape orientation 1.
- Page 90 English English To crop a picture 1. While viewing a picture in full screen, press > More then touch Crop. The cropper tool appears. 2. Do one of the following: • To adjust the cropper size, touch and hold the edge of the cropper tool. When the cropper ar- rows appear, move your finger inward to or outward from the centre of the cropper to resize it.
- Page 91 To send a picture using Email or Messaging 1. While viewing a picture in full screen, press , then touch Share. 2. When prompted, touch Email or Messaging. 3. The picture is automatically attached to your email. Compose your message, then touch Send. For more information on how to create and send emails, refer to the section called “Using Email ”.
-
Page 92: Using Music
English English To send a video using Messaging There is a 3MB limitation on the size of a video file that can be shared. If you want to share a video that you captured using the phone, this is approximately 1 minute of high quality or 2 minutes of low quality. -
Page 93: Music Library
To open Music To open Music 1. Press , touch 2. Touch the Music icon. The Music library screen displays. Play music Your music is organized into four categories: Artists, Albums, Songs, and Playlists. Touch a category to view the list within each. When inside a category, keep touching the screen until you reach the music you want to play. - Page 94 English English Use playlists Use playlists to organize your music files. You can create as many playlists as you want on your phone. To create a playlist 1. Touch a category on the Music library screen. 2. In the list that appears, select the song that you want to add in the playlist. 3.
- Page 95 To set a song as ringtone You can use songs as your phone ringtone. 1. From the Music library, navigate to the song that you want to use as ring tone. 2. Touch and hold the song then touch Use as phone ringtone on the menu.
-
Page 96: Managing Your Phone
English English MANAGING YOUR PHONE Changing basic settings Set the date, time zone, and time By default, your phone automatically uses the network-provided date, time zone, and time. To manually adjust the date, time zone, and time : To manually adjust the date, time zone, and time : To manually adjust the date, time zone, and time : 1. - Page 97 To adjust the time before the screen turns off After a period of inactivity, the phone screen turns off to conserve battery power. You can set the idle time before the screen turns off. 1. Press , then press , and then touch Settings. 2.
- Page 98 Phone services Your phone can directly link to the mobile phone network, and enable you to access and change the settings of various phone services for your phone. Phone services may include voicemail, call forwarding, caller ID, call waiting and more. Please contact your service provider to fi nd out the availability of phone services.
-
Page 99: Synchronizing Your Data
Synchronize your data with your PC You can synchronize your PC with the TAG Heuer LINK. This will ensure all your important details and dates match, and also act as a back up to help your mind at ease. You can sync your contact information thanks to the supplied PC sync tool (CD ROM) and the dedicated USB cable. -
Page 100: Protecting Your Phone And Personal Data
English English Install the PC sync tool in your PC 1. Install the PC sync tool’s driver before using the sync tool 2. Plug in USB into PC and your phone 3. Follow the instruction shows in PC and start the synchronization. Protecting your phone and personal data You can protect your SIM card from unauthorized use by assigning a PIN (personal identification number). - Page 101 Protect your phone with a screen lock You can further secure your data by locking the screen and/or requiring a screen unlock pattern, entering PIN or password every time your phone is turned on or every time it wakes up from sleep mode (screen is off).
-
Page 102: Managing Memory
English English Managing memory See how much phone memory is available for use See how much phone memory is available for use See how much phone memory is available for use 1. Press , then press , and then touch Settings. 2. -
Page 103: Resetting And Rebooting The Phone
To free up more phone memory or storage card space If your phone is running low on memory, you can try the following: • In Browser, clear all temporary Internet files and Browser history information. • Move the applications to SD card if the select specific application support. Resetting and rebooting the phone Resetting the phone deletes all data, including downloaded applications, and resets the phone back to its initial state —... -
Page 104: Trouble Shooting
English English TROUBLE sHOOTING This chapter lists some problems you might encounter while using your phone. Some problems require you to call your service provider, but most are easy for you to correct yourself. Message Possible causes SIM error There is no SIM card in the phone or it is inserted incorrectly. No network connection Signal weak - Outside GSM network area Codes do not match... - Page 105 Plug in to a different socket or check the voltage. If the charger does not warm up, replace it. Only use original TAG Heuer LINK accessories. Reconnection to another service provider is automatic. Or click on the Menu icon in the applica- tions tab/settings/Wireless &...
-
Page 106: International Warranty
English INTERNATIONAL WARRANTY Subject to the terms of the warranty herein, the manufacturer warrants to the end user that TAG Heuer mobile products are free from design defects under normal use for a period of two (2) years from the initial purchase date and one (1) year for the accessories. - Page 107 The normal wear and ageing of your phone due to normal usage is not covered by warranty. This is especially the case for: - any material surface degradation due to normal usage of product, scratches on metal, leather, rubber, glasses, spots, dust intrusion or degraded surfaces, change of color of parts due to exposition to solar radiation or contact with any chemical substance.
- Page 108 If this product proves defective under normal use and conditions, the user must contact an authorized TAG Heuer repair service center to obtain warranty service authorization. The manufacturer reserves the right to invoice for administrative costs if it transpires that a returned product is not covered by the warranty in accordance with the terms described herein.
- Page 109 CALL CENTERS CHINA +86 400 6506218 DUBAI +971 (0) 433 23 777 FRANCE +33 (0) 5 63 21 53 08 GERMANY / AUSTRIA +49 (0) 699 530 79 80 HONG KONG +852 2909 5980 INDIA +91 (0) 11 47474101 ITALY +39 (0) 2 38 59 10 59 KUWAIT +965 22 49 90 02 MALAYSIA +603 2140 8318 RUSSIA +7 800 100 4540 ( local calls )
-
Page 110: Important Legal Information
English English IMPORTANT LEGAL INFORMATION FCC/ Industry Canada Notice This device complies with Part 15 of the FCC rules. Operation is subject to the following two conditions: (1) this device may not cause harmful interference. (2) This device must accept any interference received, including interference that may cause undesired operation. -
Page 111: Declaration Of Conformity
1800, GSM 850, PCS 1900 and W-CDMA 850, 1900 and 2100 ( i.e. bands I, II and V ), Brand Name: TAG Heuer ) conformity with the appropriate standards EN 301489-1 V1.8.1, EN 301 489-3 V1.4.1, EN 301 489-7 V1.3.1, EN 301 489-17 V2.1.1, EN 301 489-24 V1.4.1, EN 301 511 V9.0.2, EN 301 908-1 V4.2.1, EN 301 908-2 V3.2.1, E300 328 V1.7.1, EN 50360:2001:EN62209-... -
Page 112: Disposal Of Your Old Appliance
English English Disposal of your old appliance 1. When this crossed-out wheeled bin symbol is attached to a product it means the product is covered by the European Directive 2002/96/EC. 2. All electrical and electronic products should be disposed of separately from the municipal waste stream via designated collection facilities appointed by the government or the local authorities.
Need help?
Do you have a question about the Link and is the answer not in the manual?
Questions and answers