
Related Manuals for Buffalo WLI-UC-GNHP


Summary of Contents for Buffalo WLI-UC-GNHP
-
Page 1: User Manual
User Manual Wireless N High Power USB 2.0 Adapter WLI-UC-GNHP www.buffalotech.com 35010984 ver.02... -
Page 2: Table Of Contents
Manual Setup (Client Manager) ..........22 Windows Vista (Client Manager V) ..........22 Windows XP (Client Manager 3) ............ 25 Manual Setup (Windows Utility) ..........26 Windows Vista (WLAN AutoConfig) ..........26 Windows XP (Wireless Zero Configuration) ........29 WLI-UC-GNHP User Manual... - Page 3 Scan ....................48 Connect ..................49 Profiles ................... 50 Profile Information (Basic) .............. 51 Profile Information (Network) ............53 Profile Information (Browser) ............54 Profile Information (Printers) ............55 System Tray Menu ................. 56 Option Menu .................. 57 WLI-UC-GNHP User Manual...
- Page 4 Chapter 5 Trouble Shooting ..........59 The Computer does not recognize the WLI-UC-GNHP Wireless Adapter..................59 Cannot connect to the network wirelessly....... 59 You forgot SSID, Encryption KEY, or Password...... 59 Other Tips ................60 Appendix ..............63 150 Mbps Mode settings ............
-
Page 5: Chapter 1 Product Overview
150 Mbps High Speed Mode 150 Mbps is the link speed when using Wireless-N mode. It represents actual wireless data speeds, including overhead. Because the overhead is not available for user data transfer, usable wireless throughput will be substantially slower. WLI-UC-GNHP User Manual... -
Page 6: System Requirements
Package Contents The following items are included in your package. If any of the items are missing, please contact your vender. • WLI-UC-GNHP..........................1 • USB connector (option) ......................1 • Air Navigator CD ........................... 1 • Quick Setup Guide........................1... -
Page 7: Chapter 2 Installation
Boot your computer and insert the AirNavigator CD. The AirNavigator Setup Wizard will launch automatically. Note: If the AirNavigator Setup Wizard doesn’t open, double click "My Computer", then your CD-ROM drive, then ”AirNavi.exe”. Click “Begin Installation”. Click “AirStation Wireless LAN Adapters”. WLI-UC-GNHP User Manual... - Page 8 Disable the firewall if it is enabled, and click “Next”. Click “Install”. Note: If you check the box to Install Wireless Client Manager, Client Manager software will also be installed. You may install Client Manager software later if desired. Click “Next”. WLI-UC-GNHP User Manual...
- Page 9 Chapter 2 Installation Read the license agreement and select “Agree”. Then click “Next”. Check Always trust software from "BUFFALO INC." and click “Install”. When this screen is displayed, attach the AirStation to your computer. Drivers will be automatically installed. WLI-UC-GNHP User Manual...
- Page 10 Note: If you checked “Install Wireless Client Manager”, the Client Manager installation wizard will run after this screen. Follow the instructions on the screen to install Client Manager. You have installed drivers for your wireless AirStation client. WLI-UC-GNHP User Manual...
-
Page 11: Installing Client Manager Utility
Boot your computer and insert the AirNavigator CD. The AirNavigator Setup Wizard will launch automatically. Note: If the AirNavigator Setup Wizard doesn’t open, double click “My Computer”, then your CD-ROM drive, then ”AirNavi.exe”. Click “Options”. Click “Advanced Installation”. WLI-UC-GNHP User Manual... - Page 12 Chapter 2 Installation Check the box for “Install Wireless Client Manager”, then click “Install”. Note: Select Client Manager V for Windows Vista or Client Manager 3 for Windows XP. Click “Next”. Read the license agreement and select “Agree”. WLI-UC-GNHP User Manual...
- Page 13 Chapter 2 Installation Click “Next”. Click “OK”. Click “Back”. Click “X” at the top right corner of the window to close it. Client Manager installation is complete. WLI-UC-GNHP User Manual...
-
Page 14: Chapter 3 Connect To A Wireless Network
Utilize this system to connect to wireless devices, computers, or game machines which support AOSS or WPS. AOSS was developed by Buffalo Technology. WPS was created by the Wi-Fi Alliance. Internet... -
Page 15: Windows Vista (Client Manager V)
If you are using Windows Vista, use the Client Manager V software to connect wirelessly with AOSS or WPS. Click the icon in the system tray to open Client Manager. Click “Create Profile”. WLI-UC-GNHP When the message “A Program needs your permission to continue” appears, click “Continue”. Click the “WPS AOSS “ button. WLI-UC-GNHP User Manual... -
Page 16: Windows Xp (Client Manager 3)
When the screen shown at left is displayed, click “WPS AOSS” button. When AOSS/WPS is complete, the Security LED will stop flashing and remain lit. The message "Security setup and connection have been Completed" is displayed in Client Manager. WLI-UC-GNHP User Manual... -
Page 17: Automatic Secure Setup (Wps Pin)
If you are using Windows Vista, use Client Manager V to connect wirelessly with a WPS PIN. Click the icon in the system tray. Click “Create Profile”. WLI-UC-GNHP When the message "A Program needs your permission to continue" appears, click “Continue”. WLI-UC-GNHP User Manual... - Page 18 Chapter 3 Connect to a Wireless Network Click the “Advanced Setup “ button. Click the “WPS-PIN” button. WLI-UC-GNHP User Manual...
- Page 19 Chapter 3 Connect to a Wireless Network This is the PIN code; write it down. Then click “Next”. Select the access point you are going to connect to and click “Next”. This screen will be displayed. WLI-UC-GNHP User Manual...
- Page 20 Connect your computer to the wireless router with a wired Ethernet cable. Log in to the wireless router’s configuration utility and navigate to its WPS page. If your router is a Buffalo AirStation, then the WPS page will be under the Wireless Config tab.
-
Page 21: Windows Xp (Client Manager 3)
Right click on the icon displayed in the system tray, and select “Easy Connection” > “WPS PIN Code type”. Write down the PIN code and click “Next”. Select the access point you are going to connect to and click “Next”. WLI-UC-GNHP User Manual... - Page 22 Connect your computer to the wireless router with a wired Ethernet cable. Log in to the wireless router’s configuration utility and navigate to its WPS page. If your router is a Buffalo AirStation, then the WPS page will be under the Wireless Config tab.
-
Page 23: Manual Setup (Client Manager)
Windows Vista (Client Manager V) With Windows Vista, use Client Manager V to connect wirelessly. Click the icon in the system tray. Click “Create Profile “. WLI-UC-GNHP When the message "A Program needs your permission to continue" appears, click “Continue”. WLI-UC-GNHP User Manual... - Page 24 Chapter 3 Connect to a Wireless Network Click the “Advanced Setup“ button. Click the “Connect Manually” button. WLI-UC-GNHP User Manual...
- Page 25 If the “Set Network Location” screen is displayed, select “Home”, “Work”, or “Public location” depending on where the AirStation will be used. When the message "Connection Complete” is displayed in Client Manager V, your computer is connected to the network wirelessly. WLI-UC-GNHP User Manual...
-
Page 26: Windows Xp (Client Manager 3)
“Scan”. Select the access point to connect to and click “Connect”. Choose the type of encryption used by your network and enter one of more encryption keys. Click “Connect” to connect to the network. WLI-UC-GNHP User Manual... -
Page 27: Manual Setup (Windows Utility)
Use Windows standard utility (WLAN AutoConfig) to connect to your access point. Right click on the wireless network icon in the system tray. Click “Connect to a network”. Select your wireless network to connect to and click “Connect”. WLI-UC-GNHP User Manual... - Page 28 Chapter 3 Connect to a Wireless Network If the screen below is displayed, click “I want to enter the network key or pass phrase instead”. WLI-UC-GNHP User Manual...
- Page 29 Chapter 3 Connect to a Wireless Network Enter the encryption key (passphrase) and click “Connect”. If the “Set Network Location” screen is displayed, select “Home”, “Work”, or “Public location” depending on where the AirStation will be used. WLI-UC-GNHP User Manual...
-
Page 30: Windows Xp (Wireless Zero Configuration)
Click “View Available Wireless Networks”. Select the network to connect to and click “Connect”. When the screen at left is displayed, enter the encryption key (passphrase) and click “Connect”. You are now connected to the wireless network. WLI-UC-GNHP User Manual... -
Page 31: Chapter 4 Client Manager
• After installation, Client Manager automatically launches when Windows boots. To load Client Manager manually, click “Start“ > “All Programs” > “BUFFALO” > “AirStation Utility” > “ClientManagerV” • Right click on the Client Manager icon in the system tray and click “Exit” to close Client Manager. -
Page 32: Main Screen
Displays the current connection speed. Signal Strength Displays the signal strength of the current connection. Create Profile Click this to display the Automatic Secure Setup and Advanced Setup screen. Advanced Click this to display the Wireless Status screen. WLI-UC-GNHP User Manual... -
Page 33: Automatic Secure Setup And Advanced Setup
Configure the settings for an access point manually. Click this to display the SSID/WPS-PIN selection screen. Option (Expert only) Click this to specify whether you use AOSS or WPS for connection in Automatic Secure Setup. It displays the WPS/AOSS selection screen. WLI-UC-GNHP User Manual... -
Page 34: Ssid / Wps-Pin Selection
Connect Manually Specify SSID of an access point and configure connection settings. Click here to display the Searching Wireless Access Points screen. Connect with WPS-PIN Click this to connect to a WPS compatible access point using a PIN. WLI-UC-GNHP User Manual... -
Page 35: Searching Wireless Access Points
Enter the Network Name (SSID) Click this to entering an SSID manually. This displays the Wireless manually Network Information screen. Search Click here to search an access point again. Next Click this to display the Wireless Network Information screen. WLI-UC-GNHP User Manual... -
Page 36: Wireless Network Information
Select the encryption method. Encryption Key or Passphrase Enter an encryption key (pass phrase). Connect to a network which does not Check to connect to a wireless network that doesn’t broadcast its broadcast the SSID SSID. Connect Click to connect. WLI-UC-GNHP User Manual... -
Page 37: Wps-Pbc / Aoss Selection
Automatic Secure Setup AOSS Click this to connect to an AOSS compatible access point, then push method the AOSS button on the access point or in its software. You will be connected to the network automatically. WLI-UC-GNHP User Manual... -
Page 38: Wireless Status
Displays the current profile name. Status Displays the current transmission status. Network Mode Displays the current network mode. Transmission Speed Displays the current transmission speed. SSID Displays the SSID of the currently connected access point. Channel Displays the current wireless channel. WLI-UC-GNHP User Manual... - Page 39 Default Gateway Displays the default gateway destination address. Primary DNS Displays the primary DNS address of your connection destination. Secondary DNS Displays the secondary DNS address of your connection destination. MAC Address Displays your wireless device’s MAC address. WLI-UC-GNHP User Manual...
-
Page 40: Wireless Lan Diagnostics
Usage of each channel This utility displays information for 2.4 GHz 11b/11g networks. 5 GHz 11a networks are not supported. The color expresses a network’s signal strength. Stronger signals are more red; weaker signals are more blue. WLI-UC-GNHP User Manual... -
Page 41: Profile List
Click to create a new profile. Edit Edit the selected profile. Click this to display the Extended Properties screens. Delete Delete the selected profile. Down Lower the priority of the selected profile. Raise the priority of the selected profile. WLI-UC-GNHP User Manual... -
Page 42: Extended Properties (Wireless)
Security key or Pass phrase Displays the security key or pass phrase if “Display password visible“ is checked. Connect an access point even SSID Check to connect to a wireless network that doesn’t broadcast its broadcasting is disabled. SSID. WLI-UC-GNHP User Manual... -
Page 43: Extended Properties (Network)
Keeps current TCP/IP network settings. this Profile Use the following settings Select this option to configure different TCP/IP network settings when connecting wirelessly with this profile. You can configure IP address, Subnet Mask, Default gateway, and DNS server address settings. WLI-UC-GNHP User Manual... -
Page 44: Extended Properties (Browser)
Do not change the browser settings Keeps current Internet Explorer settings. of this Profile Use the following settings Select this option to configure different settings for Internet Explorer home page and proxy server when connecting wirelessly with this profile.. WLI-UC-GNHP User Manual... -
Page 45: Extended Properties (Printers)
You may configure Client Manager to use different printer settings when connected wirelessly with this profile. Parameter Meaning Do not change the printer settings of Keeps current printer settings. this Profile Use the following settings Select this option to use a different printer when connecting wirelessly with this profile. WLI-UC-GNHP User Manual... -
Page 46: Using Client Manager 3 With Windows Xp
• After installation, Client Manager automatically launches when Windows boots. To launch Client Manager manually, click “Start” > “All Programs” > “BUFFALO” > “AirStation Utility” > “ClientManager3” • Right click on the Client Manager icon in the system tray and click “Exit” to close Client Manager. -
Page 47: Status
Network Type Displays the current network mode. Transmission Speed Displays the current transmission speed. Channel Displays the current wireless channel. Security Displays whether this connection uses encryption. IP Address Displays the IP address assigned to this unit. WLI-UC-GNHP User Manual... - Page 48 Chapter 4 Client Manager Parameter Meaning MAC Address Displays the MAC address of this unit. Duration Displays the duration of this connection. Signal Strength Displays the current signal strength. Reconnect Click this to reconnect with this profile. WLI-UC-GNHP User Manual...
-
Page 49: Scan
Displays the wireless channel used by each access point. Strength Displays the signal strength of each access point. Encryption Lock icon appears if the access point has encryption enabled. Connect Click to navigate to the Connect screen.. Refresh Click to relist available access points. WLI-UC-GNHP User Manual... -
Page 50: Connect
Parameter Meaning Encryption Method Select the encryption type used by the access point. Encryption Key Enter at least one encryption key (pass phrase) for the access point. Register Profile Check to save these settings as a profile. WLI-UC-GNHP User Manual... -
Page 51: Profiles
Click to have connect automatically with AOSS or WPS. After connection, a profile for this connection is created automatically. 802.1x Profiles This button is displayed when Client Manager is operating in Business Mode. Click to configure 802.1x authentication. WLI-UC-GNHP User Manual... -
Page 52: Profile Information (Basic)
The SSID is the “name” of the network that you’re connecting to.. Channel Auto-Channel will select the best channel for you automatically, or you may choose a specific channel manually. In Infrastructure mode, Auto-Channel is enabled. Encryption Method Select the encryption method used by this access point. WLI-UC-GNHP User Manual... - Page 53 Encryption, you may enter up to four encryption keys. Only a single key is necessary. Encryption Key Enter an encryption key or keys. AP is set to exclusive connection Check to connect to a wireless network that doesn’t broadcast its SSID. WLI-UC-GNHP User Manual...
-
Page 54: Profile Information (Network)
Check to automatically acquire an IP address from a DHCP server when connected wirelessly with this profile. Automatically acquire the DNS Server Check to automatically acquire the IP address of the DNS server Address from a DHCP server when connected wirelessly with this profile. WLI-UC-GNHP User Manual... -
Page 55: Profile Information (Browser)
Configure a proxy server IP address or port number to use when connected wirelessly with this profile.. Do not use the proxy server for a local If checked, the proxy server above will not be used for local address addresses.. WLI-UC-GNHP User Manual... -
Page 56: Profile Information (Printers)
You may configure Client Manager to print to a different printer when connected wirelessly with this profile. Parameter Meaning Do not change the printer settings of Check to use your current printer. Uncheck to select a different this Profile printer for use when connected wirelessly with this profile. WLI-UC-GNHP User Manual... -
Page 57: System Tray Menu
Select an automatic configuration method. Supported automatic configuration programs include AOSS, WPS, and WPS PIN.. Help Displays Client Manager Help. Option Click to display the Option Menu. Version Information Click to display your Client Manager’s version. Exit Click to exit Client Manager. WLI-UC-GNHP User Manual... -
Page 58: Option Menu
Click this to save a profile as a portable file. Information currently registered. A password (8-63 characters) is required to save a profile. Import a profile Click this to import a saved profile into Client Manager. You will need to enter the password to complete this operation. WLI-UC-GNHP User Manual... - Page 59 Automatically connect to the profile If checked, Client Manager will attempt to connect to the with highest priority profile with the highest priority as set on the Profile screen. It is recommended that most users check this box.. WLI-UC-GNHP User Manual...
-
Page 60: Chapter 5 Trouble Shooting
Chapter 5 Trouble Shooting The Computer does not recognize the WLI-UC-GNHP Wireless Adapter. • Make sure that the unit is connected to a USB port on your computer. • If your computer has multiple USB ports, try connecting to a different USB port. -
Page 61: Other Tips
Consult your network administrator (or your router) for the correct SSID, encryption type, and encryption key. To manually enter the correct security key and SSID in Windows XP, open Control Panel and click on Wireless Network Setup Wizard. Step through the wizard, entering the correct SSID and encryption key. WLI-UC-GNHP User Manual... - Page 62 If an Internet connection IS NOT available with a direct connection to the computer, please call the Internet Service Provider who installed the modem. If an Internet connection IS available with a direct connection to the computer, please call our customer support line. WLI-UC-GNHP User Manual...
- Page 63 Chapter 5 Trouble Shooting Issue: Where can I download the latest drivers, firmware and instructions for my Buffalo wireless products? Answer: The latest drivers and firmware with installation instructions are available online at www.buffalotech.com WLI-UC-GNHP User Manual...
-
Page 64: Appendix
AirStation Bandwidth 20/40MHz Select Tool, which comes with this unit, to turn on 150 Mbps mode. To configure it: 1. Click “Start” > “All Programs” > “BUFFALO” > “AirStation Utility” > “AirStation Bandwidth 20/40MHz Select Tool” and launch the utility software. -
Page 65: Specifications
WPA2-PSK (TKIP/AES), WPA-PSK (TKIP/AES), 128/64bit WEP Other Power Supply 5.0V Bus powered Power Consumption 2500 mW (Max) Dimensions 15 mm x 15 mm x 112 mm (0.6” x 0.6” x 4.4”) Weight 15 g (0.5 ounce) Operating Environment 0-40°C (32-104°F), 20-80% (non-condensing) WLI-UC-GNHP User Manual... -
Page 66: Removing The Device From The Computer
If AirNavigator Setup Wizard is not displayed, double click "My Computer" icon > CD-ROM drive icon > "AirNavi.exe" icon, in this order. 2. Click “Options”. 3. Click “Remove Drivers”. 4. Follow the instructions on the screen to remove drivers. WLI-UC-GNHP User Manual... -
Page 67: Tcp/Ip Settings
When the message “Windows needs your permission to continue” appears, click “Continue”. Select “Internet Protocol Version 4 (TCP/IPv4)” then click “Properties”. Select “Obtain an IP address automatically” and “Obtain DNS server address automatically”, and then click “OK”. Click “Close”. WLI-UC-GNHP User Manual... -
Page 68: Antenna
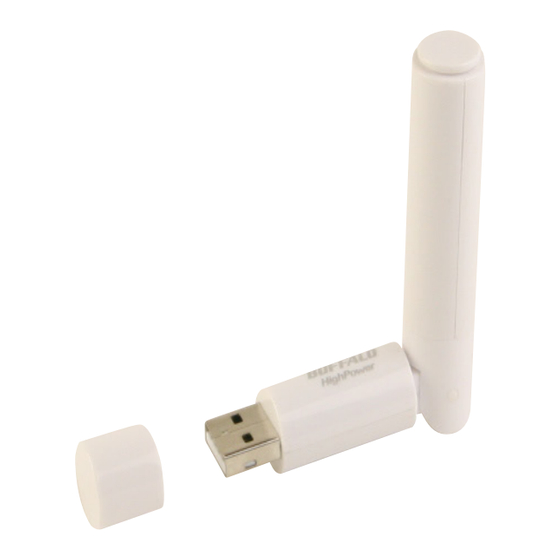
Click “Close”. Antenna The WLI-UC-GNHP has a movable antenna that may be used in different positions. Adjust the angle for the best signal as needed. Turning the unit so that the antenna points stright up will probably give the strongest signal. -
Page 69: Compliance Information
This transmitter must not be co-located or operating in conjunction with any other antenna or transmitter. SAR compliance has been established in typical laptop computer(s) with USB slot, and product could be used in typical laptop computer with USB slot. Other application like handheld PC or WLI-UC-GNHP User Manual... -
Page 70: Industry Canada Statement
This device complies with the essential requirements of the R&TTE Directive 1999/5/EC. The following test methods have been applied in order to prove presumption of conformity with the essential requirements of the R&TTE Directive 1999/5/EC: -EN60950-1:2006 Safety of Information Technology Equipment -EN62311:2008 WLI-UC-GNHP User Manual... - Page 71 RF output power may be limited to 10 mW EIRP in the frequency range of 2454 - 2483.5 MHz. For detailed information the end-user should contact the national spectrum authority in France. NCC Regulatory Information 來自台灣 NCC 的警告 經型式認證合格之低功率射頻電機,非經許可,公司、商號或使用者均不得擅自變更頻率、加 大功率或變更原設計之特性及功能。 低功率射頻電機之使用不得影響飛航安全及干擾合法通信;經發現有干擾現象時,應立即停用, 並改善至無干擾時方得繼續使用。前項合法通信,指依電信法規定作業之無線電通信。低功率 射頻電機須忍受合法通信或工業、科學及醫療用電波輻射性電機設備之干擾。 WLI-UC-GNHP User Manual...
- Page 72 Chapter 6 Appendix Česky[Czech] Buffalo Technology Inc. tímto prohlašuje, že tento AirStation WLI-UC-GNHP je ve shodě se základními požadavky a dalšími příslušnými ustanoveními směrnice 1999/5/ES. Dansk[Danish] Undertegnede Buffalo Technology Inc. erklærer herved, at følgende udstyr AirStation WLI-UC-GNHP overholder de væsentlige krav og øvrige relevante krav i direktiv 1999/5/EF.
- Page 73 Buffalo Technology Inc. declara que este AirStation WLI-UC-GNHP está conforme com os requisitos essenciais e outras disposições da Directiva 1999/5/CE. Slovensko[Slovenian] Buffalo Technology Inc. izjavlja, da je ta AirStation WLI-UC-GNHP v skladu z bistvenimi zahtevami in ostalimi relevantnimi določili direktive 1999/5/ES. Slovensky[Slovak] Buffalo Technology Inc.
- Page 74 DECIMA- El inclumplimiento de las condiciones estipuladas en este Certificado será motivo de sanción con base a lo dispuesto en la Ley de Vías General de Comunicación, Ley Fedreal de Telecomunicación y en el Reglamento de Telecomunicaciones. WLI-UC-GNHP User Manual...
- Page 75 Tested to comply With FCC Standards FCC ID: FDI-09102082-0 [ Korea ] [ UAE ] REGISTERED No: 0019204/09 DEALER No: BUF-WLIUCGNHP01(B) 0014005/08 MC/M/5/3-5511 TRA/TA-R/1167/09 [ Kuwait ] [ Oman ] [ Philippines ] No.ESD-0904340C [ Indonesia ] 12596/POSTEL/2009 2347 WLI-UC-GNHP User Manual...
-
Page 76: Environmental Information
• The take-back systems will reuse or recycle most of the materials of your end life equipment in a sound way. • The crossed-out wheeled bin symbol invites you to use those systems. • If you need more information on the collection, reuse and recycling systems, please contact your local or regional waste administration. WLI-UC-GNHP User Manual... -
Page 77: Warranty Information
Buffalo products. In no event shall Buffalo Technology/(Buffalo Inc.) liability exceed the price paid for the product from direct, indirect, special, incidental, or consequential damages resulting from the use of the product, its accompanying software, or its documentation. -
Page 78: Contact Information (Usa / Canada)
Chapter 6 Appendix Contact Information (USA / Canada) Buffalo Technology USA Inc. 11100 Metric Blvd, Suite 750 Austin, TX 78758-4018 GENERAL INQUIRIES Monday through Friday 8:30am-5:30pm CST Direct: 512-794-8533 | Toll-free: 800-456-9799 | Fax: 512-794-8520 | Email: sales@buffalotech.com TECHNICAL SUPPORT North American Technical Support by phone is available 24 hours a day, 7 days a week. -
Page 79: Contact Information (Europe)
9:00 AM - 6:00 PM Monday-Thursday 9:00 AM - 4:30 PM Friday At Buffalo Technology, we constantly update our software and firmware. For the most recent software, firmware, driver, and technical whitepaper releases available, please visit the Buffalo Technology website: www.buffalotech.com.
Need help?
Do you have a question about the WLI-UC-GNHP and is the answer not in the manual?
Questions and answers