Table of Contents
Advertisement
Quick Links
Advertisement
Table of Contents

Related Manuals for Kawai Stage Piano MP5


Summary of Contents for Kawai Stage Piano MP5
- Page 1 Owner’s Manual...
-
Page 2: Important Safety Instructions
Important Safety Instructions SAVE THESE INSTRUCTIONS INSTRUCTIONS PERTAINING TO A RISK OF FIRE, ELECTRIC SHOCK, OR INJURY TO PERSONS CAUTION RISK OF ELECTRIC SHOCK DO NOT OPEN AVIS : RISQUE DE CHOC ELECTRIQUE TO REDUCE THE RISK OF ELECTRIC SHOCK, DO NOT REMOVE COVER (OR BACK). NO USER-SERVICEABLE PARTS INSIDE. - Page 3 The product is not completely disconnected from the power supply even when the power switch is turned off. If the product will not be used for a long time, unplug the AC power cord from the AC outlet. This product may be equipped with a polarized line plug (one blade wider than the other).
-
Page 4: Notes On Repair
Do not place open flame sources, such as lighted candles on the product. The mains plug shall remain readily operable. Use the apparatus only in moderate climates (not in tropical climates) The product should be serviced by qualified service personnel when: The power supply cord or the plug has been damaged. -
Page 7: Welcome To The Mp5
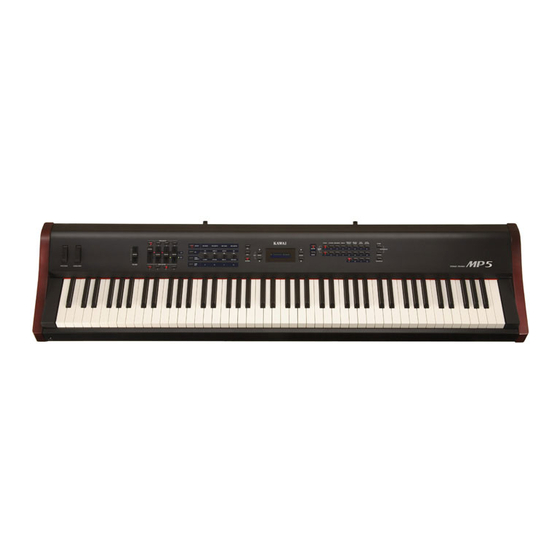
Thank you for purchasing the KAWAI MP5. The MP5 Stage Piano features 256 Internal Sounds of the highest quality. The MP5 can also be used as a MIDI master controller. On stage, at home, or in the studio, the MP5 has been designed to offer quick and easy access to many sophisticated features. -
Page 8: Table Of Contents
TABLE OF CONTENTS WELCOME TO THE MP5...7 1. NAMES AND FUNCTIONS...10 1.1 FRONT PANEL...10 1.2 HEADPHONE JACK...12 1.3 REAR PANEL...12 2. Basic Operations...14 2.1 Getting Ready...14 2.2 Selecting a Sound...15 2.3 Layer...17 2.4 Split...17 2.5 Piano Only...18 2.6 Metronome...18 2.7 Transpose...18 2.8 Using the MP5 as a MIDI controller...19 2.9 Selecting a SETUP...20 3. - Page 9 8.2.11 Receive Channel...49 8.2.12 LCD Contrast...49 8.2.13 LED Brightness...49 8.2.14 Out Mode...49 8.2.15 Foot Switch Mode ...49 8.2.16 Wheel Mode ...50 8.2.17 Dump Mode ...50 8.3 System Dump...50 8.3.1 Dump Current...50 8.3.2 Dump All Sound...51 8.3.3 Dump All Setup...51 8.4 System Reset...52 8.4.1 Reset One SOUND/SETUP...52 8.4.2 Reset All...52 9.
-
Page 10: Names And Functions
1. NAMES AND FUNCTIONS 1.1 FRONT PANEL [FADER SECTION] 1. VOLUME Fader The VOLUME fader controls the master volume level of the MP5. 2. ZONE SELECT buttons The ZONE SELECT buttons are used to select one of the four zones for editing. Only one zone can be selected at a time. - Page 11 [EFFECT BUTTONS] 11. SW button This button turns the assigned function ON or OFF. Many different functions can be assigned to this switch for your convenience. When in edit mode, pressing the SW button will exit from edit mode. 12. EFX button This button turns the EFX ON or OFF for the selected zone.
-
Page 12: Headphone Jack
FootSwitch can be assigned to different MIDI control numbers or functions in the Menu. When using the KAWAI F-20. The right pedal works as a Foot Switch, and the left pedal works as a Soft pedal. When the Rotary EFX is in use, the Soft pedal changes between Fast &... -
Page 14: Basic Operations
2. Basic Operations 2.1 Getting Ready Since the MP5 has no built-in speakers, you will need to connect a mixer, keyboard amplifier or headphones in order to listen. Turn the MP5 on, using the POWER SWITCH on the rear panel. It is recommended to turn the MP5 on before turning on any amplifiers in order to avoid switching noise. -
Page 15: Selecting A Sound
2.2 Selecting a Sound The MP5 always starts up in SOUND mode when the power is turned ON. The SOUND button will be lit to indicate SOUND mode is active. Operation 1 Select the sound category by pressing a sound select button in the top row. There are 3 rows of sound select buttons, the top row is for selecting a sound category and the second and third rows are for selecting a variation. - Page 16 In Sound mode, the “1” in the display indicates that the zone 1 is currently selected. When the multitimbre is off, the default settings of the zones are as follows. It is recomended for simple MIDI transmit/receive use on stage etc. The default TXchannel is System Ch (see page45).
-
Page 17: Layer
2.3 Layer Let’s try layering another sound. Turn the zone 2 on by pressing the ZONE ON/ OFF button for zone 2. The ZONE SELECT button for zone 2 is automatically selected and the display shows the sound name for zone 2. Select the sound for zone 2 with the SOUND SELECT buttons as shown in the previous section. -
Page 18: Piano Only
2.5 Piano Only The Piano Only function lets you quickly return the MP5 sounds to the default settings. Press the PIANO button and the SOUND SELECT button 1 simultaneously. All the current settings (except for SYSTEM settings) will go back to original and only Concert Grand sound can be played on the whole keyboard. -
Page 19: Using The Mp5 As A Midi Controller
The display shows the current TRANSPOSE amount when the TRANSPOSE button is held down. A value of “0” indicates no transposition. 2.8 Using the MP5 as a MIDI controller The MP5 can control external devices via MIDI. MIDI Connection Connect the MIDI OUT on the MP5 to the MIDI IN on an external MIDI device with a MIDI cable. -
Page 20: Selecting A Setup
UPPER SECOND The transmitted program number is shown in the display. You can also send program change numbers by using VALUE buttons. Note: Full program change numbers including bank numbers can be transmitted by setting them in MENU and saving it as a SETUP. See page35 for details. 2.9 Selecting a SETUP The MP5 offers 256 preset combinations of the panel settings called SETUPs. -
Page 21: Sw Button
3. SW Button The SW button is a programmable realtime switch which can be assigned to one of 8 different functions. Press and hold the SW button. The display shows the currently assigned function. Press the SW button again to exit without changing the function. Use the VALUE buttons to change the function. -
Page 22: Eq Bypass On/Off
When the SW button is OFF: The display briefly shows as follows and the rotary speed changes to slow. Note: When the Rotary effect is not in use, the display briefly shows as follows. 3.4 EQ Bypass On/Off You can temporarily bypass the EQ by turning the SW button on. When the SW button is lit the EQ Bypass is on. -
Page 23: Foot Switch Lock
3.6 Foot Switch Lock You can lock the assignable foot switch to avoid unnecessary movement by accident. First, connect a foot switch to the FSW jack on the rear panel of the MP5. When the SW button is lit the Foot Switch Lock is on. Foot Switch Lock On: The display briefly shows as follows and the assignable foot switch is locked. -
Page 24: External Sequencer Start/Stop
3.8 External Sequencer Start/Stop You can start and stop the external sequencer connected to the MP5 with SW button. First, connect an external sequencer to the MIDI OUT jack on the rear panel of the MP5. Make sure that the sequencer is capable to receiving external MIDI clock and commands. -
Page 25: Efx/Reverb
4. EFX/REVERB The internal sounds of the MP5 can be enhanced using the built in REVERB and EFX generators. There are 7 REVERB types and 22 different EFX types to choose from. MP5 contains 4 variations of EFX type per INT section, and different EFX can be added to the sound of each ZONE. -
Page 26: Reverb
Auto Wah: Pedal Wah: Enhancer: Overdrive: Note: You can select different types for each zone. 4.2 REVERB The MP5 contains 7 high quality REVERB types, designed to complement the internal sounds. Each internal sound has a preset REVERB type assigned as the default. -
Page 27: Control Knobs
5. Control Knobs Select the function with the buttons on the left and use the knobs to change the values. You can also move the cursor with the MENU buttons and change the value with the VALUE buttons while the display is showing Control Knobs function. - Page 28 17. ROTARY 1 18. ROTARY 2 19. AUTO WAH 20. PEDAL WAH 21. ENHANCER 22. OVERDRIVE REVERB parameter list 1. HALL 1 2. HALL 2 3. STAGE 1 4. STAGE 2 5. ROOM 1 6. ROOM 2 7. PLATE Note: When EFX/REVERB depth is set to 0 while the EFX/REVERB button is active, the EFX/REVERB button will blink to indicate that the EFX/REVERB is turned ON but the depth is set to 0.
-
Page 29: Eq (Equalizer)
5.2 EQ (EQUALIZER) The MP5 contains a four-band graphic equalizer to shape the overall tone of the sound. The EQ affects all zones at the same time. However, each SETUP can have its own EQ setting that affects the internal sounds only. Be sure that the EQ button in the CONTROL KNOBS section is lit. -
Page 30: Midi Cc# (Control Change)
CUTOFF: ATTACK: DECAY: RELEASE: Note: If the selected zone is set to BOTH, changing the TONE MODIFY parameters affects both internal and external sections. If you want different settings for internal and external sections, enter the edit mode by pressing the MENU button and select internal or external section with the ZONE SELECT button. - Page 31 When the selected zone is set to EXT, the display shows the MIDI CC numbers. The default parameters assigned for each knob are as follows. A: #10 Panpot (PAN) B: #70 Sustain Level (STN) C: #76 Vibrato Rate (VbR) D: #77 Vibrato Depth (VbD) Note: If the selected zone is set to BOTH, changing the MIDI CC# parameters affects both internal and external sections.
-
Page 32: Menu
6. MENU The MENU buttons allow access to the edit parameters in the MP5. This collection of settings together with other editable parameters can be stored as a SETUP. The MP5 provides 256 SETUPs, and all are user programmable. A SETUP consists of four zones. Each zone can be set as Internal, External or Both individually. -
Page 33: Editing Procedure And Parameters
6.1 Editing Procedure and Parameters First, press the ZONE SELECT button for the zone to be edited. Next, press the MENU buttons until the parameter you want to edit appears in the DISPLAY. When a zone is set as Both, pressing the ZONE SELECT button again will switch the menu list from Internal to External or vice versa. -
Page 34: String Resonance (Int Piano Only)
6.2.4 String Resonance (Int Piano only) The volume of string resonance can be changed to the level you prefer. The value changes from 0 (off) to 10. <String Resonance> In acoustic pianos, there are strings corresponding to each key. When a key is pressed, strings of other keys in the related harmonic series to the note played resonate. -
Page 35: Tx Prg # (Ext Only)
6.2.8 TX Prg # (Ext only) This parameter determines if a Program Change Number will be transmitted (On) or not (Off) when a SETUP is recalled. If you want to switch sounds on external MIDI devices every time you call the Setup turn this parameter ON. 6.2.9 Prg # (Ext only) This parameter determines which Program Change Number will be transmitted when a SETUP is recalled. -
Page 36: Key Range Hi/Lo
6.2.13 Key Range Hi/Lo These two parameters define the playable key range on the keyboard for the selected zone. First, while K.Range Hi appears in the display, use the VALUE buttons to set the highest note that the selected zone can play. Next, while K.Range Lo appears in the display, use the VALUE buttons to set the lowest note that the selected zone can play. -
Page 37: Velocity Compression
Note: Each zone can have a separate Velocity Switch Value. By setting the Soft Zone Velocity Switch Value higher than that of the Loud Zone, a dynamic area where both sounds play can be created. It is also possible to switch Internal Zones with External Zones for even more possibilities. -
Page 38: Transmitting Volume (Ext Only)
6.2.19 Transmitting Volume (Ext only) This parameter determines if an initial MIDI Volume message will be transmitted (On) to an external MIDI device or not (Off) when a SETUP is recalled. Note: In a zone set to External or Both, moving the faders will still transmit volume messages even if TX Volume is set to Off. -
Page 39: Foot Switch
6.2.25 Foot Switch This parameter determines if a Foot Switch connected to the FOOT SWITCH jack is active (On) or not (Off) for the selected zone. The type of controller assigned to the footswitch is a common Setup parameter and is used for all zones of a Setup as a global parameter. -
Page 40: Solo Mode
6.2.32 Solo Mode This parameter determines which note will be played when Solo is ON and more than one note is being played simultaneously. There are three choices for Solo note priority. Last: Low: When the Solo is “Off”, this page won’t be displayed. 6.3 Common Parameters Common parameters are affecting all zones. -
Page 41: Key Of Temperament
Werkmeis/Kirnberg: These two temperaments are placed in between Meantone and User: 6.3.3 Key of Temperament Limitless modulation of the key became available only after the invention of Equal temperament. When we use a temperament other than Equal temperament, we must carefully choose the key signature to play in. For example, if the song you are going to play is written in D major, choose “D”... -
Page 42: Modulation Wheel Control Change Number
6.3.7 Modulation Wheel Control Change Number This parameter assigns a Control Change Number to the Modulation Wheel on the right side of the front panel. See page72 for the list of Control Change numbers. Note: When the following Numbers are selected for the FootSW,EXP or Modulation Wheel Control Change Number, the functions affect the internal sounds, too. -
Page 43: Store
7. STORE You can save the changes of the settings made as either a SOUND or a SETUP. Up to 256 SOUNDs or 256 SETUPs can be stored. Moreover, the Common parameters can also be stored as the initial setting in SOUND mode. -
Page 44: Storing The Common Settings
7.2 Storing the COMMON settings While in SOUND mode, press the STORE button. The display will show the following screen: Press the VALUE DOWN button, the display will show the following screen: Press the VALUE UP button to confirm. The STORE procedure can be cancelled at any time by pressing any other button which is not used during the STORE procedure. -
Page 45: System
8. SYSTEM Use this mode to set the System parameters of MP5. To enter the SYSTEM mode, press the SYSTEM button. 8.1 System Menu Use the MENU buttons to scroll through the System parameters. [System Parameter] [System Dump] [System Reset] Make sure the SYSTEM button is lit. -
Page 46: Touch
8.2.2 Touch This parameter adjusts the touch response curve of the keyboard. Heavy+: This Curve has a steep rise as velocity increases, and a shallower curve at low velocities. (see 1) This curve requires the most striking force to produce a loud volume. -
Page 47: System Tuning
8.2.3 System Tuning This parameter sets the global master tuning of the MP5. The value changes from 427.0 to 453.0 (Hz). 8.2.4 Volume Slider Action This selects how the volume sliders react, when you change the volume. Normal: The value changes immediately, when the volume slider is moved. Catch: The value won’t change until the volume slider catches the position of the previously saved Volume value. -
Page 48: Multi-Timbral Mode
8.2.9 Multi-Timbral Mode Multi-Timbral Mode allows the MP5 to receive data on more than one MIDI channel simultaneously. In this mode, the MP5 can play different musical parts with different sounds for each part. On1/2: This is a flexible 16 part multi-timbral setup. (On 1 and On 2) MP5’s normal program change numbers are assigned in On 1, and General MIDI program change numbers are assingned in On 2. -
Page 49: Receive Channel
8.2.11 Receive Channel This parameter determines whether or not a particular MIDI channel will receive incoming MIDI data from an external source. This parameter can be used to filter out data on specific MIDI channels that are not intended for the MP5. On: The MP5 responds to MIDI data received on this channel. -
Page 50: Wheel Mode
8.2.16 Wheel Mode This parameter determines whether or not the modulation wheel can be used to edit parameters like a value dial. Normal: Edit: Note: When the Wheel Mode is set to “Edit”, the normal function of the wheel is ineffective,and the wheel parameters will show an asterisk. -
Page 51: Dump All Sound
Note: Loading the data back to the MP5 will change the current settings. SETUP and SYSTEM data will not change. You can use this function to temporarily change the setting from your sequencer. If you want to save the setting, you must use the STORE procedure and save as Setup. -
Page 52: System Reset
8.4 System Reset 8.4.1 Reset One SOUND/SETUP This function resets one SOUND or SETUP back to the original factory default settings. Press the SYSTEM button. Then press the MENU-DOWN button until “Reset X- X-X” (X-X-X stands for the setup number) appears on the display. Now use the SOUND SELECT buttons to select the sound or setup you want to reset. -
Page 53: Other
9. OTHER 9.1 MIDI IN When the Multi-Timbral Mode is Off, the MP5 receives the MIDI information coming in the System Channel only. (see page45) For changing the internal sounds via MIDI, refer to the SOUND Program Number List on the next page. Note: If the MP5 receives the Program Number from 1 to 128 and Bank number LSB from 2 to 3 in the System Channel (see page45), the MP5 will switch to SETUP... -
Page 54: Sound Program Number List
9.3 SOUND Program Number List Piano Concert Grand Studio Grand Mellow Grand Jazz Grand Concert Grand2 Studio Grand 2 Mellow Grand 2 Jazz Grand 2 Modern Piano Rock Piano Old Age Piano Honky Tonk Mono Piano Mono Piano 2 Mono Piano 3 Mono Piano 4 Piano Vari. - Page 55 Crystal EP New Age EP New Age EP2 New Age EP3 Clavinet Synth Clavinet Clavi & Marim Clavi Phaser Vibraphone Octave Vibes Celesta Bells Marimba Hard Marimba Xylophone Steel Drums Drawbar Be More Jazzer Be 3 Be Nice Mellow Drawbar 2 Odd Man Hi-Lo Soft Solo...
- Page 56 Organ Church Organ Full Pipes Full Ensemble Church Organ 2 PrincipleChoir Small Ensemble Small Ens. 2 Baroque Chiffy Tibia 8'&4’sPrinciple Stopped Pipe Principle Pipe 8' Celeste Diapason Voice Celeste Baroque Mix Reeds 8' Reed Reed Pipes Posaune Theater Organ Theater Organ2 Theater Organ3 Theater Tibia Elec.
- Page 57 Passionate Vln Classic Violin Passionate Vc Classic Cello Choir Breathy Choir Choir Aahs Slow Choir Jazz Ensemble Female Scat Pop Ensemble Contemp Ens. Itopia Halo Pad Halo Pad 2 Synth Vocals Brass/Wind Exp Brass Exp Saxes Tp&Bone&Tenor Flugel & Tenor Brass Section Synth Brass Synth Brass 2...
- Page 58 Pad & Synth New Age Pad New Age Pad 2 New Age Pad 3 New Age Pad 4 Atmosphere Brightness Brightness 2 Goblin Classic Synth Classic Synth2 Big Saw Saw Pad Pulse Lead Pulse Lead 2 Square Lead Lead Caliope Chiff Ensemble Lead Blow lead...
- Page 59 Rhythm Guitar Overdrive Distortion Muted Electric Pedal Steel HawaiianGuitar Jazz Guitar Jazz Guitar 2 Banjo Mandolin Sitar Harp Standard Set Standard Set 2 Room Set Analog Set Multi Timbre ON1 Multi Timbre ON2 Bank Bank Prog# Prog# MSB Bank Bank...
-
Page 60: Notes About Usb
A standard USB driver is already installed in your computer. You don’t need to install a new driver. [For Windows 2000/98SE users] You need to install the designated driver in your computer. Visit the KAWAI web site at http://www.kawai.co.jp/english/Download1.html and download the program. -
Page 61: Specifications
Specifications Keyboard 88 keys with Advanced Hammer Action IV # of Zone 4 zones # of Internal Sound 256 sounds Polyphony Maximum 192 Effect 7 Reverbs 22 Effects 4-band Equalizer Internal Memory 256 SETUPs Display 16 x 2 LCD w/backlight Jack 1/4”... -
Page 62: Mp5 Midi Implementation
MP5 MIDI Implementation Contents 1. Recognized data 1.1 Channel Voice Message 1.2 Channel Mode Message 1.3 System Real time Message 2. Transmitted data 2.1 Channel Voice Message 2.2 Channel Mode Message 2.3 System Real time Message 3. Exclusive data 3.1 Universal Realtime Exclusive Message 3.2 Dump Message 3.3 Sound Data Format 3.4 Setup Data Format... -
Page 63: Recognized Data
1. Recognized Data 1.1 Channel Voice message Note off Status 2nd Byte n=MIDI channel number kk=Note Number vv=Velocity Note on Status 2nd Byte n=MIDI channel number kk=Note Number vv=Velocity Control Change Bank Select (MSB) Status 2nd Byte n=MIDI channel number mm = Bank Number MSB ll = BankNumber LSB Modulation... - Page 64 Damper Pedal Status 2nd Byte n=MIDI channel number vv=Control Value Sostenuto Pedal Status 2nd Byte n=MIDI channel number vv=Control Value Soft Pedal Status 2nd Byte n=MIDI channel number vv=Control Value Sound controllers #1-9 Status 2nd Byte n=MIDI channel number vv=Control Value Effect Control Status 2nd Byte...
-
Page 65: Channel Mode Message
01H 64H Decay time 01H 66H Release time mm:00H - 7FH(-64 ~ 0 ~ +63) * Ignoring the LSB of data Entry * It is not affected in case of modifying cutoff if tone does not use the DCF. RPN MSB/LSB Status 2nd Byte n=MIDI channel number... -
Page 66: System Realtime Message
MONO Status 2nd Byte n=MIDI channel number mm=mono number POLY Status 2nd Byte n=MIDI channel number 1.3 System Realtime Message Status Active sensing 2. Transmitted Data 2.1 Channel Voice Message Note off Status 2nd Byte n=MIDI channel number kk=Note Number Note on Status 2nd Byte... - Page 67 Volume Status 2nd Byte n=MIDI channel number v=Volume Panpot Status 2nd Byte n=MIDI channel number vv=Panpot Expression Status 2nd Byte n=MIDI channel number vv=Expression Damper Pedal Status 2nd Byte n=MIDI channel number vv=Control Value Sostenuto Pedal Status 2nd Byte n=MIDI channel number vv=Control Value Soft Pedal Status...
-
Page 68: Channel Mode Message
RPN MSB/LSB Status 2nd Byte n=MIDI channel number mm=MSB of the RPN parameter number ll=LSB of the RPN parameter number RPN number implemented in MP5 are the followings RPN # Data MSB LSB Function & Range 00H 00H mmH llH Pitch bend sensitivity mm:00H-0cH(0~12 [half tone]), ll:00H 00H 01H... -
Page 69: System Realtime Message
2.3 System Realtime Message Status Clock Start Stop *Sending [SW] External Seq. Start/Stop 3. Exclusive Data 3.1 Universal Realtime Exclusive Message Master Volume Format:F0 7F 7F 04 01 ll mm F7 mm=MSB of Master Volume ll=LSB of Master Volume 3.2 Dump Message MP5 can receive this dump data, and also can transmit by the panel operation with System switch. -
Page 70: Sound Data Format
3.3 Sound Data Format The structure of the one Sound patch PARAMETER Sound Data ID Reverb Type Reverb Time -undifiend- 5-47 <Int Parameters> -undifined- 3.4 Setup Data Format The structure of the one Setup patch (common DATA) + (Zone 1,2,3,4 Int DATA) + (Zone 1,2,3,4 Ext DATA) 3.4.1 Common DATA PARAMETER Setup Data ID... - Page 71 3.4.2 Zone 1-4 Internal DATA PARAMETER VALUE Tone Number MSB Tone Number LSB 0-127 Voicing 0-5 (0:Normal,1~2:Mellow1~2,3:Dynamic,4~5:Bright1~2) -reserved- Damper Resonance 0-10 (0:off, 1-10) String Resonance 0-10 (0:off, 1-10) 7-40 <Both Parameters> *see table3.4.4 EFX Type 0-21 (see page25) EFX Rate 0-127 Key-Off Effect 0-10 (0:off, 1-10)
-
Page 72: Control Change Number (Cc#) Table
4. Control Change Number (CC#) Table Control Number Decimal 16-19 10-13 20-31 14-1F 33-63 21-3F 80-83 50-53 85-90 55-5A 102-119 66-77 120-127 78-7F Control Function Bank Select (MSB) Modulation Wheel or lever Breath Controller (undefined) Foot Controller Portament Time Data Entry (MSB) Channel Volume Balance (undefined) -
Page 73: Midi Implementation Chart
MIDI Implementation Chart [STAGE PIANO] Model: KAWAI MP5 Function Basic Default Channel Changed Default Mode Messages Altered Note Number: True Voice Velocity Note ON Note OFF Afer Touch Key’s Touch Ch’s Pitch Bend 0, 32 6, 38 Control Change 70, 71... - Page 76 MP5 Owner’s Manual OW1007E-C0704 Version.2 Printed in Indonesia KMSZ-0016 815921 Copyright © 2007 KAWAI Musical Instruments Mfg. Co.,Ltd. All Rights Reserved.
Need help?
Do you have a question about the Stage Piano MP5 and is the answer not in the manual?
Questions and answers