
Summary of Contents for Duratech EU - series
-
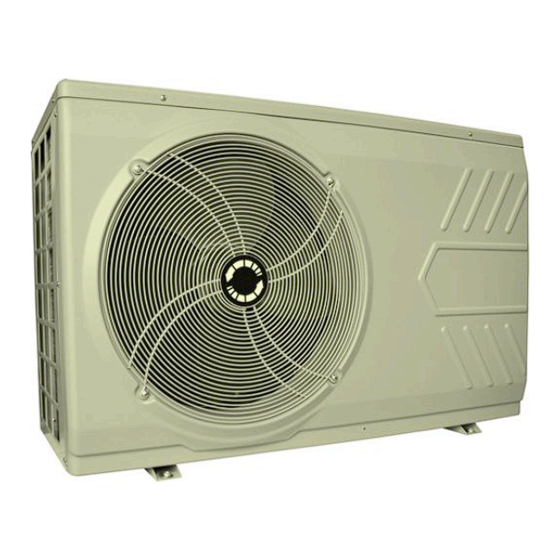
Page 1: Swimming Pool Heat Pump Units
SWIMMING POOL HEAT PUMP UNITS Installation & Instruction Manual EU - series Rev. 2.00 20.12.2010... -
Page 2: Table Of Contents
EU heat pumps Contents SWIMMING POOL HEAT PUMP UNITS _____________________________________________ 1 Contents _________________________________________________________________________ 2 1. Preface ________________________________________________________________________ 3 2. Specifications ___________________________________________________________________ 4 2.1 Technical data sheet _________________________________________________________________________ 4 2.2 Dimensions ________________________________________________________________________________ 5 3. Installation and connection ________________________________________________________ 6 3.1 Remarks __________________________________________________________________________________ 6 3.2 Location of the heat pump ____________________________________________________________________ 6 3.3 Distance from the pool _______________________________________________________________________ 7 3.4 Installation of the check-valve _________________________________________________________________ 7... -
Page 3: Preface
EU heat pumps 1. Preface In order to provide our customers with quality, reliability and versatility, this product has been made according to strict production standards. This manual includes all necessary information about installation, start-up, winterizing and maintenance. Please read this manual carefully before opening or servicing the unit. The unit must be installed by qualified personnel. -
Page 4: Specifications
EU heat pumps 2. Specifications 2.1 Technical data sheet Unit Model EU 70 EU 100 EU 140 EU 195 14,3 19,6 Heating Capacity A25./W25 BTU/h 23900 33450 48500 66500 13,5 18,6 Heating capacity A15/W25 BTU/h 23100 32400 46000 63500 12,0 16,4 Cooling capacity A25/W25 BTU/h... -
Page 5: Dimensions
EU heat pumps 2.2 Dimensions Model A(mm) B(mm) C(mm) EU 70 EU 100 EU 140 EU 195 1200... -
Page 6: Installation And Connection
EU heat pumps 3. Installation and connection 3.1 Remarks The factory only provides the heat pump unit; the other parts, including a contingent by-pass, are to be provided by the user or the installer. Attention: Please take the following steps when installing the heat pump: 1. -
Page 7: Distance From The Pool
EU heat pumps 3.3 Distance from the pool Normally, the pool heat pump is installed within a 7.5 meter radius of the pool. The greater the distance from the pool, the greater the heat loss from the piping. Since the piping is buried for the most part, heat loss is minimal for distances of up to 30 meters (15 meters to and from the pump = 30 meters total), unless the soil is wet or the water level is high. -
Page 8: Typical Setup
EU heat pumps 3.5 Typical setup Note – This setup is just an example 3.6 Adjusting the by-pass Adjust the by-pass as follows: open the 3 valves completely • slightly close valve 1 until • water pressure has increased with approximately 100 to 200 grams (see also 3.8) close valve 3 about halfway to •... - Page 9 EU heat pumps 3.7 Electrical hook-up Important - Although the heat pump is electrically isolated from the rest of the unit, this only prevents the passage of electricity to or from the pool water. Grounding the unit is still required to protect yourself from short circuits inside the unit.
- Page 10 EU heat pumps 3.8 First time start-up Note - In order for the unit to heat the pool (or spa), the filter pump must be running so that the water can circulate through the heat pump. Without this circulation, the heat pump will not start. When all connections have been made and checked, you should follow these steps: 1.
-
Page 11: Use And Operation
EU heat pumps 4. Use and operation 4.1 Features of the LED control panel LED screen Press “ ” to Press “MODE” to set the modify settings operating mode On/Off Access to parameters Press “CLOCK” to set the time Set start time Set stop time With the “On/Off”... - Page 12 EU heat pumps The first number on the LED screen stands for the number of the parameter and the second one for its value. Parameter Description Standard Desired temperature in cooling mode (8 ⇒ 28°C) 20°C Desired temperature in heating mode (7 ⇒ 40°C) 27°C Operation time of the compressor before defrosting mode starts (30 ⇒...
-
Page 13: Checking The Status
EU heat pumps Parameter 10 sets the desired operation mode for the fan speed. Value for parameter 10 Fan control Low fan speed High fan speed Automatic fan speed (high speed when air temperature is below 10°C, low speed when higher than 15°C) Low fan speed between 9PM and 8AM, high speed at other time Automatic running according to a combination of value 2 and 3 Parameters are modified as follows:... -
Page 14: Setting The Clock
EU heat pumps 4.4 Setting the CLOCK Start setting the clock by pressing the “CLOCK” key. The LED screen will display the time and the hours • will start to blink. Press “ ” to set the desired hour. • Press “CLOCK”... -
Page 15: Protection Systems
EU heat pumps 5. Protection systems EU heat pumps are equipped with the following standard protection systems: 5.1 Water pressure switch Thanks to this pressure switch, the heat pump will not work when the filter pump is not working (and the water is not circulating). -
Page 16: Anti-Frost Protection During Winter
EU heat pumps 5.7 Anti-frost protection during winter This protection can only be activated if the heat pump is in STAND-BY mode. 5.7.1 First anti-frost protection If the filter pump is controlled by the heat pump (regardless of the value for parameter 9) and when the water temperature lies between 2 and 4 °C and the air temperature is lower than 0 °C, the filter pump will be automatically turned on to prevent the water from freezing in the piping. -
Page 17: Directions
EU heat pumps 6. Directions 6.1 Swimming pool water chemistry Special attention should be paid to the chemical balance of the pool water. The pool water values should always stay within the following limits: Min. Max. Free chlorine (mg/l) TAC (mg/l) Salt (g/l) Important: failure to comply with these limits will invalidate the warranty. -
Page 18: Heat Pump Winterizing
EU heat pumps 6.3 Heat pump winterizing Important: failure to take the necessary precautions for winterizing can damage the heat pump, which will invalidate the warranty. The heat pump, filter pump, filter and conduits must be protected in areas where the temperature can drop below the freezing point. -
Page 19: Maintenance And Inspection
EU heat pumps 7. Maintenance and inspection 7.1 Maintenance Check the water inlet and drainage often. The water and air inflow into the system should be sufficient so • that its performance and reliability does not get compromised. You should clean the pool filter regularly to avoid damage to the unit caused by clogging of the filter. - Page 20 EU heat pumps Problem: the heat pump doesn’t work Observation: the screen does not light up and the fan/compressor doesn’t make a sound Possible cause Solution No electrical power supply Check power supply (wiring, fuses, ...) Problem: the heat pump doesn’t work Observation: the screen displays “OFF”...
- Page 21 EU heat pumps Problem: the heat pump works but stops after a short while Observation: the screen displays “OFF” Possible cause Solution Wrong setting of parameters Check the settings of the parameters and modify if necessary Problem: the heat pump doesn’t stop Observation: the screen displays the temperature but no error codes Possible cause...
-
Page 22: Overview Of Possible Error Codes Displayed On The Screen
EU heat pumps 7.3 Overview of possible error codes displayed on the screen Go back to chapter 5 “Protection systems” for more detailed information. The heat pump screen displays one of the following codes: Display Problem Cause Solution “WATER IN” sensor out of Sensor open or short-circuited Check or replace the sensor order... -
Page 23: Check List For Installation
EU heat pumps 7.4 Check list for installation ATTENTION / OPGELET / ATTENTION / ACHTUNG 1. Free area / vrije ruimte / espace libre / freier platz 2. Install a by-pass / installeer een by-pass / installez un by-pass / installieren sie eine Überbrückung 3. -
Page 24: Detailed Specifications
EU heat pumps 8. Detailed specifications 8.1 Electrical diagrams EU 70 EU 100 EU 140 EU 195... -
Page 25: Refrigeration Diagram
EU heat pumps 8.2 Refrigeration diagram... -
Page 26: Warranty And Rma (Return Material Authorization)
EU heat pumps 9. Warranty and RMA (return material authorization) 9.1 Warranty LIMITED WARRANTY Thank you for purchasing our heat pump. We warrant all parts to be free from manufacturing defects in materials and workmanship for a period of two years from the date of retail purchase. This warranty is limited to the first retail purchaser, is not transferable, and does not apply to products that have been moved from their original installation sites. -
Page 27: Rma Request Form
EU heat pumps 9.2 RMA Request Form Company: Date: Address: City: Country: code: Contact: Phone: E-mail: Fax: Contact: Date: Internal use RMA #: Case #: Issued by: Date: Return for repair or replacement Copy of customer invoice attached? Other documents attached to RMA request? Description of documents: Model no.: Invoice no.:...
Need help?
Do you have a question about the EU - series and is the answer not in the manual?
Questions and answers