Table of Contents
Advertisement
Advertisement
Table of Contents

Subscribe to Our Youtube Channel
Related Manuals for SHOWTEC DimMaster


Summary of Contents for SHOWTEC DimMaster
- Page 1 DimMaster ORDERCODE 50378...
- Page 2 For more information: iwant@showtec.info You can get some of the best quality, best priced products on the market from Showtec. So next time, turn to Showtec for more great lighting equipment. Always get the best -- with Showtec ! Thank you!
-
Page 3: Table Of Contents
Warning..…...................…………………………………………. Safety-instructions………………………………………………………………………………………….…. Operating Determinations……………………………………………………………………………………. Description..…................……….………………………………… Backside…….……………………………………………………………………………………….……...…. Harting Connector – Pin Connection………………………………………………….…………………….. Installation................…...…………………………………….….. Installing DimMaster ............……………………………….……..…………… Set Up and Operation..............……..………………………………… Menu System….……...............……….……………………………. - Set DMX Address.………..................………………. - Set Channel.……….......................………... - Set Scenes………....................……..………..- Test Channels....................……………………..- Set Inputs.........................…….... - Unit Set Up........................…….. -
Page 4: Warning
Make sure that the power-cord is never crimped or damaged. Check the device and the power- • cord from time to time. In case of a malfunction (burning smell, etc.), immediately stop operation, disconnect power and • contact your Showtec dealer. -
Page 5: Operating Determinations
The arising condensation water might damage your device. Leave the device switched off until it has reached room temperature. If your Showtec device fails to work properly, discontinue use immediately. Pack the unit securely • (preferably in the original packing material), and return it to your Showtec dealer for service. -
Page 6: Description Of The Device
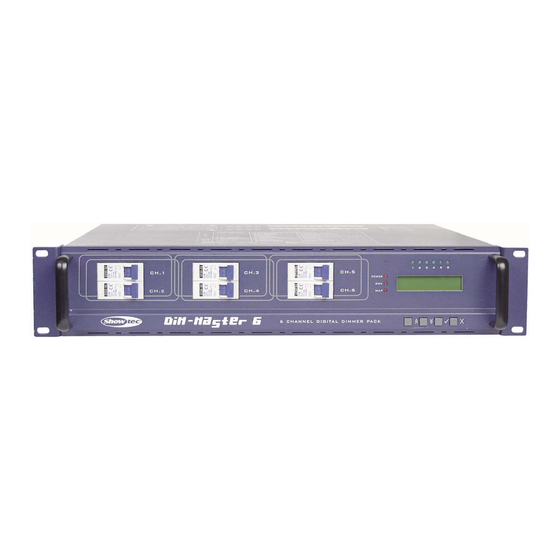
Description of the device Features • 6 Channel DMX 512 Dimmingpack, 6x16A • Inductive and resistant load • DMX connector by 3p XLR • 6 DMX channels, 24 map in DMX channels • 24 programmable scenes • 10 shows from 24 programmed scenes •... -
Page 7: Backside
There are 3 versions from the DimMaster: Standard version ordercode 50378 Ilme 16 Pole Multipin-version ordercode 50378M Schuko-version ordercode 50378S Rear Panel Fig. 2 DMX In: 3-pin XLR male, used to receive DMX data. Analog Din DMX Out: 3-pin XLR female, used to transmit DMX data. -
Page 9: Harting Connector - Pin Connection
Harting Connector – Pin Connection 1) Channel 1 Phase 9) Channel 1 Neutral 2) Channel 2 Phase 10) Channel 2 Neutral 3) Channel 3 Phase 11) Channel 3 Neutral 4) Channel 4 Phase 12) Channel 4 Neutral 5) Channel 5 Phase 13) Channel 5 Neutral 6) Channel 6 Phase 14) Channel 6 Neutral... -
Page 10: Installation
Installation Remove all packing materials from the DimMaster. Check that all foam and plastic padding is removed. Screw the equipment onto the wall. Connect all cables. Always disconnect from electric mains power supply before cleaning or servicing. Damages caused by non-observance are not subject to warranty. -
Page 11: Set Dmx Address
1. SET DMX ADDRESS ? 1 SET DMX ADDR ? Tap the UP/DOWN button to scroll to "1 SET DMX ADDR?". Press YES to enter next menu level, Start Address and Patch Address are selectable using the UP/DOWN buttons. Start Address Tap the UP/DOWN buttons to scroll to the sub-menu "11 START ADDR?", 1 SET DMX ADDR ? the LCD shows... -
Page 12: Set Channel
2. SET CHANNEL ? Tap the UP/DOWN buttons to scroll to "2 SET CHANNELS?" Press YES to enter next menu level, you may select 21 SET PREHEAT / 22 SET MAX OUT/ 23 SET CURVES/ 24 SET FADE TIME using UP/DOWN. Set Preheat Tap the UP/DOWN buttons to scroll to the sub-menu "21 SET PREHEAT?', 2 SET CHANNELS? - Page 13 SET CURVES 2 SET CHANNELS? Tap UP/DOWN to scroll to the sub-menu "23 SET CURVES?", the LCD shows 23 SET CURVES? Press YES, the LCD shows 2 SET CHANNELS? You may select all or channel 1-6 using the UP/DOWN buttons, 231 CHANNEL [ A] default=A(all channels).
-
Page 14: Set Scenes
3. SET SCENES? Tap the UP/DOWN buttons to scroll to "3 SET SCENES?" 3 SET SCENES? Press YES to enter next menu level, you may select 31 PLAY SHOW/ 32 RECORD/ 33 DMX FAIL/ 34 PRESET MAP/ 35 FADE TIMES/ 36 NO DMX SCENE using UP/DOWN. PLAY SHOW Tap the UP/DOWN buttons to scroll to the sub-menu "31 PLAY SHOW?", 3 SET SCENES? - Page 15 DMX FAIL 3 SET SCENES? Tap the UP/DOWN buttons to scroll to the sub-menu "33 DMX FAIL", 33 DMX FAIL? the LCD shows Press YES, the LCD shows 3 SET SCENES? You may select LAST HELD/ ALL OFF/ SCENE 24/ GO NO DMX/ GO MAP 331 [LAST HELD] Using the UP/DOWN buttons, default=LAST HELD.
- Page 16 SET FADE TIME 3 SET SCENES? Tap the UP/DOWN buttons to scroll to the sub-menu "35 FADE TIME?", 35 FADE FAIL? the LCD shows Press YES, the LCD shows You may select all or scene 1-24 using the UP/DOWN buttons, 3 SET SCENES? default=A(all scenes).
-
Page 17: Test Channels
4. TEST CHANNELS ? Tap the UP/DOWN buttons to scroll to "4 TEST CHANLS?" 4 TEST CHANNELS? Press YES, the LCD shows You may select all or channel 1-6 using the UP/DOWN buttons, 4 TEST CHANNELS? default=A(all channels). 41 CH [A] Press YES once, the appropriate channel(s) will be fully on;... -
Page 18: Software Rev
8. SOFTWARE REV ? Tap the UP/DOWN buttons to scroll to "8 SOFTWARE REV?". 8 SOFTWARE REV? 8 SOFTWARE REV? Press YES, the LCD shows the software revision. REV 1.0 05-26-01 READ INFO ? Tap the UP/DOWN buttons to scroll to "9 READ INFO?". 9 READ INFO? Press YES to enter next menu level, you may select 91 HOUR USED/ 92 TEMPERATURE/ 93 DMX LEVEL/ 94 MENU ACCESS/ 95 SET DEFAULT using UP/DOWN. - Page 19 MENU ACCESS 9 READ INFO? Tap the UP/DOWN buttons to scroll to the sub-menu "94 MENU ACCESS?", 94 MENU ACCESS? the LCD shows Press YES, the LCD shows the default setting "UNLOCKED". 9 READ INFO? You may select UNLOCK/LOCK using the UP/DOWN buttons. 941 [UNLOCKED] ARE YOU SURE When you select LOCK, press YES, the LCD shows...
-
Page 20: Additional Information
Additional Information FAN COOLING The unit's fan is controlled by built-in temperature sensor. When the temperature(NOW TEMPERATURE) detected by the sensor is less than 40 Celsius, the fan will switch on discontinuously. When the temperature exceeds 40 Celsius, the fan will switch on continuously. OVER TEMPERATURE SOLVING A. -
Page 21: Maintenance
Once the unit operates properly, do not carry out following steps. If the DimMaster does not operate properly, refer servicing to a technician. If the fuse is burned out, replace the broken fuse with a new one, with the same specifications. -
Page 22: Product Specifications
Product Specification Model: Showtec DimMaster Voltage: AC 230V-50Hz (CE) Channel Output (Single Phase): 10A/CH., Total 60A (CE) Channel Output (Three Phases): 10A/CH., Total 20A (CE) DMX OUT: 3-pin XLR Female DMX IN: 3-pin XLR Male MAP Input: 3-pin XLR Male...
Need help?
Do you have a question about the DimMaster and is the answer not in the manual?
Questions and answers