Table of Contents
Advertisement
Available languages
Available languages
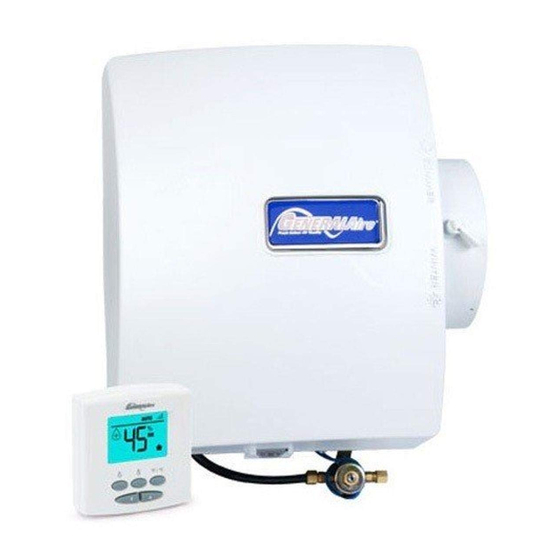
Fresh Indoor Air Quality
INSTALLER: PLEASE FILL OUT AND MAIL WARRANTY CARD AFTER INSTALLATION IS
COMPLETE. LEAVE INSTALLATION INSTRUCTIONS WITH HOME OWNER
PRECAUTION: The installer should be an experienced service technician. Disconnect electrical power before
beginning installation. Do not install where temperatures fall below 32 degrees F or where plenum temperatures
exceed 150 degrees F. When wiring into a multi-speed blower circuit see Step 9D.
INSTALLATION: The humidifier may be mounted with the 6" outlet to
the right or left by inverting the cabinet and reversing the positions of
the distributor trough and drain pan. The humidifier may be mounted
on the warm or return air plenum with equal efficiency.
See Typical Installations.
ADDITIONAL MATERIALS THAT MAY BE NECESSARY:
1. 1/4" diameter plastic supply tubing or 1/4" copper
supply tubing for hot water applications
2. 6" diameter galvanized by-pass pipe
3. electrical wire and wire nuts
4. current sensing relay (G.F. Model #GA50 suggested)
5. #8 self piercing sheet metal screws
1
8-7/8"
The GeneralAire model 900 may be installed on either the supply or
return plenum of a forced air handling system. Select a location for the
humidifier that allows for service and maintenance. Cut out a rectangle
8-7/8" wide by 12" tall. Extend horizontal centerline of cut out to the
adjacent plenum. Cut a 6" hole 10" to 15" from side of humidifier, on
cabinet centerline, using connecting collar as guide. The bypass is
reversible and can be mounted on the right or left side of the
humidifier.
2
Humidifier is self retaining. Slide top side in first, then slide chassis
down. Level chassis and install center screws. If by-pass pipe installs to
opposite side of chassis, bend clip on chassis, remove side discharge,
and reinstall discharge to opposite side of chassis. Install remaining four
corner screws.
FORM NO. 900-18 REV. F
READ AND SAVE THESE INSTRUCTIONS
R
12"
1
2
RETURN AIR
WARM AIR
DRAIN
UP FLOW
GENERALAire
HIGH EFFICIENCY AIR CLEANER
3
6"
Connect by-pass pipe to collar and humidifier cabinet. Using
holes at top and bottom of side panel discharge, pierce 2 self
tapping screws through by-pass pipe.
4
COPPER
TUBING
PLASTIC
TUBING
Mount the self tapping saddle valve or code valve on either a cold
or a hot water pipe. A side or top mount is best to avoid clogging
from pipe sediment. Connect 1/4" O.D. tubing to the saddle valve.
Copper tubing requires a brass compression nut and brass sleeve.
Plastic tubing requires a brass insert inside the tubing, a plastic
sleeve on the outside with a brass compression nut.
NOTE: DO NOT USE PLASTIC TUBING ON HOT WATER OR IN
CONTACT WITH ANY HOT PLENUM SURFACE OR DUCT.
INSTALLATION OF THIS SADDLE VALVE MUST MEET OR
EXCEED LOCAL CODES AND ORDINANCES.
900 SERIES
FLOW-THROUGH
BYPASS HUMIDIFIER
FOR INSTALLATION ON A VERTICAL
PLENUM SURFACE OF ANY
FORCED AIR FURNACE
RETURN AIR
DRAIN
WARM AIR
DOWN FLOW
R
AC SERIES
WARM AIR
Advertisement
Table of Contents

Related Manuals for GeneralAire 900 SERIES


Summary of Contents for GeneralAire 900 SERIES
- Page 1 READ AND SAVE THESE INSTRUCTIONS 900 SERIES Fresh Indoor Air Quality FLOW-THROUGH INSTALLER: PLEASE FILL OUT AND MAIL WARRANTY CARD AFTER INSTALLATION IS BYPASS HUMIDIFIER COMPLETE. LEAVE INSTALLATION INSTRUCTIONS WITH HOME OWNER PRECAUTION: The installer should be an experienced service technician. Disconnect electrical power before FOR INSTALLATION ON A VERTICAL beginning installation.
- Page 2 GCV3412 CODE VALVE INSTALLATION INSTRUCTIONS Copper Pipe 1. Turn off water supply. 2. Clean pipe, fittings and valve with sandpaper or wire brush. 3. Apply a thin layer of flux to all surfaces to be soldered. 4. Assemble valve to pipe and/or fittings. 5.
-
Page 3: Parts List For Humidifier
PARTS LIST FOR HUMIDIFIER 900-40 PAD RAIL 900-1 CHASSIS 900-9 NOZZLE GA-19 EVAPORATOR PAD 900-10 SPOUT GA4266 DISTRIBUTOR TUBE 900-15 DISTRIBUTOR TROUGH 900-11 DAMPER KNOB 900-28 DAMPER DISK 900-2 SIDE PANEL DISCHARGE 900-13 COVER 900-71 NAMEPLATE 900-14 DRAIN PAN GA4231 YELLOW ORIFICE GA4040 SOLENOID VALVE ASM P102 COMPRESSION SLEEVE (BRASS)/P190 COMPRESSION SLEEVE (PLASTIC) GA4004 STAINER SCREEN... -
Page 4: How The Humidifier Works
HOW THE HUMIDIFIER WORKS The operating principle of the humidifier is based on the most efficient and economical means of evaporating water to the air. The humidifier uses only 2.5 watts of electrical power during operation, less than the smallest household light bulb. The heat necessary for evaporating water is produced by the furnace. The water supply to the humidifier is controlled by the electric solenoid valve. -
Page 5: Humidifier Packaged Component Accessories
ELITE 900 HUMIDIFIER SPECIFICATIONS Expected Humidity Performance Coverage in Square Feet Based on Construction Type Average (0.50 AC/H) Tight (0.30 AC/H) Model No. Loose (0.75 AC/H) 2000 sq. ft. Elite 570 800 sq. ft. 1200 sq. ft. 1650 sq. ft. 2800 sq. - Page 6 WARRANTY REGISTRATION You may register online at www.GeneralAire.com or mail form below Product Information: Serial Number: _____________________________________________________________ Model: ____________________________________________________________________ Install Date: Month _______________ Day ______________ Year _____________ Fresh Indoor Air Quality Owner Information: Name: _____________________________________________________________________ Address: ___________________________________________________________________ Mail Form To: Address 2: __________________________________________________________________ General Filters, Inc City: _______________________ State: ___________ Zip Code: ____________________...
- Page 7 LIRE ET REGISTRER CES INSTRUCTIONS SÉRIE 900 Qualité de l’air frais intérieur HUMIDIFICATEUR À INSTALLATEUR : VEUILLEZ REMPLIR ET POSTER LA CARTE DE GARANTIE UNE FOIS CIRCULATION DIRECTE L’INSTALLATION TERMINÉE. LAISSER LES DIRECTIVES D’INSTALLATION AU PROPRIÉTAIRE DE LA MAISON. POUR UNE INSTALLATION SUR LA PRÉCAUTION : L’installateur doit être un technicien qualifié...
- Page 8 INSTRUCTIONS D’INSTALLATION DE LA VANNE-CODE GCV3412 Tuyau en cuivre 1. Couper l’alimentation en eau. 2. Nettoyer le tuyau, les raccords et la vanne avec du papier abrasif ou une brosse métallique. 3. Appliquer une fine couche de flux sur toutes les surfaces devant être soudées.
-
Page 9: Garantie Limitée
LISTE DES PIÈCES POUR L’HUMIDIFICATEUR 900-40 RAIL DU TAMPON 900-1 CADRE 900-9 GICLEUR GA-19 TAMPON D’ÉVAPORATION 900-10 BUSE GA4235 TUBE DE DISTRIBUTEUR 900-15 GOULOTTE DU DISTRIBUTEUR 900-11 BOUTON DU REGISTRE 900-28 DISQUE DU REGISTRE 900-2 ÉVACUATION PAR LE PANNEAU LATÉRAL 900-13 COUVERCLE 900-71 PLAQUE SIGNALÉTIQUE 900-14 BAC DE RÉCUPÉRATION... -
Page 10: Fonctionnement De L'humidificateur
FONCTIONNEMENT DE L’HUMIDIFICATEUR Le principe de fonctionnement de l’humidificateur est basé sur la façon la plus efficace et la plus économique d’évaporer l’eau dans l’air. L’humidificateur utilise uniquement 2,5 watts de courant électrique lorsqu’il fonctionne, c’est-à-dire moins que la plus petite ampoule électrique de votre maison. La chaleur nécessaire pour l’évaporation de l’eau est produite par l’appareil de chauffage. - Page 11 CARACTÉRISTIQUES DE L’HUMIDIFICATEUR ELITE 900 Performance d’humidité prévue selon la superficie en mètres carrés/pieds carrés et le type de construction Moyen (0,50 CAH) Élevé (0,30 CAH) Nº de modèle Faible (0,75 CAH) 186 m /2000 pi Elite 570 74 m /800 pi 111 m /1200 pi...
- Page 12 ENREGISTREMENT DE LA GARANTIE Le produit peut être enregistré en ligne au www.GeneralAire.com ou par la poste en envoyant le formulaire ci-dessous Renseignements sur le produit : Numéro de série : ____________________________________________________________ Modèle : ___________________________________________________________________ Date d’installation : Mois _______________ Jour ______________ Année ____________ Qualité...
Need help?
Do you have a question about the 900 SERIES and is the answer not in the manual?
Questions and answers
If another 90–****has not been used for years, will it still work