Table of Contents
Advertisement
Quick Links
Advertisement
Table of Contents

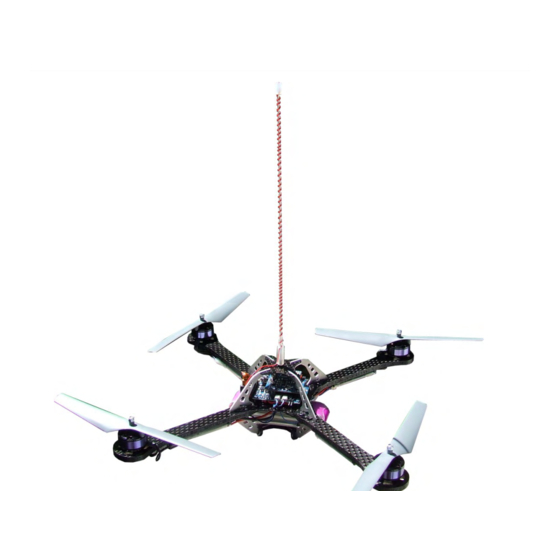
Summary of Contents for asctec X-3D-BL
- Page 1 X-3D-BL User’s Manual V2.1 incl. X-3D Mag...
-
Page 2: Table Of Contents
Optionally available: X-3D Mag ......1.2 Components required for the X-3D-BL ...... - Page 3 A.4 The red LED on the X-3D keeps blinking after the startup ....A.5 The X-3D-BL turns itself off during flight ......
-
Page 4: Introduction
Please read this manual thoroughly until the end befo- usage in non-commercial ways. It is not allowed to re you start assembling your X-3D-BL and stick with use them for any commercial or military purposes. Using any of our components for larger scale flying the proposed chronological order. -
Page 5: X-Base
X-3D-BL User’s Manual 1.1.2 X-Base as the X-3D-BL is turned on. Such an LED can be mounted to the very front of your vehicle to make it easier for the pilot to know where the front side is. The X-Base is the central control unit which is connected to and communicates with all active elements of the X-3D-BL. -
Page 6: X-3D-Funpilot
X-3D-BL User’s Manual 1.1.3 X-3D The X-3D is the sensor unit of the X-3D-BL. With three piezo-gyros and highly optimized control loops it does the actual flight/attitude control. All parameters influencing the in-flight behavior can be tuned by connecting the X-3D to a PC using the USB adapter that came with your X-3D-BL. -
Page 7: X-Bldc Brushless Motor Controllers
Every motor is controlled by an independent X- BLDC brushless motor controller. The controllers are Without the X-ACC the X-3D-BL is flying in the so highly optimized for the X-BL-52s motors and thus called Heading-Hold mode. The vehicle always tries ensure the highest efficiency possible. -
Page 8: Components Required For The X-3D-Bl
X-3D-BL User’s Manual 1.2 Components required for with the flying platform as two funtions (height and yaw) are now controlled by the onboard electronics. the X-3D-BL 1.2.1 Part list X-CSM * 1 sheet of magnesium with pre-cut parts to quarry out... -
Page 9: Additionally Required
X-3D-BL User’s Manual * 16 plastic screws (short) Optional: X-ACC * X-ACC circuit-board * 1 spacer * 2 M2-screws * Product code Optional: X-3D Mag * X-3D Mag PCB * CF-panel for integration into the X-CSM frame * 2 M2-screws... -
Page 10: Assembly
X-3D-BL User’s Manual 2 Assembly 2.1 Before you start 2.2.2 Lateral frame parts of the X-CSM Core Familiarize yourself with the kit and check if all parts are included. All parts are subject to quality assurance during production and packaging. We hope that you are contented with the quality of all components. -
Page 11: Upper Side Of The Core
X-3D-BL User’s Manual 2.2.4 Adding the booms Plug the booms onto the lateral parts of the Core from below and slide them up. If a lot of force is required 2.2.3 Upper side of the core to do so, it is very likely that upper and lower side of the booms have been confused. -
Page 12: Lower Side Of The Core
X-3D-BL User’s Manual les from top and are fixed with plastic nuts from be- low. Attention! One side of the CF baseboard is meant for mounting the R/C receiver. Please make sure that the orientation is as seen in the following photograph. -
Page 13: Mounting A Battery
X-3D-BL User’s Manual Congratulations! You have just finished your X-CSM Your X-CSM frame is now assembled completely! Core! Good luck with adding the electronics! :-) 2.2.6 Mounting a battery 2.3 Mounting the Electronics The X-CSM Core offers a good protection for your battery. -
Page 14: Preparing The X-Bldc Motor Controllers
X-3D-BL User’s Manual 2.3.4 Mounting the X-BLDC motor controllers Screw the motor controllers to the respective holes in the booms. Do this by turning the screws alternately 2.3.2 Preparing the X-BLDC motor turn by turn, until the spacers touch the boom. Thus controllers you will not bend the controller boards too much. -
Page 15: Mounting The Motors
X-3D-BL User’s Manual 2.3.5 Mounting the motors Place the motors on top of the booms as seen in the following picture, and fasten them using 4 plastic screws for each motor. Make sure you use the 8 mm screws which came with the motors, and not the lon- ger ones used for the X-CSM. -
Page 16: Mounting The Act-Receiver (35 Or 40 Mhz)
X-3D-BL User’s Manual Connect the black and blue data cables to the motor controllers ... Solder the red cables to the soldering pads at the rear right side of the X-Base marked with ”+”. The ca- bles’ order does not matter. All cables have the same length, which has been chosen such that non of the cables must be shortened nor extended. -
Page 17: Mounting A Different Receiver
X-3D-BL. Be aware that you do such a modification at your own risk! By trying to modify a receiver its warranty will be void! Almost any receiver can be used, as long as you are able to find and to access the combined PPM-Signal... -
Page 18: Last Steps
X-3D-BL User’s Manual There is no additional cable required to transfer data between the X-3D and the X-Base. Put the top cover of the X-CSM back in place and fasten it using the central plastic screw. 2.4 Last steps 2.4.1 Mounting the antenna The antenna can be assembled as seen in the follo- wing picture. -
Page 19: Marking The Front
As a pilot you always must know where the front of ning clockwise must be mounted to the front and your X-3D-BL is. To make this easily visible we re- the rear motor, whereas the counterclockwise rotating commend to attach some colorful tape to the front propellers must be mounted to the left and to the right boom. -
Page 20: Optional: Integrating The X-Acc
X-3D-BL User’s Manual 2.5 Optional: Integrating the bon fibre panel as shown in the image. The riser PCB has to look away from the CF panel and has to be X-ACC in the corner. Please use the nuts on the top of the... - Page 21 X-3D-BL User’s Manual Therefore it’s recommanded to use the whole below the X-3D Mag in the base panel just for the blue- black data cables! For calibration and setup please also read the chapter 3.4. www.x3d-shop.de - 21 - www.asctec.de...
-
Page 22: Setup And Configuration Of The X-3D-Bl
Connect the USB-adapter to your computer. Open of the X-3D-BL and optimized parameter sets for the the X-Control software, click on ”X-3D” and on the X-3D. Please unzip the archive to a local folder on left hand side on ”... -
Page 23: Software Update Of The X-3D-Funpilot
X-3D-BL User’s Manual Choose the serial port and click on ”connect”. Se- Not click on ”Connect” in the PC software, then lect the ”X-3D Vx.x for X-Base.ufc” firmware file on ”Choose firmware” and seleect the file ”X-3D- after clicking on ”select firmware”. Then click on FunPilot VX.X.hey”. -
Page 24: Configuration
You can freely choose a stick on your R/C for eve- ry function. If you are used to a certain configuration Connect the battery to the X-3D-BL, turn it on and you should definitely continue using this one. If you connect the USB adapter with your computer and haven’t flown other model aircrafts before we recom-... -
Page 25: X-3D Parameters
X-USB module to the X-3D Fun- Pilot, switch on the UFO and start the PC software. In this case it does not matter if the X-3D-BL is turned on or off. Click on ”X-3D” in the X-Control Click on ”FP/OSP”... -
Page 26: Configuration Of The X-Acc
X-Base and X-3D. You can request the on your remote control) to select Heading-Hold or X-ACC software on http://www.asctec.de using the X-ACC mode during flight. To do so, one of the code which is printed on the X-ACC packaging, and channels 5 to 8 of your remote has to be assigned the serial number of your X-3D. -
Page 27: Calibration Of The Acceleration Sensors
Please check that after the calibration the X- and Y-outputs are roughly zero and the Z-output is roughly -1000 if the X-3D-BL is standing in a horizontal orientation. The automatic calibration gives usable results, but sometimes the values can still be optimized manually. -
Page 28: Operation Of The X-3D-Bl
There is a battery warning implemented in your X-3D-FunPilot specific hints: X-3D-BL. A low battery is signalized by a pe- riodic, simultaneous tremor of all motors. This Keep the X-3D-BL totally still after tur- is hard to see but it can be heard. Depending on... -
Page 29: Hints For Using The X-Acc Mode
X-3D displays the green+yellow or green light pattern. If your X-3D-BL has the X-ACC module and the X-ACC firmwares installed it behaves different in case of a reception loss. If there is no R/C si-... -
Page 30: Control Modes X-3D Funpilot
X-3D-BL User’s Manual king tube and some foam (e.g. foam from the X-3D- Heading Hold mode(HH) FunPilot box). Shrinking the schrinking tube around X-ACC-mode the pressure sensor pin and carefully add some super glue to make it hold better. Attention: It’s very import- X-ACC + height control Modus ant that absolutly NO superglue get’s into the sensor! -
Page 31: First Flight
Turn the motors off again after the test was completed successfully. Now, place the X-3D-BL on a flat ground. Turn on the motors and lift off by pushing the throttle stick up a bit. Attention! the X-3D-BL is extremely powerful! If you give to much throttle it will rise up into the air very fast. -
Page 32: Contact Information
X-3D-BL User’s Manual 5 Contact Information This manual is copyrighted. Any kind of chan- ges or copying, completely or in part, have to be approved by the Ascending Technologies GmbH. This document may only be linked to by the Ascen- ding Technologies GmbH and the x3d-shop. -
Page 33: A Troubleshooting
Turn the system off and on again and make sure to vertical as possible. Turn the X-3D-BL on and wait that it is held totally still until the X-3D shows the until only the green LED on the X-3D is on signali- yellow+green or the green light. -
Page 34: The Red Led On The X-3D Keeps Blinking After The Startup
If all connections are o.k. please verify that all motors produce a short beep di- rectly after you turn the X-3D-BL on. If one of them does not play the sound check the power connection of the affected motor controller. Are all wires o.k.? -
Page 35: Problems That Might Occur Using The X-Acc Mode
Due to unavoidable measurement errors it is perfectly is the case, you simply have to fly gently or ho- normal, that your X-3D-BL is not always flying ver for a few seconds until the unwanted tilt is exactly leveled in the X-ACC mode. However, a gone. -
Page 36: B User-Programmable Startup Melodies
BL Sounds” in the X-3D-BL software package. Then press ”Upload”. After the upload is completed click on ”Finished” and turn your X-3D-BL off and on again. After initiali- zing it should play the new sound. Enjoy it! :-) www.x3d-shop.de - 36 -...
Need help?
Do you have a question about the X-3D-BL and is the answer not in the manual?
Questions and answers