Table of Contents
Advertisement
PNS1010 user's manual
This user's manual is designed to let you easily find the information you need to get the most
from your netbook.
•
Introduces you to the features of your netbook.
•
Gives you the useful details on using your netbook.
•
Tells you how to look after your netbook, whether at home or traveling.
•
Goes into more detail about power management and explains how to conserve power
while on the move.
•
Introduces you to BIOS, the nervous system of your netbook, and how to change its
fundamental settings.
There is no need to read the manual from the beginning to end. Simply find your way to the
section that interests you using the table of contents, or browse through the manual.
You will come across the following icons in this manual:
Helpful pointers and tricks to get more from your netbook
To help you net and avoid possible damage to your netbook's hardware or
software, or loss of your work
Points out possible damage to property, personal injury or death
Information in this document is subject to change without notice.
© Marasst, Inc. 2010. All rights reserved.
Trademarks used in this document: Microsoft and Windows are registered trademarks of
Microsoft Corporation.
Other trademarks and trade names may be used in this document to refer to either the entities
claiming the marks and names or their products.
- 1 -
About this User's Manual
Advertisement
Table of Contents

Summary of Contents for Dorumu PNS1010
- Page 1 PNS1010 user’s manual About this User’s Manual This user’s manual is designed to let you easily find the information you need to get the most from your netbook. • Introduces you to the features of your netbook. • Gives you the useful details on using your netbook.
-
Page 2: Table Of Contents
Specifications About this User’s Manual ..............- 1 - Safety Instructions ................- 3 - Specification ................... - 10 - Chapter 1 Introducing Your Netbook ..........- 14 - 1.1 Front Side ..................- 15 - 1.2 Right Side ..................- 18 - 1.3 Left Side ..................... -
Page 3: Safety Instructions
PNS1010 User’s Manual Safety Instructions Use the following safety guidelines to help protect yourself and your netbook. General Warnings • Do not operate your portable computer for an extended period of time with the base resting directly on your body. With extended operation, heat can potentially build up in the base. - Page 4 Specifications Adapter Warnings • See the installation instructions before connecting to the power supply. • Use only the adapter indicated in this manual. • Power cord sets for use in other countries must meet the requirements of that country. Use the appropriate AC adapter and power cord for your locale.
- Page 5 PNS1010 User’s Manual − Do not carry a battery in your pocket, purse, or other container where metal objects (such as car keys) could short-circuit the battery terminals. The resulting excessive current flow can cause extremely high temperatures and may result in damage from burns.
-
Page 6: Fcc Notice
Specifications provided. This product should be operated from the type of power indicated on the marking label. If you are not sure the type of power available, consult your dealer or local power company. Do not allow anything to rest on the power cord. Do not locate this product where people will step on the cord. - Page 7 PNS1010 User’s Manual − • Consult the dealer or an experienced radio/TV technician for help. − This device complies with Part 15 of the FCC Rules. Operation is subject to the following two conditions: − (1) This device may not cause harmful interference.
- Page 8 Specifications BSMI Notice (Taiwan Only) Most Marasst computer products are classified by the Bureau of Standards, Meteorology and Inspection (BSMI) as Class B information technology equipment (ITE). - 8 -...
- Page 9 PNS1010 User’s Manual This (marked on the product) indicates the product complies with the BSMI standard. BSMI 通告 (僅限於台灣地區) 如果您在電腦的底部、側面或背面板上找到一個 標誌,則適用於以下部份 的相關規定: - 9 -...
-
Page 10: Specification
Specifications Specification • Intel® Atom™ Processor N455/N475/N550 Memory • No on board memory • Support DDR-III 667MHz • One SODIMM Support with 1GB modules(Maximum Support 2GB) Chipset • Intel® NM10 Express Chipset Display • port 10.1” WSVGA, 1024 x 600 Keyboard •... - Page 11 PNS1010 User’s Manual Pointing Device • Touchpad without buttons(support multi-touch) I/O Ports • RJ-45 jack x 1 • Headphone-out x 1 • Microphone-in x 1 • 3-in-1 Card Reader x1 • USB 2.0 x 3 • RGB: VGA port x 1, 15pins •...
- Page 12 Specifications Control Buttons • Power button x 1 • Magnetic lid switch control for system standby resume Killer Switch • YES, for WLAN/Bluetooth AC Adapter • Universal AC adapter. 100-240V AC, 50-60HZ 30W with 19V DC 2 pin 240V AC cable ...
-
Page 13: Mini Card
PNS1010 User’s Manual Mini Card • 1 Mini-card slot for WLAN module Security • Kensington lock Regulatory • EMI: FCC-B, CE, CCC, C-Tick, BSMI • Safety: Compliant to UL/CSA, TUV,CB • WHQL LOGO - 13 -... -
Page 14: Chapter 1 Introducing Your Netbook
Chapter 1 Introducing Your Netbook - 14 -... -
Page 15: Front Side
PNS1010 User’s Manual 1.1 Front Side The following picture shows the front side of your netbook. Camera Power Status LED Logo PC Sheet Battery Status LED Power Key HDD Status LED TP Lock LED Wireless Status LED Mic Phone - 15 -... - Page 16 Chapter1 Introducing Your Notebook 1.1.1 Built-in Camera The built-in camera supports a 1.3 mega pixel web camera. 1.1.2 Logo PC Sheet The location of Logo badge. 1.1.3 Power Key • Power Buttons The activity of the power button is as follows: ...
- Page 17 PNS1010 User’s Manual The flashing Power On LED indicates your netbook is in standby mode. Power Status (Blue) Battery Charge (Blue/Amber) HDD Access (Blue) Wireless Status (Blue/Amber) - 17 -...
-
Page 18: Right Side
Chapter1 Introducing Your Notebook 1.2 Right Side The following picture shows the right side of your netbook. Wireless Kill switch DC-IN Kensington Lock 1.2.1 Wireless Kill switch The following is two state of kill switch 1: kill switch On: When users press Fn+F2, AP will be showed. At this time, User can turn on/off which Wireless LAN, Bluetooth and WWAN module. - Page 19 PNS1010 User’s Manual 1.2.3 VGA Port Use this port to connect an external monitor to your computer. 1.2.4 AC Adapter Connector Use this connector to attach the AC adapter to your netbook. You can connect an AC adapter when your netbook is switched on or off.
-
Page 20: Left Side
Chapter1 Introducing Your Notebook 1.3 Left Side The following picture shows the left side of your netbook. RJ-45 Microphone Jack Headphone Jack Card Reader 1.3.1 LAN Jack The RJ-45 network jack allows you to connect your netbook to a local area network (LAN). - Page 21 PNS1010 User’s Manual You can connect a headphone or an external speaker to the port and a microphone to port. The built-in speakers are disable when a device is connected to the port. 1.3.4 Card Reader Support 3-in-1 SD/MMC/MS card, which is used in digital still camera and various forms of portable information equipment.
-
Page 22: Bottom Side
Chapter1 Introducing Your Notebook 1.4 Bottom Side The following picture shows the bottom side of your netbook. Battery Latch Battery Lock 1.4.1 Battery Pack With a charged battery pack installed, you can use your netbook without connecting it to an electrical outlet. - Page 23 PNS1010 User’s Manual To remove the Battery Pack: Move the Battery Lock Switch to the left (Unlock position). Slide the Battery Release Latch to the right Gently pry the battery pack from the computer chassis. 1.4.2 Battery Release Latch The Battery Release Latch secures the battery pack. To release, slide the latch and then remove the battery pack from the bay.
-
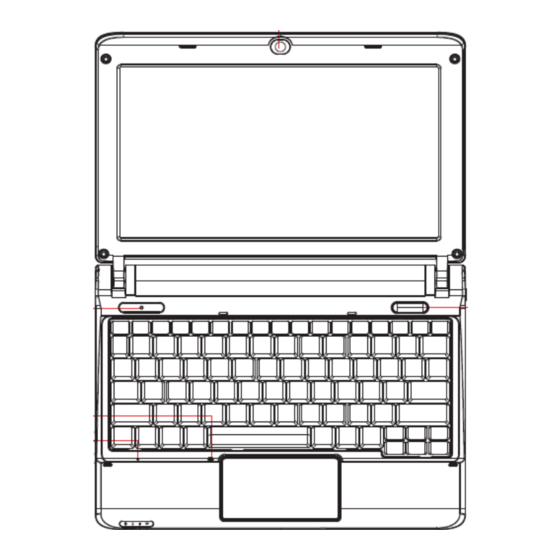
Page 24: Keyboard
Chapter1 Introducing Your Notebook 1.5 Keyboard 1.5.1 Numeric Keypad Keypad numbers and symbols are marked in blue on the lower right edge of the keypad keys. To enable the numeric keypad, press indicator will be shown on taskbar when the numeric lock is on. To disable the numeric keypad, press again. - Page 25 PNS1010 User’s Manual Audio Volume Up Play/Pause Stop Fast Rewind Fast Forward Number Lock Scroll Lock Caps Lock 1.5.3 Windows Logo Key Functions Opens Windows Explorer Opens the Run dialog box Opens the Search Results dialog box Opens the Search Results - Computers dialog box (when your...
-
Page 26: Chapter 2 Caring For Your Netbook
Chapter 2 Caring for Your Netbook - 26 -... -
Page 27: Caring For Your Netbook
PNS1010 User’s Manual 2.1 Caring for Your Netbook Cleaning Your Netbook and Keyboard Cleaning the Display Cleaning the Touch Pad Precautions - 27 -... - Page 28 Chapter2 Caring for Your Notebook Never spray cleaning products directly onto your netbook’s case or display. Only use products designed for cleaning computer displays. 2.1.1 Cleaning Your Netbook and Keyboard Shut your netbook down, turn it off and disconnect it from the electrical outlet and any external devices, such as the printer.
- Page 29 PNS1010 User’s Manual • Keep your netbook and disks away from the objects that generate the strong magnetic fields, such as the stereo speakers. Information on disks is stored magnetically. Placing the magnet too close to the disk can erase the important files.
-
Page 30: Traveling
Chapter2 Caring for Your Notebook 2.2 Traveling Identifying Your Netbook Packing Your Netbook Traveling Tips If Your Netbook is Lost or Stolen - 30 -... - Page 31 PNS1010 User’s Manual 2.2.1 Identifying Your Netbook Attach a nametag or business card to your netbook, or use the permanent marker or stencil to write a unique identifying mark (such as your driver’s license number) on the case. Create a file on the Desktop called if found. Place information such as your name, address, and telephone number in this file.
- Page 32 Chapter2 Caring for Your Notebook • When traveling in the air, please ensure that you have a charged battery available in case you are asked to turn on your netbook. • Before using your netbook on the airplane, please verify that such usage is permitted.
-
Page 33: Chapter 3 Peripherals
Chapter 3 Peripherals - 33 -... -
Page 34: Adding And Removing Sd/Mmc/Ms Cards
Chapter3 Peripherals 3.1 Adding and Removing SD/MMC/MS Cards Before removing an SD/MMC/MS card, stop it running from the configuration utility on the taskbar. Failure to do so could result in the data loss. Insert the SD/MMC/MS card into the card reader slot. To remove the SD/MMC/MS card, please push it in gently and then it ejects automatically. -
Page 35: Memory Modules
PNS1010 User’s Manual 3.2 Memory Modules This machine has one memory socket for place memory module. To remove a memory module: Remove the screws securing the bottom cover. Lift off the bottom cover. Pop out the sliver latch holding the memory module into place. The module pops up. Grasp the outer edges of the memory module with thumb and forefinger, and then gently remove it. -
Page 36: Chapter 4 The Bios Setup Program
Chapter 4 The BIOS Setup Program - 36 -... -
Page 37: System Setup
PNS1010 user’s manual 4.1 System Setup 4.1.1 Invoking setup The setup function can only be invoked by pressing F2 when “Press <F2> to enter Setup” message is prompted on the bottom of screen during POST. During setup, all Fn function keys and power saving functions are disabled. - Page 38 This field displays current version of the BIOS. - 38 -...
- Page 39 PNS1010 user’s manual 4.1.2.2 Advanced Menu Phoenix SecureCore(tm) Setup Utility Main Advanced Security Boot Exit Item specific Help SATA Controller Mode: [AHCI] ↑↓ Select Item Help F5/F6 Change Values Setup Defaults ←→ Select Menu Enter Select Sub-Menu Exit F10 Save and Exit...
- Page 40 PNS1010 user’s manual 4.1.2.3 Security Menu Phoenix SecureCore(tm) Setup Utility Main Advanced Security Boot Exit Item specific Help Supervisor Password Is: Clear Set Supervisor Password: [Enter] ↑↓ select item Help F5/F6 change values Setup defaults ←→ select menu Enter Select Sub-Menu...
- Page 41 Setup Notice Changes have been saved. [Continue] The supervisor password is set complete after user press enter” If verification fail: Setup Warning Password does not match Re-enter Password [Continue] If password on boot is required, the password must be set otherwise it cannot be enabled.
- Page 42 PNS1010 user’s manual 4.1.2.5 Exit Menu Rev. 3.5 Phoenix SecureCore(tm) Setup Utility Main Advanced Security Boot Exit Exit Saving Changes Exit system setup Exit Discarding Changes Load Optimal Defaults save your changes. ↑↓ Select Item F1 Help F5/F6 Change Values F9 Setup Defaults ←→...
- Page 43 PNS1010 User’s Manual Save Changes ↑↓ Select Item Help F5/F6 Change Values Setup Defaults ←→ Select Menu Enter Select Sub-Menu Exit F10 Save and Exit Exit Saving Changes Allows the user to save changes to CMOS and reboot system. The following message is prompted when user press “Enter”...
- Page 44 Chapter4 The BIOS Setup Program It still stay in Setup when press a key. Save Changes Allows the user to save changes and not exit Setup. The following message is prompted when press “Enter” on this item: Setup Confirmation Save configuration changes now? [Yes] [No] It still stay in Setup when press a key.
Need help?
Do you have a question about the PNS1010 and is the answer not in the manual?
Questions and answers