Table of Contents
Advertisement
Quick Links
Advertisement
Table of Contents

Related Manuals for Zoltrix Audio Plus 3200 V.2

Summary of Contents for Zoltrix Audio Plus 3200 V.2
- Page 1 Audio Plus 3200 V.2 User Manual...
- Page 2 Notice The information in this document is subject to change in order to improve the reliability, design, or function of this product without prior notice and does not represent a commitment on the part of this company. In no event will the manufacturer be liable for direct, indirect, special, or consequential damages arising out of the use the product or documentation, even if advised of the possibility of such damages.
- Page 3 FCC Compliance Statement Certified to comply with the limits for a Class B computing device according to Subpart J or Part 15 of FCC rules. See instructions if interference to radio reception is suspected. FCC WARNING This equipment has been tested and found to comply with the limits for a Class B digital device, pursuant to Part 15 of the FCC Rules.
-
Page 4: Table Of Contents
PART 1. Hardware/Software Contents 1. Hardware Introduction............1-1 1.1 Product Overview............... 1-1 1.2 Product Features ..............1-1 1.3 Hardware and Software Requirements ........ 1-3 2. Installation the Audio Plus 3200 ..........1-4 2.1 Installing the Audio Plus 3200 into your Computer ..... 1-4 2.2 Software I/O Setting............ - Page 5 PART 2. Media Rack Contents 1. Introduction ................2-1 1.1 Media Rack Overview ............2-1 1.2 Media Rack Components............ 2-1 1.3 Showing or Hiding Media Rack Components ...... 2-2 1.4 Showing a Media Rack Component’s Menu......2-2 1.5 Selecting Full or Condensed View........2-2 2.
-
Page 6: Hardware Introduction
Audio Plus 3200 Hardware Introduction 1.1 Product Overview The Audio Plus 3200 is a Hi-Fi stereo 16 bit sound card. It is compatible with Sound Blaster and Microsoft Windows Sound System. We provided in the back of Sound Card are line-in jack, micro-phone jack, a volume control knob, audio output jack, and a 15 pin D-SUB multiplexed joystick/MIDI connector. - Page 7 Hardware/Software Section 1- Hardware Introduction • FM Music Synthesizer(OPL3) • Wave Table Synthesis MPU-401 interface for Wave Table Synthesis (optional) • 16 bit Audio Codec/Mixer Stereo analog mixing from CD-audio, Line-in, FM music, voice Mono analog mixing from MIC-In Software adjustable volume •...
-
Page 8: Hardware And Software Requirements
Hardware/Software Section 1- Hardware Introduction 1.3 Hardware and Software requirements The Audio Plus 3200 can be installed in any IBM PC/XT, AT or compatible computer. To successfully install the Audio Plus 3200, you must have the following hardware and software. A) Hardware IBM PC/XT, AT, 386, 486 or compatible computer with the following: •... -
Page 9: Installation The Audio Plus 3200
Audio Plus 3200 Installation the Audio Plus 3200 WARNING: Before installing the Audio Plus 3200, you should familiarize yourself with major parts of it. Improper use of it may cause permanent damage to itself and/or your PC and/or external equipment's. 2.1 Installing the Audio Plus 3200 into your Computer After you adjust hardware jumper settings, you can install the Audio Plus 3200 into your system, please follow the steps carefully for a typical system. - Page 10 Hardware/Software Section 2- Installation the Audio Plus 3200 Table 2.1 The Audio Plus 3200 Jumper Description Function Describe Setting Windows Sound base I/O address System base I/O short short 530-7h (Default) address open short E80-7h short open F40-7h open open 604-Bh CD-ROM type Type...
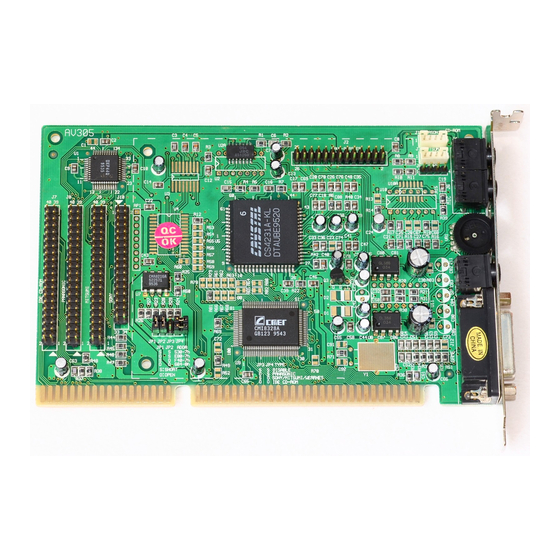
- Page 11 Figure 2.1 The Audio Plus 3200 I/O Connection and Jumpers. 1 - 6...
-
Page 12: Software I/O Setting
Hardware/Software Section 2- Installation the Audio Plus 3200 2.2 Software I/O Setting We also provide software for changing Sound Card 's I/O without jumper setting.You can find the program 'APINIT.EXE' in install path. After runing you will see all I/O settings in the main manu. Using arrow key to move to the item that you want to change and press ENTER key to execute. -
Page 13: Os/2 Driver Install
Hardware/Software Section 2- Installation the Audio Plus 3200 2.5 OS/2 Driver Install The Audio Plus 3200 sound card OS/2 driver setup flow: 1. Launch OS/2. 2. Open icon "Multimedia Application Install". 3. Select the source floppy drive that Audio Plus 3200 Sound Card OS/2 driver is in. -
Page 14: Installation Cd-Rom Drive
Audio Plus 3200 Installation CD-ROM Drive 3.1 Connecting a CD-ROM Drive There are five CD-ROM interface connectors on the Audio Plus 3200: Mitsumi, Wearnes, Panasonic, Sony and IDE. The Mitsumi CD-ROM drive interface is a 40 pin connector which supports Mitsumi LU005, Mitsumi FX001 and Mitsumi FX001D. -
Page 15: Installing Cd-Rom Software Driver
Hardware/Software Section 3- Installation CD-ROM Drive 4. Connect the audio cable that CD-ROM manufacturer supplied from the CD- ROM drive to the appropriate CD-audio input connector(J1 or J3 or J5) on the Audio Plus 3200, please refer to your CD-ROM installation guide about audio cable connecting. -
Page 16: How To Play Cd-Audio In Ms-Windows 3.1
Hardware/Software Section 3- Installation CD-ROM Drive WEARNES (For CDD-110) <Polling Mode> DEVICE=C:\CDD110\CDD.SYS /D:MSCD001 /P:340 /M:S /V <DMA Mode> DEVICE=C:\CDD110\CDD.SYS /D:MSCD001 /P:340 /M:3 /I:11 /V After you install the device driver, you can add C:\DOS\MSCDEX.EXE /D:MSCD001 in AUTOEXEC.BAT or execute on DOS prompt. 3.3 How to play CD-Audio in MS-Windows 3.1 ? After you did above installing CD-ROM software driver, you can install MCI CD audio driver in MS-Windows 3.1 to play general CD audio disk. -
Page 17: Utilities Software
Audio Plus 3200 Utilities Software It is always a good idea to make backup copy of your original software. Make a backup copy of your "Audio Plus 3200 software disk" now and store your original diskettes in a safe place. NOTE: In the following paragraphs, Utilities are assumed to be installed in default Drive:\Path directory, which is C:\AP3200. -
Page 18: Mix
Hardware/Software Section 4- Utilities Software Fig 1. APINIT environment. 4.3 MIX MIX.COM is a multi-functional mixer control program. It includes three part: 1. Window based setting At DOS prompt, type MIX [Enter] You can adjust the volumes of all channels(MASTER,VOICE,FM,CD-ROM) or change recording channel.etc.(FIG 2). -
Page 19: Aptest
Hardware/Software Section 4- Utilities Software 3. DOS command line setting You can also control mixer under DOS command line by typing MIX / argument argument: /V:l,r..VOICE volume control /A:l,r..CD-ROM volume control /F:l,r ..FM MUSIC volume control /L:l,r ..recording level control /T:x...set VOICE filter (Low or Mid or High) /R:x...set recording channel (Mic or CD-in or Line-in or Post-mixer) /K:xxx ..MONITOR function (ON or OFF) - Page 20 Hardware/Software Section 4- Utilities Software After I/O settings are tested, you may proceed to choose to test synthesized music, output voice and test recording functions. Speakers connected to the Audio Plus 3200 are necessary for all the tests. Microphone is necessary for test recording.
-
Page 21: Aputil
Hardware/Software Section 4- Utilities Software 4.5 APUTIL APUTIL.EXE is an integrated voice utility program to help you create and replay voice files. At DOS prompt, type APUTIL [Enter] Integrated environment of APUTIL appears on screen as shown in Fig 4. Fig 4. - Page 22 Hardware/Software Section 4- Utilities Software as in LOAD command. You will hear the sound that is stored in the selected file in digitized form. Play voice from memory: Play Working Memory contents. Use arrow key to highlight and Press Enter to activate. This command is not executable if Working Memory is not filled.
-
Page 23: Aporgan
Hardware/Software Section 4- Utilities Software Load voice file to memory: Loads voice file (.VOC type) into memory. Use arrow key to highlight and Press Enter to activate. A pop up menu appears : At the top, Drive:\Path is shown indicating the current directory for loading files. -
Page 24: Applay
Hardware/Software Section 4- Utilities Software 4.7 APPLAY APPLAY.EXE let you play voice file at DOS prompt. Voice is played in a background process. You may specify optionally a foreground process running at the same time voice is playing. To run APPLAY, at DOS prompt, type in applay [-Bxx] [-H] [-E"execute-command"] filename [Enter] example: APPLAY -b16 -h -e "DIR"... - Page 25 Hardware/Software Section 4- Utilities Software -yy is the desired sampling rate for recording. It must fall between 4,000 and 44,100 Hz(mono) or 22,050Hz(stereo). Default is 8,000Hz. -z is recording mode. 0 for mono mode and 1 for stereo. Default value is 0, i.e. mono mode -H sets quiet mode.
- Page 26 Media Rack Introduction Media Rack User’s Guide 2 - 1...
-
Page 27: Introduction
Media Rack Introduction 1. Introduction 1.1 Media Rack Overview Media Rack gives you control over your PC’s audio functions through a user interface as simple to use as a home stereo system. 1.2 Media Rack Components Media Rack consists of several major components: Control Center: Controls the display of Media Rack's components. -
Page 28: Showing Or Hiding Media Rack Components
Media Rack Introduction MIDI Player: Plays MIDI music files. Lets you create song playlists and use MIDI editors to modify the song files. Wave Player: Records and plays digital audio (wave) files. Lets you create wave file playlists and use editors to modify the wave files. CD Player: Plays standard audio CDs. -
Page 29: Alarm Clock
Media Rack Alarm Clock 2. Alarm Clock 2.1 Alarm Clock Overview The Alarm Clock announces the time and date in a clear human voice, and can play a digital audio (wave) file at an alarm time you set. 2.2 Alarm Clock Configuration Preferences The Clock menu offer several choices: Say Time: Makes Alarm Clock immediately say the current time. -
Page 30: Setting Alarms
Media Rack Alarm Clock 2.3 Setting Alarms To set Alarm Clock to play a wave file at a certain time: 1. Click on the On button in Alarm field of the Preferences box. 2. Type in, or Browse to, the wave file you want played. 3. -
Page 31: Midi Player, Wave Player, And Cd Player
Media Rack MIDI Player, Wave Player, and CD Player 3. MIDI Player, Wave Player, and CD Player 3.1 Controls MIDI Player (above, similar to Wave Player and CD Player) Current File or Track: The name of the current MIDI file, wave audio file, or CD track. - Page 32 Media Rack MIDI Player, Wave Player, and CD Player Previous/Next Selection: Moves to the beginning of the previous or next selection in your playlist or CD. Play: Plays the current selection until: 1) the selection, playlist, or CD has finished, 2) you press the Stop or Pause button, 3) you load a different file, 4) you move to another selection, or 5) you close the program.
-
Page 33: Playing A Single Audio Selection
Media Rack MIDI Player, Wave Player, and CD Player Playlist: Lets you create your own custom collections of audio selections, and specify the order in which selections play. Edit: Launches an editor program, if available, so you can edit the current file. 3.2 Playing a Single Audio Selection 1. -
Page 34: Creating Playlists (Midi Player Or Wave Player)
Media Rack MIDI Player, Wave Player, and CD Player (For CD Player) a. Insert an audio CD into your CD drive. If you’ve previously created a playlist for the CD, CD Player will display the name of the CD and its first track. -
Page 35: Recording Wave Audio
Media Rack MIDI Player, Wave Player, and CD Player 2. Type the CD's name in the CD Title field. 3. CD Player detects the tracks on the CD, and initially names them Track 1, Track 2, etc. Enter a more descriptive name for each by highlighting it in the left column, typing a new name in the Track Name field, and clicking on the Update Track Name button. -
Page 36: Choosing Wave Player Record Settings
Media Rack MIDI Player, Wave Player, and CD Player 3.7 Choosing Wave Player Record Settings Wave Player lets you record audio in different data formats, for different uses. Some data formats offer excellent sound quality, while others sacrifice sound quality but require less disk space. To pick a recording data format: 1. -
Page 37: System Mixer
Media Rack MIDI Player, Wave Player, and CD Player 4. System Mixer 4.1 System Mixer Overview System Mixer lets you control all audio output and input levels. 4.2 The System Mixer's Controls System Mixer displays the volume controls that your audio drivers make available. - Page 38 Media Rack MIDI Player, Wave Player, and CD Player Note: A choice of mixer control styles may be available through the Choose Style menu item of the Mixer menu. Control types and names vary. Some common types are listed below: •...
-
Page 39: Setting Recording & Playback Levels
Media Rack MIDI Player, Wave Player, and CD Player Power: Hides the System Mixer component from display. Help: Shows the System Mixer's On-line User Guide. 4.3 Setting Recording & Playback Levels The controls for each signal type set that signal's level relative to others. The master Vol control affects all output signal types equally, and sets the overall output level. -
Page 40: Using Hotkey Output Level Controls
Media Rack MIDI Player, Wave Player, and CD Player 4.4 Using Hotkey Output Level Controls You can use keyboard key combinations to adjust the master output level, without using on-screen mixer controls. This lets you adjust output while keeping Media Rack minimized, e.g. Using hotkeys, you can raise, lower, or mute the master output level.
Need help?
Do you have a question about the Audio Plus 3200 V.2 and is the answer not in the manual?
Questions and answers