Table of Contents
Advertisement
Advertisement
Table of Contents

Related Manuals for Technika Freeview STBHDIS2010

Summary of Contents for Technika Freeview STBHDIS2010
- Page 1 Model: STBHDIS2010 Freeview™ HD Set Top Box...
-
Page 3: Table Of Contents
Contents Contents............ Digital text .......... Quick Start Guide........Menu operations ........ Connecting your box ......Channels menu ........Tuning your box ........Channel organizer ......Receiving Channel Zero ....... Channel groups ........Introduction..........Install menu ........Safety is important ....... Channel tune ........ -
Page 4: Quick Start Guide
Quick start guide Connecting your box UHF Aerial HDMI Cable Scart Input on TV 1. Connecting to your TV TV RF In Connector RF In Connector Scart Output to TV Internet SPDIF AC 110-240V~, 50/60Hz, 9W RF IN RF OUT ETHERNET HDMI VIDEO... -
Page 5: Tuning Your Box
Quick start guide Tuning your box Receiving Channel Zero The first time you switch your box on, it will Press the button to put the box into automatically tune all available Freeview TV standby, Channel Zero interactive services and radio channels. will now be downloaded to your box. -
Page 6: Introduction
Introduction Safety is important To ensure your safety and the safety of others, please read the Safety information BEFORE you operate this product. Keep this information in a safe place for future reference. In the box You will find the following: 1. -
Page 7: Safety Information
Safety information IMPORTANT SAFETY INSTRUCTIONS - WARNING: TO REDUCE THE READ CAREFULLY BEFORE USE RISK OF FIRE OR ELECTRICAL SHOCK, DO NOT EXPOSE THIS Keep these instructions BOX TO WATER OR MOISTURE. 1. Do not use this box near water T H E B O X M U S T N O T B E 2. -
Page 8: Electrical Safety Information
Safety information Important Electrical information Mains supply This box generates, uses and can radiate radio frequency energy and, if not installed a n d u s e d i n a c c o r d a n c e w i t h t h e s e The mains operating voltage is detailed on instructions, may cause harmful interference the rear of the box. -
Page 9: Parts Identification
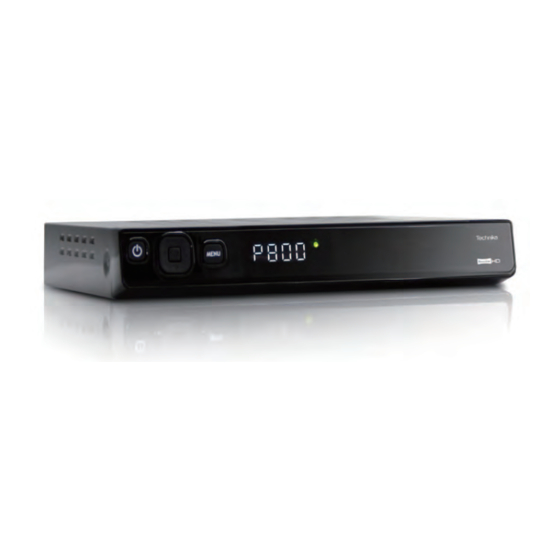
Parts identification Front Panel 1. STANDBY Power On/Standby. 2. Channel up / channel down 3. Volume up / volume down 4. OK Confirm selection in menu/on screen displays. 5. MENU Open the menu so that you can change the settings of your Digital Box Rear Panel SPDIF AC 110-240V~,... -
Page 10: Remote Control
Parts identification Remote Control STANDBY Power on/standby MUTE Turn the volume on and off NUMBER PAD Enter values and select the channel directly by entering its number TV/VCR Switch between TV and VCR programmes TV/R Switch between TV and BACK Switch between the current radio programmes channel and previous one;... -
Page 11: Remote Control
Remote control Installing batteries in the remote WARNING! DO NOT LEAVE control BATTERIES IN THE REMOTE CONTROL FOR EXTENDED 1. Remove the battery compartment cover at PERIODS AS THEY CAN LEAK the rear of the remote control by O R C O R R O D E C A U S I N G depressing the retaining clip. -
Page 12: Connecting The Box
Connecting the box Connecting to the TV and other devices WARNING! ENSURE THE TV AND ALL ANCILLARY The Quick Start Guide shows the simplest EQUIPMEN ARE UNPLUGGED FROM THE MAINS BEFORE and most effective way to connect the box to ancillary equipment. -
Page 13: Hdmi Cable
Connecting the box Note: Please consult your VCR instruction guide for details on how to connect your box to your VCR. HDMI cable You can connect the box to your TV HDMI socket with a HDMI cable. This connection will output the uncompressed digital video and audio signals. -
Page 14: Basic Operating Instructions
Operating the box Basic operating instructions Note: You can re-tune your box again at any time. See Channel Switching on for the first time tune on page 20~21. You need to perform automatic channel tuning when you turn the box on for the first Standby time Press... -
Page 15: Selecting A Channel
Operating the box Selecting a channel Programme swap Press the NUMERIC buttons to select the Press the BACK button to switch between the channel you require. Do not use leading ‘0’s current channel and previous channel. For example to select channel 17, press the 1 button, the 7 button and then the OK button. -
Page 16: Subtitles
Operating the box Audio Description • A lock icon is displayed if parental lock has been set. • A stripe icon is displayed if the channel 1. To turn Audio Description on, press the has subtitles. AD button. An Audio Description ‘ON’ •... -
Page 17: Channel Favourites List
Operating the box 4. Press the BACK button to exit the Channel list without changing channel. If you have created any channel groups, press the corresponding colour button to display only the channels that belong to that group. 2. Press the ▲ or ▼ buttons to select a favourite channel. -
Page 18: Setting The Timer
Operating the box 1. To display the TV Guide, press the GUIDE 3. Press the INFO button again to clear the button. description. 2. Press the ▲ /▼ / ◄ and ► buttons to 4. Press the BACK button to exit the TV navigate through the channels and Guide. -
Page 19: Digital Text
Operating the box 1. Press the TEXT button to display Digital text. 2. Press the ▲ and ▼ buttons to select a topic such as weather or news. 3. Press the OK button to select a topic. 4. Press the ▲ /▼ / ◄ and ► buttons to navigate around the topic pages. -
Page 20: Channels Menu
Operating the box Channels menu 1. Press the MENU button, then press the ▲ /▼ / ◄ and ►buttons to navigate to The Channels sub-menu allows you to the ‘Organise’ label under the ‘Channels’ manage your channels. You can create section in Menu. -
Page 21: Channel Groups
Operating the box common theme (e.g. ‘news’, ‘children’, Note: You must re-tune in menu to ‘movies’) or by interest to a user (e.g. ‘Sue’, restore deleted channels. See ‘Michelle’, ‘Dad’). Channel tune on page 20. 1. Press the MENU button, then press the ▲... -
Page 22: Install Menu
Operating the box 4. Press a COLOURED button to add or more times to enter a character. remove that channel from the group of the 8. You can delete the character under the cursor by pressing the RED button. same colour. 5. -
Page 23: Factory Reset
Operating the box press ►and then OK to confirm. 3. Press the OK button to begin. After pressing OK, a prompt is shown 4. You are asked to confirm whether you asking for a password. Enter the correct want to proceed. Press the OK or BACK password to perform the factory reset (default button if you do not want to re-tune, password is 0000). -
Page 24: Ethernet
Operating the box the ‘Version’ label under the ‘Install’ section in Menu. 2. The version number is displayed beneath the ‘Version’ label. When AUTO is selected and an Ethernet cable is connected, the icon is highlighted in green. The values of the ethernet settings will be configured automatically as shown in the figure above. -
Page 25: Settings
Operating the box Language • ‘Preferred audio’ allows you to set your first choice for audio. • ‘Alternative audio’ allows you to set your second choice for audio. • ‘Subtitles’ allows you to set the language in which subtitles are displayed (if subtitles are enabled, see Subtitles on page 14). -
Page 26: Time
Operating the box Audio Description • ‘Aspect ratio’ allows you to choose from 4:3, 4:3 pan scan, 4:3 letter box and 16:9. • ‘Resolution’ allows you to choose the HDMI video output format. • ‘Video output’ allows you to choose the output signal type according to what your TV can display. -
Page 27: Parental Pin
Operating the box Parental PIN 4. Press the NUMERIC buttons to enter the new password. The Parental pin menu allows you to set a 5. Confirm your new password by re-entering again using the NUMERIC buttons. pin in order to protect locked channels. To set a password and apply a parental rating. -
Page 28: Updates
Operating the box HDCP. If the broadcaster's transmission indicates that copy protection must be utilized, then the set top box will override the user settings and HDCP will be enabled. An HDCP compatible display device will be required to view this content. ‘Digital Audio Output’... -
Page 29: Channel Zero
Operating the box unpacked for the first time. Press to put your box in standby (which reduces power consumption) overnight or when you are not using it. The light on the front of the box will change to red. The box will load the Channel Zero services ready for you to use within a few hours. -
Page 30: Troubleshooting Guide
Troubleshooting guide TROUBLESHOOTING Check that the box is correctly plugged in No picture, no sound Check the television is connected to a suitable power source Check the electrical supply is turned on Ensure that the box and TV are powered on Check that the cables are fitted securely No picture Ensure the aerial is connected... -
Page 31: Additional Information
Additional Information Specifications Specifications of the box that you have just purchased may vary from the information in this table due to technical innovations. Power requirements AC 110-240V~, 50/60Hz Power consumption On: 9W Temperature Working: 0° C~40° C Storage: -30° C~80° C Humidity Working: 20%~80% Storage: 5%~90%... - Page 32 Tesco Stores Ltd, Delamare Road, Cheshunt, Herts, EN8 9SL Technika Helpline: 0845 456 6767 (Calls cost up to 4p per minute from a BT landline, other providers may vary)
Need help?
Do you have a question about the Freeview STBHDIS2010 and is the answer not in the manual?
Questions and answers
how to work USB?
The USB port on the Technika Freeview STBHDIS2010 is labeled "USB - for future interactivity." This means the USB feature is not currently active or supported and is reserved for potential future use. Therefore, there is no current way to use the USB feature.
This answer is automatically generated