Table of Contents
Advertisement
Advertisement
Table of Contents

Related Manuals for Berkel BSFTM


Summary of Contents for Berkel BSFTM
- Page 1 FUTURA USER HANDBOOKS BSFG BSFM BSFS BSFT UM - CODE N1 N2 N3 N9 - REV 0.3...
- Page 2 Introduction Thank you for having bought one of our products, we would like to recommend that you read our manual carefully before using the slicing machine. As regards safety against mechanical risks, the machines described in this manual follow the directive regulations 98/37/EEC - 73/23/EEC - 89/336/EEC and the European norms EN 1974: slicing machines - hygiene and security norms.
- Page 3 Who may operate the slicer? Only properly trained and instructed personnel may operate the slicer. Only Berkel - or authorised service engineers may rectify any faults. No access for unauthorised persons! Ensure that unauthorised persons and those who have not received any instruction do not operate or clean the slicer.
- Page 4 Safety precautions Turn thickness dial right back to safe - clockwise After slicing always reset the thickness dial right back to safe first and switch the slicer off. Dependent on the slicer setting, please be sure that the dial is turned all the way back. Exercise particular caution when removing product scraps from the meat tray.
-
Page 5: Table Of Contents
Contents 1. Premise 1.1. Purpose of the manual ........................................ 6 1.2. Keeping the manual ........................................6 1.3. Use of the machine ........................................6 2. General information 2.1. Machine limits, safety regulations ....................................7 2.2. Guarantee and maker’s responsibility ..................................7 2.3. -
Page 6: Premise
1. Premise 1.1. Purpose of the manual This publication contains all the information necessary for the use and maintenance of the slicing machines to be used for food, with circular blade, models BSFG- M-L-X (Futura gravity slicers, medium, large and extra large), BSFM-M-L-X (Futura straight feed ‘meat’ slicers, medium, large and extra large), BSFS-M-L-X (Futura straight feed ‘salumi’... -
Page 7: General Information
2. General information 2.1. Machine limits, safety regulations The machine has been designed and made to slice food products, with a continuous service, of the type and size as indicated in paragraphs 3.2, 3.4 and 3.5. 2.1.1. Environmental conditions for using the machine - Temperature ...................................... -
Page 8: Guarantee And Maker's Responsibility
2.2. Guarantee and maker’s responsibility The guarantee of a good function and a complete conformity of the machines, that are to be used accordingly, depends on the correct application of the instructions contained in this manual. The maker declines all direct and indirect resposibility deriving from: - Not following the instructions in the manual;... -
Page 9: Technical Characteristics
3. Technical characteristics 3.1. Dimensions, BSFG series Models BSFGM BSFGL BSFGX 149 mm 185 mm 225 mm 260 mm 282 mm 318 mm 198 mm 230 mm 269 mm 418 mm 670 mm 690 mm 326 mm 377 mm 430 mm 466 mm 593 mm 630 mm... -
Page 10: Dimensions, Bsfm Series
3.3. Dimensions, BSFM series Models BSFMM BSFML BSFMX 178 mm 210 mm 232 mm 253 mm 270 mm 320 mm 213 mm 240 mm 272 mm 505 mm 634 mm 650 mm 326 mm 377 mm 430 mm 590 mm 620 mm 667 mm 450 mm... -
Page 11: Dimensions, Bsfs Series
3.5. Dimensions, BSFS series Models BSFSM BSFSL BSFSX 176 mm 200 mm 245 mm 251 mm 285 mm 310 mm 211 mm 240 mm 272 mm 445 mm 590 mm 610 mm 326 mm 377 mm 430 mm 538 mm 655 mm 758 mm 450 mm... -
Page 12: Dimensions, Bsft Series
3.7. Dimensions, BSFT series Models BSFTM BSFTL BSFTX 178 mm 200 mm 242 mm 253 mm 285 mm 310 mm 213 mm 240 mm 272 mm 560 mm 620 mm 700 mm 326 mm 377 mm 430 mm 538 mm... -
Page 13: Furnished Items And Accessories
3.9. Furnished items and accessories The following documents and accessories are supplied with the machine, unless otherwise specified: - Instruction manual for use and maintenance; - EC conformity declaration; - Accessories: lubricating oil for carriage guide bars and food press and on request tool for removing the blade. 3.10. - Page 14 3. Open the box and take out the copy of the instruction manual which is on top of the polyurethane protection; 4. Continue as indicated in the manual; 5. Push the upper cardboard box down (1) using the flaps so that the next step is easier, that removing...
-
Page 15: Main Components
4.2. Main components BSFG series 1. STOP BUTTON (RED) 2. START BUTTON (GREEN) 3. IDENTIFICATION PLATE, TECHNICAL DATA AND EC MARKING 4. LUBRICATING POINT FOR GUIDE BARS 5. FOOT 6. REGULATING KNOB FOR SLICE THICKNESS 7. THICKNESS PLATE (VELA) 8. HANDLE FOR PLATE PUSHING 9. - Page 16 BSFM series 1. STOP BUTTON (RED) 2. START BUTTON (GREEN) 3. IDENTIFICATION PLATE, TECHNICAL DATA AND EC MARKING 4. SLICE THICKNESS REGULATING KNOB 5. FOOT 6. PLATE LOCKING KNOB 7. INNERTABLE 8. PLATE 9. FOOD PRESS HANDLE 10. FOOD PRESS 11.
- Page 17 BSFS series 1. STOP BUTTON (RED) 2. START BUTTON (GREEN) 3. IDENTIFICATION PLATE, TECHNICAL DATA AND EC MARKING 4. LUBRICATING POINT FOR CARRIAGE GUIDES 5. SLICE THICKNESS REGULATING KNOB 6. THICKNESS PLATE 7. BLADE 8. SHARPENER 9. BLADE COVER 10. BLADE COVER TENSION ROD 11.
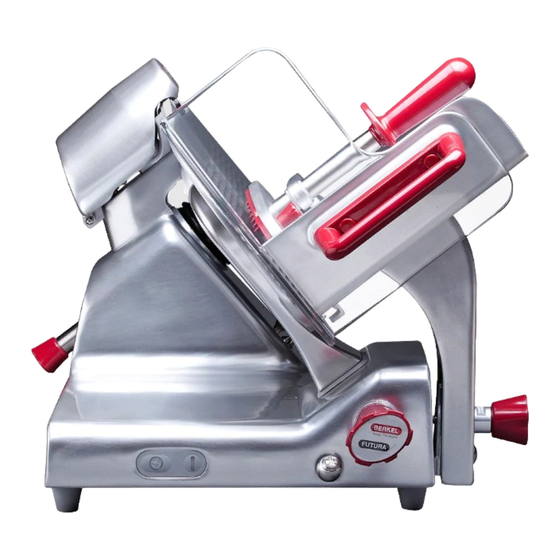
- Page 18 BSFT series 1. STOP BUTTON (RED) 2. START BUTTON (GREEN ) 3. IDENTIFICATION PLATE, TECHNICAL DATA AND EC MARKING 4. LUBRICATING POINT FOR CARRIAGE GUIDES 5. SLICE THICKNESS REGULATING KNOB 6. THICKNESS PLATE 7. BLADE 8. SHARPENER 9. BLADE COVER 10.
-
Page 19: General Description
4.3. General description The slicing machine has been designed and made according to the EEC directive 98/37 - 73/23 - 89/336 and the European norm EN 1974-1998. The machine offers the user: - Maximum security when in use, during cleaning and ordinary maintenance; - Maximum hygiene from the use of inoxidizable materials or adequately protected against oxidization together with a careful design of all the parts that come into contact with food;... -
Page 20: Installation
5. Installation 5.1. Installing the machine 5.3. Electrical connection Install the machine on a surface which The machine must be installed is level, smooth, dry and suitable for close to an EEC regulation socket the weight of the machine plus the in a system which conforms to the food to be sliced;... -
Page 21: Using The Machine
6. Using the slicing machine 6.1. Loading the goods on the plate and cutting 5. Regulate the thickness of the slice. BSFG series slicing machines Start the blade by pressing the GREEN button. 1. Ensure the thickness regulator knob is turned back to its SAFE Grip the handle attached to the position, thickness plate fully closed;... - Page 22 BSFG series slicing machines BSFG series slicing machines supplied with table extension supplied with removable product fence A second additional rest position is allowed (for the first one please see pt.3 p.21 of UM) In order to reach the new one, 1.
- Page 23 BSFM series slicing machines 5. Regulate the thickness of the slices. Start the blade by pressing the GREEN button. Grip the handle of the food press 1. Ensure the thickness regulator and start cutting with combined knob is turned back to its SAFE pressure parallel to the blade position, thickness plate fully (alternating movement of the food)
- Page 24 BSFS series slicing machines 5. Regulate the thickness of the slices. Start the blade by pressing Ensure thickness the GREEN button. regulator knob is turned back to its SAFE position, thickness plate fully closed; Grip the handle of the plate and start cutting with...
- Page 25 BSFT series slicing machines 3. Lift up the food press using the unblocking levers; supplied with with a meat table extension and stainless steel claw gripper last slice device: 1. Put the extension on the table, sliding it towards the columns 2.
-
Page 26: Cleaning The Slicing Machine
6.2. Cleaning the slicing machine Removing the blade cover 6.2.1. General information 1 . C o m p l e t e l y u n s c r e w (counterclock-wise) the tension rod The machines must be properly cleaned at least once a day; if necessary even knob of the blade cover block;... - Page 27 Disassembling the sharpener 1. Remove the whole sharpener by pulling upwards and turning in direction of thickness plate (45°) and extracting it completly. 6.2.3. Cleaning the machine and the parts that have been removed Products to be used Only use hot water and a biodegradable detergent for dishes with a 7-8 PH, at a temperature of no lower than 30 °C using a soft, spongy cloth and a semi-rigid nylon brush for the plate and the sharp food press.
- Page 28 Cleaning the sharpener 1. Clean the body with a damp cloth and the grindstones with a semi-rigid nylon brush; 2. Don’t immerse sharpener. Cleaning the components in the base The components contained in the base do not need any special cleaning; occasionally remove the dust that can accumulate in the end area of the carriage and of the thickness plate regulation.
- Page 29 6.2.5. Reassembling the slicing Reassembling the blade cover machine 1. Replace the blade cover as Reassembling the sharpener shown in the picture making sure the square section joint is in its 1. Insert the sharpener beginning proper place; from a position of 45° and turning it till that one shown in the picture and then push it downwards until it...
- Page 30 Reassembling the food plate 1. Insert the entire group on the carriage as shown in the picture; NOTE: ensure the plate locking knob is fully out (loose) or the food plate will not drop down onto the support! 2. Tighten the locking knob; 3.
-
Page 31: Maintenance And Repairs
7. Maintenance and repairs 7.1. General information The operator is allowed to carry out the following maintenance: - Blade sharpening, periodically. The interval and length of the sharpening obviously depends on the use of the machine (work times and type of product used) - Lubrication of the carriage guide bars, weekly;... - Page 32 7.2.1. Carrying 5. Carry out the sharpening of sharpening blade pressing sharpening lever as in picture NOTE: Before starting this and keeping it pressed for about operation, check that 10-15 seconds; grindstones have been cleaned; paragraph 6.2.3. 6. Let go of the sharpening lever and stop the blade by pressing 1.
-
Page 33: Lubricating The Guide Bars Of The Carriage With Arm And Food Plate Support
7.3. Lubricating the guide bars of the carriage, arm and food plate support (weekly) WARNING: Only use the supplied oil. If there is none, use white vaseline oil. DO NOT USE VEGETABLE OILS! 1. Move the carriage closest to the operator;... -
Page 34: Locating And Eliminating Failures
8. Locating and eliminating failures WARNING: In this chapter the most common problems caused while using the slicing machine are listed together with the necessary operations to eliminate the possible causes. If the problem persists ask for assistance from a qualified person authorized by the maker, do not insist on looking for the cause. -
Page 35: Electrical Diagram
9. Electrical diagram VOLTAGE CHANGE 0-230: FEEDING 230 VAC 0-400: FEEDING 400 VAC 3 PH FEEDING L1, L2, L3 3 PH MOTOR U, V, W 1 PH MOTOR U, V EMERGENCY L. S. UM - CODE N1 N2 N3 N9 - REV 0.3... - Page 36 UM - CODE N1 N2 N3 N9 - REV 0.3...
-
Page 37: Dismantling The Slicing Machine
10. Dismantling the slicing machine The machines are made up of: - Aluminium/magnesium alloy structure; - Insertions and various in stainless steel; - Electric parts and wires; - Electric motor; - Plastic materials, etc. If disassembly and dismantling are to be carried out by a third party, only consult firms that are authorized in the demolition of the above mentioned materials. If you carry out the dismantling yourself the materials must be separated according to type and consult a specialized firm for their disposal.
Need help?
Do you have a question about the BSFTM and is the answer not in the manual?
Questions and answers