Advertisement
Quick Links
Advertisement

Summary of Contents for Shintaro SH-PHD
- Page 1 Portable HDD Duplicator User Manual SH-PHD shintaro.com.au...
-
Page 2: Table Of Contents
Portable HDD Duplicator Contents 2.5”/3.5” SATA HDD Connection Diagram Features /Operating System Package Contents / Button Functions System Mode Duplicator Operation RAID1 HDD Rebuild FCC and CE Compliance Statement shintaro.com.au... -
Page 3: 2.5"/3.5" Sata Hdd Connection Diagram
2.5”/3.5” SATA HDD Connection Diagram SATA HDD SATA HDD DC-IN... - Page 4 (a) 3.5” IDE Connection Diagram 3.5”IDE 3.5”IDE 3.5”IDE 3.5”IDE (b) 2.5” IDE Connection Diagram 2.5”IDE 2.5”IDE 2.5”IDE 2.5”IDE 3.5” to 2.5” IDE Connector Card (supplied)
-
Page 5: Features /Operating System
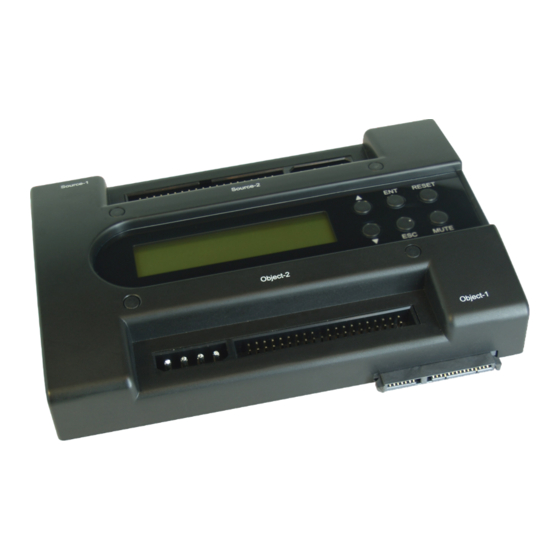
Features IDE/SATA HDD portable copy-station suitable for all 2.5”& 3.5” HDD USB 2.0 Raid bridge external station suitable for all 2.5”& 3.5” HDD Duplicator mode: Copy / Compare / Pre-scan / Erase Easy handling over display Raid mode: Raid0 / Raid1 / Normal / JBOD Stand alone usage without PC (Duplicator mode) Operating System Windows 98SE / 2000 / XP / Vista... -
Page 6: System Mode
System Mode 1. Duplicator Mode Copy HDD: Clone the boot sectors from the source HDD to the object HDD Compare HDD: Compare the sectors of the source HDD to the object HDD Pre-scan: Pre-scan the bad sectors of the source HDD Erase: Erase all the data of the object HDD Re-scan BUS: Re-scan all HDD which are connected to the station Source Size: Show the capacity of the source HDD... -
Page 7: Duplicator Operation
Duplicator operation Use the “▲” and “▼” buttons to select the Menu, and press the “ENT” button to enter the next step For example, if “Copy HDD” was selected, more detailed information would be displayed Raid operating Use the “▲“ and “▼“ buttons to change the RAID mode... - Page 8 Press “ENT” to make a selection Press “ENT” to change the mode Show the RAID information...
- Page 9 Right click the “My Computer” icon, bringing up the pop-up menu. Chose the “Manage” option. Then select the “Computer Management” option. This allows you to operate the hard disk in your computer The hard disk information is as follows: Normal mode...
- Page 10 JBOD mode RAID0 mode...
-
Page 11: Raid1 Hdd Rebuild
RAID1 mode RAID1 HDD Rebuild When the system is in RAID1 mode, if one HDD has broken, the system will automatically rebuild. If the RAID1 system has broken, the display will show “F mode” and a buzzer will alarm once per second... - Page 12 Use the “▲“ and “▼“ buttons to select the “Information” → “Drive1” or “Drive2” Note: Drive1 one is the “source HDD”, Drive2 is the “Object HDD” If the HDD is broken, the display will show “Drive not exist.” Now you may replace the broken HDD Insert a new HDD and restart the system, it will prompt you to rebuild the RAID1 system...
-
Page 13: Fcc And Ce Compliance Statement
The display will show the rebuild speed, spare volume and spare time The equipment has been tested and found to comply with the limits for a Class B Digital Device, pursuant to part 15 of the FCC Rules. This equipment has been tested and found to comply with the limits of the European Council Directive on the approximation of the law of the member states relating to electromagnetic compatibility (89/336/EEC) according to EN 55022 Class B. - Page 14 • Consult the dealer or an experienced radio/TV technician for help Caution: The Federal Communications Commission warns the user that changes or modifications to the unit not expressly approved by the party responsible for compliance could void the user’s authority to operate the equipment. support@shintaro.com.au...
Need help?
Do you have a question about the SH-PHD and is the answer not in the manual?
Questions and answers