Table of Contents
Advertisement
Quick Links
Advertisement
Table of Contents

Summary of Contents for MiCam High Definition Video Camera
- Page 1 All-in-one type Full HD sports camera with 2.0” screen...
-
Page 3: Table Of Contents
Table of contents Getting Started Preface Product Assurance Product overview Main unit Basic Operations Installing the battery Installing the Micro SD card Recording instructions Start/stop recording via wired remote Start/stop recording automatically by power-on wired remote Picture shooting instructions Playback instructions Output Connection Connect to external MIC Connect to HD TV via HDMI... - Page 4 Table of contents SYSTEM SETTINGS Setting Operational Approach Resolution Setting Quality Setting White Balance Setup AE Meter Mode Record Mode Setting Split Mode Setup Record Overwrite Setting Car Mode Stop Recording Delay Setup Motion Detection Setting External MIC VOL Setting Internal MIC VOL Setting Beep Sound Setting Laser...
-
Page 5: Getting Started
Getting Started PREFACE Thank you for purchasing the high resolution digital camcorder. The camcorder is a small, all-in-one design that is convenient for you to record activities anytime and anywhere. With the high speed dynamic photograph function, it can clearly record any activity, and let you share the experience with anybody. -
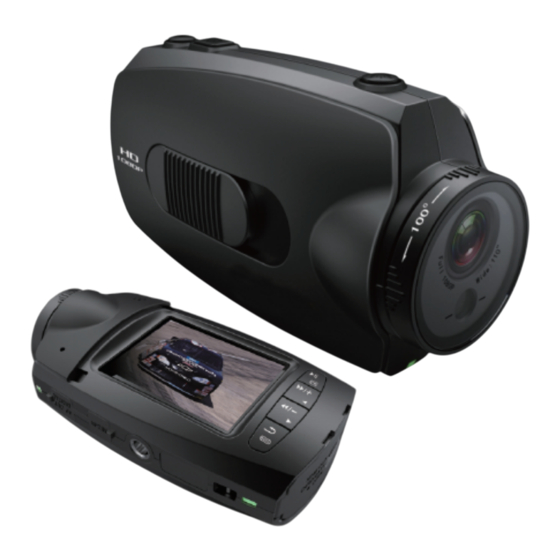
Page 6: Main Unit
Getting Started PRODUCT STRUCTURE MAIN UNIT 1. Lens 2. Laser 3. Photo shutter 4. [ ] Power Press and hold for 2 seconds to power on or power off the Cam 5. Recording switch 6. Laser button 14. Lock of the rear cover 7. -
Page 7: Basic Operations
Basic Operations Installing the Battery 1. Slide the lock on the rear cover and it will open automatically. (Refer to picture1) 2. Follow the instructions. Insert the battery with the correct Polarity (+/-). (Refer to picture2) 3. Push the rear cover closed. (Refer to picture3) Picture1 Picture2 Picture3... -
Page 8: Recording Instructions
Basic Operations Recording Instructions 1.Press [ ] key and hold for 2 seconds to power up the camera. 2. Adjust the lens to the proper angle. a) Face a blank surface and press [ ] to turn on the lasers ( The lasers will disappear in 15 seconds). -
Page 9: Start/Stop Recording Via Wired Remote
Basic Operations Start / stop Recording Via Wired Remote Press [ ] key ( hold for 2 seconds ) to power up the camera. 1. Connect wired remote to the DIGITAL interface of camera (Refer to picture 1) 2: Press REC key on the wired remote to start recording, recording indicator ( red ) turns on and ashes when it is recording. -
Page 10: Picture Shooting Instructions
Basic Operations Picture Shooting Instructions In standby mode , press [ ] key to take photos. (Refer to picture1) Picture Resolution: 5 mega pixels Picture Size: 2560 x 1920 Picture1 Playback Instructions 1. Playback on the camera a)Press and push the screen cover backwards to open it. (Refer to picture1) b)Gently press [LCD] key , and the screen will come on. -
Page 11: Output Connection
Output Connection Connect external MIC Connect MIC device to camera for capturing higher quality audio. MIC-IN Picture1 Connect to HD TV via HDMI Connect HDMI cable to HDMI interface on the camera and HDMI interface of TV. The LCD will turn off automatically when connected to TV. (Refer to picture2) HDMI MIC-IN HDMI... -
Page 12: Connect To Pc Via Usb
Output Connection Connect to PC via USB Connect USB to the Digital interface of camera and USB port on the PC. (Refer to picture1) MIC-IN Picture1 Connect to power source 1. Connect the power line to DIGITAL interface of camera, power light (Red) is on when it is connected. -
Page 13: Mount Installation
Mount Installation Cradle Tripod thread Tripod thread Note: 1) Other mounts require this cradle for installing 2) Tripod thread on device and cradle Bar Mount Bike bar 3 × Rubber Insert Bar Mount Ruber insert to adapt different bike bar Note: please choose the proper rubber insert of different thicknesses. -
Page 14: Surface Mount
Mount Installation Surface Mount Cradle Lanyard Helmet Flat Mount 3 × surface Mount Step 3: paste the camera to your helmet Step 1: push surface mount to cradle Step 2: peel off the sticker Note: 1) Please clean the surface carefully before pasting. 2) Push the stick hard on the helmet. -
Page 15: Goggle Strap Mount
Mount Installation Goggle Strap Mount Main Mount Goggle Lanyard Goggle Strap Mount Step 1: install mount to goggle Step 2: push the device with main mount to the mount Step 3: to secure the camera,use the lanyard as step3 Suction Cup Choice A Choice B Screw the suction cup to the... -
Page 16: Waterproof Case
Mount Installation Waterproof Case Note: 1) Before loading the device into the waterproof case, please slide switch of recording, and note the direction of device. 2) After loading device into waterproof case, please lock it. 3) Press the button of power to start recording... -
Page 17: System Settings
System Settings Setting Operational Approach Press[MODE] to switch into system function settings mode. 1: Press [▲][▼] key to shift the yellow cursor, choose the setting function, press [OK]key to set up. 2. Press [▲][▼] key to choose the needed function, press[OK]again. Press[MODE]to switch into system function settings mode. -
Page 18: White Balance Setup
System Settings White Balance Setup Choose different white balance value under different conditions. Default is AUTO. AUTO ● D4000 ● D5000 ● Sunny ● Cloudy ● Fluorescent ● Incandescent ● AE Meter Mode Choose different light metering mode Default is Average. Average ●... -
Page 19: Stop Recording Delay Setup
System Settings Stop Recording Delay Setup System will stop recording after [delay time]. It will be triggered when you turn off the car. (With the optional enhanced wired control) 10 SEC 30 SEC 1 MIN ● ● ● Motion Detection Setting Start MOTION DETECTION function, it will delay [TIME] to stop recording after the object leaves the shooting range. -
Page 20: Tv Type Setting
System Settings TV Type Setting NTSC ● ● Choose the correct video output system when connecting AVOUT to TV. The image on the TV will be flickering if the TV system is incorrect Video Rotation Setting STANDARD ● Choose this setting when the camera is installed in the normal position. INVERTED ●... -
Page 21: Auto Night Mode
System Settings Auto Night Mode When it is dark, the camcorder will enter into night mode automaticly. The picture will be brighter than normal, and there will be a symbol on the screen. Movie Recorvery If the battery(or card) comes out accidently, just put the battery(or card) back and recover the movie. -
Page 22: Dvr Spec
Specifications DVR Spec Hardware Software Digital Screen Loop Recording 2.0" 960×240 TFT LCD Recording Motion Detection Format Real time stamp Codec H.264 1920X1080(30/25 fps) Record Type:PAL/NTSC 1440X1080(30/25 fps) Internal Mic volume setting Recording Resolution 1280X720(30/25 fps) External Mic volume setting Snap Shot Function in Preview/ 848X480(60/50 fps) Record/Playback mode... -
Page 23: Accessories
Accessories Package content 1 x HD96 camera 1 x AV cable 1 x Cradle 1 x USB cable 1 x Gogle strap mount 1 x Battery 3 x Surface mount 1 x External microphone 1 x Bar mount 1 x Carry pouch 1 x Vented helmet mount 1 x Quick installation guide 1 x Wired control... - Page 24 All-in-one type Full HD sports camera with 2.0” screen...
Need help?
Do you have a question about the High Definition Video Camera and is the answer not in the manual?
Questions and answers