Table of Contents
Advertisement
Quick Links
>
dnp denmark as
>
Phone +45 4616 5100
Skruegangen 2
Fax
DK-2690 Karlslunde
www.dnp-screens.com
Denmark
dnp@dnp.dk
+45 4616 5200
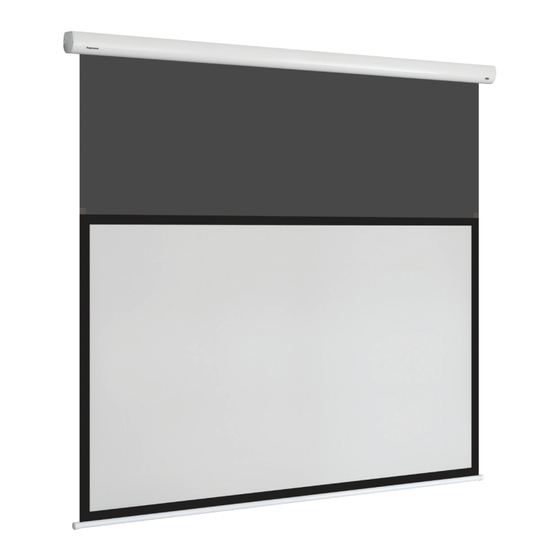
dnp Supernova™
dnp optical front
projection screens
Content:
Safety instructions
What is in the box
Screen installation on wall
Screen installation on ceiling
Installation of remote controls
User guide
Service guide
Flex Classic
Installation guide
2-4
5
6-7
8-9
10-11
12-14
15
Advertisement
Table of Contents

Summary of Contents for DNP Supernova Flex Classic
- Page 1 Supernova™ Flex Classic Installation guide dnp optical front projection screens Content: Safety instructions What is in the box Screen installation on wall Screen installation on ceiling Installation of remote controls 10-11 User guide 12-14 Service guide > dnp denmark as >...
-
Page 2: Safety Instructions
Be sure that the wall studs or other mounting fixtures are suitable for mounting the screen > Be sure that the screen is mounted correctly and securely to the wall or the dnp warranty will be invalidated > If the mains plug, extension cord, appliance inlet or power strip is used as the disconnect device, the disconnect device must remain readily operable >... - Page 3 Assurez-vous que le matériel d’installation correspond bien à la nature du support et des vis de fixation. > Assurez vous que l’écran est installé correctement et solidement au mur ou la garantie dnp sera invalidée. > Si la prise secteur, le cordon, l’alimentation de l’appareil ou la barrette d’alimentation sont utilisés comme dispositifs de déconnexion et doivent être facile à...
- Page 4 Les batteries (bloc de batteries ou batteries installées) ne doivent pas être exposées à une chaleur excessive telle que celle du soleil, d’un feu ou d’origine similaire. Caution: Changes or modifications not expressly approved by dnp denmark as make the product unsafe to use and will void the dnp denmark as warranty.
-
Page 5: What Is In The Box
Installation guide dnp Supernova™ Flex Classic What is in the box? Screen case Plate.A (x2) Plate.B ( Screen Plate (Preins the top of scre Remote Control Screw.D (x4) (4x8 mm) Screw.E (x4) (4x5 mm) Screw.F (x10) (4x30 mm) Plate.A (x2) Plate.B (x2) -
Page 6: Screen Installation On Wall
Wall Installation guide dnp Supernova™ Flex Classic Screen installation on wall (For installation on ceiling, please go to page 8) Make sure that you are at least two people to do the screen installation. Attach Plate.A to the wall using appropriate fasteners (Screw.F can be used). - Page 7 Installation guide dnp Supernova™ Flex Classic Attach the screen case to the wall by sliding Plate.B (mounted on the screen case) onto Plate.A (mounted on the wall). Install Screw.G and tighten securely. Screw.G Plate.A Plate.B Screw.G Screen case Screw.F ew.F...
-
Page 8: Screen Installation On Ceiling
Installation guide dnp Supernova™ Flex Classic Screen installation on ceiling Make sure that you are at least two people to do the screen installation. Front Attach Plate.A to the ceiling using appropriate fasteners (Screw.F can be used). Measure the length of the screen case and install the plates far enough apart so that the plates will be near the ends of Plate.A... -
Page 9: Dnp Supernova
Installation guide dnp Supernova™ Flex Classic Attach the screen case to the ceiling by sliding Plate.B (mounted on the screen case) onto Plate.A (mounted on the ceiling). Install Screw.G and tighten securely. Screw.F Ceiling Slide Plate.A te.A Plate.B Screw.G Screw.G Screen case Install two safety wires with the safety screws into Plate.C and into the ceiling with Screw.F or other appropriate screw. -
Page 10: Infrared Sensor
Remember to direct the front of the IR sensor to the front of the screen. The front of the IR sensor has a dnp logo. See later section on how to use the remote control. Front... -
Page 11: Electrical Connection
Installation guide dnp Supernova™ Flex Classic Electrical connection dnp Supernova Flex Classic Screens are available with two different voltages power supplies depending on the requirement where it will be used. The following chart indicates the wire colours used. Version 110V... -
Page 12: Using The Remote Control
This may lead to permanent damage of the screen material. This is NOT covered by the dnp warranty. When the screen is in the desired position, press and hold the Middle button (4) -
Page 13: Adjusting Screen Tension
This may lead to the bottom bar separating from the screen fabric over time. This is NOT covered by the dnp warranty. When the screen is in the desired position, press and hold the Middle button (4) untill a beep is heard. - Page 14 Installation guide dnp Supernova™ Flex Classic How to pair motor and IR remote control Press the small white motor Press the small white motor Within 5 seconds after step 2: Press programming button until the 3rd beep programming button until the 1st beep is...
-
Page 15: Maintenance
Maintenance To clean your dnp screen, use a clean damp soft cloth and dry with a clean soft cloth. If your screen is extremely dirty use a mild detergent diluted in water in a clean damp soft cloth. Use a clean damp cloth with water only to remove any detergent residue.
Need help?
Do you have a question about the Supernova Flex Classic and is the answer not in the manual?
Questions and answers