Advertisement
Quick Links
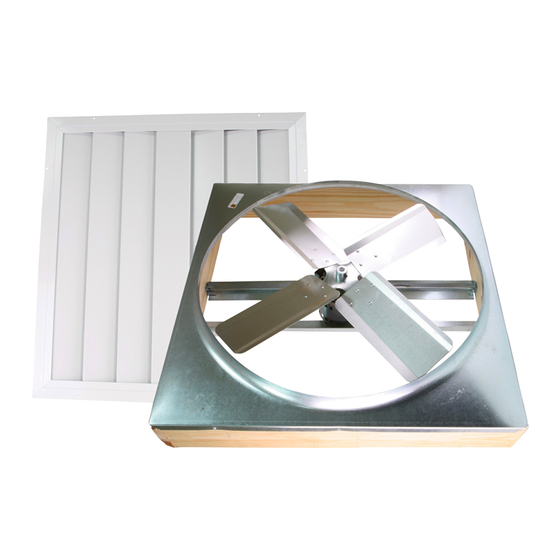
INSTALLATION INSTRUCTIONS
Models:
CX242DDWT, CX302DDWT, CX24BD2SPD, CX30BD2SPD, CX36BD2SPD
Read all warnings and instructions before beginning to install this fan.
FAILURE TO FOLLOW THESE INSTRUCTIONS COULD RESULT IN INJURY OR EVEN DEATH
1. Do not attempt to use this fan with any speed control device.
2. Use this unit only in the manner intended by the manufacturer. If you have any
questions, contact the manufacturer.
3. Before servicing or cleaning this unit, switch power off at the service panel and
lock out to prevent power from being switched on accidentally. When service
disconnecting means cannot be locked, securely fasten a prominent warning
tag to the service panel.
4. Installation work and electrical wiring must be performed by a qualified person
in accordance with all applicable codes and standards, including fire-rated
construction.
5. When cutting or drilling into a wall or ceiling, do not damage electrical wiring
and other hidden utilities.
6. The combustion airflow needed for safe operation of fuel-burning equipment
may be affected by this unit's operation. Follow the heating equipment
manufacturers guideline and safety standards such as those published by the
National Fire and Protection Association (NFPA), and the American Society for
Heating, Refrigeration and Air-conditioning Engineers (ASHRAE), and the local
code authorities.
DOUBLE CHECK FAN BLADES ARE SECURE TO HUB PRIOR TO
INSTALLATION. BLADES CAN BE DAMAGED DURING SHIPMENT AND
CAN BECOME A HAZARD UPON ACTIVATION OF MOTOR!
1. This unit has an unguarded propeller. Do not use in locations readily
accessible to people or animals.
2. For general ventilating use only. Do not use to exhaust hazardous or
explosive materials and vapors.
3. Carbon monoxide is an odorless, colorless gas that can kill. It may
be drawn into the house by operating this fan if your fuel-burning
equipment is not properly maintained, or if you lack adequate attic
100 WASHINGTON STREET, MINERAL WELLS, TX 76068-0728
PHONE: (800) 433-1626 - FAX: (940) 325-9311 - www.bvc.com
FOR
WHOLE HOUSE FANS
CAUTION
VENTAMATIC, LTD.
-1-
Advertisement

Related Manuals for Ventamatic CX242DDWT


Summary of Contents for Ventamatic CX242DDWT
- Page 1 INSTALLATION INSTRUCTIONS WHOLE HOUSE FANS Models: CX242DDWT, CX302DDWT, CX24BD2SPD, CX30BD2SPD, CX36BD2SPD Read all warnings and instructions before beginning to install this fan. FAILURE TO FOLLOW THESE INSTRUCTIONS COULD RESULT IN INJURY OR EVEN DEATH 1. Do not attempt to use this fan with any speed control device.
-
Page 2: Installation Instructions
INSTALLATION INSTRUCTIONS VERY IMPORTANT Please read before attempting installation The wooden fan frame is installed on top of the joists, and the shutters open up between the joists, so the rough opening will be smaller than the fan frame size SHUTTER ROUGH OPENING (L x W) 24-in 28 x 26... -
Page 3: How Do They Work
SQUARE HOW DO THEY WORK? FOOTAGE OF MINIMUM NFA LIVING AREA, OR (NET FREE AREA) FAN SIZE Whole House Fans are designed to pull in fresh, ATTIC SIZE IF EXHAUST MULTI-STORY REQUIRED cool air from the outside through open windows in the living space. - Page 4 PREPARE THE SHUTTER OPENING Remove all insulation from the attic floor above the installation site (be sure to take proper precautions — wear gloves, goggles, and respirator mask). Select the correct rough opening dimension from the chart. FAN SIZE SHUTTER ROUGH OPENING 24-in 28 x 26 30-in...
- Page 5 CUT THE CEILING JOIST (SKIP THIS STEP IF YOU ARE USING THE JOIST-IN METHOD.) BEFORE cutting the ceiling joists, it is best to stabilize the joists from which you are removing a section. Using 2 x 6 lumber, form a bridge across the joist on either side of the opening.
- Page 6 PREPARE AND INSTALL THE FAN ASSEMBLY IMPORTANT: Your new whole house fan is packed to prevent shipping damage. Before installing the fan in your attic, it must be prepared as follows. Belt Drive Models Direct Drive Models The motor is mounted to the underside of the For easiest installation, remove the fan blade in •...
-
Page 7: Wiring Instructions
WIRING INSTRUCTIONS WARNING: Before proceeding with this step, disconnect the power supply at the service entrance, or switch off the appropriate circuit breaker. *Note* All wiring supplies and installations must meet or exceed the requirements of local electrical and fire codes. Wire to 120 Volt, 60 Hz. circuit only, using 14-3 two-conductor wiring with ground. - Page 8 Customer must bear all other expenses incurred, including labor required for field repair or replacement, and cost of return shipping of the defective part or component to Ventamatic. Customer must also bear the cost of replacement of any part or component and the shipping charges incurred for the replacement and return of any part or component not covered by this warranty, including parts or components damaged by customer.