Table of Contents
Advertisement
Quick Links
Download this manual
See also:
Administrator's Manual
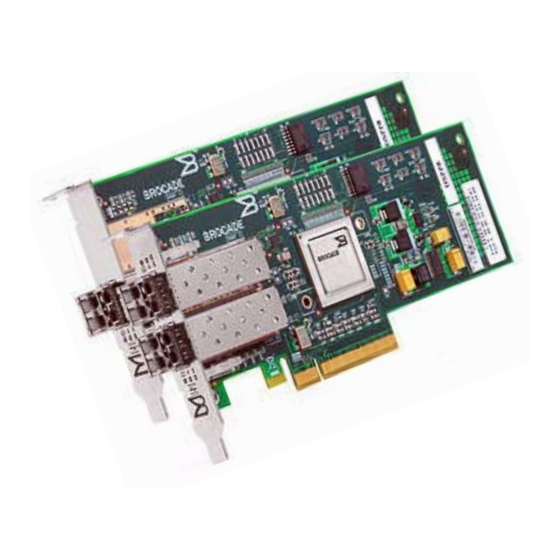
Brocade Host Bus Adapter
Quick Installation Guide
Models 825, 815, 425, and 415
Welcome!
Thank you for purchasing a Brocade
Adapter (called "Brocade HBA" in this guide). These HBAs provide reliable,
high-performance host connectivity for mission-critical Storage Area Network
(SAN) environments. Available models are listed below.
Model
Brocade 825
Brocade 815
Brocade 425
Brocade 415
1.
An 8 Gbps SFP+ installed in Brocade 425 or 415 HBAs allows 4 Gbps or
2 Gbps only.
NOTE
Install only Brocade-branded SFPs in these HBAs.
®
Fibre Channel (FC) PCIe Host Bus
Port Speed
8 Gbps maximum
8 Gbps maximum
1
4 Gbps maximum
1
4 Gbps maximum
Number of Ports
2
1
2
1
Advertisement
Table of Contents

Related Manuals for Brocade Communications Systems 825

Summary of Contents for Brocade Communications Systems 825
-
Page 1: Quick Installation Guide
Brocade Host Bus Adapter Quick Installation Guide Models 825, 815, 425, and 415 Welcome! ® Thank you for purchasing a Brocade Fibre Channel (FC) PCIe Host Bus Adapter (called “Brocade HBA” in this guide). These HBAs provide reliable, high-performance host connectivity for mission-critical Storage Area Network (SAN) environments. -
Page 2: Preparing The Host System
Brocade HBAs allow a host system to connect to a Fibre Channel SAN in a switched fabric or point-to-point topology. The combined high performance and proven reliability of a single-ASIC design makes these HBAs ideal for connecting ® hosts to SAN fabrics based on Brocade Fabric OS (FOS) or Brocade M-Enterprise OS (M-EOS). -
Page 3: Esd Precautions
Remove the blank bracket panel that covers the PCIe slot in which you want to install the HBA. If the panel is secured with a screw, remove the screw and save it for securing the HBA bracket panel back into the slot. NOTE Install HBAs in PCI-Express slots using an x8 lane transfer interface or greater for best performance. - Page 4 Pull out the protective rubber plug from the SFP connector. Using your thumb and forefinger, unlatch the bail from the side of the fiber optic cable connector and pull it straight out. Arrows stamped on the bail mark the location where you unlatch it.
- Page 5 Insert the HBA into the desired empty PCIe bus slot. Press firmly until the HBA is seated. Screw Press Here Press Here SFP Receivers PCI Express Edge of X8 Slot Host Board Secure the HBA’s mounting bracket to the case using the method required for your case.
-
Page 6: Installing Software
Connect the HBA to the fabric. NOTE Use only multimode fiber optic cable with LC connectors to connect the HBA to the fabric. For information on maximum distances supported by fiber optic cable types, refer to the “Specifications” chapter of the Brocade HBA Installation and Reference Manual. -
Page 7: Important Notes
Important notes • The procedures in this section assume that the host’s operating system has been installed and is functioning normally. • When installing the bfa_driver_linux-<version>.noarch.rpm driver package on Linux SLES 10 SP2 and SLES 9 SP4 systems, make sure that the LOAD_ UNSUPPORTED_MODULES_AUTOMATICALLY variable on your system is set to “yes,”... - Page 8 Procedure Obtain software from the Brocade HBA web site at www.brocade.com/hba using one of these options: • Download the appropriate HBA Software Installer for your host system: bfa_setup_windows_<version>.exe (Windows) bfa_setup_linux_<version>.bin (Linux) bfa_setup_<solaris version>_platform>_<version>.bin (Solaris) • Download an ISO 9660 (.iso) optical disk image from the Brocade HBA web site.
- Page 9 • Default configurations. The installer upgrades the software and loads with default configurations. When the Choose Install Set screen displays, select which software you want to install, and select Next. NOTE The Choose Install Set and Choose Install Folder screens will not display if you are upgrading from an older version of the software.
- Page 10 9. When the following screen displays, select either OK to start the HCM Agent or Don’t Start. If you select Don’t Start, note the instructions on the screen to manually start the agent on Linux, Solaris, and Windows systems after you complete software installation. You can also find instructions to manually start the agent in the Installation chapter of the Brocade HBA Installation and Reference Manual.
- Page 11 13. If a message or screen displays instructing you to restart or reboot the system, perform the action indicated. NOTE Reboot Solaris systems. A message will not display prompting you to reboot or restart. 14. Verify driver installation through tools available on your host system. Refer to the “Confirming Driver Package Installation”...
-
Page 12: Additional Resources
Brocade, Fabric OS, File Lifecycle Manager, MyView, and StorageX are registered trademarks and the Brocade B-wing symbol, DCX, and SAN Health are trademarks of Brocade Communications Systems, Inc., in the United States and/or in other countries. All other brands, products, or service names are or may be trademarks or service marks of, and are used to identify, products or services of their respective owners.
Need help?
Do you have a question about the 825 and is the answer not in the manual?
Questions and answers