Table of Contents
Advertisement
Quick Links
Advertisement
Table of Contents

Subscribe to Our Youtube Channel
Related Manuals for Xtreamer e-TRAYz

Summary of Contents for Xtreamer e-TRAYz
-
Page 2: Table Of Contents
Contents Overview ..................................6 Xtreamer e-TRAYz Info............................7 Major Functions ..........................................7 Storing and Sharing Files via the e-TRAY ................................ 7 ....................Transferring data and Forwarding links via the RapidBox ......................Syncing Folder between sysadmin via SyncFolder ..................Downloading Entertainment data via e-Downloader/e-Torrent ........................ - Page 3 Settings ..................................29 Access to e-TRAYz Home ......................................29 Disk and Volume Management....................................29 RAID mode changing ......................................29 Adding New disk ........................................31 Using as External Disk ......................................34 Power ..............................................36 Auto Shutdown ........................................36 HDD Sleep mode ........................................36 Upgrade Firmware ..........................................
- Page 4 Linkmail ............................................59 Linkcopy ............................................60 Share .............................................. 61 Sharing options ........................................65 Unshare ............................................66 RapidBox .................................. 67 File Upload ............................................68 Recent Upload ..........................................69 Allow Guest access ......................................... 70 e-Downloader................................71 File Download ........................................... 72 Extract ..............................................73 Download Option ..........................................
- Page 5 Viewing the list of Torrent Files ..................................88 Torrent Site Registration...................................... 89 Torrent Search ........................................... 91 Torrent Download ........................................... 92 File Download by using ‘Torrent RSS’ and ‘Torrent Search’ ......................92 File Download by using Torrent File Registration ..........................93 ETC ....................................
-
Page 6: Overview
Overview This USER GUIDE covers all major functions and management of Xtreamer e-TRAYz. Please refer to Online Guide for further details. Online User Guide : http://www.eunicorn.co.kr/eTRAYz/manual/1.0.0/kr/user/manual.html Online Settings Guide : http://www.eunicorn.co.kr/eTRAYz/manual/1.0.0/kr/settings/manual.html... -
Page 7: Xtreamer E-Trayz Info
Transfering data and Forwarding links via the RapidBox Users can easily upload files onto e-TRAYz as well as to send a linkage of the file to others using RapidBox. If guest receive permission, the guest can transfer files to e-TRAYz’ owner without user account on login browser. -
Page 8: Website Hosting
Xtreamer e-TRAYz allows you to host website with Apache and PHP supported. USB Print Server You can share USB 2.0 Printers through the LAN. USB Copy The built-in ‘Copy’ button on the device allows instant copy of files from the USB device to Xtreamer e-TRAYz. -
Page 9: Specification
Synch Folder shared with me SyncFolder Scheduled Synch Friend Management e-TRAYz Disk for admin’s private space. Admin can share sub- folders with users Private Disk for users’ private space e-TRAYz Connector Public Disk for sharing with local devices and USB auto copy... - Page 10 Disk connect/disconnect e-TRAYz Disk for admin’s private space. Admin can share sub- folders with users Private Disk for users’ private space Public Disk for sharing with local devices(media player, game device, settop box etc.) and USB auto copy e-TRAYz Web File manager...
-
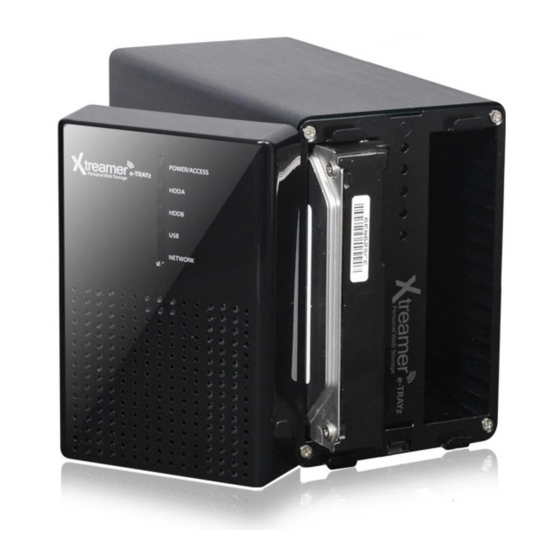
Page 11: Appearance
Appearance... - Page 12 Description Front Display status of system, internal hard disk, USB device and so on. The fan is built to exhaust waste heat out of Xtreamer e-TRAYz. It Rear will start automatically when the server starts. Pressing the button will copy the data from the connected USB...
-
Page 13: Led
Color Status Description Turned on Connected power Power/Access BLUE Blinking Data read and write at HDD Turned off Disconnected power Turned on Disconnected or abnormal status of HDD A/B HDD A/HDD B Turned off At normal status of HDD A/B Cyclic Blinking Installing software or not installed the software YELLOW... -
Page 14: Disk Bay
Disk Bay Disk Description HDD A The disk slit on the Front-right side. When you use only one disk, please insert here. HDD B The disk slit on the Front-left side. -
Page 15: Xtreamer E-Trayz Settings
After installing software, you can setup default settings using Setup Wizard. At initial setup, you must complete all steps to use the Xtreamer e-TRAYz. The Setup Wizard automatically runs after login, and you can change the settings at any time Disk You can view information and status of the disk on the system and setup RAID mode. -
Page 16: Server Name
Server Name Server name is displayed when searching equipment with iTunes, network drive or UPnP. Enter alphabet, numbers, ‘_’ or combination of those. Click ‘Apply’ button to save the set information. Administrator Information Set information of administrator. Input sysadmin's password, e-mail address and name. The ID of Administrator cannot be changed. -
Page 17: Mail Server
If mail server is not set, mail-related functions, such as Link mail or alarm mail, etc, are not activated. Please set your mail server for useful e-TRAYz. After mail setting, click ‘sending test mail’ and verify that mail sent correctly. -
Page 18: Port
Set service port. You can set Web port, e-TRAYz authentication port and e-torrent port. When you use router, each service port of router must be opened to access e-TRAYz through the internet. Setup e-TRAYz Home port and e-TRAYz homepage port. Default port of e- Web port TRAYz Home port is 8080, and of homepage is 8000. -
Page 19: Router
Router Router setup is used to grant internet users access to an e-TRAYz on your network. ※ This step can be skipped if you are not connected to the Internet via a router. ※ Not all routers provide these functions. Different router models may use different terminology. For more detailed information, refer to the router’s manual. - Page 20 Router Setting - Connect the e-TRAYz to a router or modem via a LAN cable. - Select one of two following options. Using router's UPnP function. (1) Login to your router and activate the UPnP function. (2) Log out. (3) Login to e-TRAYz main menu page and go to [Setup Wizard]-[Router] menu.
-
Page 21: Ddns
Notice. At initial setup, you must complete all eight steps above to use a e-TRAYz. Even without changes on each pages, click ‘Apply’ button to complete all of the settings. When you use router, it must be set to access Xtreamer e-TRAYz via the internet. -
Page 22: Internet Connection
Internet Connection Example of Internet Connection with a Router Step 1. Configuration IP address of e-TRAYz : 192.168.0.12 Port Number used by e-TRAYz Function Protocol Port Number Private Homepage 8000 e-TRAYz Home 8080 e-TRAYz Connector 443, 13196 e-Torrent 6890~6900 SyncFolder 20, 21 Step 2. - Page 23 Using DMZ - Enter 192.168.0.12 to IP input box (router setting) - Enter 192.168.0.12 to IP input box. Using Port Forwarding - Enter 8000, 8080, 443, 13196, 6890~6900, 873, 22, 20, 21 to port input (Virtual Server) box. (router setting) - Enter TCP to protocol input box.
-
Page 24: Example Of Router Setup
(admin) and your password (leave blank). 2. Click the Advanced tab and then click on the DMZ button. 3. Select Enable and type in the IP address of the Xtreamer e-TRAYz you want to use as DMZ host. 4. Click Apply and then Continue to save the changes. - Page 25 (admin) and your password (leave blank). Click the Advanced tab and then click Virtual Server button. Enter the Name for your virtual service. Enter the Private IP of the Xtreamer e-TRAYz on the LAN network that will be providing the virtual services.
- Page 26 Click the DMZ menu and select the Enable button on Applications/gaming pages. Enter the IP address of Xtreamer e-TRAYz you want to use as DMZ host. Click Save Settings and then continue to save the changes. Virtual Server...
- Page 27 2. Click the WAN Setup menu and then click the Default DMZ Server check box. 3. Enter the IP address of the Xtreamer e-TRAYz you want to use as DMZ host. 4. Click Apply and then Continue to save the changes.
- Page 28 1. Open your web browser and enter the IP address of your router. Enter username (admin) and your password (password). 2. Click the Port Forwarding/Port Triggering menu. 3. Choose the Port Forwarding. 4. Click the Add Custom Service button. Enter the service name in the Service Name. Enter the beginning port number in the Starting Port.
-
Page 29: Settings
Settings You can manage all of your Xtreamer e-TRAYz setting at ‘Settings’ page. Each page provides comments to help management and you can find more information with ‘Settings’ manual. Access to e-TRAYz Home Open the Web browser. Enter http://Xtreamer e-TRAYz IP address(or Domain):8080/. - Page 30 Click Configuration Change button and move to Setup wizard to change disk configuration. Click Configuration Change button on the bottom of page. Choose RAID Mode changing and click Next button. Check current RAID Mode. If current RAID mode is Linear, you can change mode to RAID 1.
-
Page 31: Adding New Disk
Check changes again, and click OK button. RAID changing will be started. Adding New Disk You can add a disk such as Additional Disk or Single Disk to current RAID configuration. If you add a disk to current RAID configuration, all data of existing disk are remained and new disk's are deleted. RAID 1 ->... - Page 32 Check current RAID mode and Disk capacity. Click button, configuration changing will be started. 2) Add a disk to RAID : Linear -> RAID 1 or RAID 1 -> Linear If you want to change RAID mode after adding a disk, first of all, add disk to current RAID configuration, then change the RAID mode.
- Page 33 Check current RAID mode and Disk capacity. Click button, configuration changing will be started. When the changing is over, log in again and run Setup Wizard. Click Configuration Change button on the bottom of [Disk] page. Choose RAID Mode changing and click Next button.
-
Page 34: Using As External Disk
Check changes again, and click OK button. RAID changing will be started. Using as External Disk(not including to RAID) You can use an additional disk as external disk. The External Disk will be added to RAID configuration later. Click Configuration Change button and move to Setup wizard to change disk configuration. - Page 35 Determine whether to format or not, and click OK button. Using after formatting : Disk will be formatted. All the partitions and data in the disk will be cleaned. If your HDD is new and not formatted, please format it first.
-
Page 36: Power
Move to [Settings] – [System] – [Power] page. Choose Auto Shutdown Activation and setup time. HDD Sleep mode HDD Sleep Mode allows you to turn the hard disk off while you're not using e-TRAYz. This mode can save electrical consumption and noise of hard disk. -
Page 37: Upgrade Firmware
Check current firmware version and recent upgrade date. Set directory for firmware download and the new files are saved automatically when you download firmware files. Default directory for firmware download is e-TRAYz Disk/ New_Firmware_List. Users can change download folder what they want. -
Page 38: Reset
System will be initialized as a factory default. All configuration including user account will be initialized and all data will be removed. e-TRAYz software should be re-installed after factory reset. Configuration Reset Disk settings and user account information(data) are retained and the following configuration information is initialized. -
Page 39: Router Setup Using Upnp
Router Setup using UPnP When you use router, you need to setup router to access e-TRAYz via the internet. When you use the router’s UPnP function, port can be simply set without complex setup such as DMZ or Port forwarding. - Page 40 D. Input the desired port number in each service to be used. If you want to use the default values, you don’t have to enter values. Select the check box and click the Change Setup button. You can apply one at a time. If the ‘Current state’...
-
Page 42: Backup & Recovery Firmware
Check current firmware version and recent upgrade date. Set directory for firmware backup and the backup files are saved automatically when you run backup the firmware. Default directory for firmware backup is e-TRAYz Disk/ Firmware_Backup. The Firmware Backup Folder will be create automatically when you backup. - Page 43 If you want to restore, click Recovery button on the right side of a file name. forget that the firmware version of backup files and current firmware version are must be the same. You can store Backup files on your PC to click file name and recover later. Click Delete button if you want to delete useless backup files.
-
Page 44: File Storage & Sharing
File Storage & sharing are the most important function of Xtreamer e-TRAYz. Users can easily save and share files within the Intranet or through the Internet using ‘e-TRAYz’. Especially, Windows users can easily use e-TRAYz’ Disk just like Network Drive through the Internet. -
Page 45: System Folder
System Folder Xtreamer e-TRAYz provides ‘System folder’ which are created by default for specific features such as auto copy, e-Downloader, RapidBox and so on. There is no right to delete at ‘e-TRAYz web’. System Folder Location Description It is a folder which stores the uploaded file by using... -
Page 46: E-Trayz
Windows explorer at internal network environment and external internet environment. * e-TRAYz is allowd on Windows 2000, 2003, XP, Vista, and Windows7 environments. The e-TRAYz edition for MAC OS X will be supported later. -
Page 47: Run E-Trayz
Run e-TRAYz Double click the e-TRAYz icon created on desktop after installation e-TRAYz connector. Input IP address of e-TRAYz Disk to connect and password created after install, and then click login button. (If you click 'save ID' and 'Auto Login', you can conveniently login next time.) - Page 48 ‘Private Disk’ is basically connected. User can select both drive’s name. [When user account access] click 'Connect' button, disk connection is completed with announcing by connection sound. It can be found that Xtreamer e-TRAYz is connected to a network drive.
-
Page 49: Disk Using
Disk Using Since e-TRAYz is connected as like network drive style, you can use it as like hard disk drive, such as C:\ or D:\ on local computer. NOTICE) General users who are not e-TRAYz owner (or system administrator) can access e-TRAYz with access authority (such as, read only or read/write) set up by owner. -
Page 50: Disk Disconnect
If you click 'Connect' button after releasing Public Disk or External Disk on check box, the connection of disk is released. e-TRAYz does not allow this release style for e-TRAYz Disk. Release it directly on Window Explorer Click right mouse button on the disk connected as a network drive at Explorer. -
Page 51: Setting
Set up login environment You can save ID account on Connector. If you check 'Auto login', e-TRAYz will be automatically logged in from next time. If you check 'Auto run when windows starts', disk will be automatically connected from next PC booting. -
Page 52: Share
Share e-TRAYz allows to connect disks on Windows as well as to share folder on the disk among users. The folder on e-TRAYz Disk among connected disks is set up sharing authority by selecting one between 'Read' or 'Read/Write' options. - Page 53 An unregistered user case When a user is registered on Web browser, user's 'Members' list is created on right side of e-TRAYz window. If you click user ID on 'Members' list, the user ID is automatically listed on 'Enter user ID or E-mail address' field.
- Page 54 If a New user is created with e-mail, you can find user account info. e-TRAYz will send sharing information for the folder to users via e-mail. Sharing Setup on Publick Disk All users are allowed to use the shared folder on Public Disk with 'Read/Write' privilege.
-
Page 55: Sharing Options
You can directly alter sharing information, such as access privileges and user setup, on Windows. Click right mouse button on the shared folder will be altered. After over mouse on e-TRAYz menu, if You click 'Sharing Option' menu on sub-menu 'Sharing Option' option window will be created. -
Page 56: E-Trayz Web
The e-TRAYz web is a functionality to store data into e-TRAYz server as well as to share data with other users by only connecting into Xtreamer e-TRAYz via web at anytime and anywhere, without installing the e-TRAYz Connector. -
Page 57: File Management
When the upload is completed, the upload window is automatically closed. NOTICE) If general user got access privileges as 'Read only' for shared folder from e-TRAYz owner, the user can download file only, not upload files to the folder, change name, move file, nor delete file. - Page 58 When multiple files and folders are transfered, it is automatically compressed and then transfered. Refer to ‘Online user manual’ for more information about ‘Create New Folder’, ‘Move File/Folder’ and so on. You can find Online User Manual at the top of the e-TRAYz web page.
-
Page 59: Linkmail
Linkmail When transmitting a large-sized file to someone else, the Linkmail function is used to forward via mail. To send Email, mail server(SMTP) and DDNS must be set before. Refer to [Settings]-[System]-[Mail(SMTP)] or [Setup wizard]-[Mail Server] for SMTP setup and refer to [Settings] – [System] – [Wired Network] or [Setup Wizard] –... -
Page 60: Linkcopy
Linkcopy By copying the address of the file saved on e-TRAYz, it may be pasted on the bulletin board or web page. After clicking the left button of the mouse on the file name, select the Linkcopy menu. Select Link type what you want. -
Page 61: Share
- A registered user case : When a user is registered on Web browser, user's 'Users' list is created on right side of e-TRAYz window. If you click user ID on 'Users' list, the user ID is automatically listed on 'Enter user ID or E-mail address' field. - Page 62 ) is altered into shared folder icon( When user account is created, confirm window is opened. e-TRAYz will send sharing information for the folder to users via e-mail. (To send e- mail, mail server and DDNS must be set up before.)
- Page 63 Setup on e-TRAYz Disk Move into 'Share this folder' area on right of e-TRAYz Disk or Public Disk. Set up privileges for shared folder. When you set up it as 'Read only', other users except owner of the folder can download only.
- Page 64 ID on this field, too. If a New user is created with e-mail, you can find user account info. e-TRAYz will send sharing information for the folder to users via e-mail. Sharing setup on Public Disk All users are allowed to use the shared folder on Public Disk with 'Read/Write' privilege.
-
Page 65: Sharing Options
Sharing Options You can change sharing information, such as access privileges and user setup. Move to shared folder to change. On right side of Windows, You can find that 'Sharing with' list maintains users who share this folder and 'Not sharing with' list maintains users who do not share this folder. If you click 'OK' button after altering 'privileges setup', altering of privileges is completed. -
Page 66: Unshare
Unshare Click a triangle button located on right side of the folder, and then click ‘Unshare this folder’ button. -
Page 67: Rapidbox
RapidBox Rapid Box is the functions to upload a file onto my e-TRAYz as well as to send a linkage of the file to others. By using RapidBox functions, at once, you can do a file upload and a send of link mail. A receiver of the mail can download files during 7 days. -
Page 68: File Upload
File Upload Move to File Upload page and Click 'Add files' button. Select files to upload. You can select at most 20 files and its maximum capacity is 2GB. When you click 'File upload' button, the file transfer is started. When file transfer... -
Page 69: Recent Upload
[Mail Server] page. And DDNS is set up on [Settings] - [System] - [Network] or [Setup wizard] - [DDNS]. Mail receiver can download files located on e-TRAYz server without user account during 7 days. Recent Upload At Recent upload page, you can view the history of RapidBox actions. -
Page 70: Allow Guest Access
Rapidbox field on web login page. The uploaded files are stored on Rapidbox folder in e-TRAYz Disk. This functionality is useful when e-TRAYz owner want to receive some files without giving user account for file sender. If you who are e-TRAYz owner, worry about arbitrary upload from others, you can deactivate the function. -
Page 71: E-Downloader
Megaupload or Rapidshare. If you use e-Downloader function, you can download files onto e-TRAYz without authentication at each download time as well as you can enjoy media file at TV. -
Page 72: File Download
File Download Copy the link of file to download. If you access file download sites, such as warez-bb.org, you can easily find file information on megaupload or rapidshare sites. Attach copied links information onto 'Add Links' field at bellow side of 'Download' page and then click 'Add Links' button. -
Page 73: Extract
The download is started after finishing waiting time. Extract Connect to e-TRAYz connector and then move to eDownloader directory on Public Disk. By using ZIP program, uncompress (or release) number 1 file among separated files which is compressed type. -
Page 74: Download Option
Download Option If you click 'Stop' button on upper side, download is stopped. And then if you click 'Start' button again, download is started beginning step again. When you want to delete a list of particular files, click 'Delete' button. You can delete selected list, completed download list, failed download list and all list. -
Page 75: Settings
Settings Download Setting Default downloaded location is You can set up location to store downloaded file by using e-Downloader. 'Public Disk' - 'eDownloader'. When you check 'Remove completed Downloads' button, if file download is completed on download page, the list is automatically deleted. When you download a file, if the file already exist on folder, you need to select one option among 'Skip', 'Overwrite', and 'Auto rename' Premium Account info. - Page 76 1. Click 'Add Account' on top of Windows. 2. Select a site, and insert ID and password - Now, e-Downloader services Megaupload and Rapidshare site. 3. If you click 'OK' button, the registration is completed.
-
Page 77: Syncfolder
SyncFolder With SyncFolder, you can sync folder to others who have a Xtreamer e-TRAYz. After Registering to 'friend' with IP(or domain) and setting, you and your 'friends' can share and sync folders each other. You can set up a Sync Schedule and synchronize the folders synced with me by using ‘Sync Now' button right now. -
Page 78: Folder I Sync
Folder I Sync You can synchronize your folder to your friends. Sync folder is limited to a maximum of 10. Synchronize Click 'Folder I Sync' menu. Select a folder to sync and input ‘Share name’ field. Click 'Select' button and select friends that they sync your folder. -
Page 79: Sync With More Friends
5. 'Folder I Sync' will behave normally to accept the others. Sync with more friends 1. Click a sync folder you want to share with more friends and then choose 'Sync with more friends' menu. 2. You can view friends list not to shared. Select friends to share and 'OK' button. 3. -
Page 80: Remove Sync
Click a friend you want to release the sync setting and then choose 'Kick out' menu. Remove Sync You can not to rename or changing of directory but remove ‘Folder I Sync’ Click the folder you want to remove 'sync' and choose 'Remove Sync' menu. -
Page 81: Getting Synced
Getting Synced To get synced, friends must be registered each other. Refer to 'Add Friends' in [SyncFolder] menu of this Manual. Getting Synced After adding friends, 1. Click 'Refresh Sync Folder List' in 'Folder synced with me' menu. 2. Click 'Accept' button of the folder synced with me. - Page 82 Select my folder to get synced with friend's folder and click OK button. The status is changing to 'On Standby'.
-
Page 83: Sync Now
Sync Now You can sync some files what you want right now. Click a folder you want to sync and then click 'Sync Now' menu. Only files that are not in my folder are listed. Select files what you want to sync. Click OK button, then synchronization is begun. -
Page 84: Recent Sync Info
Recent Sync Info Click the folder and then click 'Recent Sync Info' menu. You can check recent sync date and the number of synced files. Setup Sync schedule You can set up a Sync Schedule of total folders synced with me. Click 'Folder synced with me' menu. -
Page 85: Changing Syncfolder
Select 'Set up Schedule' of Reserve Process and set up frequency and time. Click OK button. You can see that schedule setting is completed successfully. Changing Syncfolder You can change your folder which is set synchronization with your friend’s folder. Click ‘Change a folder’ menu. -
Page 86: Remove Sync
Remove Sync You can't change sync name and my folder name. However, you can release setting of Sync(the list of synced folders is remained). If you want to delete at the list, request your friends to remove sync setting. Click the folder and then click 'Remove Sync' menu. -
Page 87: E-Torrent
TV. The downloaded file via e-Torrent is stored on ‘eTorrent’ folder in public Disk. You can change download folder at ‘Settings’ page. You can login on e-TRAYz Home(http://Domain or IP address:8080/) and then use it by clicking 'e-Torrent' icon. -
Page 88: Torrent Rss
Mininova and isohunt. With Torrent RSS, users can easily obtain the most recent torrent files without having to visit numerous sites and download media files directly to e-TRAYz. Also, users can register frequently used Torrent sites that provide files to effortlessly obtain RSS data by using the ‘Site Registration' function. -
Page 89: Torrent Site Registration
For certain sites such as Mininova , an interface is provided so that users can directly download files without having to connect to the applicable sites. Users can download immediately by clicking on the ‘down' button. If you click on a file name from the list, you will be linked to the download page of the applicable site, or you can download torrent seed file directly. - Page 90 Type in the name of the site as well as the RSS URL address and click on ‘Add' button, which will register the desired site on the bottom list. Click on the ‘Confirm' button on the bottom of the screen and refresh the Torrent RSS page to verify the added site.
-
Page 91: Torrent Search
Torrent Search You can directly search torrent files from Mininova and isohunt if you use the Torrent Search function. Select the torrent site that you wish to search for. Type in the word for the desired file and click on the ‘Search' icon. A list of files will be created on the right hand side of the page. -
Page 92: Torrent Download
Torrent Download You can download files by using 'Torrent RSS', ‘Torrent Search' and Torrent File Registration. Current page shows list files that being downloaded. File name, status, file size, completed(downloaded size), and progress are displayed. You can verify file information and downloaded location by clicking on a specific file name. Also you can pause, restart, or delete a specific file. -
Page 93: File Download By Using Torrent File Registration
File Download by using Torrent File Registration Click Register File from the lower right hand side of the ‘Download' page. Select a torrent file that is saved in the PC and click on the Ok button. You can upload up to 20 files at once. You can verify the added files from the list and the downloading progress. -
Page 94: Etc
Print Connection Connect USB printer to USB host port of e- TRAYz In PC, Select [Start] – [Run] on window desktop and input e-TRAYz address in open. (ex. \\192.168.0.10) Double click network printer icon, Lp. Search for network printer. - Page 95 Select Disk to select the path in which installation provided printer manufacturer printer driver file downloaded from manufacturer's website is located. Install printer driver. Select [Start]-[Set]-[Printer and Fax] to check that printer has been installed with IP of e-TRAYz .
-
Page 96: Using Itunes
When executing iTunes, e-TRAYz_music is displayed in share item on the left menu. This display all audio files located in Music folder of e-TRAYz. If there is a lower folder, all files in the folder are displayed as well. In case Korean or other letters break, this is a problem related to id3tag. Modification in UTF-8 type is required by using id3tag editor. -
Page 97: Usb Autocopy
In case you execute USB Auto Copy, the files in USB device are backup automatically in USB_Copy folder of e- TRAYz disk. Connect The USB device to USB 2.0 Port of e-TRAYz device. (If you connect it to USB 1.1 port, USB autocopy is not excuted. Press the Copy on the back of the device for about a second. -
Page 98: Personal Homepage
Personal Homepage After you connect e-TRAYz connector or e-TRAYz web, you upload relating files with homepage on www folder, located in subordinated ‘e-TRAYz Disk’. Rename the pre-existing file named ‘index.php’ (e.g. to ‘index.php_’) In case you use MySQL, you connect sysadmin by using SSH, and you input ‘mysql_u root_p mysql’. There is no password. -
Page 99: Appendix
Search the network folder for a media device with the network folder search function(ex. Divx Player..) • A folder named ‘Xtreamer e-TRAYz’ or server name that is set at [Settings] – [System] page is found. • You can play media files in the ‘Home’... - Page 100 If you want to use a wireless LAN Connect to a USB port a USB wireless device compatible with the product. (the upper is USB 2.0 and the lower • is USB 1.1) Set wireless network at [Settings] – [System] – [Wireless Network] page. •...
- Page 101 - When the authentication screen pops up, type in your account ID and password. - Your own domain is mounted to the finder. Mac users cannot use a e-TRAYz client program using connector. (will support later.) • If you want to use MySQL Information is as follows •...
-
Page 102: Faq
• Does not opened sharing windows at e-TRAYz connector. Verify that e-TRAYz home port has been correctly set at setting menu of connector. If you use another port not • default port(8080), input the port number into Usesr port field. - Page 103 If you cannot access to ‘Settings’, Turn off the Power switch of device. • Can Mac or Linux users use it too? • Mac or Linux users can use all of the Xtreamer e-TRAYz function except ‘e-TRAYz’ using e-TRAYz connector.
- Page 104 Where can I download the connector program? • Access to e-TRAYz Home page(http://IP address of Xtreamer e-TRAYz:8080/). Click the ‘e-TRAYz Connector’ menu at the top of page, you can download it. Is simultaneous connection with a single ID possible? • Simultaneous connection with a single ID is possible. However, it is not recommended for stable operation.
-
Page 105: Troubleshooting
Click this device and the web browser will start, getting the web page of this device. You can get the IP address • from the address of the web page. 3) In case access to Xtreamer e-TRAYz is not possible at all due to incorrect network setup Click Reset button on the rear of device until the single beeping •...
Need help?
Do you have a question about the e-TRAYz and is the answer not in the manual?
Questions and answers