Table of Contents
Advertisement
Sebury Technology Co., Ltd.
Address
5
F
Building 8
Xinwu Industrial Park
Xili
:
/
,
,
,
Tel
86
755
82885464
: +
-
-
P
C
518055
.
.:
Nanshan District
Shenzhen
China
,
,
,
.
Fax
86
755
82884565
: +
-
-
www
sebury
com
cn
.
.
.
User Manual
Before installation and use, please read the user manual carefully.
Advertisement
Table of Contents

Related Manuals for Sebury S Touch-s

Summary of Contents for Sebury S Touch-s
-
Page 1: User Manual
User Manual Sebury Technology Co., Ltd. Address Building 8 Xinwu Industrial Park Xili Nanshan District Shenzhen China 82885464 82884565 518055 sebury Before installation and use, please read the user manual carefully. -
Page 2: Table Of Contents
Contents 1. Description, Features and Specifications 2. Quick Installation Guide 3. Manager Card Operation 4. User Settings 5. Alarm 6. To Reset to Factory Default 7. Sound and Light Indication 8. Detailed Programming Guide 9. Advanced Application - Various Working Mode Application 9.1 Wiegand Reader 9.2 Standalone for Single Door 9.3 Automatic Mode... -
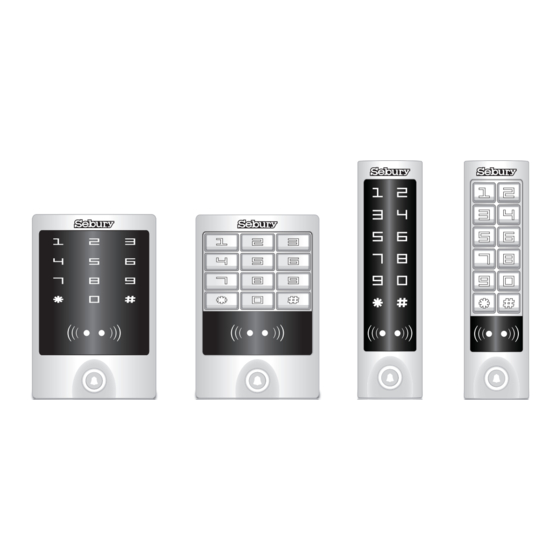
Page 3: Description, Features And Specifications
125×83×21.7 mm (s Touch-w / s Key-w) Dimension 1.2 Features 158×43×21.7 mm (s Touch-s / s Key-s) ● Strong pure aluminium alloy case; waterproof, conforms to IP65 Operating Temperature -40° C 60° C ●... -
Page 4: Quick Installation Guide
2. Quick Installation Guide (Before installation and use, please read the Quick Installation Guide carefully) Logo Indicator Light Logo Indicator Light Bracket Touch Keypad Metal Button Keypad Photosensitive Safe Screw Hole Infrared Receiving Hole Infrared Receiving Hole Tamper Window Infrared Emission Hole Infrared Emission Hole Sound Hole Access Host Bottom Panel... - Page 5 Logo Indicator Light Fix the Bracket and Install the Access Host Drill Holes Touch Keypad Safe Screw Hole For concrete wall, drill the hole in 6mm diameter Infrared Receiving Hole Access Host Bottom Panel Infrared Emission Hole Sticker Size : 78 X 121mm Product Bracket Size : 72.8 X 115.9mm Card Swiping Area Diameter...
- Page 6 Wiring Fix Safe Screws Install i Box and Exit Button Install Lock AC100V~240V Diameter: 6mm (Rubber Bungs) Yellow-Green Blue Brown Diameter: 2mm 237mm Short circuit plug for lock Lock (not included in the package, please equip it locally) +12V GND D0 D1 OPEN1 GND NC 1 +12V...
- Page 7 Lock Wiring Connecting COM and GND, then connecting lock to +12V and NO (or NC) LOCK A +12V Lock Type A: Fail Secure Lock (Unlock when power on ) , such as Electric Controlling Lock, etc. 1N4004 Lock Type B: Fail Safe Lock (Unlock when power off ) , such as EM Lock, Electric Bolt LOCK B...
-
Page 8: Manager Card Operation
4. User Settings 4.1 To unlock the door by single card only: Read valid card once, the door will open. Precondition: 1> Set the door entry by card only 2> Set “1” for opening the door by multi cards 4.2 To unlock the door by multi cards: Read 2-10 pcs valid cards (time interval can not exceed 5s), the door will open. -
Page 9: Alarm
4.6 To change the PIN of a PIN user 5. Alarm Read card Old PIN # New PIN # Repeat New PIN # 5.1 Anti Tamper Alarm When enable the anti tamper alarm function, if the access host is disassembled illegally, the access host's buzzer User ID number Old PIN # New PIN # Repeat New PIN # and the external alarm will operate. -
Page 10: Sound And Light Indication
7. Sound and Light Indication 8. Detailed Programming Guide Operation Status Logo Color Buzzer Master Start Standby Setting Standby White code Menu Menu Remarks Functions Press Key Short Ring Logo LED Light indication Read Card Green Long Ring Orange White White Flash Door Open Long Ring... -
Page 11: Wiegand Reader
1. The user ID number is any number among Note: The door will open only when read the valid To set open door by multi 1- 2000. 1~10 # card quantity up to the quantity set. It is only for cards 2. - Page 12 Optional Setting 3. Automatic mode (Factory default setting) 4. Standalone for two doors OFF- The device will be in silence except enter 5. With external reader for two doors the programming mode To set keypad tone 6. Two units interlocked for two doors ON-The device will give the voice when press the ON or OFF 7.
-
Page 13: Standalone For Single Door
9.2 Standalone for Single Door The digit of card number can be set to 26~37Bit, should be matched with the controller. (Factory default is 26Bit) Keypad transmission can be set in the following 3 modes (modes can be set by user) The wiring diagram is shown as below. -
Page 14: Automatic Mode
9.3 Automatic Mode 9.5 With External Reader for Two Doors In this mode, when the access host connects to i Box, it is standalone for single door; If without smart In this mode, access host is for entering door 1, and external reader is for entering door 2. controller, it work as Wiegand reader automatically. -
Page 15: Two Units Interlocked For Two Doors
9.6 Two Units Interlocked for Two Doors 9.7 Anti-passback for Single Door The interlocked function is mainly used in banks, prisons, and other places where a higher level security is required. In this mode, access host install outside is for entering door, external reader inside for exiting door, they build up a single door anti-passback system, access host is the anti-passback master unit. -
Page 16: Anti-Passback For Two Doors
9.8 Anti-passback for Two Doors Application Scene Graph In this mode, access host on door 1 is anti-passback master unit,and external reader on door 2 as the anti-passback auxiliary unit. Then they build up a two doors anti-passback system, which is normally used for parking lot. The users can only enter door 1 when read valid card on access host, and exit from door 2 when read valid card on external reader. -
Page 17: Simple Troubleshooting
1234 is the initial value, can't be used Can’t open door after Use 1234 as user's PIN to open doors, unless after resetting inputting user's PIN them to other 4~6 digits External Leaning on wall closely when install Door 2 (Exit) Alarm under normal situation Light leaking when install access host Reader... -
Page 18: Packing List
11. Packing List Name Remark Name Remark User Manual User Manual Fixing Location Sticker Used for locating installation position. Quick Use Guide Fixing Location Sticker Used for locating installation position Self Tapping Screw 3X20 mm Self Tapping Screw 3X20 mm Rubber Bungs 6X24 mm Screw Driver...
Need help?
Do you have a question about the S Touch-s and is the answer not in the manual?
Questions and answers