Table of Contents
Advertisement
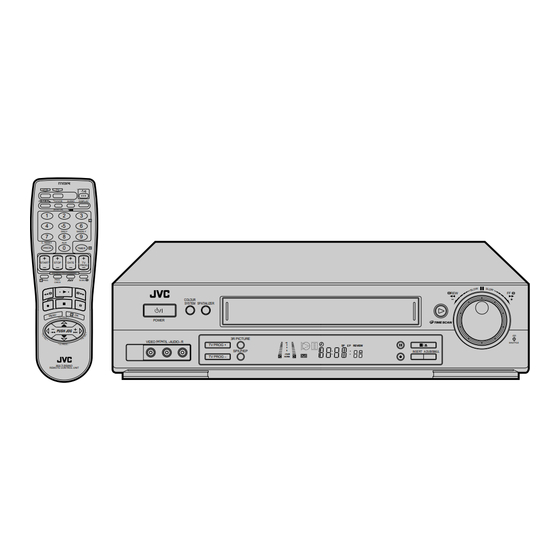
VIDEO CASSETTE RECORDER
HR-DD857MS
VCR
TV
TV/VCR
AUDIO
DISPLAY
(MONITOR)
1
2
3
2
4
5
6
DAILY
WEEKLY
7
8
9
AUX
C. RESET
0
CANCEL
TIMER
4
START
STOP
DATE
TV
PROG
EXPRESS PROGRAMMING
PROG.
30 SEC
1
PROG.
CHECK
COLOUR
SYSTEM SPATIALIZER
POWER
PUSH JOG
(MONO)
L -AUDIO- R
MULTI BRAND
REMOTE CONTROL UNIT
TM
3R PICTURE
+8
TV PROG +
4
SP
REVIEW
0
SP/LP/EP
6
15dB
TV PROG -
NORM
TM
INSTRUCTIONS
REW
FF
JOG
SHUTTLE
INSERT A.DUB/SIMUL
ENGLISH
CONTENTS
Safety Precautions ...................... 2
Basic Connections ..................... 3
Video Channel Set ..................... 4
Auto Set Up ............................... 6
On-Screen Displays ................... 8
Select Language ......................... 9
Clock Set ................................. 10
Basic Playback .......................... 11
Playback Features .................... 12
TimeScan ................................. 16
Basic Recording ....................... 18
Recording Features .................. 19
B.E.S.T. Picture System ............. 22
Setup........................... 24
Timer Programming ..... 26
Express Timer Programming ..... 28
Remote Control Functions ........ 32
Edit To Or From Another Video
Recorder .................................. 34
Edit From A Camcorder ............ 35
Audio Dubbing ........................ 36
Insert Editing ............................ 38
EN
LPT0110-001C
2
4
11
18
24
32
34
40
42
46
49
50
53
Advertisement
Table of Contents

Related Manuals for JVC HR-DD857MS


Summary of Contents for JVC HR-DD857MS
-
Page 1: Table Of Contents
VIDEO CASSETTE RECORDER HR-DD857MS TV/VCR AUDIO DISPLAY (MONITOR) DAILY WEEKLY C. RESET CANCEL TIMER START STOP DATE PROG EXPRESS PROGRAMMING PROG. 30 SEC PROG. CHECK COLOUR SYSTEM SPATIALIZER POWER PUSH JOG 3R PICTURE VIDEO (MONO) L –AUDIO– R TV PROG + SP/LP/EP TV PROG –... -
Page 2: Safety First
ABOUT HEAD CLEANING Accumulation of dirt and other particles on the video heads may cause the playback picture to become blurred or inter- rupted. Be sure to contact your nearest JVC dealer if such troubles occur. Auto Head Cleaner A built-in head cleaner automatically cleans the video heads and head drum whenever a tape is loaded or unloaded to reduce head clogging. -
Page 3: Installing Your New Recorder
INSTALLING YOUR NEW RECORDER Basic Connections Aerial terminal RF Cable (provided) Back of TV AV-IN terminals AV Cable (not provided) Mains Power Cord AUDIO OUT/ Mains outlet VIDEO OUT Connect the power plug to an AC outlet before installing the lithium battery. -
Page 4: Initial Settings
Video Channel Set Video Channel (RF Output Channel) is the channel on which your TV receives picture and sound signals from the video recorder through the RF cable. TEST SIGNAL The channel on which the screen to the left appear clearly in step 3 is your Video Channel. - Page 5 If you cannot obtain the two vertical white bars clearly with any channel between 28 and 60, consult your JVC dealer. FINISH VIDEO CHANNEL Press OK. If Auto Set Up ( pg.
-
Page 6: Select Language
Auto Set Up IMPORTANT Don't press any buttons on the recorder or remote that are not directly related to the step you are performing while Auto Set Up is in progress. If you perform Auto Set Up successfully during installa- tion, there's no need to separately perform the Language Select, Clock Set or Channel Set procedures, but if adjustments become necessary they can be performed as... - Page 7 Major Countries Australia, New Zealand, Kuwait, U.A.E, Indonesia, Singapore, Thailand, Malaysia, Iran, Saudi Arabia, Egypt, Morocco, Lebanon, Iraq China, Mongolia, Russia Hong Kong U.S.A., Japan, S.Korea, Taiwan DO NOT press any button on the recorder or remote control while Auto Set Up is in progress. AUTO CH SET PLEASE WAIT START...
-
Page 8: On-Screen Displays
On-Screen Displays Turn on the TV and select the VIDEO channel (or AV mode). MENU The superimposed indication on the TV screen tells you what the recorder is doing. PR. 12 21 : 00 24. 12. 98 SPATIALIZER HIFI You can choose whether or not to have various operational indicators appear on screen, by setting this function ON or OFF. -
Page 9: Select Language
Select Language Turn on the TV and select the VIDEO channel (or AV mode). MENU PUSH JOG TURN ON THE RECORDER Press ACCESS MAIN MENU SCREEN Press MENU. ACCESS INITIAL SET SCREEN Press PUSH JOG %fi to place the pointer next to "INITIAL SET", then press FUNCTION SET TUNER SET... -
Page 10: Clock Set
Clock Set Turn on the TV and select the VIDEO channel (or AV mode). MENU NOTE: If the year digits are automatically cleared, it is possible that you have input 29th February for a non-leap year. Input the correct data. PUSH JOG INITIAL SETTINGS (cont.) TURN THE RECORDER ON... -
Page 11: Basic Playback
PLAYBACK Basic Playback Turn on the TV and select the VIDEO channel (or AV mode). The easiest, most basic operation possible with your video recorder is tape playback. Already-recorded signals on a video tape are read by your video recorder and displayed on your TV just like a TV programme. -
Page 12: Playback Features
Playback Features High-Speed Search ACTIVATE HIGH-SPEED SEARCH During playback or still picture, press FF for forward high-speed search, or REW for reverse high-speed search. To resume normal playback, press PLAY. NOTE: For short searches, press and hold FF or REW for over 2 seconds during playback or still picture. -
Page 13: Manual Tracking
3R Picture 3R(= Resolution and Response Recovery technology) maximises sense of resolution and sharpens image edges to make playback picture look better focused. ACTIVATE 3R PICTURE Press 3R PICTURE. The button will light. To turn off 3R Picture, press 3R PICTURE again so that the light goes off. -
Page 14: Index Search
REVIEW Index Search Your recorder automatically marks index codes at the beginning of each recording. This function gives you quick access to any one of 9 index codes in either direction. NOTE: Before starting, make sure the recorder is in the Stop mode. AUDIO 30 SEC Instant ReView... -
Page 15: Tape Position Indicator
Next Function Memory You can set your recorder's power to go off automatically after the tape is fully rewound. Before starting, make sure the recorder is in the Stop mode. For Automatic Power Off After Tape Rewind .. -
Page 16: Timescan
TimeScan Your recorder is equipped with the TimeScan function. TimeScan allows noise free pictures to be displayed on your TV screen in the forward and reverse search modes. Audio will be played back at normal speed during the TimeScan modes ( TimeScan allows you to view a programme in search mode while listening to the audio. -
Page 17: Timescan Audio
TimeScan Names of special-effects playback Search -9x -7x -5x -3x PAL/ MESECAM NTSC SP/EP -7x -5x -3x Audio output Audio is output. * Still mode cannot be engaged using the remote control's PUSH JOG engaged by pressing the PAUSE button. The speed is shown during TimeScan in the upper right corner of the TV screen for approx. -
Page 18: Basic Recording
Basic Recording Turn on the TV and select the VIDEO channel (or AV mode). RECORD TV signals being received by the recorder’s built-in tuner can be recorded onto a video tape. You can “capture” a TV programme using your video recorder. NUMBER TV PROG SP/LP/EP... -
Page 19: Recording Features
Recording Features C.RESET RECORD Record One Programme While Watching Another Elapsed Recording Time Indication You can check the exact time of a recording. DISPLAY TV PROG Instant Timer Recording (ITR) This easy method lets you record for from 30 minutes to 6 hours (selectable in 30-min. -
Page 20: Receiving Stereo And Bilingual Programmes
Receiving Stereo And Bilingual Programmes Your recorder is equipped with a Sound-Multiplex decoder (A2) and a Digital stereo sound decoder (NICAM) as well, making reception of stereo and bilingual broadcasts possible. When the channel is changed, the type of broadcast being AUDIO received will be displayed on the TV screen for a few seconds. -
Page 21: Simulcast Recording
PLAY RECORD Simulcast Recording If FM simulcast TV programmes are available, you can record the TV programme with the soundtrack from an FM-broadcast. In the simulcast mode, the external audio programme is recorded on the audio track (both Hi-Fi and normal). MAKE CONNECTIONS Connect the FM tuner to the rear panel AUDIO IN connectors. -
Page 22: Picture System
B.E.S.T. Picture System Turn on the TV and select the VIDEO channel (or AV mode). PLAY RECORD MENU The B.E.S.T. (Biconditional Equalised Signal Tracking) system checks the condition of the tape in use during recording and playback, and compensates to provide the highest-possible recording and playback pictures. -
Page 23: Start Recording
Recording START RECORDING Press and hold RECORD and press PLAY on the remote, or press RECORD on the recorder. DURING B.E.S.T. B.E.S.T. COMPLETE The recorder spends approximately 7 seconds assessing the condition of the tape, then begins recording. NOTES: The B.E.S.T. system works for both SP and LP (or EP) modes only after a tape has been inserted and the Record mode is first initiated. -
Page 24: Timer Recording
Setup CODE Turn on the TV and select the VIDEO channel (or AV mode). MENU The G- CODE input channel, date, start and stop time data when setting the timer record function. Simply key in the G- TV programme you wish to record (found in most TV listings) and the recorder’s timer is automatically programmed. - Page 25 MENU PUSH JOG ENTER RECEIVING CHANNEL POSITION NUMBER Press PUSH JOG %fi or NUMBER keys to input the number of the recorder's channel position on which the Guide Program NUMBER number's broadcast is received. Then press OK or PUSH JOG If the satellite broadcast is received on your recorder's auxiliary channel "L-1", select "L-1"...
-
Page 26: G- Code Timer Programming
Timer CODE Programming Before performing G- Timer Programming: CODE Be sure to read "G- Setup" ( CODE Insert a cassette with the safety tab in place. The recorder will come on automatically. Turn on the TV and select the VIDEO channel (or AV mode). - Page 27 NUMBER STOP+/– PROG. Satellite Tuner Users To timer-record a satellite broadcast using G- 1 Perform steps 1 – 6. 2 Set the satellite tuner to the appropriate channel before the selected programme begins. 3 Leave the satellite tuner's power on. RETURN TO NORMAL SCREEN Press PROG.
-
Page 28: Express Timer Programming
Express Timer Programming Remember, the clock must be set before you can programme the timer ( pg. 10). Before performing the following steps: Insert a cassette with the safety tab in place. The recorder will come on automatically. Turn on the TV and select the VIDEO channel (or AV mode). Select the appropriate colour system by pressing the COLOUR SYSTEM button.( START+/–... - Page 29 SP/LP/EP PROG. SET TAPE SPEED Press RETURN TO NORMAL SCREEN After confirming all information is correct, press PROG. or OK. "PROGRAM COMPLETED" appears on the screen for about 5 seconds, then normal screen WEEKLY appears. TIMER Repeat steps 1 – 8 for each additional programme. ENGAGE RECORDER’S TIMER MODE Press TIMER.
- Page 30 CANCEL START+/– PROG. CHECK MENU Check, Cancel And Replace Programmes TIMER TV PROG+/– PUSH JOG To cancel or replace a programme... TIMER RECORDING (cont.) DISENGAGE TIMER MODE Press TIMER, then press ACCESS PROGRAMME CHECK SCREEN Press PROG. CHECK. PR START STOP 8:00 10:00 10:00 10:45 11:30 13:00...
-
Page 31: Auto Sp Lp Timer
Auto SP LP Timer If, when timer-recording in SP mode, there is not enough tape to record the entire programme, the recorder automatically switches to LP mode (with PAL broadcasts) or EP mode (with NTSC broadcasts) to allow complete recording. For Example . -
Page 32: Special Features
NUMBER "1" STOP Remote A/B Code Switching The remote control is capable of controlling two JVC video recorders independently; one set to respond to the remote control’s A code control signals and another set to respond to B code control signals. The remote control is preset to send A code signals because your video recorder is initially set to respond to A code signals. -
Page 33: Tv Multi-Brand Remote Control
TIMER TV VOL+/– IMPORTANT Although the provided remote control unit is compatible with JVC televisions, as well as many other models, it may not work with your TV, or in some instances, may have limited function capability. TV BRAND NAME... -
Page 34: Edit To Or From Another Video Recorder
Edit To Or From Another Video Recorder COLOUR SYSTEM NUMBER "0" TV Receiver Player AV Cable VIDEO (not provided) CHANNEL RF Cable (provided) Recorder You can use your video recorder as the source player or the recording deck. NOTES: All necessary cables can be obtained from your dealer. NTSC tapes being played back in the NTSC [ PAL mode When you dub an NTSC tape using your recorder as the playback deck, select NTSC 3.58 (or NTSC 4.43) with the... -
Page 35: Edit From A Camcorder
AUDIO/VIDEO input connectors. Use the L connector for monaural connection. When a Master Edit Control-equipped JVC camcorder is used, the camcorder is capable of controlling the recorder. Refer to the camcorder’s instruction manual for operating procedure. -
Page 36: Audio Dubbing
Audio Dubbing CD Player etc. CD Player etc. Mixer Audio mixer output Original sound AUDIO OUT NUMBER "0" PLAY STOP Audio dubbing replaces the normal audio sound of a previously recorded tape with a new soundtrack. Normal audio track Video/Hi-Fi audio track AUDIO TV PROG... - Page 37 AUDIO PLAY PAUSE STOP START DUBBING Engage the audio component's Play mode, then press PLAY to start the tape in your recorder. Audio dubbing begins at this point. " " blinks and " " is displayed on the front display panel.
-
Page 38: Insert Editing
Insert Editing Recorder TIME SCAN SHUTTLE Audio/Video signal Another recorder Player C.RESET Insert editing replaces part of the recorded scene with new material. Both the picture and Hi-Fi audio soundtrack are replaced with new ones, while the normal audio soundtrack remains unchanged. -
Page 39: Start Editing
C.RESET ENGAGE INSERT EDITING Press INSERT. Your recorder enters the Insert-Pause mode. (" ", " " and " " light up on the front display panel.) The TV screen changes from the still picture to the input source you are going to record. START EDITING Load the source cassette and play back the segment that is to be inserted. -
Page 40: Information On Multi-System Compatibility
In the NTSC4.43 mode, with some TVs, on-screen displays (Program screen etc.) may roll up or down and there may be a loss of colour. When this happens, select the AUTO mode. HR-DD857MS Multi-system tuner (B/G, I, D/K, M) -
Page 41: Tape-To-Tape Editing
TV system you have selected at the TV System Select screen. Tape-To-Tape Editing There are 4 different types of recorded tape, depending on the signal recorded. Recorded tape MESECAM SECAM NTSC HR-DD857MS Built-in RFconverter K, I, G, M Playback equipment HR-DD857MS MESECAM... -
Page 42: Auto Channel Set
Turn on the TV and select the VIDEO channel (or AV mode). MENU IMPORTANT Perform the following steps only if auto channel set has not been set correctly by Auto Set Up function ( you have moved to a different area or if a new station starts broadcasting in your area. -
Page 43: Manual Channel Set
MENU PUSH JOG Manual Channel Set Store channels that were not stored during Auto Set Up ( or Auto Channel Set ( ACCESS TUNER SET SCREEN Perform steps 1 – 3 of "Auto Channel Set" on page 42. ACCESS CHANNEL LIST Press PUSH JOG %fi... -
Page 44: Delete A Channel
Delete A Channel ACCESS TUNER SET SCREEN Perform steps 1 – 3 of "Auto Channel Set" on page 42. ACCESS CHANNEL LIST Press PUSH JOG %fi to place the pointer next to "CH EDIT", then press OK or PUSH JOG SELECT CHANNEL Press PUSH JOG %fi... - Page 45 Fine-Tuning Channels ACCESS TUNER SET SCREEN Perform steps 1 – 3 of "Auto Channel Set" on page 42. ACCESS CHANNEL LIST Press PUSH JOG %fi to place the pointer next to "CH EDIT", then press OK or PUSH JOG SELECT CHANNEL TO FINE-TUNE Press PUSH JOG %fi...
-
Page 46: Tape Transport
Press TV PROG + or – a few times to remove the noise bars from the screen. Engage and adjust tracking manually. pg. 13) Consult your JVC dealer. Select the correct colour system by pressing the COLOUR SYSTEM button. ( pg. -
Page 47: Timer Recording
RECORDING SYMPTOM 1. Recording cannot be started. 2. TV broadcasts cannot be recorded. 3. Tape-to-tape editing is not possible. 4. Camcorder recording is not possible. TIMER RECORDING SYMPTOM 1. Timer recording won’t work. 2. On-screen timer programming is not possible. 3. -
Page 48: Other Problems
OTHER PROBLEMS SYMPTOM 1. Whistling or howling is heard from the TV during camcorder record- ing. 2. When scanning channels, some of them are skipped over. 3. The channel cannot be changed. 4. Channel settings that were made manually seem to have changed or disappeared. -
Page 49: Questions And Answers
QUESTIONS AND ANSWERS PLAYBACK Q. What happens if the end of the tape is reached during playback or search? A. The tape is automatically rewound to the beginning. Q. Can the video recorder indefinitely remain in the still mode? A. No. It stops automatically after 5 minutes to protect the heads. -
Page 50: Front View
FRONT VIEW 1 2 3 COLOUR SYSTEM SPATIALIZER POWER VIDEO (MONO) L –AUDIO– R TV PROG + TV PROG – 1 POWER Button pg. 8 2 COLOUR SYSTEM Button 3 SPATIALIZER Button pg. 15 4 Cassette Loading Slot 5 PLAY Button pg. -
Page 51: Display Panel
REAR VIEW 1 Mains Power Cord pg. 3 2 AUDIO/VIDEO IN Connectors 3 AUDIO/VIDEO OUT Connectors 4 Lithium Battery Compartment DISPLAY PANEL 15dB NORM 1 B.E.S.T. Picture System Display Audio Level Indicator 2 Symbolic Mode Indicators STILL: SLOW: PLAY: FF/REW VARIABLE RECORD: SHUTTLE SEARCH: RECORD PAUSE:... -
Page 52: Remote Control
The remote control can operate not only the video recorder but also some of your TV's functions. To operate your video recorder, first press the VCR button to set the remote control to the Video mode. To operate your TV, first press the TV button to set the remote control to the TV mode (... -
Page 53: Specifications
SPECIFICATIONS GENERAL Power requirement Rating : AC 110 – 240 V`, 50/60 Hz Operating : AC 090 – 260 V`, 50/60 Hz Power consumption : 22 W Temperature Operating : 5°C to 40°C Storage : –20°C to 60°C Operating position : Horizontal only Dimensions (WxHxD) : 400 x 94 x 347 mm... - Page 54 MEMO...
- Page 55 MEMO...
- Page 56 VICTOR COMPANY OF JAPAN, LIMITED Printed in Malaysia COPYRIGHT © 1998 VICTOR COMPANY OF JAPAN, LTD. 0798CKV...
Need help?
Do you have a question about the HR-DD857MS and is the answer not in the manual?
Questions and answers