Table of Contents
Advertisement
4345, Robitaille street,
Sherbrooke (Québec)
Canada, J1L 2K2
www.thermoconcepts.com
Canada 1-800-363-3717
USA 1-800-363-1333
Les Produits Thermo Concepts Inc. Canada
INSTRUCTION MANUAL
MANUEL D'INSTRUCTIONS
MANUAL DE INSTRUCCIONES
Models
INFORMATION :
Modèles
If you have any ques-
Modelos
tions or comments on
your water cooler after
having read this book-
let, please contact your
local dealer.
Page 2 to 7
INFORMATION :
Si vous avez des ques-
tions ou des
com-
mentaires sur votre
refroidisseur d 'eau
après avoir lu ce livret,
veuillez contacter votre
Before using your new water cooler,
distributeur local.
please read the following instructions.
Page 8 à 13
Veuillez lire ces instructions avant de
brancher votre nouvel appareil.
INFORMACIONES:
Para toda clase de
Por favor, leer las instrucciones
p r e g u n t a s o d e
ientes antes de conectar su nuevo
comen-tarios sobre su
aparato.
e n f r i a d o r d e a g u a
después de la lectura
de esa libreta, por
KEEP THIS INSTRUCTION MANUAL
favor comunicarse con
su distribuïdor local.
CONSERVEZ CE MAUEL D'INSTRUCTIONS
Pàgina 14-19
CONSERVAR ESE MANUAL DE INSTRUCCIONES
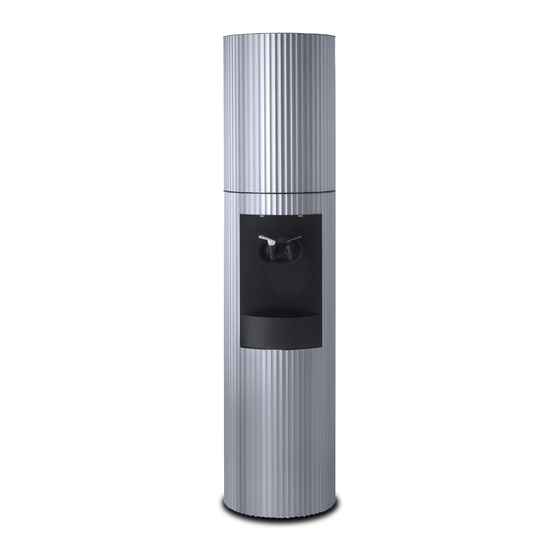
WATER COOLERS
REFROIDISSEURS D'EAU EMBOUTEILLÉE
ENFRIADORES DE AGUA EMBOTELLADA
CELSIUS
CIMA
DEGREE
FAHRENHEIT
KELVIN
SOL'EAU
S2
sigu-
Advertisement
Table of Contents

Related Manuals for Thermo Concepts Celsius

Summary of Contents for Thermo Concepts Celsius
- Page 1 Page 8 à 13 Veuillez lire ces instructions avant de brancher votre nouvel appareil. Les Produits Thermo Concepts Inc. Canada INFORMACIONES: Para toda clase de Por favor, leer las instrucciones sigu- p r e g u n t a s o d e...
- Page 2 OPERATING INSTRUCTIONS (Reminder: Do not connect the unit immediately after moving it. Wait for at least one hour) 1. Remove the cone by strongly pulling up the tongue situated on one side of the cone (see fig. #3). Remove the elbow and the floater by pulling backwards in order to be able to completely clean the stainless steel reservoir and all the parts you have removed.
-
Page 3: Installation Instructions
INSTALACION Y MANTENIMIENTO DEL SISTEMA UNIVERSAL NO SPILL INSTALLATION INSTRUCTIONS Gracias por comprar un enfriador de agua Thermo-Concepts. Por favor lea las siguientes 1. Install the water cooler in a well ventilated place, where temperature will instrucciones con mucho cuidado: not go below 0°C (32°F). - Page 4 HOT WATER RESERVOIR CLEANING INSTRUCTIONS INSTALLATION ET ENTRETIEN DU CÔNE Required Material: Merci d'avoir acheté un appareil Thermo Concepts. Veuillez suivre attentivement les recommandations de nettoyage ci-dessous. • 1 Clean dish towel • 1 Pail AVERTISSEMENT : • 1 Bottle of water cooler cleaner *.
-
Page 5: Storing And Shipping
INSTALLATION AND MAINTENANCE OF THE UNIVERSAL NO-SPILL STORING AND SHIPPING Thank you for purchasing a Thermo Concepts water cooler. If the water cooler will not be used for a extended period of time, if you move it or if Please read the following instructions carefully. - Page 6 Fig. 9 POSSIBLE TECHNICAL PROBLEMS AND WHAT TO DO Fig. 10 PROBLEM PROBABLE CAUSE SOLUTION • The water is not • Unit not connected • Connect the unit cold • Unit not connected cor- • Make sure that the plug is well pushed in the socket. rectly •...
-
Page 7: Limited Warranty
LIMITED WARRANTY Fig. 5 Fig. 6 (models: Celsius, Cima, Degree, Fahrenheit, Kelvin, S2, Sol’Eau*) First year : The Manufacturer promises the original purchaser (user) to repair or, at the Manufacturer’s option, to replace any part of this water cooler which proves to be inoperative due to a defect in material or workmanship under normal use, for a period of one year from the date of original installation. - Page 8 Les étapes #5, #6 et #7 sont nécessaires seulement si vous avez le bouchon Fig. 4 bleu Thermo Concepts offert en option. Si vous avez choisi l’option « no-spill » passez à l’étape #8. 5. Enlever le bouchon d’origine de votre nouvelle bouteille d’eau.
-
Page 9: Installation
INSTALLATION Fig. 1 1. Installer le refroidisseur d’eau dans un endroit bien aéré ne pouvant atteindre des températures au-dessous de 0°C (32°F). 2. Vous assurer de fournir une aération suffisante en maintenant un minimum de 5cm (2po) de dégagement autour de l’appareil. (voir fig. #2) 3. - Page 10 ENTRETIEN DU RÉSERVOIR D’EAU CHAUDE GARANTIA (modelos:Celsius, Cima, Degree, Fahrenheit, Kelvin, S2, Sol’Eau*) Primer año: Matériel requis : Durante un año a partir de la fecha de instalación, el fabricante se compromete ante el primer comprador (utilizador) a reparar o, si es necesario, a reemplazar toda pieza del enfriador de agua •...
-
Page 11: Conseils De Sécurité
PROBLEMAS TÉCNICOS POSIBLES Y QUÉ HACER ENTREPOSAGE ET EXPÉDITION PROBLEMA CAUSA PROBABLE SOLUCIÓN Si le refroidisseur d’eau ne doit pas servir pendant une longue période, si vous • El agua no • El aparato no está conectado. • Conectar el aparato. déménagez ou si vous devez l’expédier, suivre les instructions suivantes : está... -
Page 12: Almacenamiento Y Transporte
TABLEAU DE RECHERCHE DE SOLUTIONS ALMACENAMIENTO Y TRANSPORTE PROBLEME CAUSES PROBABLES SOLUTIONS Si no utilice el enfriador de agua algún tiempo, si cambia de domicilio o si tiene que • L'eau n'est • Appareil non branché • Brancher l'appareil. transportar el enfriador de agua, seguir las instrucciones siguientes: pas froide •... -
Page 13: Garantie
ENTRETENIMIENTO DEL TANQUE DE AGUA CALIENTE GARANTIE (modèles: Celsius, Cima, Degree, Fahrenheit, Kelvin, S2, Sol’Eau*) 1er ANNÉE : Materiales requeridos: Pendant un an à partir de la date d’installation, le fabricant s’engage vis-à-vis du premier achet- eur (utilisateur) à réparer ou, le cas échéant, à remplacer toute pièce du refroidisseur d’eau qui ne •... -
Page 14: Instrucciones Para El Uso
INSTRUCCIONES PARA EL USO INSTRUCCIONES DE INSTALACIÓN (Atención: No conecte el equipo inmediatamente después de moverlo, espere por lo menos 1. Instalar el enfriador de agua en un lugar bien aireado, en que las una hora antes de conectarlo) temperaturas no quedan debajo del limite de 0°C (32°F). 1.
Need help?
Do you have a question about the Celsius and is the answer not in the manual?
Questions and answers