Table of Contents
Advertisement
Quick Links
Advertisement
Table of Contents

Summary of Contents for EURO One
- Page 1 Euro-MERiDIAN NEplus & Intruder Alarm System Operator’s Instructions...
- Page 2 Perform Anti-Code Reset Service & Codeholder Records G1-2 Note the specification of Euro-MERiDIAN may vary between models, and some facilities in the manual may not be available. Check with your installer for full details. This equipment may be used in systems installed to a lower grade, which will be agreed with your installation company.
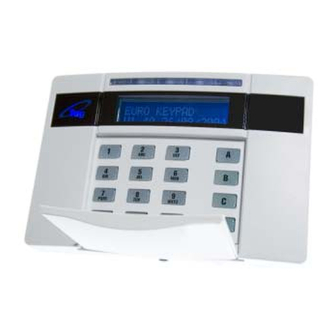
- Page 3 Page A2 You’ve Made the Right Choice Using your Euro-MERiDIAN Alarm System just couldn’t be easier! This is the Keypad from where you control your Alarm System*. Note: your security, keypad becomes disabled for 90 seconds after 24 incorrect key- presses, or after 6 attempts to present invalid tags.
- Page 4 Page A3 The MERiDIAN Keypad display gives MAINS FAIL important messages. It will alert you if you need to call your alarm installation engineer. The 10 digit numeric keypad is where you use your PIN code. The A B C D keys help simplify use, MERiDIAN TIME: and will illuminate to highlight...
-
Page 5: Warning Indications
The ‘Alert’ lamp will flash if there is information available to you. Enter your code to see the information. After a code has been entered, one of the following lamps will light: Alarm, tamper or fault. The relevant detail of the problem will be shown on the display. -
Page 6: Using Tags
Page A5 Using Tags Euro-MERiDIAN’s High Security Proximity Tag (or Card) will set or unset your Alarm system with the minimum of fuss or complexity. The Tag contains NO batteries and is completely maintenance free. Just touch the Tag to the fascia below the logo to use. - Page 7 Using the Keypad with your PIN Code or...
-
Page 8: Security Checks
Page B1 Security Checks Before you set your system: You must ensure all doors and windows are securely closed and any pets or people are excluded from areas protected movement sensors. Close Windows Close Doors Exclude Pets & People... -
Page 9: Leaving The Building
(if fitted) that is mounted screen. externally by the final exit door. If you use a Push-to-Set button, or final-door- Exit tone will cease set, you will see the screen below. Leave via Exit Route Euro-MERiDIAN is now SET... - Page 10 Page B3 Faults when you Switch On If when you key in your PIN code (or present your Tag) a warning tone sounds and the fault lamp comes on, the keypad display will show the nature of the problem. An appropriate A B C D key will flash to indicate within which area the fault exists.
- Page 11 Page B4 Faults when Leaving the Building If when you have closed the final exit door (and pushed the ‘Push to Set’ button if fitted), the exit tone continues sound interrupted tone… “beep – beep – beep – “ have probably left protected door on the exit route...
- Page 12 “beep – beep – beep –“ ENTRY [010] TIME Key in your PIN code, or present your Tag. Entry tone will cease To indicate that the system has unset, unset lamp will illuminate for five seconds. Euro-MERiDIAN is now UNSET...
- Page 13 Page B6 Part-Setting the System Intelligent Set (if programmed) If you wish to set Euro-MERiDIAN and stay in the building (eg set the alarm at night), the Euro- MERiDIAN’s intelligent operating system will realise which level of security you require and will set only part of the system.
- Page 14 Page B7 Staying in the Building Intelligent Set To Part Set Euro-MERiDIAN go to the keypad and enter your PIN code or present your Tag. The appropriate A B C D keys will illuminate Exit tone will start Leave the protected area and retire to the un-protected area (eg upstairs).
- Page 15 When Problems Arise, Just Key in your PIN Code or...
-
Page 16: Silencing Alarms
The Alarm will stop sounding display will indicate Alarm Silenced Low Volts problem. Press the ‘YES’ Key Euro-MERiDIAN will advise you on Call Engineer Low Volts any action that is needed. If the ‘Alert’ LED indication remains lit, there is additional information available. Enter your present your Tag to view. -
Page 17: Engineer Reset
You will be required to quote a 6-digit code by telephone (advise them that Quote G19867 the system is a Castle Euro-MERiDIAN). Anti-Code Needed You will then be given a special code which will reset the system for that one occasion only. - Page 18 Page C3 Automatic Inhibit Euro-MERiDIAN designed automatically disable certain functionality. The factory default settings are as shown below: Intruder After unconfirmed Alarm Signal alarms in the same area or 1 confirmed alarm. Tamper After unconfirmed Alarm Signal alarms in the same area or 1 confirmed alarm.
-
Page 19: Setting Individual Areas
Setting Individual Areas... - Page 20 Page D1 The A B C D Keys Sometimes your security needs MERiDIAN TIME: will be a little more complex and you will need to use the A B C D keys. Your Installer also give names to all four of the A B C D areas, so that you can easily identify them.
- Page 21 To change your mind, press the relevant A B C D key(s) again. Press the Yes key to accept Setting areas will displayed, with the corresponding area keys being lit. SETTING ALL AREAS Euro -MERiDIAN will now Set the selected areas.
- Page 22 Page D3 Flexi-Set When Euro-MERiDIAN is already set MERiDIAN and you wish to unset: TIME: Key in your PIN code or present your Tag. If entry timer has started: All areas for which the tag or PIN is valid will be Unset. Any areas set for which the...
- Page 23 Page D4 Flexi-Unset If your codes have been set up with Flexi-Unset enabled, you will always have a choice of what areas you would like to set or unset, regardless of whether the entry timer is running or not – providing you have a code valid for the relevant areas.
- Page 24 Page D3 This Page has been left Flexi-Set Blank for Notes...
-
Page 25: More Advanced Functions
More Advanced Functions... -
Page 26: The 'Chime' Facility
Page E1 The ‘Chime’ Facility The ‘C’ key can be used to select MERiDIAN TIME: ‘chime’ facility while system is Unset. For example, you may wish to be alerted if someone enters through a particular door during the day. Simply press the ‘C’ key. The display will show a ‘C’... - Page 27 To omit the fault, Press ‘YES’ (or ‘NO’ if Set with Fault? Bedroom Window you don’t!) The system will then set as normal. The fault will be omitted for this one arming period only. NOTE iiiiiiiiiiiiiiiiiiiiiiiiiiiiiiiiiiiiiiiiiiiiiiiiiii Only doors or windows already open can be omitted in this way.
- Page 28 If it has been accepted it will be displayed on the screen. Repeat for any other zones that need to be omitted. After 10 seconds Euro-MERiDIAN will begin to set These zones will be omitted for this one period only.
-
Page 29: Keypad Personal Attack
Page E4 Keypad Personal Attack If you ever need to summon personal assistance MERiDIAN emergency, Euro-MERiDIAN allows TIME: you to do so. Simply press the ‘1’ and ‘7’ keys at the same time. To reset: Enter you PIN code or present your Tag. - Page 30 This Page has been left Blank for Notes...
-
Page 31: Manager Menu
Page E4 Keypad Personal Attack Manager Menu enter Manager Menu, press ‘D’ and then key in your code or present your tag. The screen will display relevant information; simply press ‘No’ to move into Manager Menu. We recommend that your system is fully disarmed to use Manager Menu functions. - Page 32 Exit Manager Menu? (see page F23) These features can also be accessed with a standard user code. Pressing the ‘NO’ key will take you from one Menu to the next (as well as ‘Escaping’ from within menu). Pressing the ‘YES’ key will take you into a menu (as well as ‘Accepting’...
- Page 33 Page F2 Manager Menu Press ‘D’ and key in your Manager PIN code or user code. The first Menu choice asks you if SET DATE & TIME? you wish to ‘Set Date & Time?’ If you wish to enter the menu, press ‘YES’.
-
Page 34: Set Date And Time
Page F3 Set Date & Time Press ‘NO’ to move to next menu. SET DATE & TIME? Press ‘YES’ ‘NO’ (Press to move to the next menu) Enter Year (eg 06=2006) YEAR (00-99) [06] Press ‘YES’ Enter Month MONTH (1-12) [08] Press ‘YES’... -
Page 35: Omit Zones
Page F4 Omit Zones Some of your doors may rarely be used. Opening them, even with Omit Zones [--] Euro-MERiDIAN Unset, designed to cause an alarm. If you need to open these doors you can omit them from the system as shown below. - Page 36 Page F5 Changing or adding PIN Codes/Tags A record should be kept as shown on Page G2 CHANGE CODES? Press ‘YES’ (Press ‘NO’ to move to the next Menu) Press ‘YES’ Change User Codes? Master (Press ‘NO’ to programme the Manager Code Turn to the next page to continue to programme user codes.
- Page 37 ENTER USER CODE [****] To delete a code or Tag press ‘C’. Press ‘YES’ Euro-MERiDIAN will not allow you to programme in codes that are already in use by the system. Note: ‘EN Grade 3’ Standard users can only edit their...
- Page 38 Page F7 Changing or adding PIN Codes/Tags Choose the level of authority the User Type code-holder is allowed. (User) User – cannot access Manager Menu. Manager – can use Manager Menu. (Use ‘B & D’ keys to make your choice). Press ‘YES’...
- Page 39 Page F8 Changing or adding PIN codes/TAGS Flexi-Set gives you the opportunity to choose the areas you require to Flexi Set set when you use your PIN code or Tag. If you do not choose Flexi-Set your Flexi Set Code/Tag will simply set the areas assigned without offering you the opportunity to choose.
- Page 40 Page F9 Changing or adding PIN Codes/Tags If you do not have Access Control Assign Codes to or Wards, go to page F10. Readers Press ‘YES’ (Press ‘NO’ to move to next menu) Wards Access To assign a Tag to Access Control Readers, or a Ward Reader Enter Reader...
- Page 41 Page F10 Changing or adding new PIN Codes/Tags Using the numeric keys, you can enter a user name, similar to typing a text message on a mobile phone. Use ‘0’ key for space. The A B C D keys on the keypad are used as follows: ‘A’...
-
Page 42: Review History Log
Page F11 Review History Log REVIEW LOG? Press ‘YES’ (Press ‘NO’ to move to the next menu) Panel Log? Press ‘YES’ To advance through the logs: Date & Time Press ‘D’ <EVENT> For added information: <Area Involved> Press ‘C’ <User Involved> To move backward to previous events: Press ‘B’... - Page 43 Page F12 Review History Log If Access Control Facility is in use, a separate log is available dedicated to events using this function. Follow the same procedure as described on page F11, but press ‘NO’ to choose between ‘PANEL LOG’ and ‘ACCESS LOG’. Access Control is available if your panel is fitted with an MSX-76 or MSX-280 card.
- Page 44 Page F13 SMS Phone Book Press ‘YES’ PHONEBOOK? (Press ‘NO’ to move to the next Menu) Use the ‘D’ key to scroll to which SMS Numbers SMS telephone number you wish to change (1-4). Press ‘YES’ Using the numeric keys, type in Mobile No.
-
Page 45: Walk Test
Page F14 Walk Test Press ‘YES’ WALK TEST? (Press ‘NO’ to move to the next Menu) Choose the area(s) you wish to test by pressing the appropriate ABCD keys. Walk Test Zone Press ‘YES’ Front Door All detectors waiting to be tested will scroll in the display. - Page 46 Page F15 Testing your Alarm Sounders SIREN TEST? Press ‘YES’ (Press ‘NO’ to move to the next menu) Testing Siren Press ‘YES’ Siren will sound, Strobe will flash SIREN TEST? Press ‘NO’ to move to next menu.
- Page 47 The fee for routine checking is collected automatically via a premium rate number when the Euro-MERiDIAN makes its regular authorisation and routing call to the messaging computer. Should this call fail, the display will show ‘CHC Test Fail’...
- Page 48 Page F17 Test CHC Communications It is recommended that this test is only undertaken under supervision your alarm installation engineer. Press ‘NO’ to move to the next menu TEST CHC COMMUNICATIONS? (Press ‘YES’ to make the test (under the direction of an alarm engineer), the test call will be via a premium rate number) If your alarm panel is connected to Press Y if using...
-
Page 49: Dial Out Menu
Select Operation diagnostic data to your PC where Diagnostics [1] it can be printed if needed. Calling Remote Press ‘YES’ The Euro-One panel does not have options to choose which PC it will dial, it will automatically call PC 1. -
Page 50: Allow Engineer Menu
Page F19 Page F21 Block Up/download Allow Engineer Menu When your alarm installation engineer comes to your premises ALLOW ENGINEER MENU? for a maintenance visit or to correct a fault after an alarm he will require access programming of the system. Press ‘YES’... -
Page 51: Block Remote Set
Page F20 Block Remote set Your alarm system BLOCK REMOTE configured so that your alarm SET? installation company or company manager can set or unset the system remotely via PC. Should you wish to block this access you can do so through this menu. Press ‘YES’... - Page 52 Required G15234 (advise them that the system is a Castle Euro-MERiDIAN). You will then be given a special code which will reset the system for that one occasion only. Press ‘YES’ Enter your Code [ After entering the correct anti- code you may continue using your system normally.
-
Page 53: User Programmable Functions
Page F22 User Programmable Functions Persons holding Manager codes to Euro-MERiDIAN have access to the following programming options: Set Date & Time (page F2) Change User Codes (page F5) Change Mobile Telephone Numbers (page F13) Allow Engineer Access (page F19) - Page 54 Page F23 Menu Exit To exit from Manager Menu and EXIT MANAGER return to normal mode. MENU? Press ‘YES’ If you wish to select any of the Manager Menu items again press the ‘NO’ key until your choice is displayed (see F2).
-
Page 55: Service Information
Tel: Name Tel: Panel Type Software Version Installed to Grade (See below) Environmental Class 2 Euro-ONE panels are suitable for use in installations designed meet requirements of Grade 2, Euro-ONE PLUS and MSX upgraded panels meet the requirements of Grade 3. -
Page 56: User Codes
Page G2 User Codes Warning: This information should be removed from the manual and stored in a secure location. Photocopy this page if you have more users. Access Name Type Areas Attributes FlexiSet Reader John Manager ABCD Set/Unset 1 2 8... - Page 57 Page G3 Disclaimer Euro-MERiDIAN includes the facility to send electronic signals to an Alarm Receiving Centre (ARC), and also to send SMS text messages to mobile telephones. Alarm, etc. signals may be transmitted via a PSTN link, using a variety of formats, to suitable receiving equipment located at the premises of an independently operated Alarm Receiving Centre.
- Page 58 Your Alarm System is a RINS1020-v1 Software Version © Sept 2006...
Need help?
Do you have a question about the One and is the answer not in the manual?
Questions and answers