BMW S 1000 RR Rider's Manual
Hide thumbs
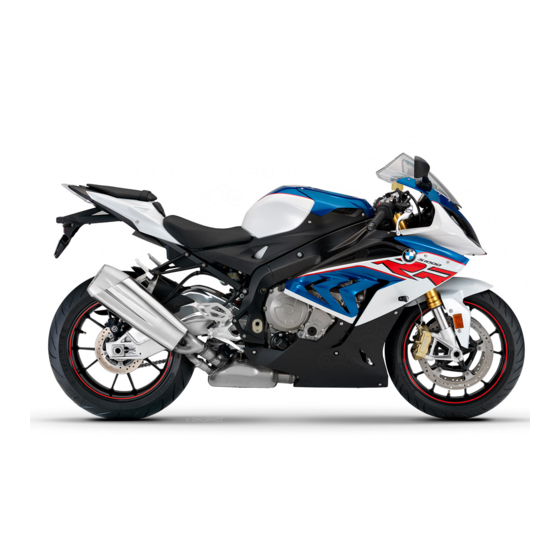
Also See for S 1000 RR:
- Rider's manual (300 pages) ,
- Owner's manual (196 pages) ,
- Brochure (19 pages)
Table of Contents
Advertisement
Quick Links
Advertisement
Table of Contents

Related Manuals for BMW S 1000 RR


Summary of Contents for BMW S 1000 RR
- Page 1 Rider's Manual S 1000 RR BMW Motorrad The Ultimate Riding Machine...
- Page 2 Motorcycle data/dealership details Motorcycle data Dealership details Model Person to contact in Service department Ms/Mr Vehicle identification number Phone number Colour code Date of first registration Dealership address/phone number (com- Registration number pany stamp)
- Page 3 We congratulate you on your choice of a motorcycle from We hope that you will enjoy rid- BMW and welcome you to the ing your BMW and that all your community of BMW riders. journeys will be pleasant and Familiarise yourself with your new safe.
-
Page 4: Table Of Contents
....68 BMW Motorrad Race ABS ......41 Dynamic Traction Control DTC . - Page 5 Bulbs ..... . 131 Brake system with BMW Wheels and tyres ..157 Fuses .
- Page 6 12 Service ....163 BMW Motorrad service ..164 BMW Motorrad service quality ..... 164...
-
Page 7: General Instructions
General instructions Overview ......6 Abbreviations and symbols ..6 Equipment . -
Page 8: Overview
BMW optional ex- overview of your motorcycle. All tras originally ordered. Indicates the end of an maintenance and repair work on item of information. -
Page 9: Equipment
If your BMW was supplied with equipment and accessories. equipment not described in Because of this, your motorcycle this Rider's Manual, you will... -
Page 11: General Views
General views General view, left side ....11 General view, right side ... . . 13 Handlebar fitting, left . -
Page 13: General View, Left Side
General view, left side Adjuster, spring preload, front ( Adjuster for front rebound- stage damping ( Adjuster for rear compression-stage damping ( Adjuster for spring preload, rear ( Seat lock ( Table of tyre pressures Payload table Chain settings Engine oil level indicator 109) Adjuster for front compression-stage... -
Page 15: General View, Right Side
General view, right side Brake-fluid reservoir, rear 114) VIN and type plate (on steering-head bearing, right) Brake-fluid reservoir, front 113) Coolant level indicator (be- hind side panel) ( 115) Engine-oil filler neck 110) Adjuster for rear rebound- stage damping (... -
Page 16: Handlebar Fitting, Left
Handlebar fitting, left High-beam headlight and headlight flasher ( Control for the laptimer with BMW Motorrad Race ABS Operating the ABS with BMW Motorrad Race ABS and DTC Control for DTC ( Control for hazard warning flashers ( Operation of the flashing... -
Page 17: Handlebar Fitting, Right
Handlebar fitting, right Control for selecting the ride mode ( Starting engine ( Emergency off switch (kill switch) (... -
Page 18: Underneath The Seat
Underneath the seat Battery with BMW Motorrad Race ABS different battery position: set further back and turned 180° Helmet holder ( Luggage loops ( Toolkit ( 108) Fuse box ( 139) Rider's Manual... -
Page 19: Instrument Panel
Instrument panel Panels for warning and tell- tale lights ( 20) ( Rev. counter Shift light ( Ambient-light brightness sensor (for adapting the brightness of the instru- ment lighting) with anti-theft alarm (DWA) Anti-theft alarm telltale light (see the instructions for use for the anti-theft alarm) Multifunction display The instrument-cluster... -
Page 20: Headlight
Headlight Side light Low-beam headlight High-beam headlight... -
Page 21: Status Indicators
Status indicators Standard status indicators ..20 Standard warnings ....21 ABS warnings ..... . 27 DTC warnings . -
Page 22: Standard Status Indicat
Standard status Telltale lights Service-due indicator indicators Multifunction display Flashing turn indicators, If the next service is due in less left than one month, the date for the next service is shown briefly Flashing turn indicators, Speedometer after the Pre-Ride Check com- right Coolant temperature pletes. -
Page 23: Standard Warnings
1 or indicated by a warning consult a specialist workshop, serviced at a date in advance string in the display. preferably an authorised BMW of the forecast due date. If the Motorrad dealer. countdown distance to the odo- meter reading at which a service... - Page 24 If a warning string 2 appears on the display it is accompanied by the 'General' warning light 3 showing red or yellow. If two or more warnings occur at the same time, all the appropriate warning lights show, alternating with warning strings as applic- able.
- Page 25 Warnings, overview Warning light Status indicators Meaning EWS ! Lights up yellow appears on Electronic immobiliser active ( the display Lights up Fuel down to reserve ( Lights up red Temperature read- Coolant temperature too high ( ing flashes Lights up Engine in emergency-operation mode LAMPR ! Lights up yellow...
- Page 26 Warning light Status indicators Meaning VDS! appears on Drop sensor missing or defective the display...
- Page 27 Reserve fuel sible by a specialist workshop, nication between key and engine preferably an authorised BMW electronics is disrupted. Motorrad dealer. approx. 4 l Remove all other vehicle keys...
- Page 28 LAMP ! appears on the display. workshop, preferably an author- cases, the engine stops and re- ised BMW Motorrad dealer. A defective bulb places fuses to start. Otherwise, the en- your safety at risk because gine runs in emergency operating...
-
Page 29: Abs Warnings
Motorcycle dropped ised BMW Motorrad dealer. VDS! The detailed descriptions relat- (Vertical Down Sensor) ing to BMW Motorrad Race ABS appears on the blank display. ABS warnings start on page ( 100), and you Possible cause: with BMW Motorrad Race... - Page 30 Warnings, overview Warning light Status indicators Meaning Flashes ABS self-diagnosis not completed Lights up ABS deactivated ( Lights up ABS fault (...
-
Page 31: Dtc Warnings
Pull away slowly. Bear in mind The detailed descriptions relating formation on situations that can that the ABS function is not to BMW Motorrad DTC start on lead to an ABS fault ( 102). available until self-diagnosis has page (... - Page 32 Warnings, overview Warning light Status indicators Meaning Quick-flashes DTC intervention ( Slow-flashes Self-diagnosis not completed ( Lights up DTC switched off ( Lights up DTC fault (...
-
Page 33: Anti-Theft Alarm Warnings
DTC switched off specialist workshop, preferably and has intervened to reduce DTC warning light shows. an authorised BMW Motorrad torque. The warning light flashes dealer. for longer than DTC intervention lasts. This affords the rider visual... - Page 34 Mode of presentation Anti-theft alarm warnings appear as plain-text warnings 2 in com- bination with the 'General' warn- ing light 3 showing after the Pre- Ride Check and relate to the ca- pacity of the internal battery that supplies power to the anti-theft alarm.
- Page 35 Warnings, overview Warning light Status indicators Meaning DWALO ! appears Anti-theft alarm battery weak ( on the display DWA ! Lights up yellow appears on Anti-theft alarm battery flat ( the display...
- Page 36 Seek the advice of a specialist proportion of its original capa- workshop, preferably an author- city. There is no assurance of ised BMW Motorrad dealer. how long the anti-theft alarm can remain operational if the motor- cycle's battery is disconnected.
-
Page 37: Operation
......41 BMW Motorrad Race ABS ..41 Dynamic Traction Control DTC . -
Page 38: Ignition Switch And Steering Lock
(EWS) if a key is lost ABS self-diagnosis is or mislaid ( 37). performed. ( Ignition switch and steering lock, with BMW Motorrad Race ABS tank filler cap lock and seat lock and DTC are all operated with the same DTC self-diagnosis is per- key. -
Page 39: Electronic Immobiliser Ews
You can obtain replacement/extra unit has recognised the key as keys only through an authorised "authorised" for your motorcycle. BMW Motorrad dealer. The keys Press and hold down button 2 A spare key attached to are part of an integrated security... -
Page 40: Odometer And Tripmeters
Residual range Press button 2 to step the The following values can be dis- minutes reading down. played: When the minutes reading is Total distance covered correct, press and hold down Trip I Tripmeter 1 ( button 2 until the number Trip II Tripmeter 2 ( stops flashing. -
Page 41: Lights
High-beam headlight and updated. headlight flasher The calculated range is an Start the engine. approximate value. Con- sequently, BMW Motorrad re- commends that you should not try to use the full residual range before refuelling. Lights Immediately after switching off... -
Page 42: Hazard Warning Flashers
Hazard warning The turn indicators are can- celled automatically after flashers you have ridden for approxim- Switching on hazard ately 10 seconds, or covered a warning flashers distance of about 200 m. Switch on the ignition. The hazard warning flash- ers place a strain on the battery. -
Page 43: Emergency Off Switch
ABS warning light shows. switch) BMW Motorrad Race Operating the kill switch when riding can cause with BMW Motorrad Race the rear wheel to lock and thus cause a fall. Deactivating ABS function Do not operate the kill switch Switch on the ignition. -
Page 44: Dynamic Traction Control Dtc
BMW Motorrad Race ABS The ABS function is deactiv- If the coding plug for the and DTC ated. SLICK function is not inserted, switching the ignition off and Activating ABS function then on again will have the same effect. -
Page 45: Ride Mode
Activating DTC function then on again will have the same effect. A DTC fault has occurred if the DTC warning light shows when the motorcycle accelerates to a speed in ex- cess of 5 km/h after the ignition was switched off and then on again. - Page 46 See the section entitled "Engineering details" for more information on the various ride modes that can be selected. If the coding plug has been in- Repeatedly press button 1 until stalled the menu includes the the arrow is to the left of the SLICK mode 4 as an extra se- setting you want.
- Page 47 ning the motorcycle on racing riding the motorcycle on public adaptation settings even after slicks. the ignition has been switched roads. off. In these cases, do not insert the When SLICK mode is selected: coding plug for riding on public Note that ABS control for the Installing coding plug roads.
-
Page 48: Brakes
Attempting to adjust the handbrake lever while rid- ing the motorcycle can lead to accidents. Do not attempt to adjust the handbrake lever unless the mo- torcycle is at a standstill. To do so, press retainer 2 and When the coding plug is inser- pull the cap up. -
Page 49: Mirrors
Spring preload From position 1: widest span between handlebar grip and Setting clutch lever It is essential to set spring pre- to position 6: narrowest span load of the front suspension to between handlebar grip and suit the terrain. Increase spring handlebar lever preload for riding in rough terrain Mirrors... - Page 50 load, in other words), use the Load-dependent adjust- tool from the on-board toolkit ment of spring preload to turn adjusting screws 3 in direction a. Negative spring displace- To increase negative spring ment of front wheel displacement (reduce spring 10...15 mm (With rider preload, in other words), 85 kg) use the tool from the on-...
-
Page 51: Damping
toolkit to turn adjusting ring 2 plate carrier to screw 2 of the chain guard. in direction a. Apply the rider's weight to the Tighten screw 1 to the spe- cified tightening torque. motorcycle. With the assistance of a Clamping screw to top second person, measure spring retainer distance d between points 1... - Page 52 Adjusting compression- Compression stage, ba- stage damping for front sic setting, front wheel Position 3 (comfortable set- ting with rider 85 kg) Position 5 (normal setting with rider 85 kg) Position 8 (sports setting with rider 85 kg) To increase damping: Use the Make sure that the settings are tool from the on-board kit to identical on left and right.
- Page 53 Adjust the rebound-stage Rebound stage, basic damping for front wheel setting, front Position 2 (comfortable set- ting with rider 85 kg) Position 5 (normal setting with rider 85 kg) Position 8 (sports setting with rider 85 kg) To increase damping: Use the tool from the on-board kit to Adjusting compression- turn the adjusting screw in the...
- Page 54 Compression stage, ba- sic setting, rear, high speed Position 2 (comfortable set- ting with rider 85 kg) Position 6 (normal setting with rider 85 kg) Position 10 (sports setting Adjust compression-stage To increase damping: Use the with rider 85 kg) damping for long bump tool from the on-board tool- travel (low speed) by turning...
-
Page 55: Tyres
Adjusting rebound-stage Rebound stage, basic damping for rear wheel setting, rear Make sure the ground is level Position 2 (comfortable set- and firm and place the motor- ting with rider 85 kg) cycle on its stand. Position 5 (normal setting with rider 85 kg) Position 8 (sports setting with rider 85 kg) -
Page 56: Front And Rear Seats
Install the rear seat and screw them on firmly to pre- vent sudden deflation. Make sure the ground is level and firm and place the motor- cycle on its stand. Check tyre pressures against the data below. Tyre pressure, front Open seat lock 1 with the igni- tion key. -
Page 57: Helmet Holder
Installing front seat Lock the seat lock with the ig- nition key. Remove the front seat Push the upholstery of the front seat forward slightly Engage the front seat in above the screw holes and mount 2, then lower the rear of hold it in this position. -
Page 58: Luggage Loops
Luggage loops Securing luggage to motorcycle Remove the rear seat ( 54). Turn the rear seat upside down. Use the loops 1 and the rear The helmet catch can footrests, for example, to se- scratch the panelling. cure luggage to the rear seat. Make sure the lock is out of the In this process, take care not to way when you hook the helmet... -
Page 59: Riding
Riding Safety instructions ....58 Checklist ......59 Starting . -
Page 60: Safety Instructions
Risk of poisoning the year. Your authorised BMW damages to the components in Motorrad dealer will be glad to Exhaust fumes contain carbon question and lead to failure of... -
Page 61: Checklist
Catalytic converter Risk of overheating Tension and lubrication of the drive chain If misfiring causes unburned fuel Cooling would be to enter the catalytic converter, inadequate if the engine At regular intervals: there is a danger of overheating were allowed to idle for a lengthy Engine oil level (every refuelling and damage. -
Page 62: Starting Engine
ABS self-diagnosis is tery voltage is too low. Recharge performed. ( the battery before you start the with BMW Motorrad Race ABS engine, or use jump leads and a and DTC donor battery to start. Telltale and warning lights 1 DTC self-diagnosis is per- The engine starts. - Page 63 BMW Motorrad Race counter moves to the position ABS self-diagnosis for zero engine revolutions. completed BMW Motorrad Race ABS per- The telltale and warning lights go forms self-diagnosis to ensure its The ABS warning light goes out. operability. Self-diagnosis is per- out.
-
Page 64: Running In
Phase 2 quently; avoid riding at constant BMW Motorrad DTC performs engine rpm for prolonged peri- self-diagnosis to ensure its op- DTC warning light slow- ods. erability. Self-diagnosis is per- flashes. Try to do most of your rid- formed automatically when you... -
Page 65: Shifting Gear
Tyres Shifting gear Running-in speed New tyres have a smooth sur- Shift light face. This must be roughened by riding in a restrained manner at no full load (Odometer read- various heel angles until the tyres ing 0...1000 km) are run in. This running in pro- Do not omit the first inspection cedure is essential if the tyres are after 500 - 1200 km. -
Page 66: Shift Assistant
SETUP the load change. BMW Motor- menu. rad recommends disengaging the clutch for upshifts in these Shift assistant circumstances. -
Page 67: Brakes
BMW Motorrad Race ABS pre- Delayed braking action or poor To optimise stopping distance, vents the front wheel from lock- braking efficiency must be apply the front brakes rapidly and ing up. -
Page 68: Parking Your Motorcycle
Parking your Riding in the rain or through On a gradient, the motorcycle puddles of water. should always face uphill; se- motorcycle lect 1st gear. After the motorcycle has been Side stand washed. Refuelling Switch off the engine. Riding on salted or gritted roads. - Page 69 Fuel can attack the material tank past the bottom edge of of the windscreen, which the filler neck. becomes dull or unsightly. When refuelling after run- Wipe off the windscreen immedi- ning on reserve, make sure ately if it comes into contact with that you top up the tank to a fuel.
-
Page 70: Secure The Motorcycle For Transport
Make sure that the motorcycle Reserve fuel cannot topple sideways. Push the motorcycle onto the approx. 4 l transportation flat and hold it in position: do not place it on the Press the fuel tank cap down side stand or centre stand. firmly to close. - Page 71 Pull the straps down and tight. At the rear, secure the straps to the rear footrests on both sides and tighten the straps. Tighten all the straps uniformly; the motorcycle's suspension should be compressed as tightly as possible front and rear.
-
Page 73: On The Race Track
On the race track Multifunction display ....72 LAPTIMER mode ....74 INFO mode . -
Page 74: Multifunction Display
Multifunction display sequent viewing in the INFO mode. Select the display mode INFO mode: The data saved beforehand in LAPTIMER mode can be viewed in INFO mode. Note that this mode can be activ- ated only when the motorcycle is at a standstill. - Page 75 Overview of mode selection solid line: short press broken line: press and hold down Operating odometer Setting clock ( 37). Starting timing ( 76). Starting INFO menu Starting SETUP menu...
-
Page 76: Laptimer Mode
LAPTIMER mode Labels for the values this freeze period can be set as described on page ( 89). shown on the display Mode of presentation The following times can be dis- played in the second line: The time for the preceding lap, labelled "LASTLAP". - Page 77 Overview of LAPTIMER mode solid line: short press broken line: press and hold down Ending timing ( 77). Interrupting timing ( 77). Starting timing ( 76). Customising display layout 76).
- Page 78 Customising display Starting timing of another lap can be started only by an external signal. layout Infrared receiver with infrared receiver An infrared signal provides a con- venient way of operating the in- strument panel in LAPTIMER mode. The instrument panel can be operated in this way only Press button 1 to start timing.
- Page 79 Interrupting timing Ending timing you delete the current timing session in the INFO mode. Press button 1 to interrupt tim- Begin by pressing button 1 to ing. interrupt timing. Press button 1 again to re- To save the reading as the last sume timing.
-
Page 80: Info Mode
INFO mode button 2 is pressed the laps are shown in reverse sequence: Selecting saved lap ATBEST All-time best lap ( BEST Best lap saved ( LAST Last lap saved ( All other laps saved in memory Exiting INFO mode INFO RETURN Option for deleting the data from memory... - Page 81 Overview of INFO mode solid line: short press broken line: press and hold down Selecting saved lap 78). Deleting lap times ( 82). Direct jump to the CLEAR ALL menu Exiting INFO mode 80). Clearing all saved data 81). Activate the ROAD mode 81).
- Page 82 Information per lap Lap time for the lap cur- rently displayed Exiting INFO mode Press and hold down button 2 to exit the INFO menu. Alternately: Top speed The readings already recorded (max) and lowest speed remain saved in memory. (min) on the lap currently displayed Repeatedly press but-...
- Page 83 Clearing all saved data Activating ROAD mode means that other races can sub- sequently be timed and the lap times of those races compared with the best lap from earlier races. The all-time best lap can also be deleted from memory. If the all-time best lap is from a race timed in the past, it is ac- companied on the display by the...
- Page 84 Deleting lap times best time until the best time was deleted becomes the new best lap. LAST the last lap in memory the lap in question is deleted. The lap that was the second- last time until the last time was deleted becomes the new last lap.
-
Page 85: Setup Mode
SETUP mode parameters are shown in reverse sequence: Selecting a parameter Engine speed for shift light ON SFT-ON Engine speed for shift light SFTOFF OFF ( Shift-light brightness SFT-BR Shift-light flash frequency SFT-FL Display setup in laptimer mode SETUP LAPTIMER Repeatedly press button 1 or Display hold time for the most button 2 until the parameter... - Page 86 Overview of SETUP mode solid line: short press broken line: press and hold down Selecting a parameter 83). Direct jump to ROAD mode Setting parameter ( 85). Exiting setup mode 85).
- Page 87 SETUP MENU Setting parameter Exiting setup mode appears on the display. Engine speed for shift light ON Press and hold down button 2 Press and hold down button 1 until the multifunction display until the parameter starts to switches to ROAD mode. flash.
- Page 88 Engine speed for shift Shift-light brightness Shift-light flash frequency light OFF Shift-light brightness expressed Frequency at which the shift light as a percentage of maximum flashes, shown in Hz (1/s). Engine speed for shift light OFF brightness. If you select ON the shift light in rpm.
- Page 89 Version 1 Version 2 Version 3 The second line shows the run- The second line shows the time The second line shows the run- ning time for the current lap, recorded for the preceding lap, ning time for the current lap, the the best lap saved in memory the running time for the current all-time best lap is shown in the...
- Page 90 Version 4 Version 5 Version 6 The second line shows the time The second line shows the run- The second line is blank, the recorded for the preceding lap, ning time for the current lap, the third line shows the running time the best lap saved in memory is third line is blank.
- Page 91 Display-freeze period for Minimum lap time the most recent time If an infrared receiver is used for timing laps, you can set the min- Freeze time in seconds. imum time that must elapse from After the start of a new lap the when the first signal is received time for the preceding lap re- until a second signal will be ac-...
-
Page 92: In The Gravel Trap
In the gravel trap Removing and installing mirrors with BMW Motorrad Race ABS and DTC Removing mirror Make sure the ground is level DTC deactivation and firm and place the motor- On very loose surfaces (for ex- cycle on its stand. -
Page 93: Number-Plate Carrier
Removing and installing Open retainer 2 and discon- nect the plug. number-plate carrier Removing number-plate with anti-theft alarm (DWA) carrier Switch off the ignition. Make sure the ground is level and firm and place the motor- cycle on its stand. with anti-theft alarm (DWA) Engage the left and right mir- If applicable, deactivate the... - Page 94 Carefully disengage anti-theft Use a small screwdriver to Remove screws 8 with wash- alarm bracket 5 from the rear push retainer 7 to the left and ers and remove the number- frame and turn it up. at the same time push the plug plate carrier.
- Page 95 secure it to the rear frame with cable tie 1. with anti-theft alarm (DWA) Hold the number-plate carrier Connect the plug, making sure in position and work the cable that retainer 6 engages. through opening 9. Install screws 8 with the wash- Push the plug of the number- ers.
-
Page 96: Removing And Installing Front
applies by analogy to the left side panel. Removing side panel ( 115). From the front, work the anti- Remove screw 2 and remove theft alarm into position in the the turn indicator. Work the holder. cable through the fairing side panel. - Page 97 Installing front flashing Install screws 2 and 3. turn indicator Engage the fairing side panel in mount 7 on the engine spoiler. Install screw 1. Remove screw 1 on the in- board side of the right side panel. Seat the side panel in the rub- ber buffer at position 5.
- Page 98 Remove screws 4 with the washers. Pull the fairing side panel at position 5 to disengage it from the rubber buffer and remove. Work the cable through the fairing side panel. Clip in the turn-signal cable at position 1. Install the side panel ( 116).
-
Page 99: Engineering Details
Race ABS ......100 Electronic engine management with BMW Motorrad DTC ..103... -
Page 100: Ride Mode
In these cases, do not insert the RACE standard tyres recommended coding plug for riding on public SLICK (only with coding plug by BMW Motorrad. The SLICK roads. inserted) mode is for racing slicks and sur- faces with a very high level of... - Page 101 reserved, engine response is cor- RACE SLICK respondingly soft. RACE is the sportiest mode The SLICK mode cannot be ac- The ABS always intervenes early available without the coding plug tivated unless the coding plug is enough to prevent as effectively inserted.
-
Page 102: Brake System With Bmw Motorrad Race Abs
No brake pressure in the brake the ground is also deactivated. system When this mode is selected the with BMW Motorrad Race In order to achieve this state, controller of the DTC system the motorcycle must be at assumes that the motorcycle is... - Page 103 At this instant the built up at the rear wheel by transferrable limit, the wheels BMW Motorrad Integral ABS the integral function. If the start to lock and the motorcycle must assume an extremely low brake pedal is depressed after loses its directional stability;...
- Page 104 When you brake, bear in mind of maintenance. sued. that ABS control cannot be relied In order to ensure that the BMW Exceptional riding on in all circumstances to prevent Motorrad Race ABS is always conditions:...
-
Page 105: Electronic Engine Manage
BMW Motorrad Race ABS is un- Even DTC is constrained rear wheel's incipient tendency to able to counteract their effects. by the laws of physics. In- spin or slip sideways. - Page 106 The BMW Motorrad DTC is un- If the coding plug for the SLICK able to control a situation of this mode is not inserted, you can nature.
-
Page 107: Accessories
Accessories General instructions ....106 Luggage ......106... -
Page 108: General Instructions
BMW proved by BMW for this purpose. affect the motorcycle's handling. motorcycles without constituting Genuine BMW parts and ac- a safety hazard. -
Page 109: Maintenance
Maintenance General instructions ....108 Jump starting ..... . 140 Toolkit . -
Page 110: General Instructions
48). cial tools and a thorough know- Extension for screwdriver ledge of motorcycle technology. blade If you are in doubt consult a Adjusting rear suspen- specialist workshop, preferably sion (in combination with your authorised BMW Motorrad plain screwdriver blade) dealer. -
Page 111: Engine Oil
than a short ride will lead to mis- Open-ended spanner 10 Reversible screwdriver blade interpretation; this in turn, means Width across flats 10/13 that the engine will be operated With star-head and Torx Adjusting chain tension with the incorrect quantity of oil. 120). -
Page 112: Topping Up Engine Oil
Have the oil level corrected without enough oil, but the same by a specialist workshop, also applies if the oil level is too preferably an authorised BMW high. Motorrad dealer. Always make sure that the oil level is correct. -
Page 113: Brake System
From the rear toward Top up the engine oil to the Have the brakes checked by a specified level. specialist workshop, preferably brake pads 1. an authorised BMW Motorrad Check the engine oil level Brake-pad wear limit, dealer. 109). front... - Page 114 If genuine BMW Motorrad Use only brake pads with carrier brake pads are not installed, plates at least 4.5 mm thick. it is absolutely essential to BMW Motorrad recommends measure the thickness of the installing only genuine BMW brake-pad carrier plates.
- Page 115 Have the brake pads replaced by a specialist workshop, preferably an authorised BMW Motorrad dealer. Check the brake fluid level in Brake fluid level, front Check the brake-fluid brake fluid reservoir 1.
- Page 116 Check the brake-fluid level at regular intervals. Have the defect rectified as quickly as possible by a spe- cialist workshop, preferably an authorised BMW Motorrad dealer. Check the brake-fluid level, rear brakes Check the brake fluid level in Brake fluid level, rear rear reservoir 1.
-
Page 117: Coolant
From in front toward the regular intervals. inside of the right side panel. Have the defect rectified as quickly as possible by a spe- cialist workshop, preferably an authorised BMW Motorrad dealer. Coolant Open cap 1 of the expansion Checking coolant level tank. - Page 118 The procedure described here for the right side apply applies by analogy to the left side panel. Remove screws 2 and 3. Disconnect plug 6. Remove screws 4 with the Remove the side panel. washers. Installing side panel Pull the fairing side panel at position 5 to disengage it from Remove screw 1 on the in- the rubber buffer and remove.
-
Page 119: Clutch
Have the clutch checked by a Seat the side panel in the rub- specialist workshop, preferably ber buffer at position 5. an authorised BMW Motorrad Install screws 4 with the wash- dealer. ers. Install screws 2 and 3. Connect plug 6. -
Page 120: Tyres
Tyres Checking clutch-lever Adjusting clutch-lever play play Check the tyre tread depth Your motorcycle's handling and grip can be impaired even before the tyres wear to the minimum tyre tread depth permitted by law. Have the tyres changed in good time before they wear to the minimum permissible tread Pull clutch lever 1 until resist-... -
Page 121: Rims
Use a screwdriver to push the and apply chain lubricant. dealer. chain up and down at a point To prolong chain life, BMW midway along the run between Motorrad recommends the use pinion and sprocket and meas- of BMW Motorrad chain lubric- ure difference a. -
Page 122: Adjusting Chain Tension
Chain deflection Locknut of the final-drive chain tensioning screw 30...40 mm (Motorcycle with 19 Nm no weight applied, supported Tighten quick-release axle on its side stand) nut 1 to the specified tight- If measured value is outside per- ening torque. mitted tolerance: Rear quick-release axle Adjusting chain tension... -
Page 123: Wheels
Wheels Checking chain wear Tyre recommendation For each size of tyre BMW Motorrad tests and classifies as roadworthy certain makes. BMW Motorrad cannot assess the suitability or provide any guarantee of road safety for other tyres. BMW Motorrad recommends permissible chain length Engage 1st gear. -
Page 124: Removing Front Wheel
Remove screws 2 of the brake ably an authorised BMW Motor- the process of removing the calipers on left and right. rad dealer. In some cases, the brake calipers. -
Page 125: Installing Front Wheel
BMW Motorrad front-wheel Remove quick-release axle 2, stand for lifting the motorcycle. while supporting the wheel. Installing auxiliary stand at front Roll the front wheel forward to wheel ( 128). remove. Installing front wheel Possible malfunctions when ABS and DTC systems in- tervene if non-standard wheels are installed. - Page 126 Remove the front-wheel stand and the auxiliary stand. Ease the brake calipers on to the brake discs. with BMW Motorrad Race Tighten screws 2 on left and right to the specified tightening torque. Radial brake caliper to...
-
Page 127: Remove The Rear Wheel
BMW Motorrad Race Installing auxiliary stand at rear wheel ( 130). Slip wooden chocks or similar under the rear wheel to prevent it from dropping out after the quick-release axle has been removed. Remove quick-release axle 5 and remove adjusting plate 6. -
Page 128: Installing Rear Wheel
Installing rear wheel holder 8. clear of the motorcycle, take care not to damage ABS Possible malfunctions when with BMW Motorrad Race sensor 9. ABS and DTC systems in- tervene if non-standard wheels are installed. See the information on the effect... - Page 129 BMW Motorrad Race ing brake-caliper carrier 10 for- ised BMW Motorrad dealer. ward at the same time. Roll the rear wheel on the sup- port into the swinging arm as far as necessary to permit the brake-caliper carrier to be in- serted.
-
Page 130: Front-Wheel Stand
BMW Motorrad Race Insert right adjusting plate 6 Insert left adjusting plate 4. in the swinging arm in such a Install axle nut 1 with its way that anti-twist stop 12 is washer, but do not tighten the Seat the brake and ABS line in vertical. - Page 131 Place the motorcycle on its centre stand or another auxiliary stand before lifting the front wheel with the BMW Motorrad front-wheel stand. Place the motorcycle on an Use basic stand (0 402 241) Turn brackets 2 long ends in.
-
Page 132: Rear-Wheel Stand
Rear-wheel stand Installing auxiliary stand at rear wheel Engage the auxiliary stand in Install adapter pins the front suspension and apply (2 152 841) 1 in the rear wheel even pressure to push it down swinging arm on left and right to the ground. -
Page 133: Bulbs
it is easier for other users to oversee the motorcycle. Replace defective bulbs as soon as possible; always carry a complete set of spare bulbs if possible. The bulb is pressurised and can cause injury if dam- aged. Turn brackets 2 long ends out. Engage the auxiliary stand in Wear protective goggles and the rear wheel swinging arm... - Page 134 Make sure the ground is level and firm and place the motor- cycle on its stand. Switch off the ignition. Remove cover 2 so that the Release spring clip 4 at left high-beam headlight bulb can and right and swing it up. be replaced.
-
Page 135: Replacing Parking-Light
Bulbs for the low-beam headlight H7 / 12 V / 55 W Bulb for high-beam headlight H7 / 12 V / 55 W Connect plug 3. Remove parking-light cover 1. Install the cover. Replacing parking-light bulb, left Make sure the ground is level and firm and place the motor- cycle on its stand. - Page 136 Bulb for parking light W5W / 12 V / 5 W Remove bulb 4 from the Install socket 3 in the socket, socket. making sure that retainer 2 en- gages Replace the defective bulb. Install the cover. Do not touch the glass of Replacing parking-light new bulbs with your fingers.
- Page 137 Bulb for parking light W5W / 12 V / 5 W Remove cover 1. Remove bulb 4 from the socket. Replace the defective bulb. Do not touch the glass of new bulbs with your fingers. Insert bulb 4 into the socket. Use a clean, dry cloth to hold the bulbs when handling them.
- Page 138 Install socket 3 in the head- Remove screw 1. Turn bulb 2 counter-clockwise light housing, making sure that and remove it from the bulb retainer 2 engages housing. Install the cover. Replace the defective bulb. Replacing turn indicator Do not touch the glass of bulbs, front and rear new bulbs with your fingers.
-
Page 139: Led Rear Light
Seek the advice of a specialist RY10W / 12 V / 10 W workshop, preferably an author- ised BMW Motorrad dealer. Working from the inboard side, insert the glass into the bulb Maximum number of de- housing and close the housing. - Page 140 Replacing number-plate Replace the defective bulb. light Do not touch the glass of new bulbs with your fingers. Use a clean, dry cloth to hold the bulbs when handling them. Dirt deposits, in particular oil and grease, interfere with heat radi- ation from the bulb.
-
Page 141: Fuses
The figures in the circuits checked by a specialist graphic correspond to the fuse workshop, preferably an author- numbers. ised BMW Motorrad dealer. Close the fuse cover. The latch engages with an audible click. Install the rear seat (... -
Page 142: Jump Starting
Jump starting and the other end to the neg- fully insulated crocodile clips at both ends. ative terminal of the discharged The wires leading to the battery. Jump-starting with a donor- power socket do not have Start the engine of the vehicle battery voltage higher than a load-capacity rating adequate with the discharged battery... -
Page 143: Battery
BMW Motorrad has de- Compliance with the points be- veloped a float charger spe- low is important in order to max- cially designed for compatibility... - Page 144 Connecting battery to with BMW Motorrad Race with BMW Motorrad Race motorcycle Note the different positions Note the different positions Connect battery positive lead 2 of the battery and terminals 1 of the battery and terminals 1 first. and 2.
-
Page 145: Installing Battery
If you want to have the date set The battery has to be re- consult a specialist workshop, charged at regular intervals preferably an authorised BMW in the course of a lengthy period Motorrad dealer. of disuse. See the instructions for caring for your battery. -
Page 147: Care
Care Care products ..... 146 Washing motorcycle ....146 Cleaning easily damaged compon- ents . -
Page 148: Care Products
Do not use cleaning agents that BMW Motorrad recommends pads have dried out. contain alcohol, solvents or ab- that you use BMW insect re- rasives to clean plastic parts. mover to soften and wash off insects and stubborn dirt on... -
Page 149: Paint Care
Do not use cleaning agents. Using silicone sprays for We recommend BMW vehicle the care of rubber seals can polish or BMW paint cleaner for Chrome cause damage. this purpose. Use plenty of water and BMW... -
Page 150: Protective Wax Coating
BMW Motorrad dealer. Com- wax or synthetic wax. bine work for laying up/restoring to use with a BMW service or It is time to rewax the paint- inspection. work when water "puddles" on the surface, instead of forming Restoring motorcycle beads. -
Page 151: Technical Data
Technical data troubleshooting chart ....150 Riding specifications ....162 Threaded fasteners ....151 Engine . -
Page 152: Troubleshooting Chart
troubleshooting chart Engine does not start at all or is difficult to start. Possible cause Rectification Side stand Retract the side stand ( 59). Gear engaged and clutch not disengaged Select neutral or pull the clutch lever ( 59). Clutch pulled before ignition was switched on Switch on the ignition, then pull the clutch lever. -
Page 153: Threaded Fasteners
Threaded fasteners Front wheel Value Valid Quick-release axle in threaded bush M24 x 1.5 50 Nm Clamping screws in axle holder M8 x 35 19 Nm Radial brake caliper to axle mount M10 x 65 38 Nm Rear wheel Value Valid Locknut of the final-drive chain tensioning screw... - Page 154 Rear wheel Value Valid Adapter to rear wheel swinging M8 x 30 20 Nm Clamping screw to top spring retainer M5 x 25 3 Nm Spring strut to main frame M10 x 65 56 Nm Mirrors Value Valid Mirror to front panel carrier M6, Replace nuts 8 Nm Mechanical thread lock...
-
Page 155: Engine
Engine Engine design Transversely mounted, four-cylinder four-stroke in-line engine tilted 32° forward, with four valves per cylinder, two overhead camshafts with cam followers; liquid cooled, with electronic fuel in- jection, integrated six-speed gearbox, wet-sump lubrication. Displacement 999 cm Cylinder bore 80 mm Piston stroke 49.7 mm... -
Page 156: Fuel
4 l BMW recommends BP fuels Engine oil Engine oil, capacity 3.5 l, with filter change products recommended by BMW Motorrad and generally admissible viscosity classes Castrol Power 1 Racing SAE 5W-40, API SL / ≥-20 °C JASO MA2 ≥-20 °C SAE 5W-40, API SJ / JASO MA2 ≥-20 °C... -
Page 157: Clutch
Clutch clutch type Multiplate oil-bath clutch, anti-hopping Transmission gearbox type Claw-shift 6-speed gearbox, integrated into en- gine block Gearbox transmission ratios 1.652 (76:46 teeth), Primary transmission ratio 2.647 (45:17 teeth), 1st gear 2.091 (46:22 teeth), 2nd gear 1.727 (38:22 teeth), 3rd gear 1.500 (36:24 teeth), 4th gear 1.360 (34:25 teeth), 5th gear 1.261 (29:23 teeth), 6th gear... -
Page 158: Rear-Wheel Drive
Rear-wheel drive Type of final drive Chain drive Type of rear suspension Two-arm cast-aluminium swinging arm Number of teeth, rear-wheel drive (Pinion / 17 / 44 sprocket) Secondary transmission ratio 2,588 Running gear Front wheel Type of front suspension Upside-down telescopic fork Spring travel, front 120 mm, At wheel Rear wheel... -
Page 159: Brakes
Brake-pad material, rear Organic material Wheels and tyres Recommended tyre sets You can obtain an up-to-date list of approved tyres from your authorised BMW Motorrad dealer or on the Internet at "www.bmw-motorrad.com". Front wheel front wheel type Cast aluminium, MT H2 front wheel rim size 3.50"... -
Page 160: Electrics
Rear wheel rear-wheel type Cast aluminium, MT H2 rear wheel rim size 6.0" x 17" Tyre designation, rear 190 / 55 ZR 17 Tyre pressure Tyre pressure, front 2.5 bar, Tyre cold Tyre pressure, rear 2.9 bar, Tyre cold Electrics Fuses Current rating of fuse 1 (Instrument panel ) 7.5 A... -
Page 161: Spark Plugs
Current rating of fuse 6 (Horn) 7.5 A Current rating of fuse 7 (Ignition switch) Current rating of fuse 8 (Sensor group) Main fuse 40 A Battery battery type AGM (Absorbent Glass Mat) battery battery rated voltage 12 V battery rated capacity 10 Ah with anti-theft alarm (DWA) 12 Ah... -
Page 162: Frame
Maximum number of defective LEDs in rear-light unit Bulbs for flashing turn indicators, front RY10W / 12 V / 10 W Bulbs for flashing turn indicators, rear RY10W / 12 V / 10 W Bulb for number-plate light W5W / 12 V / 5 W Frame Frame type Cast light alloy weldment with bolt-on light-alloy... -
Page 163: Dimensions
Dimensions Length of motorcycle 2056 mm Height of motorcycle 1138 mm, To windscreen at DIN unladen weight Width of motorcycle 826 mm, Across mirrors Front-seat height 820 mm, Without rider rider's inside-leg arc, heel to heel 1810 mm, Without rider Weights Unladen weight 203 kg, DIN unladen weight, ready for road, 90 %... -
Page 164: Riding Specifications
Riding specifications Top speed >200 km/h... -
Page 165: Service
Service BMW Motorrad service ... . 164 BMW Motorrad service quality ..164 BMW Motorrad mobility services - roadside assistance ....164 BMW Motorrad service network . -
Page 166: Bmw Motorrad Service
To ensure that your BMW is al- BMW Motorrad mobility ably an authorised BMW Motor- ways in optimum condition, BMW rad dealer. -
Page 167: Bmw Motorrad Service
BMW Service place to look after you and your service is approaching, on the The BMW Service is carried out motorcycle in more than 100 basis of the programmed values. once a year; the extent of servi- countries. - Page 168 with the increased wear and tear associated with this mode of use.
-
Page 169: Ance Work
Confirmation of maintenance work BMW Pre-delivery BMW Running-in Check Check Completed Completed Odometer reading Next service at the latest or, if logged beforehand, Odometer reading Stamp, signature Stamp, signature... - Page 170 BMW Service BMW Service BMW Service Completed Completed Completed Odometer reading Odometer reading Odometer reading Next service Next service Next service at the latest at the latest at the latest or, if logged beforehand, or, if logged beforehand, or, if logged beforehand,...
- Page 171 BMW Service BMW Service BMW Service Completed Completed Completed Odometer reading Odometer reading Odometer reading Next service Next service Next service at the latest at the latest at the latest or, if logged beforehand, or, if logged beforehand, or, if logged beforehand,...
- Page 172 BMW Service BMW Service BMW Service Completed Completed Completed Odometer reading Odometer reading Odometer reading Next service Next service Next service at the latest at the latest at the latest or, if logged beforehand, or, if logged beforehand, or, if logged beforehand,...
- Page 173 BMW Service BMW Service BMW Service Completed Completed Completed Odometer reading Odometer reading Odometer reading Next service Next service Next service at the latest at the latest at the latest or, if logged beforehand, or, if logged beforehand, or, if logged beforehand,...
-
Page 174: Confirmation Of Service
Confirmation of service The table is intended as a record of maintenance and repair work, the installation of optional accessories and, if appropriate, special campaign (recall) work. Item Odometer Date reading... - Page 175 Item Odometer Date reading...
-
Page 176: Index
Brake pads Abbreviations and symbols, 6 Chain Checking front, 111 Adjusting tension, 120 Checking rear, 112 Control, 14 Checking tension, 119 Running in, 63 Engineering details, 100 Checking wear, 121 Brakes Operation, 41 Lubricating, 119 Adjusting brake lever, 46 Self-diagnosis, 61 Checklist, 59 Checking operation, 111 Warnings, 27... - Page 177 Engine Fuses, 158 Damping Position on the motorcycle, 16 Control, 15 Adjuster, front, 11 Ride mode, 15 Replacing, 139 Adjuster, rear, 11, 13 Starting, 59 Technical data, 158 Adjusting, 49 Technical data, 153 Dimensions Warning for engine Technical data, 161 Gear indicator, 20 electronics, 25 Drop sensor...
- Page 178 Headlight Motorcycle Laying up, 148 Overview, 18 Laying up, 148 Lights Helmet holder, 16, 55 Restoring to use, 148 Control, 14 High-beam headlight Multifunction display, 17 Headlight flasher, 14, 39 Switching on, 39 Overview, 20 High-beam headlight, 14 Telltale light, 20 Race functions, 14 Parking light, 39 Horn, 14...
- Page 179 Service, 164 Rear-wheel drive Technical data Service-due indicator, 20 Technical data, 156 Battery, 159 Shift light, 17 Rear-wheel stand Brakes, 157 Shifting gear Installing, 130 Bulbs, 159 Shift assistant, 64 Refuelling, 66 Clutch, 155 Shift light, 63 Reserve volume Dimensions, 161 Side stand Warning, 25 Electrics, 158...
- Page 180 Toolkit Vehicle identification number, 13 Contents, 108 Stowage, 16 Torques, 151 Warning lights, 17 Transmission Warnings, 21 For starting, 59 Mode of presentation, 21 Technical data, 155 With ABS, 27 Transportation With anti-theft alarm, 31 Lashing, 68 With drop sensor, 27 Trim panels With DTC, 29 Removing and installing, 115...
- Page 181 The right to modify designs, equipment and accessories is reserved. Errors and omissions excepted. © 2010 BMW Motorrad Not to be reproduced either wholly or in part without written permission from BMW Motorrad, After Sales. Printed in Germany.
- Page 182 Usable fuel capacity approx. 17.5 l Reserve fuel approx. 4 l Tyre pressure Tyre pressure, front 2.5 bar, Tyre cold Tyre pressure, rear 2.9 bar, Tyre cold BMW recommends *01418522211* Order No.: 01 41 8 522 211 07.2010, 4th edition...
Need help?
Do you have a question about the S 1000 RR and is the answer not in the manual?
Questions and answers