Advertisement
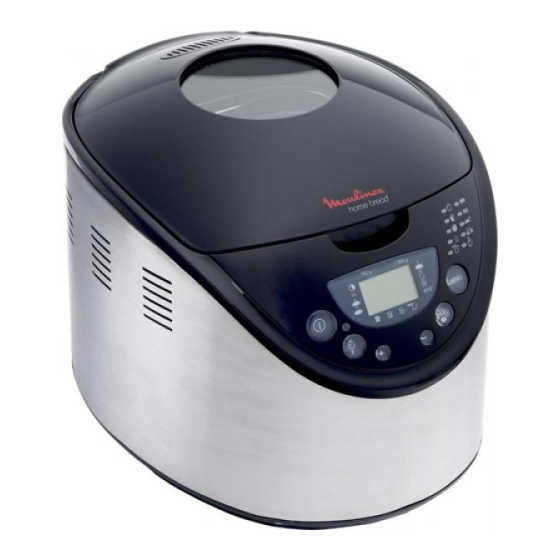
GETTING TO KNOW YOUR BREADMAKER
A - lid with window
B - control panel
b1 - display screen
b2 - on/off button
b3 - weight selection
b4 - buttons for setting delayed start time
BEFORE YOU BEGIN
A slight odour may be given off when used for the first time
C - bread pan
D - kneading paddle
graduated beaker - E
tablespoon measure - f1
double doser - F
teaspoon measure - f2
choice of programmes - b6
browning selection button - b5
GB
15
Advertisement
Table of Contents

Related Manuals for Moulinex ow-3000


Summary of Contents for Moulinex ow-3000
-
Page 1: Getting To Know Your Breadmaker
BEFORE YOU BEGIN A slight odour may be given off when used for the first time GETTING TO KNOW YOUR BREADMAKER A - lid with window C - bread pan D - kneading paddle B - control panel graduated beaker - E tablespoon measure - f1 double doser - F teaspoon measure - f2... -
Page 2: First Steps
INTRODUCTION Bread plays an important role in our nutrition. Who has never dreamed of making their own freshly baked bread at home? Now you can using a breadmaker. Whether you are a beginner or an expert, all you have to do is add the ingredients and the breadmaker does the rest. -
Page 3: Basic Bread
QUICK-START To get to know your breadmaker, we suggest trying the BASIC BREAD recipe for your first loaf. BASIC BREAD BROWNING > MEDIUM SALT > 1.5 teaspoons (programme 1) WEIGHT > 1000 g SUGAR > 1 tablespoon TIME > 3 : 18 POWDERED MILK >... -
Page 4: Using Your Breadmaker
USING YOUR BREADMAKER A default setting is displayed for each programme. You will therefore have to select the desired settings manually. SELECTING A PROGRAMME Choosing a programme triggers a series of steps which are carried out automatically one after another. The MENU button enables you to choose a certain number of different programmes. - Page 5 SELECTING THE WEIGHT OF THE BREAD The bread weight is set by default at 1000 g. This weight is shown for informational purposes. See the recipes for more details. Programmes 6, 7, 8 and 9 do not have weight settings. Press the button to set the desired weight of 750 g or 1000 g.
-
Page 6: Practical Advice
DELAYED START PROGRAMME You can programme the appliance up to start 15 hours in advance to have your prepara- tion ready at the time you want. This function cannot be used on programmes 5,6,7,9,10. This step comes after selecting the programme, browning level and weight. The programme time is dis- played. - Page 7 Adding oats, bran, wheat germ, rye or whole grains to the bread dough will give a smaller, heavier loaf of bread. Using T55 flour is recommended unless otherwise specified in the recipe. Sifting the flour also affects the results: the more the flour is whole (i.e. the more of the outer envelope of the wheat it contains), the less the dough will rise and the denser the bread.
- Page 8 RECIPES For each recipe, add the ingredients in the exact order indicated. Depending on the recipe chosen and the corresponding programme, you can take a look at the summary table of preparation times (page 24-25) and follow the breakdown for the various cycles.Do not alter the quantities or omit ingredients as it can upset the critical balance of the recipe.
- Page 9 PROGRAMME 4 tsp > teaspoon - tbsp > tablespoon BRIOCHE KUGELHOPF 750 g 1000 g 750 g 1000 g Eggs Eggs Butter 150 g 175 g Butter 140 g 160 g Liquid milk 60 ml 70 ml Liquid milk 80 ml 100 ml Salt 1 tsp...
-
Page 12: Troubleshooting Guide
TROUBLESHOOTING GUIDE Not getting the expected results? This table will help you. Bread rises Bread falls Bread does Crust not Sides brown too much after rising not rise golden but bread not and sides too much enough enough fully cooked floury button was pressed during baking... -
Page 13: Cleaning And Maintenance
CLEANING AND MAINTENANCE > Unplug the appliance and let it cool down. > Clean the body of the appliance and the inside of the pan with a damp sponge. Dry thoroughly. > Wash the pan and kneading paddle in hot water. If the kneading paddle remains stuck in the pan, let it soak for 5 to 10 min.
Need help?
Do you have a question about the ow-3000 and is the answer not in the manual?
Questions and answers