Table of Contents
Advertisement
Advertisement
Table of Contents

Summary of Contents for HydroPoint WeaterTRAK ET plus
- Page 1 9 & 12 station models...
-
Page 2: Table Of Contents
Table of Contents Introduction ..............1 ® Welcome to the World of WeatherTRAK ........1 Chapter 1: Getting to Know Your WeatherTRAK ET plus ..........5 Overview of the Controller ............6 Selecting and Adjusting the Settings ..........9 Chapter 2: Setting Up Your WeatherTRAK ET plus ..........13 Setting the Irrigation Start Time ..........14 Setting the Water Window............14 Setting the High ET Start..............15... - Page 3 Chapter 4: Using Special Features ......63 Viewing Run ..................64 Using Rain Pause ................65 Watering Manually ................67 Understanding Alerts..............71 Using ET..................73 Using Display Adjust ..............74 Using Help ..................75 Setting to Off ..................77 Activating WeatherTRAK Rain Service ........78 Setting the Zip Code..............79 Setting the ET Zone ..............79 Displaying the Group Number............80 Setting the Maximum Backup ET ..........80...
- Page 4 Appendix C: Site Data Gathering......95 Introduction ..................95 The Processes..................96 Appendix D: FCC Information ......101 Index ................103 Table of Contents...
-
Page 6: Introduction
(ET) updates via the WeatherTRAK ET Everywhere™ service. HydroPoint Customer Service completes the solution, providing expert assistance at every step of the way. Help is just a phone call away at: (800) 362-8774. - Page 7 WeatherTRAK ET plus and the controller automatically calculates a scientifically based, customized schedule for you. WeatherTRAK ET Everywhere service. HydroPoint obtains weather station data from a host of public and private partners including the National Oceanic and Atmospheric Administration...
- Page 8 WeatherTRAK ET plus to questions about horticulture, water conservation and proper plant maintenance. If you need help, just call HydroPoint Data Systems at (800) 362-8774 or look HydroPoint Data Systems up on the Web at www.hydropoint.com. Go to the support page.
-
Page 10: Chapter 1: Getting To Know Your Weathertrak Et Plus
WeatherTRAK ET plus installed and programmed by an authorized WeatherTRAK ACE contractor. For more information, call HydroPoint at: (800) 362-8774. HydroPoint has provided a mounting template and separate poster with step-by-step instructions for installing WeatherTRAK ET plus. Getting to Know Your WeatherTRAK ET plus... -
Page 11: Overview Of The Controller
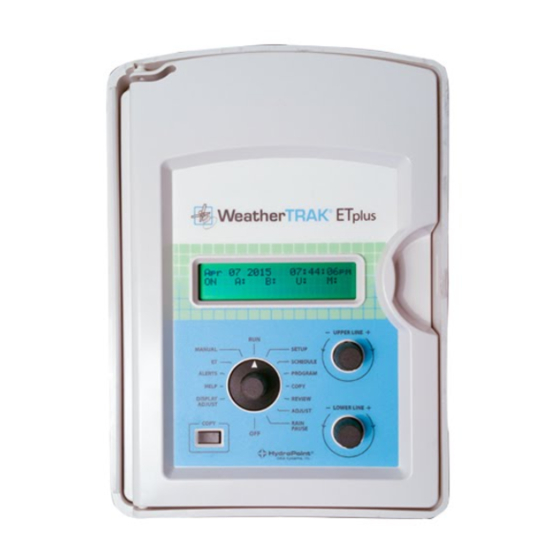
Overview of the Controller The main controls on WeatherTRAK ET plus are: • a Function Selector knob (1) for selecting functions (5), • an Upper Line knob (2) and • a Lower Line knob (3). You will also see a Copy button (4) and an information display (6). Function Selector Turn this knob left or right to select items to view. - Page 12 Upper Line Knob Turn this knob left or right to select items on a list that appear on the upper line of the display. Lower Line Knob Turn this knob left or right to change the items on the list that you have selected.
- Page 13 Review This setting displays each station’s: • Irrigation runtime, • Number of cycles, • Soak times, • Adjustment factor expressed as a percentage and • Operating days. Adjust When you set a station to “Fully Automated”, this feature adjusts station runtimes by adjusting the percentage ET. When in “Fully Automated”...
-
Page 14: Selecting And Adjusting The Settings
This setting displays: • The last ET value received along with the time and date it was received, • The weekly ET value, which is an accumulation of the ET values sent over the last seven days and • An optional feature that allows you to set custom plant and turf types and associated water requirements. - Page 15 Turn the Upper Line knob to the left or right to scroll through items on the list. For example, if you choose SETUP with the Function Selector, you can turn the Upper Line knob left or right to scroll through the entire list of setup features.
-
Page 17: Chapter 2: Setting Up Your Weathertrak Et Plus
Activating WeatherTRAK ET plus. After you are finished with the basic set-up and have completed the Installation and Program Settings worksheet, please call HydroPoint Customer Service to activate your WeatherTRAK ET plus. To start, turn the Function Selector knob to SETUP. -
Page 18: Setting The Irrigation Start Time
Setting the Irrigation Start Time With WeatherTRAK ET plus, once you set a start time, the rest of the irrigation calculations are done automatically. To set the irrigation start time: Turn the Upper Line knob until you see: SET IRRIG START (HOUR) 12:01am Turn the Lower Line knob to set the hour (a.m. -
Page 19: Setting The High Et Start
The lower line of the display shows the default setting of 23:00 hours. Turn the Lower Line knob to set the number of hours. Turn the Upper Line knob to the right once more to select the number of minutes. Turn the Lower Line knob to set the water window minutes (00 to :59). -
Page 20: Setting The Clock
Setting the Clock To set the clock: Turn the Upper Line knob until you see: SET CLOCK (YEAR) Sep 21 2005 Turn the Lower Line knob to set the year. Turn the Upper Line knob to the right once more to select the month. -
Page 21: Setting Auto Daylight Savings
Setting Auto Daylight Savings Turn the Upper Line knob until you see: AUTO DAYLIGHT SAVINGS? Turn the Lower Line knob to select “Yes” or “No.” Setting the Maximum Active Stations You should always set the maximum active stations to correspond to the actual number of valves that are wired to the controller. -
Page 22: Viewing The Serial Number
B=34 C=31 D=18 Note: Before calling HydroPoint Data Systems to activate your controller you should leave the phase integrity screen on for several minutes to acquire the correct phase integrities for the controller. Call HydroPoint Customer Service at: (800) 362-8774. -
Page 23: Displaying The Microzone
Turn the Lower Line knob to select a lock phase. Your choices are: • • • C or • None (Default Setting). When you lock onto a phase other than “None,” the controller will beep when receiving your activation message. Important: This feature is used only at ET Everywhere service activation. -
Page 24: Displaying The Wt Version
Displaying the WT Version This information will be used for ET Everywhere service activation only. To view this, turn the Upper Line knob until you see: WT VERSION ver 00300a29 The number you see is the current WeatherTRAK ET plus version. Setting the Stacking Option Stacking is an irrigation term for sequential versus simultaneous operation of two or more schedules. -
Page 25: Setting The Water District Number
Setting the Water District Number (Option for Water Agency Program Participants) HydroPoint provides a water district number if, and only if, you are a registered and willing participant in a water agency program. During activation, you will be instructed on what value, if any, should be entered. -
Page 26: Setting The Radio Antenna
Turn the Lower Line knob to select “Internal” or “External.” Turn the Upper Line knob until you see: SETUP COMPLETE You can purchase a kit that has the connection cable and antenna. Please call your local distributor or HydroPoint Sales for more information. Setting Up Your WeatherTRAK ET plus... -
Page 27: Activating Weathertrak Et Plus
Activating WeatherTRAK ET plus You are ready to activate your WeatherTRAK ET plus controller! Please call HydroPoint Data Systems now at: (800) 362-8774. Important: Activation takes about three minutes to complete. Be sure to have your Installation and Program Settings worksheet and the controller’s serial number ready when you call. -
Page 29: Chapter 3: Programming Your Weathertrak Et Plus
Chapter 3 Chapter 3: Programming Your WeatherTRAK ET plus This chapter explains how to set schedules and program your WeatherTRAK ET plus. You will learn about: • Setting Schedules, • Introduction to Programming, • Fully Automated Program, • User Program With ET, •... -
Page 30: Setting Schedules
Setting Schedules Schedules are water days that you can assign on a station-by-station basis. You must set a schedule before you begin any programming. There can be up to two different schedules: • A or • Once you create a schedule, you can then apply it to a given station during programming. - Page 31 After you select a schedule, please see the following procedures for the schedule that applies to you. If you selected “Automated by WeatherTRAK,” you will see the following display: BEST NON-WATER DAY SCH A None This is the default setting. You can set a non-watering day if you wish.
- Page 32 If you selected “Interval,” you will see the following display: WATER DAY INTERVAL SCH A 01 Day (water every day) Turn the Lower Line knob to choose one of the following: • 01 Day-31 Day. Note: WeatherTRAK ET plus treats the current day as “Day 0” and will water on that day.
- Page 33 WeatherTRAK ET plus will water on “Y” days as needed in response to the changing weather. During winter months, some of these days may be skipped, while in the summer, every “Y” day may be required to irrigate. If you do not set enough days to allow watering during times of high ET, the system will alert you of the problem.
-
Page 34: Introduction To Programming
Introduction to Programming You need to program WeatherTRAK ET plus in order to create an irrigation routine for each station at your site. There are four PROGRAM modes you can select. They are: • Fully Automated, • User Programmed-With ET, •... -
Page 35: Fully Automated Program
The “User Programmed--NO ET” mode does not use ET Everywhere service and the program remains unchanged unless you change it. This mode always applies the same amount of water regardless of changing weather and changing landscape requirements. Fully Automated Program With this method, the design of the irrigation program is completely automated based on parameters that you select. - Page 36 Set Precipitation Rate This is the amount of water applied in inches per hour. After you select a sprinkler type, you set the precipitation rate. Important: The precipitation rate is vital to determine the proper runtimes for each station and to allow the system to operate properly and efficiently.
- Page 37 By selecting a plant type, you select values for both. The crop coefficient adjusts the gathered ET to the ET amount required by the specific plant material. Some plants may need much less water than the relative daily ET to thrive, e.g., native plants, while other plants may require more.
- Page 38 12. Set Slope Factor You enter the relative flatness of your landscape. • Slope factors are aimed at reducing runoff and maximizing water intake by the plants’ roots. • Slope factors will affect the duration of each water cycle and the number of cycles required to apply water.
- Page 39 Set Program Mode Turn the Upper Line knob until you see: SET PROGRAM MODE STA 01 Fully Automated Turn the Lower Line knob to select “Fully Automated” from the following choices: • Fully Automated (Default Setting), • User Programmed-With ET, •...
- Page 40 Turn the Lower Line knob to choose: • Yes (end time) or • Set Sprinkler Type Turn the Upper Line knob until you see: SET SPRINKLR TYPE STA 01 Spray Head The lower line of the display shows the default setting. Turn the Lower Line knob to choose one of the following sprinkler types: •...
- Page 41 Turn the Upper Line knob to the next position. PRECIP Digit 2 STA 01 1.70 Inches/Hr (default) – Note that the cursor has moved to the “7,” which can now be changed. Turn the Lower Line knob to change the number. Repeat these steps until you have set your desired precipitation rate.
- Page 42 Turn the Lower Line knob to choose the desired response. • 0 to 9 (Default setting “0” to create “70”). Note: The value “(default)” will appear if the sprinkler is using the sprinkler type’s default value. Set Soil Type Turn the Upper Line knob until you see: SET SOIL TYPE STA 01 Sandy Turn the Lower Line knob to choose one of the following...
- Page 43 • Native Shrubs/Trees, • Native Grasses, • Custom Plant A, • Custom Plant B or • Custom Turf. Set Root Depth Turn the Upper Line knob until you see: SET ROOT DEPTH STA 01 06 Inches (default) – Note: The lower line of the display shows the default setting based on the selected plant and soil type or the last value you selected.
- Page 44 Set Slope Factor Turn the Upper Line knob until you see: SET SLOPE FACTOR STA 01 None/Slight 0-5% Grade The lower line of the display shows the default setting. Turn the Lower Line knob to choose one of the following slope factors: •...
- Page 45 Note: By default this feature will be inactive. WeatherTRAK Rain Service is only available in select regions and must be activated by HydroPoint Customer Service. If not activated, no percentage can be set. This feature is not the same as the RAIN PAUSE function.
-
Page 46: User Program With Et
User Program With ET To program with ET, you must enter the entire irrigation program (cycle time, number of cycles per operating day, soak time) and also assign water days. The program you create is then modified by daily ET Everywhere service. Stations in this mode will run according to the same start times you set in SETUP. - Page 47 To Begin User Program: Set Station Turn the Function Selector knob to PROGRAM. Set Program Mode Turn the Upper Line knob to “Set Program Mode.” Turn the Lower Line knob to “User Programmed--With ET,” as in the display below. SET PROGRAM MODE STA 02 User Programmed--With ET Set Cycle Time Turn the Upper Line knob until you see:...
- Page 48 Turn the Lower Line knob to the desired tenths of minutes (Turn to 8): • 0 to 9. This is what the display looks like when the cycle time is set to “25.8 minutes.” SET CYCLE 10ths STA 02 25.8 Minutes Set Number of Cycles Turn the Upper Line knob until you see: SET # OF CYCLES STA 02...
- Page 49 By inserting a minimum soak time between the irrigation cycles, the irrigation water is allowed to soak into the soil before the next cycle begins. Note: Some soak times may be longer than the minimum soak time that you set because other stations may be completing their cycle runtimes before the station can return to watering.
- Page 50 For each month of the year, the user selects which days of the week to water. Note: There is a cursor beneath the “Y” under the “S” for Sunday to indicate it can be changed. In this example, set Sunday and Thursday as Water Days.
- Page 51 After you set the water days for the year you are finished. The following worksheet can help you to determine the weekly schedule for each month of the year. Make a copy of the table shown below and mark a “Y” in those days that irrigation should occur. January February March...
- Page 52 For “Water 7 Days Per Week”: Turn the Upper Line knob until you see: SCHEDULE COMPLETE STA 02 There are no other choices. The entry process is finished. You can now program additional stations or use the COPY feature to copy programs between stations.
-
Page 53: User Program No Et
User Program No ET To program without ET, you must figure out the entire irrigation schedule (cycle time, number of cycles per operating day, soak time and days of operation) and enter it into the controller. Unless you change it, the schedule remains the same. This mode is different from the “User Programmed--With ET Mode”... - Page 54 Copy Program Default This erases all station programming and restores factory-set defaults to individual stations or all stations. Copy Schedule Defaults This erases all schedules and restores factory-set defaults to all schedules. Copy Setup Defaults This erases all user selections and restores the factory-set defaults for the SETUP feature.
- Page 55 Now change the destination station (Turn the Lower Line knob “To STA 04.”) COPY FROM STA 03 To STA 04 (Press COPY) Now press the Copy button. The display will change briefly to this: COPYING DONE! Then the display will change back to this: COPY FROM STA 03 To STA 04 (Press COPY) Another example of the COPY function is:...
- Page 56 Copy Program Defaults You can copy program defaults to individual stations or to all stations. Turn the Function Selector knob to COPY. COPY FROM STA 01 To STA 02 (Press COPY) Turn the Upper Line knob past all of the “COPY FROM STA 01, 02, 03...”...
- Page 57 Copy Schedule Defaults Turn the Function Selector knob to COPY. You will see the following display: COPY FROM STA 01 To STA 02 (Press COPY) Turn the Upper Line knob past all of the “COPY FROM STA 01, 02, 03...” displays through to the last Station on your controller, and past “COPY PROGRAM DEFAULTS.”...
- Page 58 Copy Setup Defaults Turn the Function Selector knob to COPY. You will see the following display: COPY FROM STA 01 To STA 02 (Press COPY) Turn the Upper Line knob past all of the “COPY FROM STA 01, 02, 03...” displays through to the last station on your controller, and past “COPY PROGRAM DEFAULTS”...
-
Page 59: Reviewing
Reviewing The Review feature lets you look at each station’s entire irrigation schedule with a turn of the knob. The following are examples of REVIEW displays for each program mode. Turn the Function Selector knob to REVIEW. If using the “Fully Automated” mode the display will look like this: STA 01 04.6 MIN 03X AUTO... - Page 60 Note: If the high ET start time is used for a given day, then “Hi ET” will replace the “+10%” field and the percent adjust will not be shown. For more information on high ET please see page 15. Turn the Upper Line knob to REVIEW the next station(s). If you are using “User Programmed--With ET,”...
-
Page 61: Adjusting
Reading from left to right, the upper line of the display shows: • STA 03 Station Number • 12.0 MIN Runtime in Minutes • Number of Cycles • U-NO Program Mode Reading from left to right, the lower line of the display shows: •... - Page 62 Note: If you want to change an irrigation runtime in the “User Programmed--With ET” mode or the “User Programmed--NO ET” mode, it is necessary to make the changes back in the “Program” mode. The “Adjust” feature does not operate in these two modes. The steps to use the ADJUST feature include: Adjust You can select individual controller stations with the...
- Page 63 “No Change” will not alter the schedule. This is what the display looks like when Station 3 is set to “Decrease Irrigation -05%:” ADJUST STA 03 Decrease Irrigation -05% Any stations that are in the “User Programmed” mode will look like this: ADJUST STA 01...
- Page 64 For example, if the automatically calculated irrigation schedule requires 4 minutes per cycle, 4 times per day for a total of 16 minutes, and the user adjusts irrigation to increase 20%, the new cycle time will be 4.8 minutes (4 x 1.20). The total adjusted runtime will be 19.2 minutes (4.8 x 4).
-
Page 67: Chapter 4: Using Special Features
Chapter 4 Chapter 4: Using Special Features In this chapter you will learn about many of the special features of WeatherTRAK ET plus. These include: • Viewing Run, • Using Rain Pause, • Watering Manually, • Understanding Alerts, • Using ET, •... -
Page 68: Viewing Run
Viewing Run After you have completely programmed your WeatherTRAK ET plus, you can turn the Function Selector knob to RUN. The controller will now operate normally. Leaving the controller Function Selector knob in any setting except OFF will allow automatic operation. Here are some examples of what the display may look like when on RUN: Sep 21 2005... -
Page 69: Using Rain Pause
Reading from left to right, the lower line shows: • STA ON Identifies Stations On • A: 01 Station 1 is Watering as Part of Schedule A • B: 02 Station 2 is Watering as Part of Schedule B • M: 03 Station 3 is Watering as Set by User in MANUAL... - Page 70 The steps to use the RAIN PAUSE feature are: Rain Pause This turns off all stations of the controller. Days to Resume This sets the number of days to pause. Rain Pause Turn the Function Selector knob to RAIN PAUSE. The display will look like this: RAIN PAUSE ALL STATIONS 00 Days to Resume...
-
Page 71: Watering Manually
Note: If your controller is in RAIN PAUSE and you need to either increase or decrease the number of days before it resumes normal irrigation, turn the Function Selector knob to RAIN PAUSE and change the number of days with the Lower Line knob. If the rain switch is tripped, no stations will run. - Page 72 Manual Water Specific Stations Turn the Function Selector knob to MANUAL. The display will look like this: MANUAL WATER Specific Stations Leave the setting at the default of “Specific Stations.” The choices are: • Specific Stations (Default Setting) or • All Stations.
- Page 73 This is what the display looks like when Station 4 is set for 10 minutes: MANUAL WATER SET STA 04 10.0 Minutes Repeat this pattern of selecting a station to manually water for the desired amount of time until complete. Manual irrigation starts immediately on the first station that had a time entered.
- Page 74 The choices using the Lower Line knob are: • Specific Stations (Default Setting) and • All Stations. Turn the Upper Line knob. The display will look like this: MANUAL WATER ALL STATION 00.00 Minutes The lower line of the display shows the default setting. Only whole minutes are set.
-
Page 75: Understanding Alerts
To fix Water Window Status alerts: expand the water window, reduce the run times with the ADJUST feature, or allow more days to irrigate. To fix Communication Status alerts: call HydroPoint Customer Service at: (800) 362-8774. To see alerts: Turn the Function Selector knob to ALERTS. - Page 76 Water Window Status Alert MANUAL WINDOW STATUS TIME: 300 MIN (+60) STATUS: WARNING SEE ALERT This alert shows the total amount of used window (runtime plus idle soak time) and shows the amount that this exceeds the Set window. If the runtime is under the window allotment, then there is not a warning, but this screen still shows the time and amount it is under.
-
Page 77: Using Et
Communication Status Alert The display will look like this: COMMUNICATION STATUS COMMUNICATION LOST STATUS: WARNING SEE ALERT This will appear if ET Everywhere service has failed to communicate for 4 days. For these 4 days, WeatherTRAK ET plus will use the last received ET to calculate programs. -
Page 78: Using Display Adjust
Turn the Upper Line knob until you see: Custom Plant Types (Kc) SET KC CUSTOM PLANT A 1.00 SET KC CUSTOM PLANT B 1.00 SET KC CUSTOM TURF JAN 1.00 Kc is a mathematical notation for “Landscape Coefficient.” This is an adjustment factor for each station based on the plant type that is being irrigated. -
Page 79: Using Help
Using Help If you are having problems with any aspect of your WeatherTRAK ET plus controller, help is available from a HydroPoint Customer Service Representative at the number shown in the display. Help screens will help you to identify and troubleshoot any problems that may occur with the WeatherTRAK ET plus controller. - Page 80 Turn the Upper Line knob to the next position. MICROZONE 12345678 Turn the Upper Line knob to the next position. DATA ENCRYPTION MASK 02341234567877665244 (OK) Turn the Upper Line knob to the next position. START TIMES 1st 11:00pm Hi ET 1:00pm You enter the start time with the SETUP function.
-
Page 81: Setting To Off
This action will restart the controller microprocessor and erase all of the programming previously entered into the controller. You will be required to call HydroPoint Customer Service and reactivate the controller. You should only do this when directed by HydroPoint Customer Service. -
Page 82: Activating Weathertrak Rain Service
WeatherTRAK Rain Service is available in some markets. This service can only be activated by calling HydroPoint Customer Service at: (800) 362-8774. Under SETUP, turn the Upper Line knob until you see: RAIN SERVICE ACTIVE Turn the Lower Line knob to select “Yes”... -
Page 83: Setting The Zip Code
Setting the Zip Code To set your zip code: Under SETUP, turn the Upper Line knob until you see: SET ZIP CODE Digit1 15645 – Turn the Lower Line knob to select a number from “0” to “9.” Continue to turn the Upper Line and Lower Line knobs until you have selected the correct five-digit zip code. -
Page 84: Displaying The Group Number
Displaying the Group Number The group number may be assigned at activation or at a later date via HydroPoint Customer Service. If not assigned, the default is 00000. This number is used to group controllers together for sending ET Everywhere service messages. -
Page 86: Appendix A: Quick Reference Guide
Continue using the Upper and Lower Line knobs to set the clock month, day, hour, minute, time zone and max active stations. Activate Call HydroPoint Customer Service to activate your controller at: (800) 362-8774. Be sure to have your completed Installation and Program Settings worksheet available. -
Page 87: Programs
Rotate the Upper Line knob to select the day pattern type. Using the Lower Line knob, select the day pattern for the selected schedule. Rotate the Upper Line knob to select the setting for the selected day pattern. Using the Lower Line knob, set the day pattern settings. Water day patterns available: “Automated by WeatherTRAK,”... -
Page 88: Copy
Copy The COPY feature allows you to quickly copy the program settings of one station to one or more stations. One to one: Turn the Function Selector knob to COPY. Using the Upper and Lower Line knobs select the station to copy from and copy to. -
Page 89: Adjust (Auto Mode Only)
Adjust (Auto Mode Only) The ADJUST feature allows you to easily adjust (increase or decrease) the watering times per station in 5% increments. Adjust should be used for fine-tuning each station according to its specific watering needs. How to adjust: Turn the Function Selector knob to ADJUST. -
Page 90: Rain Pause
Rain Pause The RAIN PAUSE feature allows you to suspend irrigation for all stations for up to 14 days. After a RAIN PAUSE setting has expired, normal irrigation will resume. RAIN PAUSE can be set automatically but can be changed from the controller. To set a Rain Pause: Turn the Function Selector knob to RAIN PAUSE. -
Page 92: Appendix B: Troubleshooting Guide
Change the station program parameters or adjust to reduce the required amount of water for each zone. Communication Alert: Call HydroPoint Customer Service at: (800) 362-8774. Electrical Alert Most likely, this is caused by a blown solenoid or wiring problem. -
Page 93: The Controller Programs Correctly But The Stations Are Not Irrigating
The Controller Programs Correctly But the Stations are Not Irrigating Turn the Function Selector to RUN. Check the “Date” and “Time” settings. Be sure they are correct. If the date is wrong, controller will not be in sync with the actual date which may cause valves to not operate on correct days. -
Page 94: Feature Adjust Is Not Working
Feature Adjust is Not Working Turn the Function Selector to RUN. Check the ”Date” and “Time” settings. Be sure they are correct. Turn the Function Selector to REVIEW. ADJUST changes may be subtle, shown as a small difference in the runtime or number of cycles, or it may be more significant depending on the percentage adjustment. -
Page 95: The Display Is Blank
If not, power down the unit, wait for 30 seconds and restart the unit. The display should return. If the display does not return, call HydroPoint Customer Service at: (800) 362-8774. The Display is Frozen Turn the Function Selector to RUN. The display should change and show the date and time. -
Page 96: Week 1 In The Review Screen Is Much Different
Week 1 in the Review Screen is Much Different When the controller is installed, any days previous to today will not be shown in “Week 1” schedule. The controller shows what days have irrigated or it anticipates what days will irrigate if the weather remains as it is today. -
Page 98: Appendix C: Site Data Gathering
Appendix C Appendix C: Site Data Gathering Introduction HydroPoint Data Systems, Inc. manufactures a line of ET-based irrigation controllers that allow the user to enter details about their landscape. The WeatherTRAK Scheduling Engine applies this data to calculate an efficient irrigation program. -
Page 99: The Processes
The Processes Precipitation Rate Gathering - Initial Controller Installation Process Review the System Installation Make note of the following: A descriptive name for each active station on the controller. The manufacturer of the irrigation nozzles on each station. The spacing of heads for each station (general observation only). The pressure at the heads (general observation only). - Page 100 Precipitation Rate Gathering – Follow-Up Site Visit Process Review the landscape conditions. Closely check the condition of the landscape. Look for stress in the plant materials or other signs of under-watering or over- watering, such as soggy areas or puddles immediately after irrigation.
- Page 101 Compare Site Information to Criteria Do the heads have head-to-head coverage? (Does one head spray all the way to the next head? I.e. it does not spray less than or greater than the spacing between heads.) If YES, go to Step 2. If NO, go to Step 3. Do you have access to the manufacturer’s sprinkler nozzle data? If YES, go to Process 1.
- Page 102 Process 2: Station Catch Can Audit Perform a system audit per the Irrigation Association’s (IA) Certified Landscape Irrigation Auditor (CLIA) criteria. For information on the CLIA program contact the Irrigation Association at: www.irrigation.org Process 3: Sprinkler Type Default If the first two processes are not possible, then set the controller to the default precipitation rate for each zone’s sprinkler type.
-
Page 104: Appendix D: Fcc Information
Appendix D Appendix D: FCC Information The equipment has been tested and found to comply with the limits for a Class B digital device, pursuant to part 15 of the FCC Rule. These limits are designed to provide reasonable protection against harmful interference in a residential installation. -
Page 106: Index
Index Activating the Rain Decrease Irrigation ....58 Service ........78 Display Adjust, Using..8, 74 Adjust ......8, 58, 86 Displaying the Group Adjusting ........57 Number ........80 Auto Daylight Savings ....17 Drip Emitter ......36 Automatic Programming, Ending ........41 Efficiency, Setting....32, 37 ET Everywhere Service ..2, 3, 19, Bubbler ........36 20, 31, 42, 49, 57 ET, Using ........73... - Page 107 Part Circle Impact ....36 Locking on a Phase ....18 Part Circle Rotor ......36 Lower Line Knob ......7 Phase Integrity, Viewing..18 Plant Type, Setting....32, 38 Manual ....9, 67, 68, 69, 86 Precipitation Rate, Setting ........32, 36 Maximum Active Stations ..17 Program........7 Maximum Backup ET, Setting the ........80 Programs ........84...
- Page 108 Understanding Alerts ....71 Schedule ........7 Schedule, Setting ....31, 35 Upper Line Knob ......7 Usable Rainfall, Setting..34, 41 Schedules, Setting ....26, 83 Serial Number, Viewing ..18 Setup ........7, 83 Warm Season Grass ....38 Shrubs - High Water Use ..38 Water District Number, Setting ........21 Shrubs - Low Water Use ..38 Water Days, Setting ....42, 45...
- Page 109 HydroPoint Data Systems, Inc. Although every precaution has been taken in the preparation of this Manual, HydroPoint Data Systems, Inc. assumes no responsibility for errors or omissions. Neither is any liability assumed for damages resulting from the use of the information contained herein. The information in...
Need help?
Do you have a question about the WeaterTRAK ET plus and is the answer not in the manual?
Questions and answers