
Related Manuals for Maxol Supacombi HE28

Summary of Contents for Maxol Supacombi HE28
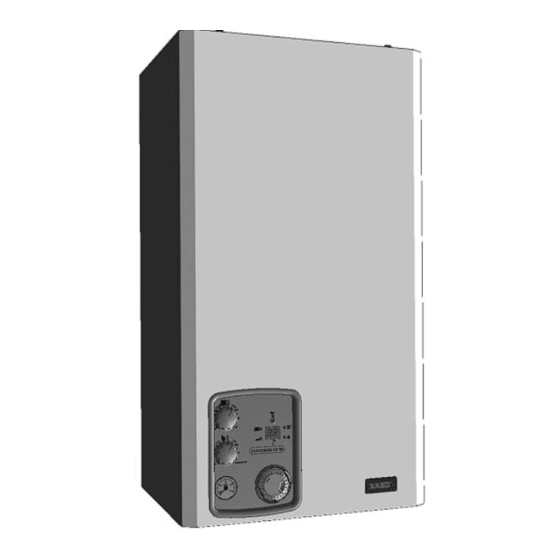
- Page 1 SUPACOMBI HE28 INSTALLATION & SERVICING INSTRUCTIONS TO BE GIVEN TO THE USER 0086 Pin 87/BR/93 G.C. Appliance No. 47-260-12...
-
Page 2: Table Of Contents
INTRODUCTION ....... 0 The Maxol Supacombi HE 28 is a high efficiency Important Information . -
Page 3: Important Information
The appliance is designed for use with sealed primary water systems and incorporates a circulating pump, diverter valve Maxol products are manufactured in accordance with ISO 9000 assembly, pressure gauge, flow switch, safety valve and system and do not, and will not, contain any hazardous materials or expansion vessel. -
Page 4: Technical Specifications
C and Ireland) using gas category 2H (G20 with a governed gas supply at 20 mbar (8 in.wg) inlet pressure). PERFORMANCE DATA Appliance Maxol Supacombi HE 28 Mode Rate 28.3 Central Heating Output... -
Page 5: General Specifications
Appliance Maxol Supacombi HE 28 Seasonal Efficiency (SEDBUK) Band “B” NOx Classification Class “2” l/min 11.5 Design Domestic Hot Water Performance raised 35ºC (gpm) (0.5) DHW Specific Rate (D) EN625 l/min 13.5 Min Mains Water Inlet Pressure for Operation (psi) (4.3) -
Page 6: Overall Dimensions & Minimum Clearances
OVERALL DIMENSIONS AND MINIMUM CLEARANCES CONCENTRIC AIR / FLUE DUCT SPECIFICATIONS The Maxol Supacombi HE 28 can be installed to a horizontal or kit or a Vertical Concentric flue terminal kit comprising the a vertical flue system. The different flue applications as shown in connecting parts to the appliance and end terminal. -
Page 7: Additional Concentric Flue Kits Plume Diverter Kit
2.5.3 2.5.2 VERTICAL CONCENTRIC FLUE ADDITIONAL CONCENTRIC FLUE KITS TERMINAL KIT (C The following additional concentric kits are available as optional - PART NO. 956081 extras. Flue Extension Ducts - 1000 mm and 500 mm long, (each duct extends the flue length by up to 950 mm and 450 mm respectively). -
Page 8: Plume Diverter Kit
PLUME DIVERTER TERMINAL 2.5.4 The resistance of the plume diverter is equivalent to INSTALLATION 1.2 Mtrs of flue length. Ensure this is taken into account when calculating the maximum allowable remaining flue Plume Diverter Kit Part No: 956103 length. (ie Max flue length = 2.7 Mtrs subtract plume (For use with Telescopic horizontal flue kit - Part no 956120 - only) diverter @ 1.2 Mtrs = 1.5 Mtrs remaining length) -
Page 9: Appliance Hydraulic Circuit
APPLIANCE HYDRAULIC CIRCUITS... -
Page 10: Installation Requirements
INSTALLATION REQUIREMENTS electrical provisions of the Building Regulations applicable in STATUTORY REQUIREMENTS Scotland. GAS SAFETY (INSTALLATION AND USE) REGULATIONS The appliance is suitable only for installation in GB and IE and FLUE TERMINAL POSITION should be installed in accordance with the rules in force. Detailed recommendations for flue installation are given In GB, a CORGI Registered Installer must carry out the installation. -
Page 11: Condensate Disposal
CONDENSATE DISPOSAL FLUE TERMINAL POSITION • The boiler includes a condensate trap that prevents the combustion products entering the drain; however an additional • trap is required, a seal of at least 75mm and an air break of at • •... -
Page 12: Domestic Hot Water System
Expansion Vessel Requirements b) The installation should be designed to operate with a flow temperature of up to 95°C. Vessel charge and 0.75 initial system pressure c) A sealed system must only be filled by a competent person. Total water content of system d) The available pump head for the appliance is given in Fig. -
Page 13: Electricity Supply
3.10 EXTERNAL CONTROLS to control the maximum water flow rate. However, if the flow rate The Maxol Supacombi HE may be used with any certified mains is too high a 12 l/min flow rate regulator can be fitted as an voltage room thermostat, as described in section 4. -
Page 14: Appliance Installation
APPLIANCE INSTALLATION Before installing the appliance, check that the chosen location is PREPARING THE WALL suitable (section 3.2) and that the requirements for flue position a) Fix the paper template in the required position (ensuring that the (section 3.3) and minimum clearances (Fig. 1) are satisfied. necessary clearances are observed). -
Page 15: Mounting The Appliance
MOUNTING THE APPLIANCE VIEW OF CONNECTIONS ON REAR OF BOILER a) Remove all casing panels (see section 6.2) Take the protective caps off the boiler pipework. c) Lift the appliance into position as shown in Fig. 11. Position the top of the appliance approximately 10mm above the top of the wall mounting plate and use the side wings on the plate to locate the appliance in a horizontal direction. -
Page 16: Pressure Relief Valve Connection
AIR / FLUE DUCT INSTALLATION correct flue installation please refer to the installation instructions that are provided with the individual flue kits as described in section 2.5. Measure the required flue length as shown in Fig. 14. Refer to section 2.5 to determine whether any extension kits are required. -
Page 17: Electrical Connections
4.8.1 INSTALLING THE AIR/FLUE DUCT 4.8.2 INSTALLING THE AIR/FLUE DUCT FROM INSIDE THE ROOM FROM OUTSIDE THE BUILDING Wall thickness up to 800 mm (31 in) only. (Flue hole diameter 100 mm – wall liner not necessary) a) Push the terminal through the wall liner taking care to ensure Secure the flue elbow with seal to the appliance using 4 that the terminal is the correct way round and the external wall-... -
Page 18: Commissioning And Testing
COMMISSIONING & TESTING 2) Fill the system with water using the method described in FILLING THE WATER SYSTEM section 3.7 to about 2.0 bar. Vent the system via the radiator valves and system air vents in accordance with normal practice. WARNING: The commissioning of this boiler and system Ensure that all system air vents are closed. -
Page 19: Commissioning The Appliance
COMMISSIONING THE APPLIANCE Refer to Figures 19 & 20 If, at any time during the commissioning procedure, it is required to prevent the appliance from modulating, set the CH control knob to the Service position (fully clockwise). a) Check that the gas supply is turned ON and the gas service cock is OPEN. -
Page 20: Dhw Flow Rate
DHW FLOW RATE FROST PROTECTION Should the mains flow rate be considered to be too high, a flow The appliance is fitted with a frost protection device which regulator is available as a spare part which will limit the flow. operates the boiler when the temperature is below 5°C. -
Page 21: Users Instructions
SERVICE MODE: 5.10 APPLIANCE LOG BOOK The appliance enters the SERVICE mode by turning the CH A logbook is supplied with this appliance at the back of these control knob to (full clockwise). The and ECO lights instructions to record installation and commissioning details and flash. -
Page 22: Routine Servicing
ROUTINE SERVICING Operate in DHW mode, at full rate. After ten minutes operation To ensure continued efficient operation of the appliance, it is check the CO /CO values and compare with those figures stated recommended that it is checked and serviced as necessary at in section 2.3. -
Page 23: Removal Of Casing Panels
Combustion chamber lid Refer to Figure 26 Remove the 6 screws, gently ease control panel forward and REMOVAL OF CASING PANELS remove combustion chamber lid taking care not to damage the seals. Refer to Figures 24, 25 and 26 Front panel Remove the 2 screws from underneath and unhook from side panel retaining lugs. -
Page 24: Gas Rate Check
GAS RATE CHECK a) After servicing, check the gas rates against section 2.2 or the data plate. b) If the gas rates are incorrect ensure the inlet pressure, with the appliance running, is correct. c) If the gas rates are still incorrect contact: Technical Help line: d) Undo the 4 screws F holding the burner and remove. -
Page 25: Re-Assembly
RE-ASSEMBLY Re-assemble the boiler in the following order: a) Refit the burner. b) Reconnect the electrodes. c) Refit the combustion chamber panel and the fan holder bracket. d) Refit the inner case cover. IMPORTANT. Ensure the boiler sealing panel is correctly fitted and that a good seal is made. -
Page 26: Internal Wiring Diagram
INTERNAL WIRING DIAGRAM 7.1 : FUNCTIONAL FLOW WIRING DIAGRAM... -
Page 27: Fault Finding
FAULT FINDING To RESET the boiler press the reset button. If the appliance will not GENERAL reset, refer to the diagnostic chart shown below, together with the notes given in sections 8.3, 8.4 and 8.5 Before looking for a fault condition, check that: The mains electrical supply is turned on. - Page 28 CENTRAL HEATING FAULT FINDING Upon a demand for Central Heating, (closure of the time switch and room thermostat or programmer, where fitted), the controls should carry out a set of start up checks, followed by an ignition sequence. Refer to Section 5.2. If the control has powered up correctly but does not respond to a CH demand.
- Page 29 BLOCKING CODES (Display flashes and the error light will be lit) LED CODE FAULT/EFFECT REASON ACTION Check air in heat exchanger/recuperator Check recuperator – flue ways Overheated appliance Flue over temperature > 125°C ways may require cleaning Check flue thermistor Check CH thermistor –...
-
Page 30: Replacement Of Parts
REPLACEMENT OF PARTS i) Move the pipe N upwards freeing it from the connection and Before commencing any service operation, ISOLATE the mains rotate towards right. electrical supply and TURN OFF the gas supply at the main service cock. j) Remove the heat exchanger by sliding it forwards. -
Page 31: Fan And Air Pressure Switch
h) Remove the bracket V by unscrewing the screws that hold it to IMPORTANT: Ensure gas is turned OFF before the chassis. proceeding with the next step. i) Rotate the heat exchanger as indicated by the arrow and Run the boiler (the Fan must run) and check the electric remove it towards the front of the boiler. -
Page 32: Diverter Valve Actuator
a) CH: Close the CH flow and return isolating valves. Attach a DIVERTER VALVE ACTUATOR hose to the drain point and open the drain valve. Refer to Figure 37 DHW: Close the cold water inlet valve and open all DHW a) Ensure supply voltage is isolated. -
Page 33: Dhw Flow Regulator
Drain both the boiler and DHW circuits, refer to section 9.9. 9.12 DHW FLOW REGULATOR c) Remove the two spring clips securing the bypass pipe and pull Refer to Figure 39 out the pipe. a) Ensure supply voltage is isolated. d) Remove the two socket screws l securing the heat exchanger to b) Remove the casing... -
Page 34: Auto Air Vent
9.17 PRESSURE RELIEF VALVE Refer to Figure 18 Remove the casing front panel and lower the controls fascia panel. b) Drain the boiler. Refer to section 9.9. c) Undo the pipe connection and unscrew and remove the valve. d) Fit the new valve and re-assemble in reverse order. -
Page 35: Control Pcb
If access to the control PCB is required proceed as follows:- a) Unclip the rear plastic cover. b) Disconnect the ribbon cable from both PCBs. c) Unclip the control PCB and the display PCB from the front housing. d) Replace in reverse order, ensuring the ribbon cable is in the correct position and does not interfere with the operation of the control knobs. -
Page 36: Short Parts List
SHORT PARTS LIST G C Part No. Description Manufacturer Part No. 173-149 Burner 700608 Injector 701035 Expansion vessel 451021 H20-985 Main heat exchanger 451014 H21-049 601018 Gas valve 500705 Air pressure switch 500703 Pressure relief valve 300753 Combustion chamber insulation panel set 988578 Control p.c.b. - Page 38 BENCHMARK No. GAS BOILER COMMISSIONING CHECKLIST BOILER SERIAL No. NOTIFICATION No. CONTROLS To comply with the Building Regulations, each section must have a tick in one or other of the boxes TIME & TEMPERATURE CONTROL TO HEATING ROOM T/STAT & PROGRAMMER/TIMER PROGRAMMABLE ROOMSTAT TIME &...
-
Page 39: Service Interval Record
SERVICE INTERVAL RECORD It is recommended that your heating system is serviced regularly and that you complete the appropriate Service Interval Record below. SERVICE PROVIDER Before completing the appropriate Service Interval Record below, please ensure you have carried out the service as described in the boiler manufacturer’s instructions. Always use the appliance manufacturer’s specified spare part when replacing gas controls. - Page 40 Email: sales@maxolboilers.co.uk or service@maxolboilers.co.uk or training@maxolboilers.co.uk www.maxolboilers.co.uk Maxol Boilers are manufactured in the UK by Halstead Boilers Ltd, part of the Glen Dimplex Group. Halstead Boilers is continuously improving its products and may therefore change specifications without prior notice. The statutory rights of the consumer are not affected.
Need help?
Do you have a question about the Supacombi HE28 and is the answer not in the manual?
Questions and answers