Table of Contents
Advertisement
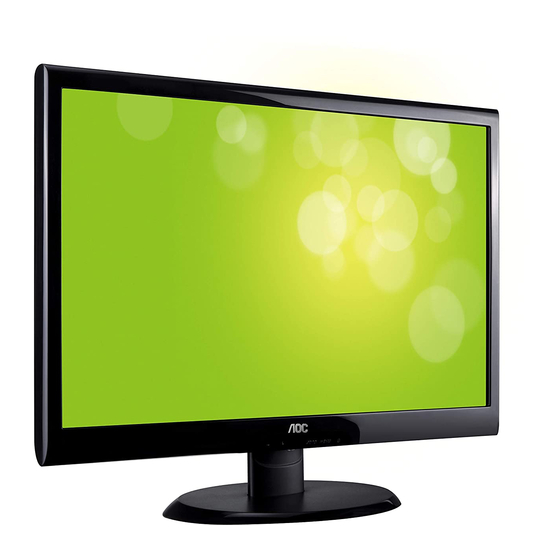
23.6" Flat Wide LCD Monitor
Service
Service
Service
Description
Table of Contents....................................................1
Revision List...................................................................2
Important Safety Notice.................................................3
1.Monitor Specification...................................................4
2.LCD Monitor Description.........................................5
3.Operation Instruction.................................................6
3.1.General Instructions..................................................6
3.2.Control Buttons and Connections...............................6
3.3.OSD Setting............................................................8
4.Input/Output Specification.....................................18
4.1.Input Signal Connector..........................................18
4.2.Preset Display Modes...... ..........................19
4.3.Panel Specification...........................................20
5.Block Diagram............................................................22
5.1.Main Board....................................................22
5.2.Power Board..................................................23
ANY PERSON ATTEMPTING TO SERVICE THIS CHASSIS MUST FAMILIARIZE HIMSELF WITH THE
CHASSIS AND BE AWARE OF THE NECESSARY SAFETY PRECAUTIONS TO BE USED WHEN SERVICING
ELECTRONIC EQUIPMENT CONTAINING HIGH VOLTAGES.
CAUTION: USE A SEPARATE ISOLATION TRANSFOMER FOR THIS UNIT WHEN SERVICING
R FOR TH
Table of Contents
Page Description
6.Schematic..........................................................24
6.1.Main Board.......................................................24
6.2.Power Board....................................................29
7.PCB Layout.........................................................31
7.1.Main Board......................................................31
7.2.Power Board.....................................................33
7.3.Key Board........................................................36
8.Maintainability.....................................................37
8.1.Equipments and Tools Requirement..................37
8.2.Trouble Shooting.............................................38
9.White-Balance,Luminance Adjustment...............42
10.Monitor Exploded View......................................44
11.BOM List......................................................45
SAFETY NOTICE
1
AOC e2450Swh
Horizontal Frequency
30 - 83kHz
Page
Advertisement
Table of Contents

Related Manuals for AOC e2450Swh


Summary of Contents for AOC e2450Swh
-
Page 1: Table Of Contents
23.6" Flat Wide LCD Monitor AOC e2450Swh Service Service Service Horizontal Frequency 30 - 83kHz Table of Contents Description Page Description Page Table of Contents…………………..…………………..…...1 6.Schematic…………..….........24 Revision List.…...........……..2 6.1.Main Board..…….…...........24 Important Safety Notice.….…......……..3 6.2.Power Board..……….........29 1.Monitor Specification......………....4 7.PCB Layout..………..........31 2.LCD Monitor Description……….……………………..5 7.1.Main Board………..…........31... -
Page 2: Revision List
Revision List Version Release Date Revision History TPV Model Name Initial release HDBMNZNEAHA1DNE Jun.-29-2011 HDB2NZ2EAHA1DNE HDB2NZ2EAHA2DNE HDB2NZ2FAHA1DNE HDB2NZ2JAHA1DNE HDB2NZ6BDFA1DNE HDBMNZ2FAHA1DNE HDBMNZ2JAHA1DNE Feb.-26-2012 Add new models HDBMNZ6BAHA1DNE HDC2NZ2FAHA2DNE HDC2NZ2LAHA4DNE HDC2NZ6BDFA1DNE HDC2NZ6BDFA3DNE HDC2NZ6BDFA4DNE... -
Page 3: Important Safety Notice
Important Safety Notice Proper service and repair is important to the safe, reliable operation of all AOC Company Equipment. The service procedures recommended by AOC and described in this service manual are effective methods of performing service operations. Some of these service operations require the use of tools specially designed for the purpose. The special tools should be used when and as recommended. -
Page 4: Monitor Specification
1.Monitor Specifications... -
Page 5: Lcd Monitor Description
2.LCD Monitor Description The LCD monitor will contain a main board, an adapter board, a converter board and a key board which house the flat panel control logic, brightness control logic and DDC. The power part will provide AC to DC Inverter voltage to drive the backlight of panel and the main board chips each voltage. -
Page 6: Operation Instruction
3. Operating Instructions 3.1 General Instructions Press the power button to turn the monitor on or off. The other control knobs are located at front panel of the monitor (See Figure ). By changing these settings, the picture can be adjusted to your personal preferences. * The power cord should be connected. - Page 7 1. AC port 2. VGA 3. DVI (available for selected models) 4. HDMI(available for selected models) 5. Audio(available for selected models) To protect equipment, always turn off the PC and LCD monitor before connecting. 1. Connect the power cable to the AC port on the back of the monitor. 2.
-
Page 8: Osd Setting
3.3 OSD Setting Basic and simple instruction on the control keys. 1)Press the MENU-button to activate the OSD window. 2) Press - or + to navigate through the functions. Once the desired function is highlighted, press the MENU-button to activate it . press - or + to navigate through the sub-menu functions. Once the desired function is highlighted, press MENU-button to activate it. - Page 9 Luminance 1 Press (Menu) to display menu. 2 Press - or + to select (Luminance), and press to enter. 3 Press - or + to select submenu, and press to enter. 4 Press - or + to adjust. 5 Press to exit.
- Page 10 Image Setup 1 Press (Menu) to display menu. 2 Press - or + to select (Image Setup), and press to enter. 3 Press - or + to select submenu, and press to enter. 4 Press - or + to adjust. 5 Press to exit.
- Page 11 Color Setup 1 Press (Menu) to display menu. 2 Press - or + to select (Color Setup), and press to enter. 3 Press - or + to select submenu, and press to enter. 4 Press - or + to adjust. 5 Press to exit.
- Page 12 Picture Boost 1 Press (Menu) to display menu. 2 Press - or + to select (Picture Boost), and press to enter. 3 Press - or + to select submenu, and press to enter. 4 Press - or + to adjust. 5 Press to exit.
- Page 13 OSD Setup 1 Press (Menu) to display menu. 2 Press - or + to select (OSD Setup), and press to enter. 3 Press - or + to select submenu, and press to enter. 4 Press - or + to adjust. 5 Press to exit.
- Page 14 Extra 1 Press (Menu) to display menu. 2 Press - or + to select (Extra), and press to enter. 3 Press - or + to select submenu, and press to enter. 4 Press - or + to adjust. 5 Press to exit.
- Page 15 Exit 1 Press (Menu) to display menu. 2 Press - or + to select (Exit), and press to enter. 3 Press - or + to select submenu, and press to enter. 4 Press - or + to adjust. 5 Press to exit.
- Page 16 Orange or red e-Saver Welcome to use AOC e-Saver monitor power management software! The AOC e-Saver features Smart Shutdown functions for your monitors, allows your monitor to timely shutdown when PC unit is at any status (On, Off, Sleep or Screen Saver);...
- Page 17 Screen+ Welcome to "Screen+" software by AOC, Screen+ software is a desktop screen splitting tool, it splits the desktop into different panes, each pane displays a different window. You only need to drag the window to a corresponding pane, when you want to access it. It supports multiple monitor display to make your task easier. Please follow the...
-
Page 18: Input/Output Specification
4. Input/Output Specification 4.1 Input Signal Connector Analog connector... -
Page 19: Preset Display Modes
4.2 Preset Display Modes... -
Page 20: Panel Specification
4.3 Panel Specification 4.3.1 General Features M236H3-LA3 is a 23.6” TFT Liquid Crystal Display module with WLED Backlight unit and 30 pins 2ch-LVDS interface. This module supports 1920 x 1080 Full HD mode and can display up to 16.7M colors. The converter module for Backlight is not built in. - Page 21 LED array electrical characteristics Note (1) LED light bar input voltage and current are measured by utilizing a true RMS multimeter as shown below: (2) PBL = IPIN × VPIN × ( 8 ) input pins , LED light bar circuit is ( 9 )Series, ( 8 )Parallel. (3) The lifetime of LED is defined as the time when LED packages continue to operate under the conditions at Ta = 25 ±2 ℃...
-
Page 22: Block Diagram
5. Block Diagram 5.1 Main Board 04.SCALER 05.PANEL INTERFACE 02.INPUT VLCD GNDR GNDR VLCD GNDG GNDG GNDB GNDB DVI5V HSY NC HSY NC VSY NC VSY NC DDCA_SDA DDCA_SDA DDCA_SCL DDCA_SCL DVI5V RX0+ RX0+ RX0- RX0- RX1+ RX1+ RX1- RX1- RX2+ RX2+ +5V_SB... -
Page 23: Power Board
5.2 Power Board AC input Transformer Rectifier Bridge 14.5V EMI filter (T901) diodes Rectifier and Filter Start Resistor (R908,R911) Feedback PWM Control Circuit Power Switch LD7576AGR (U901) (Q901) Regulator Photo coupler (IC903) (U902) L801 ZD801 MOSFET (CN805) (Q801) PWM Control OZ9998AGN (IC801) -
Page 24: Schematic
6. Schematic 6.1 Main Board 715G4641M01000004S CN101 RED+ D-SUB 15P FB101 BEAD R102 100R 1/16W 5% C102 47nF 16V RED- GREEN+ FB102 BEAD R103 100R 1/16W 5% C103 47nF 16V GREEN- BLUE+ FB103 BEAD R104 100R 1/16W 5% C104 47nF 16V BLUE- VGA5V R110... - Page 25 CN501 HDMI HDMI1/D2+ HDMI1_D2+ D2 Shield HDMI1/D2- HDMI1_D2- HDMI1/D1+ HDMI1_D1+ D1 Shield HDMI1/D1- HDMI1_D1- HDMI1/D0+ HDMI1_D0+ D0 Shield HDMI1/D0- HDMI1_D0- HDMI1/CK+ HDMI1_CK+ DET_HDMI CK Shield HDMI1/CK- HDMI1_CK- R753 CEC3* CE Remote CEC_CTRL HDMI_SCL DDC CLK HDMI_SDA DDC DATA R153 ZD104 HDMI1_+5V 1K 1/16W 5% NC/RLZ5.6B...
- Page 26 VCC3.3 DVDD FB401 FB402 DVI_VCC +5V_SB VCC3.3 120 OHM 120 OHM C405 C407 C409 C410 100N16V 100N16V 100N16V 100N16V VCC3.3 MPLL_VDD +5V_SB AUDIO_VDD ADC_VDD DVDD CVDD C403 C402 DVI_VCC ADC_1V8 MVDD MVDD 10uF 16V 10uF 16V C404 C406 100N16V 100N16V FB403 FB404 VCC3.3...
- Page 27 PA[0..9] PB[0..9] PA[0..9] PB[0..9] LVB0M CN408 LVA0M LVB0P CONN LVA0P LVB1M LVB0M RXO0- LVA1M LVB1P LVB0P RXO0+ LVA1P LVB2M LVB1M RXO1- LVA2M LVB2P LVB1P RXO1+ LVA2P LVBCKM LVB2M RXO2- LVACKM LVBCKP LVB2P RXO2+ LVACKP LVB3M LVA3M LVB3P LVBCKM RXOC- LVA3P LVBCKP RXOC+ LVB3M...
- Page 28 +5V_SB VCC3.3 U701 +5V_SB VCC3.3 VOUT VCC3.3 +5V_SB C702 R701 C701 10K 1/16W 5% 220uF/16V 100N16V C705 C703 C704 100N16V 100uF/16V 100N16V CN701 R702 1K 1/16W 5% PWMB* Adj_BACKLIGHT VCC3.3 U702 VCC3.3 NC/AP2114D-3.3TRG1 R704 VOUT 47K 1/16W 5% R705 ON/OFF 47K 1/16W 5% VCC3.3 +5V_SB...
-
Page 29: Power Board
6.2 Power Board Adapter 715G4744P01003001M R929 100 OHM 1/4W BD901 C916 C928 F801 KBP208G R930 100 OHM 1/4W 2N2 500V 2N2 500V 0R05 1/4W +14.5V R903 100 OHM 1/4W R904 ZD901 250OHM2W MTZJ T-72 16B 80GL22T-3 C918 NC/470UF/25V T901 D901 POWER X'FMR SR515 R905... - Page 30 Converter 715G3918P03000004C R844 NC C811 NC Vout CN801 CONN ZD801 +12V F801 FUSE L801 B3100B R833 1 OHM 1/10W R832 1 OHM 1/10W CN803 R831 1 OHM 1/10W 22uH R830 1 OHM 1/10W C801 C813 C803 C804 C810 100uF 50V 100N 50V 220P 100V 33UF 100V...
-
Page 31: Pcb Layout
7. PCB Layout 7.1 Main Board 715G4641M01000004S... -
Page 33: Power Board
7.2 Power Board Adapter 715G4744P01003001M... - Page 34 Converter 715G3918P03000004C...
-
Page 36: Key Board
7.3 Key Board 715G4747K02000001C... -
Page 37: Maintainability
8. Maintainability 8.1 Equipments and Tools Requirement Voltmeter. Oscilloscope. Pattern Generator. DDC Tool with an IBM Compatible Computer. Alignment Tool. LCD Color Analyzer. Service Manual. User Manual. -
Page 38: Trouble Shooting
8.2 Trouble Shooting No Power No power Check power cable is Re-plug the power cable tightened? Check Power “On/Off” Turn on the Power “On/Off” switch is “On”? Check the LED Check the AC power indicate is OK? Replace the converter board Replace main board and check connections Replace key board and check connections... - Page 39 2. No Video (Power LED Blue) No Video (Power LED Blue) Press the power Replace the main board button is OK? Replace the converter The end board Replace the main The end board and connection Replace the LVDS/FFC Check the LVDS/FFC cable or panel cable or panel Replace the key board...
- Page 40 3. DIM DIM (image overlap, focus or flicker) Reset in factory mode The end Set to the optimal The end frequency, select the recommended frequency Readjust the phase and pixel The end clock in the user mode Pull out signal cable and Check the signal cable check “Self Test Feature and the PC...
- Page 41 4. Color is not optimal Color is not optimal Color shift Miss color Reset the factory mode Replace the signal cable In the user mode, set the” color settings” until customer satisfy The end Pull out the signal cable and check the screen color display is normal? Replace the signal cable or PC Replace the main board...
-
Page 42: White-Balance,Luminance Adjustment
9.White- Balance, Luminance Adjustment Approximately 30 minutes should be allowed for warm up before proceeding white balance adjustment. How to setting MEM channel you can reference to chroma 7120 user guide or simple use “SC” key and “NEXT” Key to modify xyY value and use “ID” key to modify the TEXT description Following is the procedure to do white-balance adjust . - Page 43 2. Switch the MEM. Channel to Channel 9 (with up or down arrow on chroma 7120) 3. The LCD-indicator on chroma 7120 will show x=283±20,y=297±20 4. Adjust the RED on factory window until chroma 7120 indicator reached the value R=100 5.
-
Page 44: Monitor Exploded View
10. Monitor Exploded Views NO P/N PART NAME Q'TY 1 Q34G7393* BEZEL 2 A33G1181* 3 A33G1182 1 POWER LENS 4 Q52G1801MNT160CFL MYLAR 5 A15G1597 MAIN FRAME 6 A15G1587101 HINGE PLATE 7 Q34G7394 REAR COVER 8 H37G0026011 HINGE 9 Q33G0504 STAND STAND 10 Q34G7395 COVER... -
Page 45: Bom List
Q34G7396AED 1B0130 BASE Q45G8801M08A0100BX MANUAL PE BAG Q45G990161940900BX PROTECT BAG Q50G 4 10 TIE (Y1900221) M05201 Q52G100202500A00JY AL FOIL M05202 Q52G100204500A00JY AL FOIL M05203 Q52G100204500A00JY AL FOIL Q52G1301024A0100YY BIG CARTON TAPE FOR AOC 60MM Q52G1801MNT160CFLT INSULATING SHEET Q52G6019 14 TAPE... - Page 46 089G 715GAAE01 SIGNAL CABLE E08901 089G412A15NIS3 AC POWER CORD 1500mm H40G 001624 1A CARTON LABEL BARCODE 1 H40G 24N61546A e2450Swh id label PRC Q41G78D161528A AOC AP WARRANTY CARD 808GE2450SWHCIS E2450SWH CIS(中亚) ASS'Y 026G 800504 H BAR CODE LABEL E08904 089G 173 56 4B...
- Page 47 AC POWER CORD 1500MM TAIWAN H40G 001624 1A CARTON LABEL BARCODE 1 H40G 22N61580A e2250Swd TW ID LABEL Q41G78D161528A AOC AP WARRANTY CARD 808GE2450SWHUAE E2450SWH United Arab Emirates ASS'Y 089G 173 56 4B AUDIO CABLE E08908 089G 184HAA500 HDMI CABLE 1800mm E08902 089G 715GAAE01...
- Page 48 089G1745GAA 9 DVI CABLE E08901 089G404A15N HL AC POWER CORD 1500mm H40G 001624 1A CARTON LABEL BARCODE 1 H40G 24N61546A e2450Swh id label PRC Q41G78D161528A AOC AP WARRANTY CARD GND1 009G6005 1 GND TERMINAL U902 056G 139 9 IC EL817M(X) photocoupler DIP-4...
- Page 49 709G4747 HM001 COMSUPTIVE ASS'Y Q901 057G 667941 MOSFET P0765ATF 7 650 TO-220F 090G6064 1 HEAT SINK 0M1G 930 8120 SCREW 3x8 055G 23524 WELDING FLUX WITHOUT PB Q51G 6 4509 GLUE_RTV Q55G 100625 TIN STICK_LOW ARGENTUM U901 056G 379529 AC/DC CONVERTER IC LD7576AGR SOP-7 RJ801 061G0805000 JF RST CHIPR 0 OHM +-5% 1/8W FENGHUA...
- Page 50 C813 067G315M1016KV EC 100UF 20% 35V 8*7 CN802 311GB254B04AAL PIN HEADER 2.54mm 4P V/T - 9.16mm CN801 311GB254B07AAL PIN HEADER 2.54MM 7P 5P7.2MM/2P4.0MM H40G 45762429A LABEL Q55G 100625 TIN STICK_LOW ARGENTUM R002 061G0603000 FF RST CHIPR MAX0R01 1/10W FENGHUA R004 061G06031001FF RST CHIPR 1 KOHM +-1% 1/10W FENGHUA R003...
- Page 51 C922 367G415X4713AT EC 470uf 20% 16V 10X13 RS C918 367G415X6814AT EC 680uf 20% 25V 10x20 RS 709G4744 HA001 CONSUMPTIVE ASS'Y E715 715G4744P01003001C PWR PCB FR1 SS 193X132+1.6(mm) 2nd source E715 715G4744P01003001M PWR PCB FR1 SS 193*132*1.6mm IC801 056G 700 12 LED DRIVER OZ9998AGN-A1-0-TR SOP-24 Q801 057G 763 92...
- Page 52 SW003 077G603S AI HJ TACT SWITCH AI 2PIN SEALED SW004 077G603S AI HJ TACT SWITCH AI 2PIN SEALED SW005 077G603S AI HJ TACT SWITCH AI 2PIN SEALED SW001 077G603S AI HJ TACT SWITCH AI 2PIN SEALED E715 715G4747K02000001C KEY PCB FR1 SS 135*11*1.6mm U401 056G 562392 SCALER NT68677UMFG/E QFP-128...
- Page 53 R139 061G0402100 JT RST CHIP 10R 1/16W 5% TZAI YUAN R138 061G0402100 JT RST CHIP 10R 1/16W 5% TZAI YUAN R137 061G0402100 JT RST CHIP 10R 1/16W 5% TZAI YUAN R136 061G0402100 JT RST CHIP 10R 1/16W 5% TZAI YUAN R135 061G0402100 JT RST CHIP 10R 1/16W 5% TZAI YUAN...
- Page 54 R462 061G0402153 JT RST CHIP 15K 1/16W 5% TZAI YUAN R120 061G0402222 JT RST CHIP 2K2 1/16W 5% TZAI YUAN R121 061G0402222 JT RST CHIP 2K2 1/16W 5% TZAI YUAN R415 061G0402222 JT RST CHIP 2K2 1/16W 5% TZAI YUAN R427 061G0402222 JT RST CHIP 2K2 1/16W 5% TZAI YUAN...
- Page 55 R613 061G0603000 JT RST CHIP MAX 0R05 1/10W TZAI YUAN R614 061G0603000 JT RST CHIP MAX 0R05 1/10W TZAI YUAN R420 061G0603331 JT RST 0603 330R 5% 1/10W R429 061G0603471 JT RST CHIPR 470OHM +-5% 1/10W TZAI YUAN R454 061G1206301 JT RST CHIPR 300 OHM +-5% 1/4W TZAI YUAN R455 061G1206301 JT...
- Page 56 C625 065G0402105A5K CAP 0402 1UF 10% 10V X5R C623 065G0402105A5K CAP 0402 1UF 10% 10V X5R C614 065G0402105A5K CAP 0402 1UF 10% 10V X5R C612 065G0402105A5K CAP 0402 1UF 10% 10V X5R C611 065G0402105A5K CAP 0402 1UF 10% 10V X5R C605 065G0402105A5K CAP 0402 1UF 10% 10V X5R...
- Page 57 C403 065G080510615K CHIP 10uF 16V X5R 0805 C402 065G080510615K CHIP 10uF 16V X5R 0805 C603 065G120622615K CAP CHIP 1206 22UF K 16V X5R FB410 071G 56K121 TA CHIP BEAD 120R/6000mA HCB2012KF-121T60 FB601 071G 56K121 TA CHIP BEAD 120R/6000mA HCB2012KF-121T60 FB602 071G 56K121 TA CHIP BEAD 120R/6000mA HCB2012KF-121T60 FB603...
Need help?
Do you have a question about the e2450Swh and is the answer not in the manual?
Questions and answers