Table of Contents
Advertisement
Quick Links
Advertisement
Table of Contents

Summary of Contents for Sofradir ATOM 1024
-
Page 1: Atom 1024 User Manual
ATOM 1024 User Manual ATOM is a trademark of Sofradir-EC Inc. Page 1... - Page 2 Sofradir-EC Incorporated. The same copyright and restrictive notices must be duplicated on any authorized copies.
-
Page 3: Table Of Contents
MODEL OVERVIEW ............................... 8 GETTING STARTED ............................... 9 ..................................9 NPACKING ............................9 HAT YOU NEED TO GET STARTED 3.2.1 ATOM 1024 SW Support Disk contents ......................10 3.2.2 Additional Documents ............................10 3.2.3 Frame Grabber support notes ..........................10 ..................................10 EATURES HARDWARE OVERVIEW ............................. - Page 4 ) .............. 36 ONFIGURE THE FOR POINT POINT CONNECTION CAMERA MODELS 7.2.1 Configure the PC NIC for static IP address (for GigE camera models) ..............36 7.2.2 Restore NIC setup for network connection (DHCP delivered IP address) ............37 ) ....................38 UMBO FRAMES PACKETS SETUP CAMERA MODELS...
- Page 5 ....................72 ODEL NTERFACE HYSICAL IMENSIONS 11.4 ATOM 1024 L M ....................73 ODEL NTERFACE HYSICAL IMENSIONS 11.5 ATOM 1024 G (CZ 25-225 ................74 ODEL NTERFACE HYSICAL IMENSIONS 11.6 ATOM 1024 G (CZ 25-150 ................75 ODEL NTERFACE HYSICAL IMENSIONS 11.7...
-
Page 6: About
Warnings The ATOM 1024 camera and related firmware and software components are not designed or intended for use or resale in hazardous environments requiring fail-safe performance, such as in the operation of nuclear facilities, aircraft navigation or communications systems, air traffic control, or other devices or systems in which a... - Page 7 malfunction of the camera hardware or software would result in foreseeable risk of injury or death to the operator of the device or systems, or to others. Operating Do not use a dedicated PoCL (Power over Camera Link) Frame Grabber with the camera. Handling Avoid touching the detector window.
-
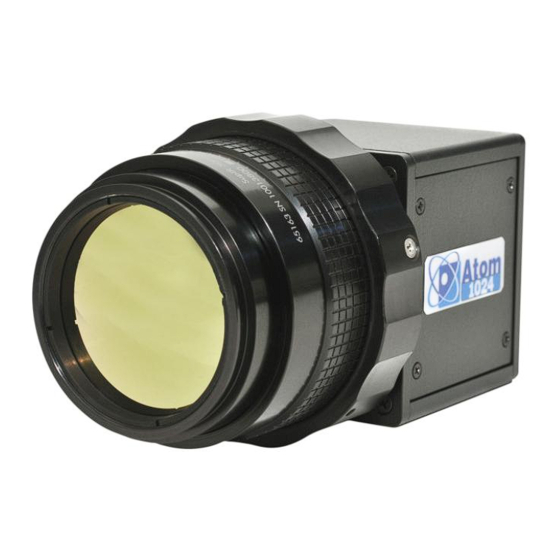
Page 8: Model Overview
2 Model Overview ATOM Model Lens HFOV (nominal) 1024-73L (LVTTL) 1024-73C (Camera Link) 13mm, f1.1 manual focus 73º 1024-73G (GigE) 1024-20L (LVTTL) 50mm, f1.0 manual focus 1024-20C (Camera Link) 20º 50mm, f1.2 fixed focus 1024-20G (GigE) 1024-40L (LVTTL) 1024-40C (Camera Link) 25mm, f1.2 fixed focus 40º... -
Page 9: Getting Started
3. CD/DVD Release Software Disk (which includes a copy of the User Manual) 4. Quick Start Guide 5. Additional Accessories ordered (Lens, cables) What you need to get started To setup and use the ATOM 1024 camera, the following items are needed: ATOM™ 1024 Camera ... -
Page 10: Atom 1024 Sw Support Disk Contents
3.2.2 Additional Documents The Quick Start Guide is a brief guide to get your Atom 1024 setup, installed and running. This document is included on the software CD as well as in the box with the camera. At additional cost, the following documents are available: ... -
Page 11: Hardware Overview
4.1.1 Camera Link Camera Link Power Camera Mount Above is an example of an ATOM 1024 with a Camera Link video interface (with an f 1.0 50mm manual focus lens) See Section 4.2.1 for the power supply pin layout. -
Page 12: Gige
4.1.2 GigE GigE Power Camera Mount Above is an example of an ATOM 1024 with a GigE video interface (with an f 1.2 50mm fixed focus lens) See Section 4.2.1 for the power supply pin layout. See Section 4.3.2... -
Page 13: Lvttl
4.1.3 LVTTL LVTTL Connector Above is an example of an ATOM 1024 with an LVTTL video interface (with an f 1.0 50mm manual focus lens) See Section 4.3.3 for the power supply pin layout. See Section 4.3.3 for more on the LVTTL video interface. -
Page 14: Continuous Zoom
4.1.4 Continuous Zoom The Continuous Zoom models come with a GigE video interface. GigE Power See Section 4.2.3 for the power supply pin layout. See Section 4.3.2 for more on the GigE video interface. Page 14... -
Page 15: Power Input Jack
Power input jack 4.2.1 Camera Link & GigE power input Power input connection for 6V DC supply. The connector is a circular type receptacle (Hirose p/n HR10A-7R- 5S(73)). See Figure 1 for connector pin location and Table 1: Power input connector pin-out for connector pin- out. -
Page 16: Continuous Zoom Power Input
(with part numbers from TE Connectivity): Power Supply 12V 1.5A minimum 2-pin housing (770602-2) Crimps (770601-2) & Crimp Tool (58517-1) Negative Positive ATOM 1024 CZ 25-150mm ATOM 1024 CZ 25-225mm 422 Level Converter Board, as displayed above Page 16... -
Page 17: Digital Video Output Interface
Digital Video Output Interface Depending on the model, the Digital Video output interface will be LVTTL, Camera Link, or GigE. The digital video interface provides 14 bits of parallel pixel data, with clock signals identifying pixels (pixel clock), lines (horizontal sync), and frames (vertical sync). It will be selectable between uncorrected raw, full amplitude resolution non-uniformity corrected, and 8-bit gain and level compensated image data. -
Page 18: Camera Link Interface (C Models)
2 LVDS pairs for asynchronous serial communication, and 4 LVDS pairs for discrete control signals. The discrete control signals are not used with the ATOM 1024 Camera and are terminated. The connector is a Mini-Camera Link 26-pin 3M SDR receptacle. Power over Camera Link, PoCL, is not supported. -
Page 19: Lvttl Interface (L Models)
Table 5: GigE Network connection speed LED Status No connection, 10Mbps connection, 100Mbps connection Green 1Gbps connection 4.3.3 LVTTL interface (L models) The LVTTL interface provides a connection to customer designed video output board. The video signals are 3.3V LVTTL and are not intended to be driven over a cable. The 70-pin camera connector interface supports, 14 bits of data, framing, clock and 2 asynchronous serial signals along with 2 control signals and power. - Page 20 The 14-bit parallel data bus contains full-dynamic range RAW/NUC digital output with bad pixel correction. The ATOM 1024 system changes Output Video data on the falling edge of PCLOCK. The system receiving data from the ATOM 1024 system should latch it on the rising edge of this clock. Page 20...
-
Page 21: Camera Mount ( For Cand Gmodels )
Number of active LINES in each active Frame is 768 for XGA and 480 for VGA modes. Camera Mount (for C and G models) The ATOM 1024 C and G models have a camera mount so the camera may be mounted on a tripod. The L models do not have a camera mount. -
Page 22: Manual Focus (13Mm & 50Mm)
4.5.1 Manual Focus (13mm & 50mm) 4.5.1.1 13mm f/1.1 Manual Focus 73° FOV 4.5.1.2 50mm f/1.0 Manual Focus 20° FOV Page 22... -
Page 23: Fixed Focus (25Mm & 50Mm)
4.5.2 Fixed Focus (25mm & 50mm) 4.5.2.1 Fixed focus (25mm f/1.2 40° FOV) Adjusting the 25mm Fixed Focus Lens Inner Lens The fixed focus lens allows the option to unlock and change the focus; then re-lock the lens in place with the lock ring. Lock Ring While facing the camera, use the grooves on the lock ring to... - Page 24 4.5.2.2 Fixed Focus (50mm f/1.2 20° FOV) Lens Baffle Focus Grip Adjusting the 50mm Fixed Focus Lens: Rotate the Focus Grip to adjust your focus. 2. When the desired focus is reached, insert the supplied lockdown screw (replacement screw: Nylon Tip 18-8 SS Socket Set Screw 4-40 Thread, 1/8"...
-
Page 25: Continuous Zoom
4.5.3 Continuous Zoom 4.5.3.1 25-150mm f/1.4 Continuous Zoom motorized focus 6.6-40° FOV 4.5.3.2 25-225mm f/1.5 Continuous zoom motorized focus 4.4-40° FOV Page 25... -
Page 26: Accessories
4.5.3.3 15-100mm f/1.4 Continuous zoom motorized focus 9.15-56º FOV Accessories Camera Link Cable (Mini – Standard) o 2m (915154) o 5m (915155) o 10m (915156) Power Supply with serial cable (915288) Camera Link Frame Grabber Boards: o 16MB PCI-1426/16 (915219) o 32MB PCI-1426/32 (915220) o PCI-1428 (915221) o PXI-1428 (915222) -
Page 27: Installing Pc Software
When installing all of the third party software packages, take care to review the End User License Agreements associated with each. Sofradir-EC provides these packages on our installation media as a convenience, and takes no responsibility for performance and reliability, and provides no direct support for these products. - Page 28 Click on the “Next” button to continue to install the software. Read the end-user software license agreement and click the bullet next to the statement of accept once the license agreement has been reviewed and agreed to. Click on the “Next” button to continue. Page 28...
- Page 29 Click on the “Next” button to continue. If the default folder location is not acceptable click on the “Change” button to edit the folder location then click on the “Next” button to continue. Click on the “Install” button to continue. Page 29...
- Page 30 Click on the “Finish” button when completed. Page 30...
- Page 31 Following a successful installation, these new items should appear on your Start menu under the Pleora Technologies Inc heading. Select the item for GEVPlayer to start the video acquisition application. Page 31...
-
Page 32: Sofradir-Ec Tools
ATOM GUI Application The ATOM GUI application is the program that allows you to send communications to your ATOM 1024 camera. Initiating the ATOM GUI setup wizard will present you with a preliminary welcome screen. Click 'Next' to proceed to the installation folder. -
Page 33: Install The Pleora Ethernet Device Driver (For Gige Camera Models)
Install the Pleora Ethernet device driver (for GigE camera models) 1. Run the Driver Installation Tool from All Programs > Pleora Technologies Inc. > eBUS SDK > Tools 2. Verify the current driver installed. 3. Select the driver from the Action pull down menu then click Install. Page 33... -
Page 34: Installing Camera Files
4. Click Install again to install the device driver. 5. Verify the Current Driver installed is an eBUS driver. 6. Click Close when done. 6 Installing Camera Files Cameras using the Camera Link interface require camera files for the NI software to communicate between the NI frame grabber and the camera. -
Page 35: Customize The Ni Camera File To Operate With A Different Frame Grabber
2. Run the NI Camera File Generator program. 3. On the initial screen, click on the button labeled “Open Existing Camera File.” 4. Navigate to the NI camera file folder, and select one of the provided SEC camera files (e.g. Sofradir-EC ATOM 1024.icd). -
Page 36: Gige Connection Configurations (For Gige Camera Models)
7 GigE Connection Configurations (for GigE camera models) Configure Windows Firewall (for GigE camera models) Configure Windows Firewall to allow GEV Player through. 1. From the Start menu, select Start > Control Panel 2. From the Control Panel, select the category System & Security, then Windows Firewall 3. -
Page 37: Restore Nic Setup For Network Connection (Dhcp Delivered Ip Address)
5. Select the “Use following IP address” bullet and enter 192.168.1.1 for the IP address and 255.255.255.0 for the Subnet mask. Note: The Subnet mask may automatically be filled in with 255.255.255.0 after the IP address is entered. 6. Click Ok when done. 7.2.2 Restore NIC setup for network connection (DHCP delivered IP address) 1. -
Page 38: Jumbo Frames/Packets Setup (For Gige Camera Models)
Jumbo frames/packets setup (for GigE camera models) Before using Jumbo frames, make sure the PC NIC and Ethernet switches support Jumbo frames, otherwise the packets will be discarded. 7.3.1 PC NIC setup for jumbo frames/packets For Windows 7, 1. Select Start 2. -
Page 39: Verify Setup Of Jumbo Frames/Packets
7.3.2 Verify setup of jumbo frames/packets 1. Open a Command Prompt window, Click on Start > Run, then type Cmd in the Run box and click Ok. 2. In the Command Prompt window, type the following and hit Enter ping [–f] [–l size] [target name or IP address] ping –f –l 9000 192.168.0.133 3. - Page 40 7. From the GEV Player main screen, Select Tools then Setup. 8. From the Setup window, select Data receiver and Multicast. 9. Make sure that the Multicast address from the GEV Player matches the Atom Gui Multicast Address (as shown above) Page 40...
-
Page 41: Getting An Image
10. Click Ok 11. In GEV Player, Click the Select / Connect button. 12. Select your Gig-E interface and verify that the Access Status says “Control” highlighted in yellow. 13. Click OK 14. The GEV Player should now display video and the GUI can be used to control the camera. Note: The Play and Stop button are not active as well as the GEV Device control button so if a change in image size is needed the GEV Player will need to be set back to Controller and Data receiver. -
Page 42: Acquire An Image
SofradirEC14BitCameraLink.ic d (as seen to the right). 7. For following uses, right-click Channel, click the Camera drop-down and choose the Sofradir-EC selection (as seen to the right) and choose the appropriate camera. 8. From the Acquisition Parameters tab near the bottom of the window, setup the Width and Height. -
Page 43: Gige Video Interface
8.2.2 GigE Video interface Review the following and perform the necessary steps. a. Update to the Pleora Ethernet Driver to improve performance (See Section 5.3) b. Configure Windows Firewall to allow GEV Player through (See Section 7.1) c. Configure for network or point-to-point connection d. - Page 44 5. Click the Play button 6. Observe Error count is 0 and the Stream number of images is incrementing. 8.2.2.2 GigE Video interface point-to-point connection 1. Configure the PC’s NIC for a static IP address (Section 7.2.1) 2. Launch GEVPlayer from the desktop shortcut or the start menu. Click the Select / Connect button.
- Page 45 5. Select the Gig-E interface. Page 45...
- Page 46 6. Select the “Set IP Address…” button. Page 46...
- Page 47 7. Enter a two as the last digit of the IP address and click OK. Page 47...
- Page 48 8. Verify the IP Configuration is Valid now. Page 48...
- Page 49 9. Select the GigE interface and click OK. 10. The following warning may be displayed. Click Ok. Note: It is recommended to go back and update the Ethernet device driver for improved performance (See Section 5.3). Page 49...
-
Page 50: Lvttl Interface
11. Select the GEV Device control button 12. Setup Width, Height, PixelFormat (Mono14) and TestImageSelector (Off). 13. Click the Play button and observe Error count is 0 and the Stream number of images is incrementing. 8.2.3 LVTTL interface Note: The LVTTL interface is intended to connect to custom designed hardware. The custom designed hardware will provide an interface from which to acquire an image. -
Page 51: Troubleshooting Your Image (For Gige Camera Models)
Troubleshooting your image (For GigE Camera Models) This section contains images that illustrate the effects of common configuration problems. If the Gigabit Ethernet interface hardware is configured to generate a test pattern instead of live video from the camera, the displayed images will be a saw-tooth pattern that moves from right to left at a... - Page 52 If the image dimensions are not set correctly, you will see a correctly acquired and displayed image, but the image field of view will not be correct. You will likely see a smaller image area than expected. If you see vertical banding of any size in the image, this may simply be the result of a mismatch...
-
Page 53: Camera Configuration And Adjustment
The serial interface settings are 57600 baud, 8 bit data, 1 stop bit, no parity, and no flow control. The ATOM 1024 receives data on the TXD signal and transmits data on the RXD signal. The TXD and RXD serial signals are 3.3V LVTTL level signals and the TXD signal needs to be set high when the serial interface is idle. -
Page 54: Using The Atom Config
10 Using the ATOM Config 10.1 Connecting & Safe Shutdown The GUI requires only two files to operate: AtomConfig.exe and AtomSerialCmdLib.dll (both in the same directory). 10.1.1 Connect to ATOM Config 1. Launch AtomGui from your computer by clicking the AtomGui.exe application file. 2. -
Page 55: Info Tab
10.2 Info Tab The Info Tab displays hardware & firmware identification numbers, camera status, and the detector temperature (VTEMP). Refresh the Status, Fault Indicators, and VTEMP values by pressing the Refresh button. Initiate a self-test operation by pressing the “Self Test” button. This operation can take several minutes during which the “Image ready”... -
Page 56: Video Tab
10.3 Video Tab The Video Tab is used to set the detector window format. The Video Tab can also configure the output video display resolution, output video zoom, output video data resolution, and enable video image correction. The Video Tab can also select from a live image and several test patterns. 10.3.1 Detector Disable Selecting this checkbox will disable the detector. - Page 57 Frame grabber Pin 5 (PAIR8+) and Pin 18 (PAIR8-) In LVTTL camera models the signal is accessed from J1 pin 13. The External Sync signal exists in Gigabit Ethernet camera models and can be accessed via the Pleora SDK as the same CC1 control line described in the Camera Link configurations.
-
Page 58: Select Image Zoom
The NUC that limits spatial noise depends on the thermal conditions around the pixels. These conditions include not only camera ambient temperature, but also effects such as the self heating generated by bias current applied during the integration time as well as the cooling that takes place in the interval between integration cycles. While NUC operations compensate for ambient temperature changes, this self heating and cooling is directly influenced by variations in frame rate and is not automatically compensated for in NUC adjustments. -
Page 59: Lens Selection (Only For Customers Purchasing Multiple Lenses)
This field is only present if your configuration file defines manual lens choices. If you have purchased more than one lens to connect to your ATOM 1024 camera, you would select which lens you are operating with from the dropdown menu. -
Page 60: Video Source & Test Pattern Selection
10.3.9 Video Source & Test Pattern Selection From the Video tab, click the bullet next to Test Pattern to change your video source from the Detector to the Test Pattern. There are six Test Patterns you may choose from: All White, All Black, Col Ramp (Black -> White), Col Ramp (White ->... -
Page 61: Image Tab
10.4 Image Tab The Image Tab can set the palette, auto or manual gain and level, and AGC cutoff thresholds. Palette – The Polarity settings configures the video as White-Hot or Black-Hot. The camera defaults to White-Hot. Gain Mode – The gain mode defaults to Automatic Gain. Manual Gain –... -
Page 62: Setting Manual Gain And Level Settings
10.4.2 Setting Manual Gain and Level settings 1. From the Image tab, click the bullet next to Manual for Gain Mode and Level Mode. 2. Edit the value for Manual Gain and Manual Level in the up/down counter box or click and drag the slider. 10.4.3 Setting AGC cutoffs From the Image tab, edit the value for Cold &... -
Page 63: Nuc Tab
10.5 NUC Tab The NUC Tab is used to initiate a Touchup (1 pt. NUC), and to enable or disable image processing including video noise reduction. The NUC tab also allows selection of the Auto 1NUC Threshold percentage which if the ambient temperature of the current plateau has changed by more than this percentage, a Touchup is automatically performed. -
Page 64: Initiating A Touchup (Through Lens)
10.5.2 Initiating a Touchup (through Lens) 1. From the NUC tab, change the Shutter Mode from Automatic to Manual by clicking the bullet next to Manual for Shutter Mode. 2. Place a uniform temperature object in front of the lens. 3. -
Page 65: Default Values
10.7 Default Values This table shows the power-on defaults for all user controllable settings. The Atom camera will return to these configuration settings every time it is powered on. Field Name Field Default Detector Disable Detector enabled (unchecked) Enable External Trigger Disabled (unchecked) Zoom Output Bits... -
Page 66: Physical Dimensions Drawings
11 Physical Dimensions Drawings This section contains the physical dimension drawings for each permutation of the ATOM 1024 camera. 11.1 Standard lens Dimensions 11.1.1 Universal Lens Mount Inteface Page 66... -
Page 67: 13Mm (F1.1) Manual Focus Lens Dimensions
11.1.2 13mm (f1.1) Manual Focus Lens Dimensions Page 67... -
Page 68: 25Mm (F1.2) Athermal Fixed Focus Lens Dimensions
11.1.3 25mm (f1.2) Athermal Fixed Focus Lens Dimensions Page 68... -
Page 69: 50Mm (F1.2) Athermal Fixed Focus Lens Dimensions
11.1.4 50mm (f1.2) Athermal Fixed Focus Lens Dimensions Page 69... -
Page 70: 50Mm (F1.0) Manual Focus Lens Dimensions
11.1.5 50mm (f1.0) Manual Focus Lens Dimensions Page 70... -
Page 71: Atom 1024-20 C Model Physical Dimensions
11.2 ATOM 1024-20 C Model Physical Dimensions Note: Drawing displays the model without a lens mounted. Page 71... -
Page 72: Atom 1024 G Model Interface Physical Dimensions
11.3 ATOM 1024 G Model Interface Physical Dimensions Note: Drawing displays the model without a lens mounted. Page 72... -
Page 73: Atom 1024 L Model Interface Physical Dimensions
11.4 ATOM 1024 L Model Interface Physical Dimensions Note: Drawing displays the model without a lens mounted. Page 73... -
Page 74: Atom 1024 G (Cz 25-225Mm) Model Interface Physical Dimensions
11.5 ATOM 1024 G (CZ 25-225mm) Model Interface Physical Dimensions Page 74... -
Page 75: Atom 1024 G (Cz 25-150Mm) Model Interface Physical Dimensions
11.6 ATOM 1024 G (CZ 25-150mm) Model Interface Physical Dimensions Page 75... -
Page 76: Atom 1024 G (Cz 15-100Mm) Model Interface Physical Dimensions
11.7 ATOM 1024 G (CZ 15-100mm) Model Interface Physical Dimensions Page 76... -
Page 77: Specifications
12 Specifications Infrared Engine Model ATOM 1024 Uncooled ASi Microbolometer Size 1024 x 768 Pixel Pitch 17 µm Frame Rate (full frame) 30 Hz Thermal Time Constant < 10 ms Digital Output LVTTL (L model), Gigabit Ethernet (G model), Camera Link... -
Page 78: Maintenance
Cleaning 13.1.1 Non-Optical Surfaces The non-optical surfaces of the ATOM 1024 Camera can be cleaned with water, mild detergents, and a soft cloth. 13.1.2 Optical Surfaces The optical surfaces of the lens should only be cleaned when visibly dirty. Care should be taken to avoid touching the exposed lens faces. -
Page 79: Repairs
4) No warranty is made as to Products which have not been installed, operated or maintained in accordance with Seller's instructions or the instructions contained in its operations or maintenance manuals when furnished by Seller, or which have been subject to misuse, abuse, accident or alteration or to improper or negligent use, maintenance, storage, transportation or handling. -
Page 80: Returning Products For "Out Of Warranty" Repair
If you choose to authorize the repair, the camera will be repaired and returned following receipt of payment. 16 Contact Information Sofradir-EC Incorporated 373 Route 46 West Fairfield, NJ 07004...
Need help?
Do you have a question about the ATOM 1024 and is the answer not in the manual?
Questions and answers