Table of Contents
Advertisement
Quick Links
Advertisement
Table of Contents

Summary of Contents for MediaMatrix nControl
- Page 1 Hardware Manual Version 1.7.1.0 July 23, 2014...
-
Page 2: Copyright Notice
Prepared by Peavey Digital Research, 6 Elm Place, Eynsham, Oxford, OX29 4BD, UK. Email:mmtechsupport@peavey.com. Scope This guide describes how to physically install an nControl unit, connect it to a network and specify basic settings, ready to use it with NWare. Version 1.7.1.0... -
Page 3: Table Of Contents
Chapter 4 Installing the nControl ................ 15 DHCP versus static IP ..........................16 Installation procedure ..........................16 Installing multiple Audio Science cards ....................19 Chapter 5 Setting up the nControl unit ............... 21 Introduction .............................22 Using the Windows interface ........................23 Using the web interface ..........................30 Chapter 6 Maintaining the nControl unit ............ -
Page 5: Chapter 1 Important Safety Instructions
C h a p t e r 1 Important safety instructions In This Chapter Safety warnings ....................2 July 23, 2014 Version 1.7.1.0... -
Page 6: Safety Warnings
Chapter 1 - Important safety instructions Safety warnings Warning: When using electrical products, basic cautions should always be followed, including the following: 1. Read these instructions. 2. Keep these instructions. 3. Heed all warnings. 4. Follow all instructions. 5. Do not use this apparatus near water. 6. - Page 7 Hardware Manual 18. This electrical apparatus should not be exposed to dripping or splashing and care should be taken not to place objects containing liquids, such as vases, upon the apparatus. 19. The on/off switch in this unit does not break both sides of the primary mains. Hazardous energy can be present inside the chassis when the on/off switch is in the off position.
-
Page 9: Chapter 2 Before You Start
C h a p t e r 2 Before you start In This Chapter Important network considerations ..............6 Power outage and surge protection ..............6 Warranty Registration ..................6 Thank You! ....................... 6 July 23, 2014 Version 1.7.1.0... -
Page 10: Important Network Considerations
Thank You! Thank you for purchasing this MediaMatrix product. It is designed to provide years of trouble-free operation and high quality performance. We are confident that you will find this product and other MediaMatrix products to be of the highest quality. -
Page 11: Chapter 3 Introduction To Ncontrol
C h a p t e r 3 Introduction to nControl In This Chapter Description ......................8 Features ......................8 Applications ...................... 10 Example set up ....................10 Front panel ......................12 Rear panel ......................13 July 23, 2014 Version 1.7.1.0... -
Page 12: Description
SNMP and execute Python scripts. nControl supports RATC and PASHA protocols, allowing you to interact with an NWare project via an Ethernet or serial connection. After nControl has been installed and given initial configuration settings, it is managed using NWare. Notes: ... - Page 13 Hardware Manual Compatible with NWare version 1.5.1 and later. July 23, 2014 Version 1.7.1.0...
-
Page 14: Applications
The nControl can also be used to monitor network devices, such a switches, via SNMP and other protocols, and this information can then be made available to the system administrator. - Page 15 Hardware Manual The NION supplies audio to the amplifiers across the network, and complements the role of the nControl in providing an overall audio management and networking solution. July 23, 2014 Version 1.7.1.0...
-
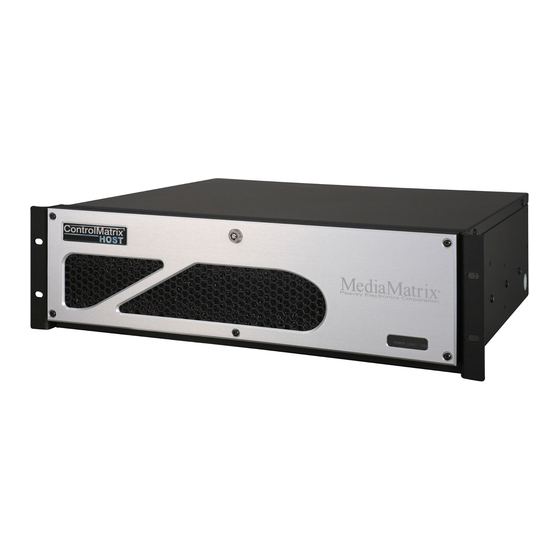
Page 16: Front Panel
Chapter 3 - Introduction to nControl Front panel 1. Front panel lock. 2. Holes for rack-mount bolts (not supplied). 3. Air Vent. Air intake vent provides fresh air flow to internal cooling system. Do not block or obstruct this vent. Proper airflow must be maintained for proper operation. -
Page 17: Rear Panel
Ethernet on Category 5e (CAT5e) cabling. 6. PCI expansion slots for inserting extra cards, including: AudioScience cards to allow the nControl to transfer audio data across a CobraNet network. Multi-port Ethernet cards to allow a project to control devices on multiple separate networks using RATC or SNMP. - Page 18 Chapter 3 - Introduction to nControl Note: You must connect both cables to the unit, otherwise a warning sound will be heard when you switch the unit on. The system is designed to provide redundant power using two independent power supplies.
-
Page 19: Chapter 4 Installing The Ncontrol
C h a p t e r 4 Installing the nControl In This Chapter DHCP versus static IP ..................16 Installation procedure ..................16 Installing multiple Audio Science cards ............19 July 23, 2014 Version 1.7.1.0... -
Page 20: Dhcp Versus Static Ip
If any of these items are missing, please contact your Authorized Peavey MediaMatrix contractor/dealer. If you intend to use NWare:Kiosk with the nControl unit, or you want to view status information and change advanced Windows settings, you will also need a monitor, keyboard and mouse. - Page 21 7. Use a tape measure or a level to verify that the nControl unit is installed straight and level. 8. At the rear of the unit, insert an Ethernet cable into one of the Ethernet ports, then connect the other end of the cable to a local Ethernet switch.
- Page 22 Devices part of the devices tree will not function. The hardware key can be inserted into a USB port at the rear of the nControl unit, but we recommend that the key is inserted into the recessed USB port at the front, as this will make it easier to access should you need to remove the key.
-
Page 23: Installing Multiple Audio Science Cards
Each card shipped from Peavey has an adapter number of 1, which is set using a jumper on the card. If you want to fit more than one AudioScience card to an nControl, you must specify a unique adapter number for each card. -
Page 25: Chapter 5 Setting Up The Ncontrol Unit
C h a p t e r 5 Setting up the nControl unit In This Chapter Introduction ....................... 22 Using the Windows interface ................23 Using the web interface ..................30 July 23, 2014 Version 1.7.1.0... -
Page 26: Introduction
Chapter 5 - Setting up the nControl unit Introduction The configuration settings for an nControl unit are distributed between two different user interfaces: the web interface (accessed via a web browser) and the Windows interface (accessed via configuration screens that are displayed when you connect a monitor directly to the nControl unit). -
Page 27: Using The Windows Interface
Specifying the basic network settings The nControl unit is configured to connect to a DHCP server to obtain an IP address and network settings. If it cannot find a DHCP server, an IP address starting with 169 will be used. - Page 28 Chapter 5 - Setting up the nControl unit Specifying settings for running Kiosk If you want Kiosk to start automatically when the nControl boots up, you must specify a project name (and optionally, a user name and password). These settings will then be used automatically.
- Page 29 Hardware Manual Starting Kiosk manually Note: In order to use Kiosk on the nControl, you will need to attach a monitor, keyboard and mouse to the unit. 1. On the main set up screen, click Exit. This screen is displayed.
- Page 30 Windows firewall. Note: Changing settings can have adverse affects on the operation of the unit, so it is very important that you only change them when instructed to do so by MediaMatrix Technical Support. To specify advanced system configuration settings 1.
- Page 31 Making a new time zone available for selection If you are installing nControl units in a time zone that is not listed on the Time and Timezone tab of the web interface, you will need to add a new entry for the time zone to the timezones_lut.txt file on the nControl unit.
- Page 32 11. Click Yes. Configuring the RAID storage system The nControl unit is fitted with two hard disk drives, which are configured to use RAID 1 mirroring. Instead of using a single disk to store data, it is written to both drives simultaneously. This ensures that should one of the drives fail, there is a full copy of the data on the other and the system can continue to operate normally.
- Page 33 Note: Changing settings can have adverse affects on the operation of the unit, so it is very important that you only change them when instructed to do so by MediaMatrix Technical Support. To display the Command Prompt window 1.
-
Page 34: Using The Web Interface
Using the web interface Recording the activation key Each nControl unit is shipped with a USB hardware key, which works in conjunction with a software activation key to control licensing on the unit. If the unit stops functioning, you will... - Page 35 Local Area Connection and Local Area Connection 2 on the Network screen correspond to. If the nControl is fitted with one or more Ethernet expansion cards, there will be 4 or 8 additional ports available. In the web interface, these ports are labeled Local Area Connection 3-6 or Local Area Connection 3-10 respectively.
- Page 36 9. Click Set to confirm the action. Specifying a name for the nControl unit You can specify a name for the nControl unit that will identify it in NWare and will also be shown in the web interface. To specify a name for the nControl unit 1.
- Page 37 Interfacing with a CAB device The nControl unit can interface with CAB devices, including the CAB 4n. This in turn allows control of external devices via the GPIO port, relays, RS-485 port etc. on the CAB. The nControl unit has two Ethernet ports, allowing a number of different configurations. In the example below, the nControl unit can communicate with the CAB via the first of its two Ethernet ports, labeled Local Area Connection in the web interface.
- Page 38 Chapter 5 - Setting up the nControl unit In the next example, in order to communicate with the CAB, data must be sent via the second Ethernet port, labeled Local Area Connection 2 in the web interface. You need to specify which Ethernet port is to be used for communicating with CAB devices on the network.
- Page 39 Specifying an IP address for connecting to other network devices The Pandad Windows service that runs on the NWare PC will detect the nControl unit using a specified IP address and make it available in NWare. This IP address will also be used to connect to other MediaMatrix devices on the network.
-
Page 40: Setting The Time And Date
There is a time synchronization system that ensures that the time and date settings on NIONs, nControl units and nTouch 180 units are the same across the control network. If you change the date on a NION, for example, it is automatically changed on the other devices. This feature is especially useful for debugging. - Page 41 Note: The mapping file contains a comprehensive list of time zones for both systems, but it is possible that NION, nControl and nTouch 180 units are being run in a part of the world which uses a time zone that is not in the mapping file. In this case, you will need to add a new mapping for the local time zone.
- Page 42 Chapter 5 - Setting up the nControl unit Scenario Actions to take do not need to make a selection. 6. Under the Zone box, click Set. You want the time and date for all On the master node: nodes on the network to be obtained 1.
- Page 43 Copying media files to the nControl unit You can copy media files over to the nControl unit using FTP and then use them in your NWare projects. This allows you to quickly change the available media in a project. You can also minimize the size of the NWare project file by storing your media on the nControl unit and not in the project file itself.
- Page 44 You can disable the FTP server by clearing the FTP check box (see procedure below), but if you are using an nControl unit or nTouch 180 unit, you must restart it before the change will take effect. To enable the FTP server 1.
-
Page 45: Managing Users
Hardware Manual Managing users Introduction Users are created via the web interface, and assigned privileges to allow them to perform certain operations, as listed below. Privilege What it controls Deploy Determines whether the user can deploy a role to this node. -
Page 46: Deleting A User
Chapter 5 - Setting up the nControl unit 3. In the user name box, type the name of the new user. 4. If you want to specify a password for the user, which must be specified when the user logs on, type the password in the Password box, and then type the password again in the Confirm box. - Page 47 Hardware Manual Specifying settings for running Kiosk If you want Kiosk to start automatically when the nControl boots up, you must specify a project name (and optionally, a user name and password). These settings will then be used automatically.
- Page 48 Two nControl units are set up as peers. One unit is active and the other unit is in standby mode. The unit in standby mode continuously monitors the active unit and synchronizes its files with the active unit.
- Page 49 Hardware Manual If Kiosk users are connected to a project hosted on an nControl unit when it fails, they will be automatically connected to the project on the backup unit after a short delay. Notes: By default, when one nControl unit takes over from another, the controls in the project (knobs, faders etc.) are reset to their default values.
- Page 50 Chapter 5 - Setting up the nControl unit 7. Restart the first nControl unit. 8. Repeat steps 2-7 for the second nControl unit. Version 1.7.1.0 July 23, 2014...
-
Page 51: Chapter 6 Maintaining The Ncontrol Unit
Adding entries to the log manually ..............48 Restarting the ControlManager application ............49 Updating the firmware ..................49 Recovering the nControl unit if it stops functioning ......... 50 Using advanced recovery options ..............52 July 23, 2014 Version 1.7.1.0... -
Page 52: Viewing Hardware Status Information
Open the web interface, then navigate to the Versions screen. The screen shows the version of firmware loaded on the nControl unit. Rebooting or shutting down the unit 1. Open the web interface, then navigate to the Special screen. -
Page 53: Restarting The Controlmanager Application
Restarting the ControlManager application ControlManager is the main MediaMatrix software application that resides on the nControl unit. When you want to restart this application, as an alternative to rebooting the nControl unit, you can restart ControlManager and leave the hardware powered up. -
Page 54: Recovering The Ncontrol Unit If It Stops Functioning
To obtain a new activation key 1. Open a web browser, connect to the nControl unit, then navigate to the Hardware screen. 2. Select the contents of the Machine Identifier box and then press CTRL+C to copy it to the Clipboard. - Page 55 Hardware Manual If you have specified a valid activation key, the Key Present box will change to Yes. 5. Power cycle the nControl. July 23, 2014 Version 1.7.1.0...
-
Page 56: Using Advanced Recovery Options
Chapter 6 - Maintaining the nControl unit Using advanced recovery options Caution: This section is intended for MediaMatrix Technical Support staff or users who are under instruction from Technical Support. Using the wrong configuration options could prevent the nControl from functioning. - Page 57 Hardware Manual wipe_switch When set to 1, reformats and repartitions the hard disk, wiping the contents from both C: drive and D: drive on an nControl unit. When set to 0, C: drive will be formatted and the system will be restored on this drive;...
-
Page 59: Appendix A Reference Information
A p p e n d i x A Reference Information In This Appendix Front panel connections ..................56 Rear panel connections ..................57 RS-232 serial port pin outs ................58 Mechanical specifications ................. 59 Technical Support ..................... 59 July 23, 2014 Version 1.7.1.0... -
Page 60: Front Panel Connections
Note: The hardware key can be inserted into a USB port at the rear of the nControl unit, but we recommend that the key is inserted into the recessed USB port at the front, as this will make it easier to access should you need to remove the key. -
Page 61: Rear Panel Connections
Note: The hardware key can be inserted into a USB port at the rear of the nControl unit, but we recommend that the key is inserted into the recessed USB port at the front, as this will make it easier to access should you need to remove the key. -
Page 62: Rs-232 Serial Port Pin Outs
RX data TX data N.C. Ground N.C. N.C. N.C. N.C. Note: Transmit (TX) and Receive (RX) are from the point of view of the MediaMatrix device. Connect them to the opposite port of the remote unit. Version 1.7.1.0 July 23, 2014... -
Page 63: Mechanical Specifications
If you cannot find the information you require, contact your dealer or distributor. If you are still unable to solve the issue, you can contact us directly using the details below. MediaMatrix has an extensive Technical Services Group that provides technical support, repair and implementation services. -
Page 65: Warranty Statement
End Users: Take the defective product and your dated sales receipt What This Warranty Does Not Cover or other proof of purchase to your Authorized MediaMatrix Systems Integrator or Authorized Peavey Service Center. System The Warranty does not cover: (1) damage caused by accident,... - Page 66 MediaMatrix® A Division of Peavey Electronics Corp. 5022 Hartley Peavey Drive, Meridian Mississippi, 39305, USA Phone: 866.662.8750 http://mediamatrix.peavey.com Features & Specifications subject to change without notice Copyright © 2014, All Rights Reserved 80307507...
Need help?
Do you have a question about the nControl and is the answer not in the manual?
Questions and answers