Advertisement
Quick Links
Patio Plus
Installation, Operating & Maintenance Instructions
This manual must be left with the purchaser/user of this appliance, and
This appliance is tested and approved for use in winds up to 15
mph. (25 km/hr.) Do not use if wind is exceeding 15 mph. (25
km/hr.) or damage will result.
The installation of Patio Plus heaters must only be performed by licensed
technicians trained and educated in the installation of this type of gas appliance.
WARNING: Read this manual completely before first installing or servicing this
equipment. Failure to read and fully understand this manual may result in an
improper installation, which could cause faulty operation of the heater, property
damage, serious injury or death. If you do not fully understand these instructions,
contact your Patio Plus representative or the manufacturer prior to the
commencement of installation, servicing or maintenance. Easy Radiant Works
accepts no responsibility for damages whatsoever resulting in improper installation
of this heater. Improper installation voids all warranties. This manual must remain
with the heater at all times.
For Your Safety
Do not store or use gasoline or other flammable vapours and liquids in the vicinity of this or any other
appliance.
Warning
Improper installation, adjustment, alteration, service or maintenance can cause injury, property damage or
death. Read the complete installation manual and all warning labels on the appliance before installation or
servicing this equipment. This heater should be installed or serviced by a qualified, licensed gas technician.
For Your Safety
If you smell gas:
1.
Shut off gas to appliance.
2.
Extinguish any open flame.
3.
If odour continues, immediately call your gas supplier.
Consigned de Security
Ill is interdict d'utiliser des lequides inflammables ou degageant des vapeurs
inflammables, a proximate de tout appareil fonctionnant au gaz.
Si vous sentez une odeaur de gaz:
1.
Fermer le gaz sur l'appareil.
2.
Eleinore toute flame ouverte.
3.
Si l'odeur persiste, contracter votre distributeur de gaz.
1
infrared patio heaters
must remain with the appliance.
Advertisement

Subscribe to Our Youtube Channel
Summary of Contents for Warnock Hersey Patio Plus
- Page 1 (25 km/hr.) Do not use if wind is exceeding 15 mph. (25 km/hr.) or damage will result. The installation of Patio Plus heaters must only be performed by licensed technicians trained and educated in the installation of this type of gas appliance.
- Page 2 Only persons familiar with such codes and certified for the installation of gas appliances are authorized to install Patio Plus heaters. Improper installation, maintenance or adjustment of Patio Plus heaters can cause serious injury, property damage or death.
- Page 3 Infrared Heat Patio Plus heaters are effective in heating outdoor spaces because they utilize infrared or radiant heat. Infrared energy is the same type of warmth we get from the sun. Infrared energy warms people and objects without heating the intervening air. Unlike the sun, Patio Plus heaters do not produce Ultraviolet (UV) rays that can be harmful.
- Page 4 Important Safety Rules 1. Children and adults should be alert to high surface temperatures of areas above the post when operating this heater. 2. Children should be carefully supervised when they are in the area of the heater. 3. NEVER hang anything including clothes or other flammable items on the heater.
- Page 5 “Patio Plus” infra red heaters are available for both L.P. and Natural Gas and are approved for indoor & outdoor applications. This appliance must only be used with the fuel for which it was originally labeled. Do not convert this heater to an alternate fuel without first consulting the manufacturer.
- Page 6 WARNING (Care & Use of L.P. cylinders) L.P. GAS CANNOT BE USED ON UNITS DESIGNED FOR NATURAL GAS. NATURAL GAS CANNOT BE USED ON UNITS DESIGNED FOR L.P. If your heater is designed for use with an L.P. cylinder, the cylinder must meet the following requirements: cylinder weight is 20 lb.
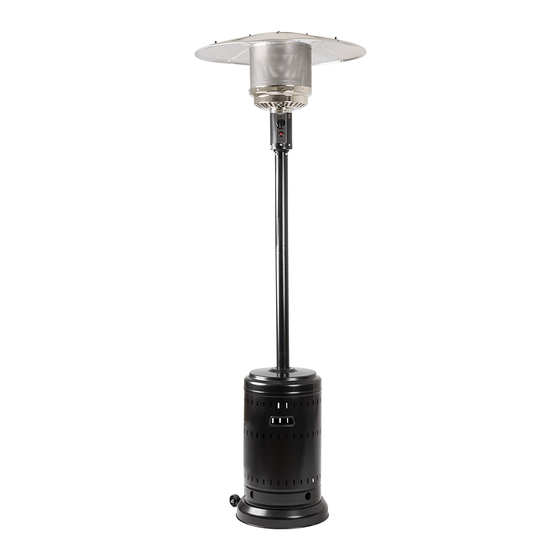
- Page 7 ASSEMBLY INSTRUCTIONS (Portable Models) PH-45-20-P-LP (Liquid Propane) (for use with 20 lb. propane cylinder) PH-45-30-P-LP (Liquid Propane) (for use with 20 lb. & 30 lb. propane cylinders). Step 1 Carefully remove all packages from the main packing box. Remove the base assembly from the interior packing box.
- Page 8 ASSEMBLY INSTRUCTIONS Model PH-45-FS-LP & Model PH-50-FS-N Free standing model for use will approved flexible supply line. Step 1 Determine a safe, level and suitable location for the weighted base. Step 2 Remove the 3/8” x 1” bolt in the base of the heater head and set aside.
- Page 9 ASSEMBLY INSTRUCTIONS PH-45-FB-LP (Liquid Propane), PH-50-FB-N (Natural Gas), PH-45-FB-R-LP (Liquid Propane & PH-50-FB-R-N (natural gas). Fixed base model for permanent mounting to deck or patio. (“R” indicates heater with remote switching option. Requires switched 24 Volt power supply to heater.) Step 1 Determine a safe, level and stable location for the base mount to be installed.
- Page 10 ASSEMBLY INSTRUCTIONS Inground Post Model PH-45-IG-LP (Liquid Propane), PH-50-IG-N (Natural Gas) PH-45-IG-R-LP & PH-50-IG-R-N for permanent inground post mounting. (“R” indicates heater with remote switching option. Requires switched 24 Volt power supply to heater.) Step 1 Determine a safe, level and stable location for the heater to be installed.
- Page 11 ASSEMBLY INSTRUCTIONS PH-45-H-LP (Liquid Propane) & PH-45-H-R-LP (Liquid Propane) PH-50-H-N (Natural Gas) & PH-50-H-R-N (Natural Gas) Hanging Model - complete with hanging bracket for suspending below an existing supporting structure. Roof deck or supporting structure Step 1 Determine a safe and appropriate location for the Minimum heater to be installed bearing...
- Page 12 Test Firing Heater Leak test all gas connections with soapy water. Soap bubbles indicate gas leakage. Do not use an open flame to test for leaks. Test fire the heater following the lighting instructions on the heater post. To Light Pilot Push and turn the control knob to “PILOT”...
-
Page 13: Troubleshooting
Troubleshooting Installation, servicing and maintenance of Patio Plus heaters must only be performed by licensed technicians trained and educated in the installation and servicing of this type of gas appliance. Problem Possible Causes Solution Pilot won’t light -No gas to burner -Refill fuel tank &... - Page 14 Keep the ventilation opening of the cylinder enclosure clean and free from debris. Visually inspect the burner flame for abnormalities. WARNING When storing or packaging 2 or more Patio Plus reflector dishes together, you MUST separate them using suitable material to prevent them from sticking together or damage will occur.
Need help?
Do you have a question about the Patio Plus and is the answer not in the manual?
Questions and answers