Table of Contents
Advertisement
Quick Links
Advertisement
Table of Contents

Summary of Contents for Mullen S-10
- Page 1 Mullen Guitar Co., Inc. Owner’s Manual G2 & Royal Precision Pre-Royal Discovery Covers Models S-10, D-10, S-11, D-11, S-12, D-12 Mullen Guitar Co., Inc. 11906 County Rd. MM Flagler, CO 80815 Ph. 970-664-2518 Fax. 970-664-2519 www.mullenguitars.com E-mail sales@mullenguitars.com...
- Page 2 Assembly & Setup Tuning your Guitar 7-11 · Tuning Open Strings · 8-10 Tuning Tunable Splits · Tuning the Half Stop Adjusting Your Guitar 13-14 · Pedal Stop · Pedal Height · Knee Lever Travel · Knee Lever Tilt · Changer Return Springs Care and Maintenance ·...
- Page 3 Your Name Guitar Model Address Special Notes...
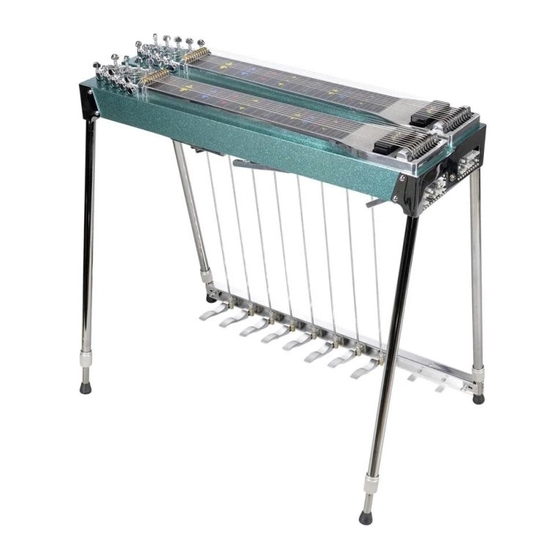
- Page 4 First, start by screwing legs into leg holes. You may want to develop your own method for marking which legs you put where, and installing them the same each time. Screw legs in tight, do not use any tools for installing legs. Then, secure the pedal bar to the front legs.
- Page 5 Insert Pedal Rod through hole in pedal linkage. Pedal rods are numbered for your convenience. Slide Disconnect outer sleeve down and attach to ball joint, then release the outer sleeve.
- Page 6 Removing Guitar from case. Hold guitar firmly with left hand on the rear changer end leg, and the right hand on the front key head end leg. Make sure properly position yourself as not to cause any strain on your back.
-
Page 7: Tuning Your Guitar
Tuning Your Guitar First step is to tune all your strings open, (no pedals or knee levers) using the tuning keys ( pictured above) Then you can engage a pedal or knee lever. If it is not perfectly in Tune, you can adjust your tuning nut that corresponds to that pull. - Page 8 Tuning The Splits Correctly tune the open tuning Using the 6th string and the B Pedal as an example.
- Page 9 Tuning The Splits Tune the 6th string G# to A using the nylon tuning nut. The next step is to tune the 6th string split which will be, Lowering G# to G . With pedal B down, tune knee lever to the G note , this is the split.
- Page 10 Tuning The Splits Release the B pedal and tune the G# to F# with the knee lever. To tune this you will have use the allen screws located behind the changer. This will give you the G# to F# solid stop. When tuning the splits on any string make sure the allen screws are backed out as shown above.
- Page 11 We also have available a tunable half stop, which is tunable from under the guitar, and also you can adjust the tension For more information on this product E-mail Mullen Guitars . If you have trouble you may email.
-
Page 12: Care And Maintenance
· If there are any items that was not addressed here you may email Mullen Guitar Co., Inc for recommended cleaning methods · It in not recommended that you transport your guitar unless in the guitar case to prevent damaged. - Page 13 Adjusting Pedal Stop An 8-32 allen screw located directly behind the pedal rod linkage in the bottom of the Aluminum Panel on the G2. A 5/64 allen wrench is used for this purpose. Adjusting Knee Lever Stop The knee lever stop is the screw that the knee lever bracket stops against.
- Page 14 Knee Lever angle adjustment. Each Knee lever has a tilt adjustment. It will be on the end of the knee lever, where it is mounted. Counter clockwise to make the knee levers closer together and clockwise to move apart using a 5/64 allen wrench Adjusting Changer Return Springs Each String has an adjustable return spring.
- Page 15 Lubricating Your Mullen Guitar Below you will find the main points to oil. Remember a little oil will go a long way. Do not Over Oil. Pedal linkage slide where it attaches to the aluminum Linkage Ball Joints on Pedals...
- Page 16 Notes...
-
Page 18: Changing Strings
Changing Strings New Strings Here are some tips that might be helpful when replacing new strings. The number 1 problem many players encounter is that annoy- ing third E9th string G#. Breaking it when installed can be elimi- nated if put on properly. When putting this string on attach it to the changer and cut it when... - Page 19 Valuable String Tip We have been asked several times about gauged rollers on guitars. Our rollers are all the same gauges. This makes it easier to re-install when removed. Since they are all the same gauge you don't have to worry about putting them in the same position on the nut sup- port.
- Page 20 Mullen Guitar Co., Inc. 11906 County Rd MM Flagler Colorado 80815 Family Owned and Operated We have dedicated more than 30 years to building Pedal Steel Guitars. And we are continually getting better thanks to all dedicated Steel Players for making it possible for us to help in any way we can.
Need help?
Do you have a question about the S-10 and is the answer not in the manual?
Questions and answers