
Subscribe to Our Youtube Channel
Summary of Contents for Robertson Tweed 5E3 PCB
- Page 1 Tweed 5E3 Valve Junior Conversion Build Manual Tweed 5E3 PCB Valve Junior Conversion Build Manual v3.0 13 Feb 2011 1 of 40...
-
Page 2: Introduction
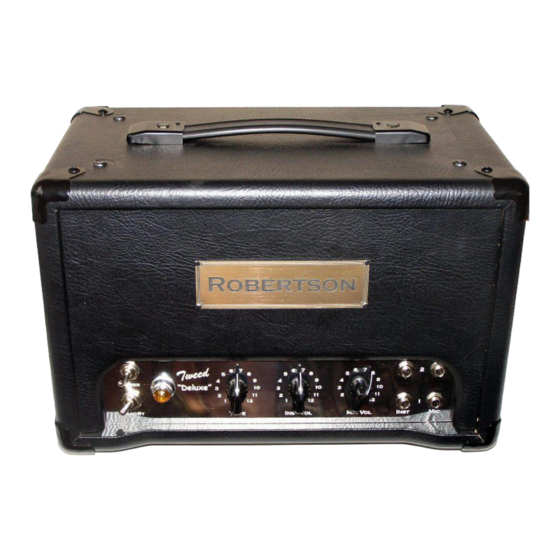
Benton GA-5 or Legacy Valve Edition into a 14-18 watt Push Pull tube amplifier modeled after the legendary Fender Deluxe Model 5E3 (AKA Tweed Deluxe 5E3). The heart of the amp is the Tweed 5E3 PCB, which conveniently lays out the circuit in a printed circuit board, PCB, package. -
Page 3: Electrical Shock Warning
Building, modifying, or repairing tube amplifiers should only be performed by trained personnel. Tweed 5E3 PCB Valve Junior Conversion Build Manual v3.0 13 Feb 2011 3 of 40... -
Page 4: Disclaimer Of Liability
PPWatt.com reserves the right to make design changes or improvements without obligation to revise prior versions. All specifications are subject to change without notice. The Tweed 5E3 PCB by PPWatt.com is licensed under a Creative Commons Attribution-Share Alike 3.0 United States License. Tweed 5E3 PCB Valve Junior Conversion Build Manual v3.0... -
Page 5: Table Of Contents
Prepare the Chassis ....................14 Layout and Drill ....................14 6.1.1 Layout the Tweed 5E3 PCB for Drilling ............ 14 6.1.2 Layout the Faceplate for drilling ..............15 6.1.3 Drilling the Chassis base ................16 ... - Page 6 Power Up with Tubes ..................39 9.3.1 The Real Test ....................39 Finish Things Up....................40 10.1 Re-Assemble the Amp ..................40 Tweed 5E3 PCB Valve Junior Conversion Build Manual v3.0 13 Feb 2011 6 of 40...
-
Page 7: Project Overview
Even an experienced builder will get value out of reading it 4.1.1 Parts: The Tweed 5E3 PCB Misc. parts and components (refer to the Tweed 5E3 PCB parts list document for a full listing of what parts are needed and where you can buy them) 4.1.2 Tools:... -
Page 8: Remove The Evj Chassis
Remove the four chassis screws and pull out the chassis. Tweed 5E3 PCB Valve Junior Conversion Build Manual v3.0 13 Feb 2011 8 of 40... -
Page 9: Remove The Tubes And Tube Retainers
However, you might want to label them (Input 1,Input 2, 4 out, 8 out, 16 out & Ground) just in case you want to use it in another SE build at a later time. Tweed 5E3 PCB Valve Junior Conversion Build Manual v3.0... - Page 10 Continue to use the hole closest to the edge of the chassis, and mark where the new one needs to be drilled. You could drill it now, or do it along with the rest of the drilling later. Tweed 5E3 PCB Valve Junior Conversion Build Manual v3.0 13 Feb 2011...
-
Page 11: Clean Up The Power Transformer
PT than the stock unit. A 300 - 325v CT @ 125mA+ PT will give you a far better sounding amp. Tweed 5E3 PCB Valve Junior Conversion Build Manual v3.0 13 Feb 2011 11 of 40... -
Page 12: Remove The Volume Potentiometer
Unplug the input jack wire at the circuit board. Remove the six (6) screws fastening the circuit board to the chassis. the new PCB. Tweed 5E3 PCB Valve Junior Conversion Build Manual v3.0 13 Feb 2011 12 of 40... - Page 13 Unscrew the input jack and remove it from the chassis. Set it aside for use completely new input jack complex for this project. Tweed 5E3 PCB Valve Junior Conversion Build Manual v3.0 13 Feb 2011 13 of 40...
-
Page 14: Prepare The Chassis
& bottom of the chassis. 6.1.1 Layout the Tweed 5E3 PCB for Drilling Since the Tweed 5E3 PCB was designed to use the stock EVJ chassis standoffs, one method to mark the additional chassis holes is to install the board. -
Page 15: Layout The Faceplate For Drilling
We have developed a number of professional grade faceplate options for the Tweed 5E3 PCB. The information is on the web site. We highly recommend you buy or fabricate one of these faceplates and use it to layout the front panel drill drill plan printout. -
Page 16: Drilling The Chassis Base
6.1.3 Drilling the Chassis base Start by setting the center of each hole to be drilled. A center punch is often (AKA Unibit) to do the really large holes. Tweed 5E3 PCB Valve Junior Conversion Build Manual v3.0 13 Feb 2011... - Page 17 -drilled hole is quite wide. Whilst the 5E3 PCB uses the stock stand- first noval socket. D -offs to more than make up for it. Tweed 5E3 PCB Valve Junior Conversion Build Manual v3.0 13 Feb 2011 17 of 40...
-
Page 18: Tweed 5E3 Pcb
7. Tweed 5E3 PCB 7.1 Assemble the Tweed 5E3 PCB Tweed 5E3 PCB begins. Did you check you make sure you have all of the I wish I did. The graphics used in the assembly of this circuit board will NOT always be an exact reflection of what your board will look like. -
Page 19: Pcb Standoffs
We want to fit the socket(s) to the chassis drill holes. In a sense, it (they) will be custom, or perfectly, fit to how you drilled the chassis. Tweed 5E3 PCB Valve Junior Conversion Build Manual v3.0 13 Feb 2011... - Page 20 When all of the socket lugs are soldered, remove the circuit board from the chassis and touch-up any solder joints on the other side (or socket side). Tweed 5E3 PCB Valve Junior Conversion Build Manual v3.0 13 Feb 2011...
-
Page 21: Spade Connectors
Trim the leads off at the top of each solder pool. If you are using a center-tapped PT, like the MPS 325.2, Weber 025130 or Edcor XPWR107 Tweed 5E3 PCB Valve Junior Conversion Build Manual v3.0 13 Feb 2011 21 of 40... -
Page 22: The Jumpers
If you are 7.1.5 The Tweed 5E3 PCB can be configured to have a cascaded V1 gain stage along with many other configurations including tube tremolo & higher power 6L6 versions. Look in the 5E3 section of PPWatt.com and ask for help from the friendly folk over there ;-) -
Page 23: Filter Capacitors
Power Transformer. matter of personal choice. If you are using tube rectification, your choices are more restricted. You should rapid rate. Solder and trim the leads. Tweed 5E3 PCB Valve Junior Conversion Build Manual v3.0 13 Feb 2011 23 of 40... -
Page 24: Bypass Capacitors
(the longer one) into the square pad and the negative lead (as indicated by the pad. current parts list. I used 22uF bypass capacitors rather than the stock 25uF in this build. Tweed 5E3 PCB Valve Junior Conversion Build Manual v3.0 13 Feb 2011 24 of 40... -
Page 25: Install The Remaining Components
N.B. C8 & C9 the tone control caps are not installed on the PCB. They are attached between the Tone & Volume Pots. Then do the power resistors Tweed 5E3 PCB Valve Junior Conversion Build Manual v3.0 13 Feb 2011 25 of 40... - Page 26 They are part of the input jack complex. I use metal film resistors for the 64K & 1M input resistors rather than carbon up ! like. Tweed 5E3 PCB Valve Junior Conversion Build Manual v3.0 13 Feb 2011 26 of 40...
-
Page 27: Input Jack Complex
This is a picture of the input jack complex for the prototype 5E3 I assembled where the 1M resistors were on the PCB see them here. Tweed 5E3 PCB Valve Junior Conversion Build Manual v3.0 13 Feb 2011 27 of 40... -
Page 28: Tone & Volume Potentiometers
Cut the tab off of each of the pots with a pair of cutters (side cuts). A pair of pliers can also be used to bend You should end up with it looking like this: - This time Tweed 5E3 PCB Valve Junior Conversion Build Manual v3.0 13 Feb 2011 28 of 40... -
Page 29: Connect The Control Leads
If you do choose to use a separate ground, do NOT use one of the transformer bolts. Personally, I just use the existing star ground. Tweed 5E3 PCB Valve Junior Conversion Build Manual v3.0 13 Feb 2011... -
Page 30: Putting It All Together
& soldered to the PCB. 8. Putting it all together 8.1 Install the New Components been drilled, and the Tweed 5E3 PCB has been assembled, we can prep the chassis and install all of the new components. 8.1.1 Hookup the Tweed 5E3 PCB Place the circuit board into the chassis, align the mounting standoffs to their respective chassis holes and lightly fasten the board to the chassis with a screw. - Page 31 It should look like Guide the PCB, Pots & Jacks back in & loosely fit them. They out after this last lot of measuring & wire cutting. Tweed 5E3 PCB Valve Junior Conversion Build Manual v3.0 13 Feb 2011 31 of 40...
-
Page 32: The New Output Transformer
Re-Install the output jack board into its stock location. Guide the ground wire from the output jack board to the star grounding stud. This will be secured to the stud later. Tweed 5E3 PCB Valve Junior Conversion Build Manual v3.0 13 Feb 2011 32 of 40... - Page 33 Just make sure not to flick the switch with the amp on full Twist the brown wires as shown & slide the newly soldered spade connectors onto the Tweed 5E3 PCB spade connectors as shown. Insulate & tie off the blue OT wires out of the way.
-
Page 34: The Power Supply Connections
& up, soldering from the top side of the PCB. The thin wires you can see soldered to these same pads go to the 6v Bezel. If you have a 120/240v If you are using a stock Tweed 5E3 PCB Valve Junior Conversion Build Manual v3.0 13 Feb 2011... - Page 35 U.S. would use the 115v taps, yellow & black. Australia & most of Europe would use the 240v taps, Brown & Black or 230v taps, Blue & Black) Fasten the ground wires from the Tweed 5E3 PCB and the output transformer to the star ground screw post.
-
Page 36: Turn On The Power
The fuse should be rated for no more than 4A Slo-Blo. I that it serves a useful purpose. This fuse assembly is a common cause of problems. Make sure there is continuity across it. Tweed 5E3 PCB Valve Junior Conversion Build Manual v3.0 13 Feb 2011... -
Page 37: Power Up Without Tubes
If a significant deviation from these readings is observed, turn off the amp, unplug the mains power and investigate. These measurements will read high since there is no load on the transformer. Tweed 5E3 PCB Valve Junior Conversion Build Manual v3.0 13 Feb 2011... - Page 38 The unloaded B+ voltage should measure the same all the way up the power rail. A slight fluctuation is normal. If a difference greater than 5-10 Vdc is measured, troubleshoot the problem. Turn OFF the amplifier. Tweed 5E3 PCB Valve Junior Conversion Build Manual v3.0 13 Feb 2011 38 of 40...
-
Page 39: Power Up With Tubes
Turn the power off, disconnect the black ground lead from the star ground lug, then power back on & probe with the two. Be Tweed 5E3 PCB Valve Junior Conversion Build Manual v3.0 13 Feb 2011 39 of 40... -
Page 40: Finish Things Up
Attach the back panel with the stock screws. Congratulations! Your have successfully converted your Epiphone Valve Junior into a Tweed 5E3. Plug in a guitar and enjoy your new amp. Tweed 5E3 PCB Valve Junior Conversion Build Manual v3.0 13 Feb 2011...
Need help?
Do you have a question about the Tweed 5E3 PCB and is the answer not in the manual?
Questions and answers