Advertisement
Advertisement
Table of Contents
Troubleshooting

Related Manuals for Rietschle Thomas 2660CE37-807

Summary of Contents for Rietschle Thomas 2660CE37-807
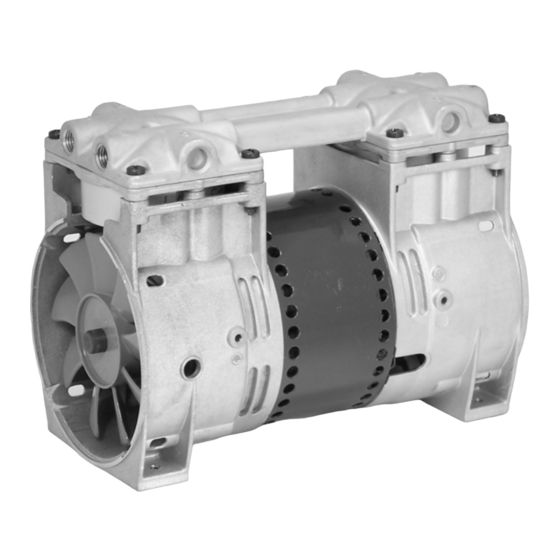
- Page 1 A Thomas Industries Company 2660CE37-807 & 2660CGHI42-807 Compressor Field Service Manual ©2003 Thomas Industries Sheboygan, Inc. FSM 0159 Rev. A 07/04...
-
Page 3: Table Of Contents
A Field Service Manual Prepared by A Thomas Industries Company Thomas Compressor 2660CE37-807 & 2660CGHI42-807 Field Service Manual ©2003 Thomas Industries, Sheboygan Inc. Field Service Manual FSM 0159 Rev. A 0704 Table of Contents P a g e Introduction ..................................4 Safety First .................................. -
Page 4: Introduction
Introduction This Field Service Manual is intended for use ONLY by properly trained and experienced repair personnel employed by an authorized service center. THIS SERVICE MANUAL SHOULD NOT BE USED BY OR DISTRIBUTED TO THE PUBLIC. THE INSTRUCTIONS AND WARNINGS HEREIN PRESUME EXISTING FAMILIARITY WITH THE DESIGN AND FUNCTION OF THESE AND SIMILAR PRODUCTS, AND THEIR COMPONENTS. -
Page 5: Safety First
Safety First It is recommended that you thoroughly read and understand this manual before you attempt to service the Thomas series of compressors to which this applies. PLEASE NOTE THE FOLLOWING CAUTIONS AND WARNINGS FOR YOUR OWN SAFETY. Caution To avoid personal injury and/or property damage, only authorized service personnel should service this unit. -
Page 6: Exploded View And Parts List
Exploded View and Parts List Exploded View of the Thomas 2660CE37-807 & 2660CGHI42-807 Series Compressor... - Page 7 Field Service Parts List for Thomas 2660CE37-807 & 2660CGHI42-807 Compressor Item Part Qty. Qty. Per Unit Description Per Ass'y See Chart Connecting Rod, Eccentric & Bearing Assembly 624677 Piston Cup 625776 Screw - Piston Cup Retainer 626392 Piston Cup Retainer...
-
Page 8: Preventive Maintenance And Troubleshooting Guide
Preventive Maintenance and Troubleshooting Guide Thomas Industries recommends that you perform the following service to minimize unexpected downtime for your compressor: • • • • • Replace the connecting rods or piston cups and sleeves • • • • • Replace the flapper valves •... -
Page 9: Troubleshooting Guide
Troubleshooting Guide If you are having a problem with your compressor, use this table to help determine the cause(s): Problem Possible Cause Corrective Action Unit Will Motor Loud Flow Pressure Not Start Overheats Unit High voltage at Reduce voltage compressor Low voltage at Increase voltage compressor... -
Page 10: Required Tools And Materials
Required Tools and Materials To disassemble and reassemble your compressor, you need the following tools and materials: Torque wrench that has an inch-pound scale (for head screws, set screws, flapper valve screw, and pipe plugs). ® Torx T-25 driver (for head screws). 1/8"... -
Page 11: Component Repair
Component Repair Servicing the Head, Valve Plate Assembly and Connecting Rod and Bearing Assembly The head would only need to be replaced if it is visibly damaged. Component Parts Required You will need: Head (if damaged) Head gasket O-ring Valve plate O-ring Complete valve plate assembly or individual flapper valves. - Page 12 Opposite Lead Side Removing the Flapper Valves Note: We recommend you remove and replace one flapper valve at a time. This will help to simplify the repair process and orient the flapper valve correctly on the valve plate. If you are replacing a flapper valve on the top side of the valve plate (side facing the head), remove the flapper valve screw (1) with a 1/4"...
- Page 13 5. Place a valve restraint (3) over the flapper valve. 6. Place a valve keeper strip (4) over the valve restraint observing that the word “UP” is facing you and oriented as shown in the illustration. 7. Line up the screw holes in all of the valve components and insert the flapper valve screw (5) into the valve plate.
- Page 14 Port 1 1. If you are replacing a flapper valve on the bottom side of the valve plate (side facing the compressor housing), remove the flapper valve screw (1) with a 1/4" hex socket, lift off the valve keeper strip (2), 2.
- Page 15 3. Place a valve keeper strip (3) over the flapper valve, observing that the word “UP” is facing you, not the valve plate, and oriented as shown in the illustration. 4. Line up the screw holes in all of the valve components and insert the flapper valve screw (4) into the valve plate.
-
Page 16: Servicing The Connecting Rod Assembly And Eccentric Assembly
Servicing the Connecting Rod Assembly and Eccentric Assembly Refer to the Preventive Maintenance and Troubleshooting Guide in this manual to determine whether a complete connecting rod assembly, or its component parts, or an eccentric needs to be serviced. Component Parts Required You will need: Connecting rod assembly(ies) or piston cups and sleeves... - Page 17 2. Turn the motor shaft to align the eccentric set screw with its access hole and use an Allen wrench to loosen the eccentric set screw (see illustration for location of access hole). Eccentric Eccentric Set Screw Access Hole Opening in Housing 3.
- Page 18 Caution Do not crimp the piston cup (4) when you remove the connecting rod assembly from the compressor housing. If the cup is crimped, you must replace it. Rebuilding Connecting Rod Assemblies If you are rebuilding the connecting rod assembly using component parts, follow this procedure: When replacing the piston cup (4), be sure to replace the sleeve (1) at the same time.
- Page 19 Assembly of the Connecting Rod to the Compressor 1. Line up eccentric set screw with flat on shaft. Slide connecting rod assembly over shaft through front of housing with eccentric toward end of shaft. Push connecting rod assembly tight against housing bearing. Note: Both connecting rod assemblies shown for orientation.
-
Page 20: Reassembling The Compressor
Reassembling the Compressor Top of Valve Plate Groove After the connecting rod assembly and eccentric are correctly assembled, you can assemble the valve plates and head to the compressor. Caution To prevent damage to the compressor, never apply any sealant or lubrication to the O-rings. - Page 21 3. Position the compressor housing as shown in the illustration. Notice the orientation of the power leads. Note: Make sure that the connecting rod sleeves are seated against the compressor housing. Power Leads 4. Observe the orientation of the valve plate assemblies.
- Page 22 Opposite Lead Side Exhaust 5. Place the head on the valve plate assemblies observing the position of the air intake and exhaust ports. Note: Make sure the head gasket O-rings are not pinched. 6. Insert the head screws and finger tighten each screw until it is snug.Use a Torx®...
- Page 23 NOTES...
- Page 24 A Thomas Industries Company...
Need help?
Do you have a question about the 2660CE37-807 and is the answer not in the manual?
Questions and answers