Advertisement
Quick Links
This is a Quick Start Guide for using the VEX CORTEX Microcontroller and VEX Joystick. Refer to the VEX Wiki
(http://www.vexforum.com/wiki/index.php/VEX_Cortex_Microcontroller) for updates to this document.
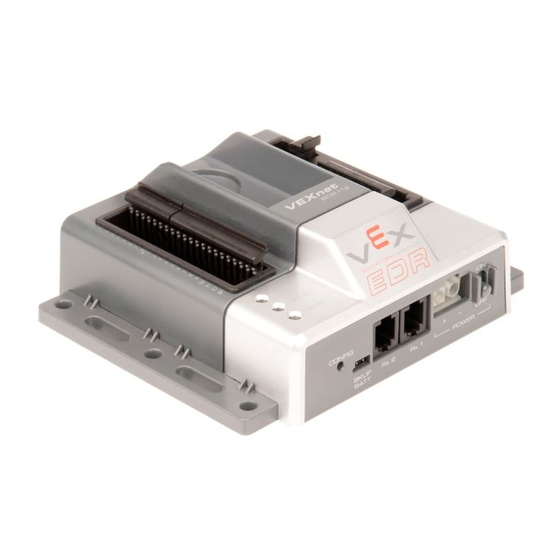
1. Basic connections; batteries, microcontroller, joysticks and (2) VEXnet keys.
a. Attach 7.2v battery power and a VEXnet 802.11g key to the VEX CORTEX as shown.
b. Add AAA batteries to the Joystick by loosening the screw as shown. Remove the battery cover.
c. Install six identical batteries as shown. Use Alkaline, Ni-Cad or Ni-MH chemistries, but DO NOT mix different
chemistry batteries. Charge rechargeable batteries only with a quality charger designed for your battery chemistry.
0510
Page 1 of 9
CORTEX Microcontroller and Joystick Quick Start Guide
Advertisement

Summary of Contents for Vex CORTEX
- Page 1 CORTEX Microcontroller and Joystick Quick Start Guide This is a Quick Start Guide for using the VEX CORTEX Microcontroller and VEX Joystick. Refer to the VEX Wiki (http://www.vexforum.com/wiki/index.php/VEX_Cortex_Microcontroller) for updates to this document. 1. Basic connections; batteries, microcontroller, joysticks and (2) VEXnet keys.
- Page 2 ON the CORTEX but leave the Joystick OFF. The USB A-A cable will power the Joystick. f. Turn ON the CORTEX Microcontroller and the Joystick by setting the power switches to ON as shown in the two pictures below.
- Page 3 Default Code, refer to Section 3. a. Add motors and test. The following picture shows 276-2163 VEX Motors plugged into Motor Port 2 and Motor Port 5. With default code, pushing Joystick Channel 3 up will cause Motor 2 to turn clockwise. Pushing Joystick Channel 2 up will cause Motor 5 to turn counterclockwise.
- Page 4 CORTEX Microcontroller and Joystick Quick Start Guide c. Two Joystick Operation: The default code allows two Joysticks to control motors when a jumper is installed in CORTEX location Digital 11. Connect the two Joysticks together using the PARTNER Ports with a coiled handset cord as shown.
- Page 5 CORTEX Microcontroller and Joystick Quick Start Guide 3. Default Operation: Refer to the attached figures for details and options of Joystick input to Motor response. These motor directions will make a Protobot robot go forward when the sticks are pushed “up”. Robots that do not have an idler gear will go in the opposite direction until a reversing jumper is installed or custom code is created.
- Page 6 Jumper in Analog 7 Motor 9 ignores CW Jumper in Analog 8 a. The CORTEX may be reprogrammed. Shown is the interconnect sketch for wireless reprogramming. For non-wireless reprogramming, the VEXnet keys may be substituted with a USB A-male to A-male cable. 276-2186...
- Page 7 CORTEX Microcontroller and Joystick Quick Start Guide 4. Diagnostics Information: refer to the following chart for Joystick and CORTEX light patterns and meanings. Robot VEXnet Game Blip Startup - looking for USB device (yellow) Fast Linking - Searching for VEXnet mate...
- Page 8 5. Analog Information: Analog lines are input only and read about 62 (0.2 volts) when open. When connected to a 0 to 5v source, such as the VEX Potentiometer, you will read from near 0 (0 volts) to near 1023 (5 volts).
- Page 9 Yellow or Red Robot light on the CORTEX. Solution: used fully charged Robot battery. d. Yellow or Red Robot light on the Joystick, even though the CORTEX is green. Solution: Joystick latches CORTEX’s lowest battery level. Power cycle both Joystick and CORTEX.
Need help?
Do you have a question about the CORTEX and is the answer not in the manual?
Questions and answers