Table of Contents
Advertisement
Advertisement
Table of Contents

Related Manuals for Aeroqual 200 series


Summary of Contents for Aeroqual 200 series
-
Page 1: User Guide
Series 300, 305, 500 & 505 Monitor User Guide... -
Page 2: Quick Start Guide
Quick Start Guide Unpack monitor and check supplied components are correct Insert Battery (see section 3.0) Insert Sensor When new, plug in the power adaptor and turn on your monitor (with sensor head installed) for 24hrs. Note: The battery requires 15hrs from full discharge. -
Page 3: Table Of Contents
Contents 1.0 Monitor Components 2.0 About Your Monitor 3.0 Assembly and Installation 3.1 Battery pack 3.2 Sensor warm up 3.3 Monitor and Sensor Versions 4.0 Operating Instructions 4.1 Turning the Monitor on and off 4.2 Operating under battery power 4.3 Sensor Head Failure 4.4 Using the Menus &... -
Page 4: Monitor Components
User guide • Battery pack – 9.6 V Please check that all these components have been supplied and contact your dealer or Aeroqual by email at: sales@aeroqual.com if any of the components are missing. Replacements Replacement batteries, sensor heads and other accessories can be purchased separately. -
Page 5: About Your Monitor
2.0 About Your Monitor The Aeroqual Series 200 Monitor has been specifically designed to incorporate Aeroqual’s in-depth knowledge of accurate ambient gas measurement. Different sensor heads are used for specific gases or depending upon whether high or low concentrations are to be meas- ured. -
Page 6: Assembly And Installation
3.0 Assembly and Installation Assembly The following needs to be completed before the Monitor is ready for use: - • Insert the sensor head into the top of the monitor. The sen- sor head is keyed to ensure the head is inserted correctly. •... - Page 7 • Do not short circuit as this may cause burns • Use only batteries approved by Aeroqual and recharge your battery only with the AC/DC adaptors supplied by Aeroqual. • Never use any charger or battery that is damaged or worn out.
- Page 8 • If left unused a fully charged battery will discharge itself over time. Note: If you have difficulty charging the battery, either: Replace the battery Contact Aeroqual with the software version number (see section 3.3 to locate the version number.)
-
Page 9: Sensor Warm Up
3.3 Monitor and Sensor Versions Turning the monitor on will display “AEROQUAL MONITOR V x.x”, where "V x.x" represents the version of the monitor base. The display will then show “... -
Page 10: Operating Instructions
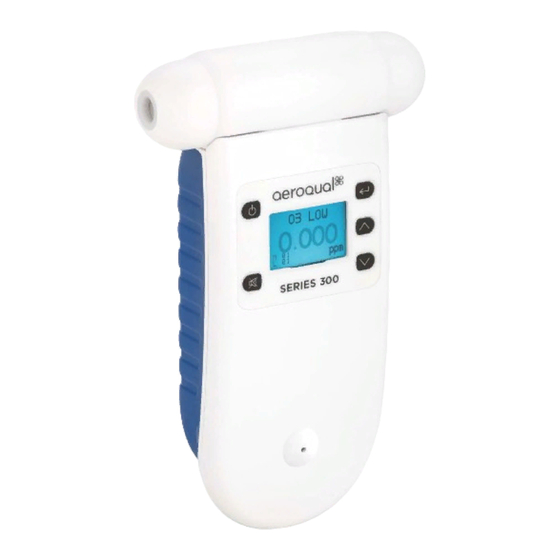
To turn the monitor on, press & hold the power button until the screen activates. The monitor will turn on and the display will show “AEROQUAL MONITOR S200 / S205 Vx.x”,. After 5 seconds the display will change to indicate the type of sensor head. -
Page 11: Operating Under Battery Power
Turning Standby Mode on and off To activate Standby Mode with the monitor on, press the power button once. This will stop operation of the monitor; however the sensor will be kept warm. This mode is used to conserve power between operations but keep the sensor ready to measure the gas concentration with only a short warm up phase as described in “Warm up”... -
Page 12: Using The Menus & Key Functions
An incorrect "ZERO CAL" does not cause permanent damage. The process should be repeated under the above conditions. NOTE: Carbon Dioxide sensors MUST be calibrated in a cer- tified Zero Air environment. If in doubt contact Aeroqual Limited. Press and hold until the word GO appears next to Reset Routine. -
Page 13: Changing Unit Of Measurement
4.6 Changing Unit Of Measurement (Concentration Unit) To enter the ‘CONC UNIT’ menu press . The unit display will appear. OZONE UNIT: ppm (or) mg/m 3’ Press to scroll between ‘ppm’ or ‘mg/m Press to confirm the unit selection Press to scroll down to the next Menu choice 4.7 The Max/Min/Average Measurement Cycle Pressing... -
Page 14: Alarm Mute (Perc Only)
4.8 ALARM MUTE (for PERC only) Note: With “Alarm Mute ON” (enabled) the alarm condition will be muted only until the gas concentration drops below the alarm level – remember this is a temporary mute function. To enter the “ALARM MUTE” menu press and the following screen will appear: - ALARM MUTE... -
Page 15: Alarm Level (Perc Only)
If you select “Alarm Permanent OFF” and exit the menu, the symbol will be displayed on the gas concentration screen to indicate that the alarm has been permanently muted. Press to scroll down to the next menu choice. 4.10 ALARM LEVEL (for PERC only) To enter the “ALARM LEVEL”... -
Page 16: Troubleshooting
5.0 Troubleshooting Series 200/205 Fault Description Possible cause Remedy No power Lead connection broken Reconnect power lead Power supply failure Replace 12V DC power supply Battery flat Recharge battery S200 damaged Replace unit Sensor head damaged Replace sensor head Sensor failure Insufficient warm up Run the sensor on full power for when the sensor... - Page 17 Fault Description Possible cause Remedy Reading higher than Sensor correct Check calibration of gas expected in the pres- generator. ence of sensor gas Interferent gas pre- Move sensor to clean air sent and check reading upon exposure to known gas concentration Sensor calibration lost Replace /refurbish sensor...
-
Page 18: Specifications
6.0 Specifications Series 200 Monitor Base Measurement units PPM or mg/m Removable / replaceable sensor head On-board alarm* Alarm status displayed * Low battery indication Alarm mute function* Sensor condition status Stand-by mode External signal for alarms & control None External signal functions None Analogue output... -
Page 19: Drawings
7.0 Drawings Depressions in the battery cover demarcating the screw-hole posi- tions for fixing the unit to the wall. -
Page 20: Care And Maintenance
8.0 Care and Maintenance Your Aeroqual Monitor is a product of superior design and quality and should be treated with care. When using your Aeroqual Monitor: • Keep it and all its parts and accessories out of the reach of small children. -
Page 21: For Your Safety
Do not use the Ozone Sensors in or near volatile fuel or chemi- cals. HEALTH AND SAFETY IN THE WORKPLACE The Aeroqual Series 200 Monitors and Sensor Heads are used to monitor ambient gas concentrations. Aeroqual does not guarantee user safety. In hazardous environments, an appro-... -
Page 22: Statements Of Compliance
10.0 Statements of Compliance The Aeroqual Series 200 Monitor and Remote Adaptor Kit comply with EN 50082-1:1997 The Aeroqual Series 200 Monitor and Remote Adaptor Kit comply with EN 50081-1:1992 The Aeroqual Series 200 Monitor and Remote Adaptor Kit comply with Part 15 of the FCC Rules. -
Page 23: Warranty
11.0 Warranty Thank you for purchasing this Aeroqual product. To get maximum use of the features of your new product we recommend that you follow a few simple steps: Read the guidelines for safe and efficient use. Read all the terms and conditions of your Aeroqual Warranty. - Page 24 • If Aeroqual repairs or replaces the product, the repaired or replaced product shall be warranted for the remaining time of the original warranty period or for ninety (90) days from the date of repair, whichever is longer.
-
Page 25: Copyright
Aeroqual reserves the right to revise this document or withdraw it at any time without prior notice. The availability of particular products may vary... -
Page 26: Guidelines On How To Measure Ozone
13.0 Guidelines on How to Measure Ozone The following information is presented to help users operate their Aeroqual monitor with an ozone sensor installed in the most effective and efficient manner. General • Ozone is heavier than air and tends to sink. Thus detection of leaks from ozone generating equipment should be per- formed at the most appropriate position. -
Page 27: Zero Calibration Additional Information
Information A zero calibration menu routine is included in the Series 200, however it is important to understand when this should be used. All Aeroqual sen- sors are supplied pre-calibrated and zero calibration is performed in the factory in an atmosphere containing < 0.5 ppm hydrocarbons, 50% rela- tive humidity and 25 oC. -
Page 28: Sensors And Accessories
Volatile Organic Compounds (VOC) 0 - 25 ppm (Isobutylene standard) 0 - 500 ppm Sensors heads are interchangeable Other gases and calibrations available on request – contact Aeroqual R33 Wall Bracket R10 Remote Sensor Kit R40 Carry Case R32 Cigarette Lighter Adaptor...
Need help?
Do you have a question about the 200 series and is the answer not in the manual?
Questions and answers