Table of Contents
Advertisement
Quick Links
INSTALLATION AND INSTRUCTION MANUAL
The Split Phantom
The Split Phantom
™
Undercover Interior LED Split Lightbar
With Generation-4 LED
Takedown and Directional Pursuit Lights
Models
ULB21-DLP
ULB24-DLP
(Discrete)
(Gen 4 Starburst)
IMPORTANT:
Please read all of the following instructions before installing your new warning light.
PLIT450 REV. B
8/26/11
Advertisement
Table of Contents

Summary of Contents for Split Phantom ULB21-DLP
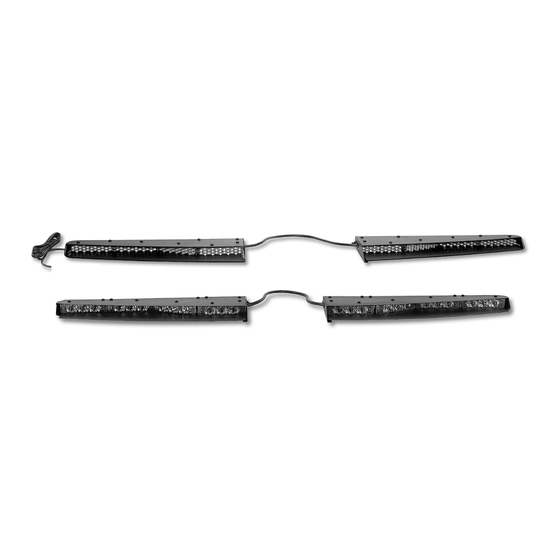
- Page 1 INSTALLATION AND INSTRUCTION MANUAL The Split Phantom The Split Phantom ™ Undercover Interior LED Split Lightbar With Generation-4 LED Takedown and Directional Pursuit Lights Models ULB21-DLP ULB24-DLP (Discrete) (Gen 4 Starburst) IMPORTANT: Please read all of the following instructions before installing your new warning light.
- Page 2 Star Headlight & Lantern Co., Inc. assumes no responsibility for the integrity of the installation for this or any of its products. The Split Phantom ™ uses state-of-the-art Light Emitting Diode (LED) technology. This warning light is comprised of ultra-high intensity LEDs that are operated by a micro-controller to efficiently produce light output with lifetimes up to 100,000 hours.
-
Page 3: Optional Mounting Brackets
Optional Mounting Brackets There are seven (7) optional mounting brackets that can be used to mount your Split Phantom ™ or Half Phantom ™. Your light comes with the one that was selected at the time the light was ordered. Please review the diagram below that shows the parts included with each kit. -
Page 4: Mounting Instructions
The installer assumes all responsibility for the integrity of the installation. It is the sole responsibility of the owner to ensure the light is secure. Split Phantom ™ is designed to be mounted on the inside of your vehicle. -
Page 5: Universal Bracket Installation
The mounting instructions are divided into two separate sections. If you are using the Universal Mount, proceed below. If you will be using one of the vehicle specific brackets, please skip to page 9. UNIVERSAL BRACKET INSTALLATION (Model 274-ULB21-U1) SUCTION CUP WINDOW ADHESIVE MOUNT The Universal Mount use two forked brackets and either a pair of suction... - Page 6 Universal Mounting (CONT'D) Attach Forked Brackets to Light 1. Insert one of the carriage bolts through one of the washers. Please note that washer is used as a spacer on the square neck of the carriage bolt. Slide the bolt and washer through the back of the left bracket.
- Page 7 Universal Mounting (CONT'D) Attach Forked Brackets to Visor Clips (If you do not have visor clips, or your visor clips will NOT provide a secure mount, or this method will not work in your vehicle for any other reason, use the alternate method on the next page.) 1.
- Page 8 Universal Mounting (CONT'D) Attach Forked Brackets using Alternate Method If you are not using the visor clip installation described on the previous page, continue below. 1. Some vehicles may not have visor clips appropriate for the previously described installation, or may completely lack any visor clips. An alternate mounting screw hole is provided in the bracket for these situations.
- Page 9 Universal Mounting (CONT'D) Attach The Suction Cups or Window Adhesive Mounts 1. Remove the two #4 x 1/4" Phillips pan head screws on either end of the bar, along with the washers and nylon spacers. Remove outermost screws from bottom of unit. (Bottom View) 2.
- Page 10 VEHICLE SPECIFIC BRACKET INSTALLATION (Models 274-ULB21-CH, 274-ULB21-CV, 274-ULB21-EX, 274-ULB21-IM, and 274-ULB21-TA) 1. Remove both the driver and 2. Loosen (LOOSEN, DO NOT REMOVE!!) passenger visor clips from the three visor pivot arm screws on one the vehicle. side of the vehicle with appropriate screwdriver.
- Page 11 Vehicle Specific Mounting Brackets (CONT'D) 7. Remove the two pairs of screws from each light half as shown to the right. 8. Install a stud bracket at each location using the same screws to secure each bracket. The tabs on each stud bracket should point AWAY from the cable joining the two halves.
-
Page 12: Baffle Adjustment
Vehicle Specific Mounting Brackets (CONT'D) 12. For models that have the separate “L” brackets, with the acorn nuts still slightly loose, slide the light as close to the front windshield as possible. Once it is touching the window, tighten the two acorn nuts that secure the two brackets together. -
Page 13: Quick Wiring Guide
Wiring For proper installation and full operability, this light requires a 10.5A ignition switched power source, connections to the negative terminal of the battery, and four external switches rated for a minimum 1A (user supplied). These lights come with a pre-installed 6-conductor harness. In addition, the cable also contains a bare drain wire and foil shielding. - Page 14 Detailed Wiring Descriptions Black: (Ground) Connect the Black wire to the negative side of the battery (preferred) or a good chassis ground. This wire provides the ground for the operation of the light. Bare: (Ground) Connect the bare wire to the negative side of the battery (preferred) or to a good chassis ground.
-
Page 15: Operating Instructions
Warning Lights Lights Indicator LED ® The Star Phantom Located on the bottom of , is an Indicator LED. When your light is activated in any mode, this LED will flash to alert you to the lightbar activity in the daylight. - Page 16 Flashing Mode, the Pattern Select/Burst Mode button will act as the Pattern Select button. Each time this switch-button is depressed, ® ® The Star Phantom The Star Phantom will cycle to the next pattern. designed with thirty-five different patterns (see next page).
-
Page 17: Pattern List
Indicator LED: Pressing and holding the pattern select button until the LED’s • flash four times (approx. 12 seconds) will disable or enable the indicator LED. Split Phantom will remember the pattern it was in when turned off and •... - Page 18 Split Phantom Once your is installed, please test all the patterns ™ and options to familiarize yourself with the various patterns and the operation of the buttons. If you have any questions concerning this or any other product, please contact our Customer Service Department at (585) 226-9787.
- Page 19 These lights use state-of-the-art Light Emitting Diode (LED) technology. These warning lights are comprised of ultra-high intensity LEDs that are controlled by a solid state flasher unit to efficiently produce light output with lifetimes up to 100,000 hours. Under normal circumstances, you will not need to replace any LEDs in this light.
Need help?
Do you have a question about the ULB21-DLP and is the answer not in the manual?
Questions and answers