
Summary of Contents for ADSI HS Digital Label Printing System
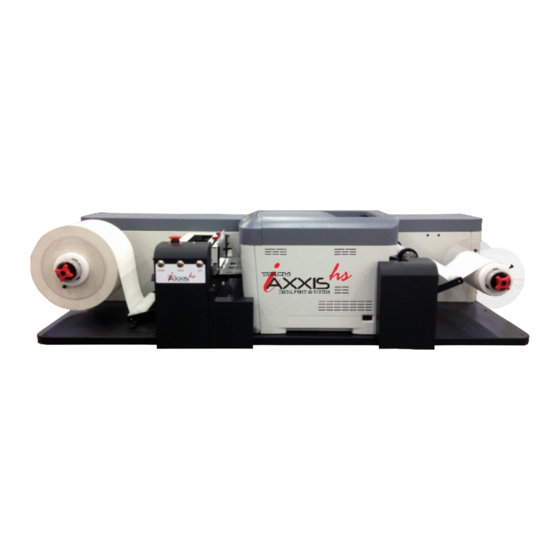
- Page 1 AXXIS DIGITAL LABEL PRINTER Operations Manual Manual Version 2.6 - October 2014 Congratulations on your new purchase! Copyright Allen Datagraph Systems Inc. - All rights reserved.
-
Page 3: General Information
Thank You for Selecting an Allen Datagraph Product At Allen Datagraph Systems, Inc. (ADSI), we are committed to serving you, our customer. Our goal is to provide you with competitive, quality products and services to meet your needs. Customer input is of great value to Allen Datagraph Systems, Inc.;... -
Page 4: Technical Support
Service Policy – All service is subject to ADSI service policy. You can read the policy here: Web Site Copy - http://www.allendatagraph.com/techsupport/ServicePolicy.pdf There are many online documents available to help you to operate the AXXIS HS at our technical support page at http://www.allendatagraph.com. Click on Tech Support then Online Documents, fill... -
Page 5: Specifications
· 100BASE-TX Ethernet · 10BASE-T High Speed 2.0 Power Requirements: AXXIS HS Print Base & Printer: 900 watts voltage input ranges 100-127 VAC / 50-60 Hz or 220-240 VAC / 50-60 Hz 9 Amps / 4.5 Amps Dimensions and Weight:... - Page 6 Items Shipped Unassembled from Machine A packing box marked “Accessories” is shipped with the equipment in the crate. These items are required for operating the equipment. The tools included in this kit (such as the Hex Key Wrenches) are specifically sized for the machine and should be stored nearby for easy access. The box con- tains the following items: Accessory Kit: Component ID...
-
Page 7: Table Of Contents
1.1.0 Installation of AXXIS HS Digital Label Print Station ....... . -
Page 8: Introduction
1.0 Introduction The AXXIS HS Digital Label Printing System is shipped assembled however, it must be properly unpacked, installed, and setup to run prior to operating. This manual will guide you through each of these processes. 1.0.1 Safety For your own safety, read this instruction manual before operating the equipment. -
Page 9: Site Preparation
1.0.2 Site Preparation The following are guidelines for preparing the customer site for installation of the ADSI equipment. Location: 1. Provide a sturdy level table for equipment weighing 200+ lbs. 2. Provide adequate clearance around the machine to allow easy access for inspection and maintenance. - Page 10 1.0.2 Site Preparation Changing the Fuse Configuration (continued): 3. Reverse the position of the fuse block so that the desired voltage will appear in the fuse block cover. 4. Close the fuse block cover and verify that the desired voltage is showing. Risk of Electrical Fire - Do not change the fuse location in the fuse block.
-
Page 11: Installation Of Axxis Hs Digital Label Print Station
1.1.0 Installation of AXXIS HS Digital Label Print Station 1.1.1 Setup Printer Base The printer base is shipped assembled in the box. Remove packing material and set the printer base on a solid table. PLEASE USE CAUTION WHEN LIFTING: The printer base weighs approximately 200 lbs. -
Page 12: Assembling The Printer
1.1.5 Assembling the Printer 1.1.5.1 Accessing Printer 1. Press down the OPEN button, and open the top cover. 2. Next remove the orange stopper in the fuser by pressing down the blue lever of the fuser unit in the direction of arrow. NOTE: If you do not use the printer for a long time or transport it, please use the stopper. -
Page 13: Installing The Transfer Belt
5. Return the image drum cartridge back to the printer. 6. Turn the four blue lever of each starter toner cartridge in the direction of the arrow. 7. Close the top cover. NOTE: If the message of [%COLOR% Waste Toner Full. Replace Toner.] on the control panel doesn’t disappear indefinitely, please double check that the blue lever of the toner cartridge is fully moved in the direction of the arrow. -
Page 14: Powering The Printer Base
1.1.6 Powering the Printer Base WARNING: THE AXXIS HS PRINTER IS AVAILABLE IN TWO POWER MODELS. YOU MUST ORDER THE CORRECT MODEL FOR YOUR POWER SOURCE. DO NOT PLUG PRINTER IN IF YOUR POWER SOURCE DOES NOT MATCH THE PRINTER MODEL YOU ORDERED. -
Page 15: Connecting Printer Base To Pc
1.1.7 Connecting Printer Base to PC The AXXIS HS print station can be connected to the PC via Ethernet or USB. These connectors are located on the left rear (gear side) of the printer base directly behind the in-feed. Be sure that you have also connected the fixed USB and Ethernet cables to the back of the printer. -
Page 16: Webbing The Roll Media And Test Print
1.2 Webbing the roll media and Test Print Once the AXXIS HS print driver is installed, it is recommended to perform a test print to ensure the connection to the printer is operational. Webbing the AXXIS HS Load the roll media onto the input mandrel. Rotate the red nip handle to the 12 o’clock position to allow material insertion between nip and grit rollers. -
Page 17: Installing Wasatch Softrip
Select the AXXIS HS (USB) from this drop down menu. For Ethernet or LAN connections: Go to the AXXIS HS printer display panel on the printer to find the IP Address. Select Menu (UP ↑) → select Configuration Menu → select Network → select IPv4 Address to display the IP Address of the printer on the Network it is connected to;... -
Page 18: Wasatch Test Print
Click on Set Maximum Height and uncheck Height Center. Select OK. 1.2.3 Wasatch Test Print To ensure the connection to the AXXIS HS printer is operating correctly, in SoftRIP go to FILE → OPEN and select one of the training label files on the AllenDirectCUT CD: AXXIS HSTrainingLabel_5_inch.eps”, labels in CorelLabel.zip, IllustratorLabel.zip in the techsupport... - Page 19 On the Layout Screen, right click on the label frame → select Add Copies → select number of copies you need to make your layout at least 11 inches long (if using AXXIS HSTrainingLabel_5_ inch.eps then add 2 copies) → hit Okay.
-
Page 20: Cleaning The Printer
1.3.0 Cleaning the Printer Occasionaly you will need to clean the loose toner inside and outside of the printer. The toner will adhere to the internal components and needs to be regualarly cleaned. This can be done with a clean dry cloth and a toner vacuum. Follow the steps below: NOTE: Try not to touch the image drum terminals, the LED lens array and the LED head connectors when cleaning the printer. -
Page 21: Cleaning The Led Lens Array
1.3.1 Cleaning the LED Lens Array If there is loose toner on the LED lens array or if you are getting a white band or a white stripe (light printing) in the vertical direction well printing, then it is time to clean the LED head as de- scried below. -
Page 22: Troubleshooting & Faq
1.4 Troubleshooting & FAQ This document gives some basic advice about troubleshooting your AXXIS HS Printer. It is not intended to be a complete guide to all possible problems. However, even if you are a non-technical person, there are some simple steps you can take to try and diagnose a problem. If you have managed to perform some basic troubleshooting procedures, then our tech support team will be in a much better position to help you before you contact them. -
Page 23: Media Weight Settings
1.4.3 Media Weight Settings Using a compatible media weight for different types of materials is critical for proper operation of the printer because the fuser operates at extremely high temperatures. If an incompatible media weight is used for an extended period of time it can result in damage to the printer and/or it’s components. -
Page 24: Troubleshooting With Media Weight Settings
1.4.4 Troubleshooting with Media Weight Settings Warning - If a heavier than required media weight is used, this may result in overheating and/or damaging the internal components of the printer. Toner Flaking - If the toner is flaking off your media after it has been printed, this is a sign that your media weight setting was not heavy enough. -
Page 25: How To Print Pre Die Cut Labels
1.5 How to Print Pre Die Cut Labels The Axxis HS printer comes with pre-die-cut label sensors to allow printing on label material that is either pre-die-cut and weeded or pre die cut and mark printed on top or bottom of media. -
Page 26: Wasatch Settings
Wasatch Settings: Click on button in Wasatch which brings up property page. Enter your left margin after unchecking width center. Reduce value to move toward gear and increase to move towards operator. Select the button and then button. - Page 27 In box 1, set Media Weight controls the time the media is exposed to the fuser. The heavier the Media Weight setting the longer it is exposed to the fuser’s heat. This may affect printing speed. In box 2, Roll Width will set Wasatch to the correct media size. This will also adjust your printable area in the Layout screen.
- Page 28 Left / Right alignment Table of connected pages below. The table shows acceptable sizes of labels. The number of labels in column 3 is how often the printer realigns the print to the mark. If you have more than 1 row the spacing is controled by the register mark period.
Need help?
Do you have a question about the HS Digital Label Printing System and is the answer not in the manual?
Questions and answers