Table of Contents
Advertisement
Advertisement
Table of Contents

Summary of Contents for GE Interlogix Digiplex IV
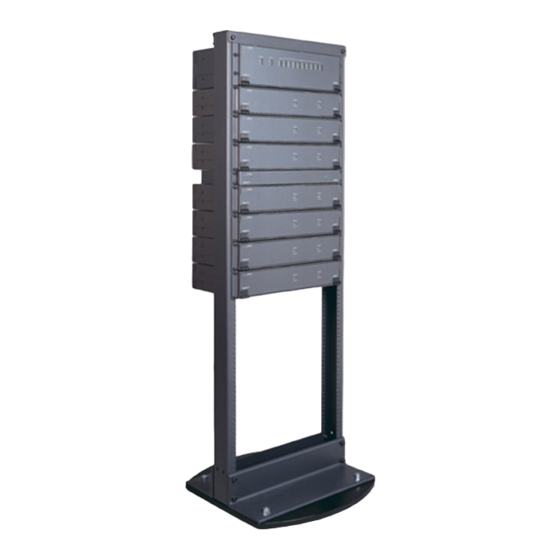
- Page 1 ® Digiplex Matrix Switching System...
- Page 2 No part of this document may be protection against harmful interference reproduced or transmitted in any form or by any means without the prior written permission of GE Interlogix, when the equipment is operated in a Video Systems Group.
-
Page 3: Table Of Contents
Digiplex IV User Manual Table of Contents ABLE OF ONTENTS ......................5 EFORE EGIN ......................6 NTRODUCTION 1.1 T ....................6 ECHNICAL OTES 1.2 W …..................6 HAT YOU NEED FOR ..................... 7 NSTALLATION VERVIEW 2.1 DIP S ..................8... - Page 4 Table of Contents Digiplex IV User Manual 5.3 D LED I ................49 IAGNOSTIC NDICATIONS 5.3.1 KTD-443 Video Input Card .................... 49 5.3.2 KTD-444 Monitor Output Card..................50 5.3.3 Optional KTD-445 Video Loss Card ................50 5.3.4 KTD-447 CPU Card ....................... 51 A.
-
Page 5: Before You Begin
Customer Support For assistance in installing, operating, maintaining, and troubleshooting this product, refer to this document and any other documentation provided. If you still have questions, please contact GE Interlogix Technical Support and Sales: GE Interlogix, Video Systems Group... -
Page 6: Introduction
IV is a video matrix switching system. The master switcher chassis of the Digiplex IV system provides 64 video inputs and 32 monitor outputs. The Digiplex IV system expands from 64 inputs x 32 outputs to more than 512 inputs x 64 outputs by adding expansion cards and expansion chassis. (For systems larger than 512 x 64, contact your GE Interlogix sales representative.) Video is brought into the master and slave... -
Page 7: Installation Overview
NSTALLATION VERVIEW The general progression of installation for a Digiplex IV system follows the flow shown below. Specific instructions for installing the components and setting the DIP switches and jumpers are provided in section 3 Hardware Installation. See Figures 1 and 2 for the front and back views of a 512 x 64 system that provides the DIP switch settings and ribbon cable connections. -
Page 8: Dip Switch Settings
Installation Overview Digiplex IV User Manual DIP S WITCH ETTINGS Note: The black squares represent the poles of the DIP switches. Figure 1. DIP switch settings 1034169B / December 2003... -
Page 9: Back Panel Connections
Digiplex IV User Manual Installation Overview ANEL ONNECTIONS Figure 2. Back panel connections 1034169B / December 2003... -
Page 10: Ardware Nstallation
Digiplex IV User Manual ARDWARE NSTALLATION All Digiplex IV component chassis mount into 19-inch (48.26 cm) racks. For specifications and functionalities of individual components, see the product specification. For individual system configurations, see Appendix G. System Configurations. There are six basic hardware configurations that manage the video inputs and monitor outputs of the 16 input/output configurations that exist between systems sized 64 x 32 and 512 x 64. - Page 11 Digiplex IV User Manual Hardware Installation CAUTION: Complete all instruction steps before supplying power to the unit. Mount the KTD-440 chassis into a 19-inch (48.26 cm) rack. Mount a KTD-446 power supply near the KTD-440 chassis. See Figure 4 and perform the following: Connect all camera cables to their respective BNC video input connectors.
-
Page 12: Installing The Ktd-440G Chassis
Hardware Installation Digiplex IV User Manual Digiplex IV systems are shipped preconfigured. If you need to verify or change the termination, signal format settings, or addressing for the system, refer to appendixes A, B, and C. Connect the KTD-446 power supply to the KTD-440 chassis, then to a power source. See Figure 5. -
Page 13: Installing The Ktd-440N Chassis
Digiplex IV User Manual Hardware Installation Connect the KTD-446 power supply to the KTD-440G chassis, then to a power source. See Figure 7. 115 VAC 5 VDC Power source power cord KTD-446 power cord KTD-440G Figure 7. KTD-440G power connections... - Page 14 Hardware Installation Digiplex IV User Manual Terminal strip Monitor outputs RS422 control in RS422 control out (if used) RS232 5 VDC Output bus Input bus Figure 8. KTD-440N back panel connections Set the KTD-440N chassis to control monitors 33 through 64. Use the DIP switches on the KTD-447 cards in both the KTD-440N and KTD-440 chassis.
-
Page 15: Installing The Ktd-441 Chassis
Digiplex IV User Manual Hardware Installation Digiplex IV systems are shipped preconfigured. If you need to verify or change the termination, signal format settings, or addressing for the system, then refer to appendixes A, B, and C. Connect the KTD-446 power supply to the KTD-440N chassis, then to a power source. See Figure 10. -
Page 16: Installing The Ktd-442 Chassis
Hardware Installation Digiplex IV User Manual Connect the KTD-446 power supply to the KTD-441 chassis, then to a power source. See Figure 12. 115 VAC 5 VDC Power source power cord KTD-446 power cord KTD-441 Figure 12. KTD-441 power connections... - Page 17 Digiplex IV User Manual Hardware Installation KTD-442-2 PORT 7 PORT 6 PORT 5 To KTD-440G From KTD-441 INPUT RANGE INPUT RANGE INPUT RANGE 448 – 511 384 – 447 320 – 383 Figure 14. KTD-442-2 back panel connections Connect the KTD-446 power supply to the KTD-442 chassis, then to a power source. See Figure 15.
-
Page 18: System Programming
Refer to the programming instructions for those devices. ROGRAMMING WITH THE PTIONAL ROGRAMMING OFTWARE If you are programming the system using the optional KTD-411 Digiplex IV programming software, then refer to that manual for further instructions. ROGRAMMING WITH THE NTERNAL ENUS If you are programming the system using the internal menus, you will need a keypad or computer keyboard (see section 4.2.2 Setting Up the Programming Interface). -
Page 19: Menu Tree
Digiplex IV User Manual System Programming 4.2.1 M Typical Programming Sequence Main Menu MAIN MENU MON 001 SITE TITLES ~~~~~~~~~~~~~~~~~~~~~~~~~~~~~~ ~~~~~~~~~~~~~~~~~~~~~~~~~~~~~~ BNC INPUT MAPPING >0000 FRONT ENTRANCE GROUP SWITCHING 0001 VISITOR PARKING MEMORY MANAGEMENT 0002 RECEIVING First, set up site titles. -
Page 20: Setting Up The Programming Interface
Set up the programming hardware as shown in Figure 16 (using a keypad) or Figure 17 (using a keyboard). Note: If you are programming the system using the optional KTD-411 Digiplex IV programming software, refer to that manual for the programming hardware setup. -
Page 21: Accessing Matrix Switcher Programming
Digiplex IV User Manual System Programming 4.2.3 A CCESSING ATRIX WITCHER ROGRAMMING 4.2.3.1 U SING A EYBOARD Ensure that the keyboard is plugged into the KTD-447 card in the KTD-440 chassis as shown in Figure 17. Verify the currently selected monitor by pressing F5 on the keyboard. -
Page 22: Using A Keypad
System Programming Digiplex IV User Manual 4.2.3.2 U SING A EYPAD For keypads other than the KTD-405, begin at the normal operating display and select the monitor to be programmed by pressing the mon key and the number keys that correspond to the monitor number (e.g., 02 for monitor 2). -
Page 23: Programming The Matrix Switcher
Digiplex IV User Manual System Programming 4.2.4 P ROGRAMMING THE ATRIX WITCHER Moving through the internal menus and making selections requires different keys or the joystick depending on the programming interface (keypad or keyboard) being used. See Table 2. Note: You must program each monitor in the system separately when programming the monitors with the internal menus. Monitor programming can be copied to another monitor or to all monitors using menu E-6. -
Page 24: Programming Bnc Input Mapping
CAUTION: Programming of BNC input mapping should be performed by a qualified technician. Video Inputs Digiplex IV can map any camera to any BNC input regardless of its address. Camera 300 does not need to be physically attached to BNC 300. The switcher will recognize a command being sent to a specific addressed camera (i.e., camera site) and will forward that... - Page 25 Digiplex IV User Manual System Programming At the B-0 BNC input mapping menu, press the 1 key to access the B-1 menu to map the camera inputs. Use # and $ to scroll through the sites, use ! and " to move the cursor between the camera site and BNC columns, and use the number keys to enter the BNC assignment number into the BNC column.
- Page 26 System Programming Digiplex IV User Manual At the B-2 menu, press the 1 key to access the B-3 menu to assign a range of cameras to each remote slave. Use !, ", #, and $ to move between the fields, use the number keys to enter values, and use the clear key to delete values.
-
Page 27: Programming Monitors
Digiplex IV User Manual System Programming 4.2.4.3 P ROGRAMMING ONITORS You must program each monitor in the system separately when programming the monitors with the internal menus. Monitor programming can be copied to another monitor or to all monitors using menu E-6. - Page 28 System Programming Digiplex IV User Manual At the E-1 alarm call-up menu, press the 1 key to access the E-2 menu to arm/disarm alarms. When an alarm occurs at an armed camera site, the site’s associated monitor switches from the video that it was displaying and displays the video from the alarming camera site.
- Page 29 Digiplex IV User Manual System Programming At the E-1 alarm call-up menu, press the 3 key to access the E-5 menu to program alternate and spot monitors. Alternate monitors are used to display video from additional alarming camera sites when multiple alarms occur at the same time.
- Page 30 System Programming Digiplex IV User Manual At the E-1 alarm call-up menu, press the 4 key to toggle between lock mode on and off. The lock mode arms or disarms a monitor so ALARM CALL-UP MON 001 that it displays or ignores active alarms coming ~~~~~~~~~~~~~~~~~~~~~~~~~~~~~~ from camera sites.
- Page 31 Digiplex IV User Manual System Programming At the E-0 monitor setup menu, press the 3 key to access the E-7 menu to define sequences of cameras that the monitor will automatically switch through. MONITOR SETUP MON 001 SEQ ROUTINES MON 001...
- Page 32 System Programming Digiplex IV User Manual At the E-7 sequence routines menu, press the 7 key to program a sequence routine for a specified range if cameras. Note: Sequence routines can be accessed by all users regardless of camera permissions.
- Page 33 Digiplex IV User Manual System Programming At the E-9 text display menu, press the 1 key to access the E-10 menu to enable or disable the display of camera titles (and site numbers) on the monitor screen, and to position them if enabled.
-
Page 34: Programming Group Switching
System Programming Digiplex IV User Manual At the E-0 monitor setup menu, press the 5 key to access the E-12 menu to program a universal dwell time to be used for sequencing all of the camera sites for the designated monitor. - Page 35 Digiplex IV User Manual System Programming At the C-1 group switching menu, press the 4 key to access the C-8 menu to program group titles. Use # and $ to move to the group number to be titled, use ! and " to move the cursor between character positions of the title, and use # and $ to scroll through the character choices for the current character position.
- Page 36 System Programming Digiplex IV User Manual At the C-7 group-specific menu, monitors already assigned to the group have an asterisk (*) beside the MON (monitor) number. Use # and $ to move the on-screen arrow to the monitor/camera to be changed. Use ! and " to point the on-screen arrow left toward the monitor number or right toward the camera site number.
- Page 37 Digiplex IV User Manual System Programming CAUTION: You can override and lose a group’s alarm assignment by assigning a different alarm number to a group that already has an alarm assigned to it. At the C-3 group call-up alarm menu, an alarm number appears in the ALARM column for groups already assigned an alarm.
- Page 38 System Programming Digiplex IV User Manual At the C-1 group switching menu, press the 2 key to access the C-4A menu to program the group sequences. A group sequence allows a group of cameras to sequentially switch on multiple monitors.
-
Page 39: Programming Video Loss
Digiplex IV User Manual System Programming 4.2.4.5 P ROGRAMMING IDEO The video loss card provides its own visual and audible alerts. If a video loss card is installed, monitor 16 becomes dedicated to scanning for and reporting video loss conditions. Monitor 16 is no longer available as a primary, alternate, or spot monitor. - Page 40 System Programming Digiplex IV User Manual At the J-0 video loss menu, press the 1 key to access the J-1 menu to view the video loss list. The list provides the numbers of the first seven camera sites that are reporting video loss.
- Page 41 Digiplex IV User Manual System Programming At the J-0 video loss menu, press the 3 key to access the J-3 menu to enable/disable video loss detection for individual camera sites. Use $ and # to move through the site list or use the number keys to enter a site number. Use the set key to scroll through the detection level list to select a level.
-
Page 42: Programming Memory Management
EMORY ANAGEMENT CAUTION: Before clearing the memory, back up your system’s programming with the KTD-411 Digiplex IV Matrix Switcher Programming Software. Clearing the memory deletes your user-defined settings from the switcher’s nonvolatile memory and reloads the factory defaults. Note: To receive context-sensitive help at any point during the programming, press the alarm key. - Page 43 Digiplex IV User Manual System Programming At the D-1 monitor memory menu, use the number keys to enter the number of the monitor to have its memory cleared. At the D-2 clear memory menu, use the keypad or keyboard keys to enter the programming access code (9, 5, 1, seq on any keypad, or 9, 5, 1, F2 on a keyboard) to authorize the clearing of the memory of the selected monitor.
- Page 44 System Programming Digiplex IV User Manual At the D-0 memory management menu, press the 3 key to access the D-4 menu to clear the user- defined BNC mapping. The D-4 clear BNC map menu requires an authorization code before deleting the user-defined settings. Use the keypad or keyboard keys to enter the programming access code (9, 5, 1, seq on any keypad, or 9, 5, 1, F2 on a keyboard).
-
Page 45: Troubleshooting
YPES OF ESETS There are two types of resets for the Digiplex IV system. A soft reset resets the software and cycles the power for a chassis and the cards contained within it. A hard reset clears your system’s nonvolatile memory, deletes your custom programming, and restores the factory defaults. -
Page 46: Common Issues
KTD-440 master switcher chassis. Note: Also ensure that the data signal distributors and GE Interlogix domes are downline of the switcher. (4) Ensure that the ribbon cables between the chassis are connected to the correct chassis and fully plugged in. - Page 47 Digiplex IV User Manual Troubleshooting Problem Probable Cause Solution (7) Ensure that your KTD-447 CPU card(s) are updated with firmware dated after January 2000 by checking the date code on the EPROMs. (8) If the system cards and cabling are good, then the CPU or power supply might be defective.
- Page 48 Troubleshooting Digiplex IV User Manual Problem Probable Cause Solution No or intermittent Outdated firmware, Try the following solutions in order of the most common switching or sequencing nonresponsive monitor, to the least common resolution: of cameras defective cards, or (1) Ensure that your KTD-447 CPU card(s) are updated improperly with firmware dated after January 2000.
-
Page 49: Diagnostic Led Indications
Digiplex IV User Manual Troubleshooting LED I IAGNOSTIC NDICATIONS See Table 3 for the appearance of the diagnostic indications listed in the following sections. Table 3. LED appearance State Appearance No illumination Illuminated until interrupted On (briefly) On for 500 ms to 1 sec, then off... -
Page 50: Ktd-444 Monitor Output Card
Troubleshooting Digiplex IV User Manual 5.3.2 KTD-444 M ONITOR UTPUT State Indication Steady blink Monitor is in an alternate mode (e.g., programming). Monitor is receiving data from the KTD-447 (e.g., time and date updated by a time/date Blink generator (if present)). -
Page 51: Ktd-447 Cpu Card
Digiplex IV User Manual Troubleshooting 5.3.4 KTD-447 CPU C State Indication Card is operating correctly (i.e., powered and processing). Steady blink Card is receiving power, but the power supply or processor is experiencing difficulties. Indicates the data rate of RS232 serial communication from the computer interface On (short) connection (RS232 or PC keyboard port). -
Page 52: Appendix A. Setting The Termination
Appendix A. Termination Digiplex IV User Manual A. S PPENDIX ETTING THE ERMINATION Termination is established with DIP switch 8 on the KTD-447 card in the KTD-440 and KTD-440N (if present) chassis. If powered, remove power from the chassis. Leave the card(s) in the chassis and set the termination as shown in Figure 23. -
Page 53: Appendix B. Setting The Signal Format
Digiplex IV User Manual Appendix B. Signal Format B. S PPENDIX ETTING THE IGNAL ORMAT Signal format is established in the KTD-440 chassis and the KTD-440N chassis (if present) with the DIP switch on the KTD-447 CPU card, the jumper on all KTD-444 monitor output cards, and the jumper on the optional KTD-445 video loss card (if present). -
Page 54: Appendix C. Addressing The Ktd-443 Cards
Appendix C. Addressing Digiplex IV User Manual C. A KTD-443 C PPENDIX DDRESSING THE ARDS The KTD-443 video input card is a 64 input by 16 output crosspoint switcher. The first four positions of the DIP switch correspond to the range of video input numbers for the chassis. The second four positions are reserved for future use. -
Page 55: Appendix D. Establishing Remote Slaves
Digiplex IV User Manual Appendix D. Remote Slaves D. E PPENDIX STABLISHING EMOTE LAVES Note: If remote slaves will be needed, design your system to include them before installation. Adding remote slaves to an existing system usually requires significant system changes. -
Page 56: Appendix E. Group Switching
Appendix E. Group Switching Digiplex IV User Manual E. G PPENDIX ROUP WITCHING Group switching displays a succession of camera groups on a series of monitors when manually selected. To sequence cameras as groups, the same monitors must be assigned to one camera of each group. -
Page 57: Appendix F. Assigning The Group Function To Aktd-404 Key
Digiplex IV User Manual Appendix F. Group Function Key F. A KTD-404 K PPENDIX SSIGNING THE ROUP UNCTION TO A To assign a key on the KTD-404 keypad for group switching: Remove power from the keypad. Remove the four screws on the bottom of the keypad. -
Page 58: Appendix G. System Configurations
YSTEM ONFIGURATIONS This appendix provides a reference of the 16 configurations that exist between systems sized 64 x 32 and 512 x 64. These are the most common configurations of the Digiplex IV matrix switching system. 64 I 32 O... -
Page 59: 128 Inputs By 4 To 32 Outputs
Digiplex IV User Manual Appendix G. System Configurations 128 I 32 O NPUTS BY UTPUTS RS422 control in KTD-440 with video inputs 0 – 63 and monitor outputs 1 – 32 KTD-441-1 with video inputs 64 – 127 128 I... -
Page 60: Nputs By To Utputs
Appendix G. System Configurations Digiplex IV User Manual 192 I 32 O NPUTS BY UTPUTS RS422 control in KTD-440 with video inputs 0 – 63 and monitor outputs 1 – 32 KTD-440G KTD-441-1 with video inputs 64 – 127 KTD-441-2 with video inputs 128 –... - Page 61 Digiplex IV User Manual Appendix G. System Configurations 192 I 64 O NPUTS BY UTPUTS RS422 control in KTD-440 KTD-440N with video inputs 0 – 63 providing 32 additional and monitor outputs 1 – 32 monitor outputs KTD-441-1 KTD-440G with video inputs 64 – 127 KTD-441-2 with video inputs 128 –...
-
Page 62: Nputs By To Utputs
Appendix G. System Configurations Digiplex IV User Manual 256 I 32 O NPUTS BY UTPUTS RS422 control in KTD-440 with video inputs 0 – 63 and monitor outputs 1 – 32 KTD-441-1 with video inputs 64 – 127 KTD-441-2 with video inputs 128 – 191 KTD-441-3 with video inputs 192 –... -
Page 63: Nputs By To Utputs
Digiplex IV User Manual Appendix G. System Configurations 256 I 64 O NPUTS BY UTPUTS RS422 control in KTD-440 KTD-440N with video inputs 0 – 63 providing 32 additional and monitor outputs 1 – 32 monitor outputs KTD-441-1 KTD-440G with video inputs 64 – 127 KTD-441-2 with video inputs 128 –... -
Page 64: Nputs By To Utputs
Appendix G. System Configurations Digiplex IV User Manual 320 I 32 O NPUTS BY UTPUTS RS422 control in KTD-440 with video inputs 0 – 63 and monitor outputs 1 – 32 KTD-441-1 with video inputs 64 – 127 KTD-441-2 with video inputs 128 – 191 KTD-441-3 with video inputs 192 –... -
Page 65: Nputs By To Utputs
Digiplex IV User Manual Appendix G. System Configurations 320 I 64 O NPUTS BY UTPUTS RS422 control in KTD-440 KTD-440N with video inputs 0 – 63 providing 32 additional and monitor outputs 1 – 32 monitor outputs KTD-441-1 KTD-440G with video inputs 64 – 127 KTD-441-2 with video inputs 128 –... -
Page 66: Nputs By To Utputs
Appendix G. System Configurations Digiplex IV User Manual 384 I 32 O NPUTS BY UTPUTS RS422 control in KTD-440 with video inputs 0 – 63 and monitor outputs 1 – 32 KTD-441-1 with video inputs 64 – 127 KTD-441-2 with video inputs 128 – 191 KTD-441-3 with video inputs 192 –... -
Page 67: Nputs By To Utputs
Digiplex IV User Manual Appendix G. System Configurations 384 I 64 O NPUTS BY UTPUTS RS422 control in KTD-440 KTD-440N with video inputs 0 – 63 providing 32 additional and monitor outputs 1 – 32 monitor outputs KTD-441-1 KTD-440G with video inputs 64 – 127 KTD-441-2 with video inputs 128 –... -
Page 68: 448 Inputs By 4 To 32 Outputs
Appendix G. System Configurations Digiplex IV User Manual 448 I 32 O NPUTS BY UTPUTS RS422 control in KTD-440 with video inputs 0 – 63 and monitor outputs 1 – 32 KTD-441-1 with video inputs 64 – 127 KTD-441-2 with video inputs 128 – 191 KTD-441-3 with video inputs 192 –... - Page 69 Digiplex IV User Manual Appendix G. System Configurations 448 I 64 O NPUTS BY UTPUTS RS422 control in KTD-440 KTD-440N with video inputs 0 – 63 providing 32 additional and monitor outputs 1 – 32 monitor outputs KTD-440G KTD-441-1 with video inputs 64 – 127 KTD-441-2 with video inputs 128 –...
-
Page 70: 512 Inputs By 4 To 32 Outputs
Appendix G. System Configurations Digiplex IV User Manual 512 I 32 O NPUTS BY UTPUTS RS422 control in KTD-440 with video inputs 0 – 63 and monitor outputs 1 – 32 KTD-441-1 with video inputs 64 – 127 KTD-441-2 with video inputs 128 – 191 KTD-441-3 with video inputs 192 –... - Page 71 Digiplex IV User Manual Appendix G. System Configurations 512 I 64 O NPUTS BY UTPUTS RS422 control in KTD-440 KTD-440N with video inputs 0 – 63 providing 32 additional and monitor outputs 1 – 32 monitor outputs KTD-440G KTD-441-1 with video inputs 64 – 127 KTD-441-2 with video inputs 128 –...
-
Page 72: Index
Diagnostic LEDs · 6 Accessing Matrix Switcher Programming · 21 Diagnostic LEDs · 49 Alarm Call-up · 37 Digiplex IV System · 6 Alarm Key · 23 DIP Switch Settings · 8 Alternate Monitors · 29, 39 Armed Camera Site · 28 BNC Input Mapping ·... - Page 73 Digiplex IV User Manual Index Soft Reset · 45 Spot Monitors · 29, 39 System Configurations · 58 Universal Dwell Time · 34 Technical Notes · 6 Video Loss · 39, 41 Termination · 52 Troubleshooting · 45 Common Issues · 46 Diagnostic LED Indications ·...
Need help?
Do you have a question about the Digiplex IV and is the answer not in the manual?
Questions and answers