Table of Contents
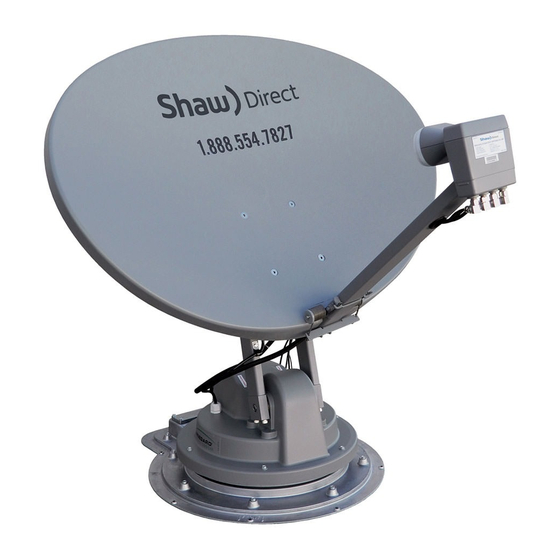
Advertisement
Advertisement
Table of Contents

Summary of Contents for Shaw Satellite Antenna
- Page 1 Satellite Self-Installation Manual July 2014...
-
Page 2: Getting Started
Use a compass, protractor and carpenter’s level • Use a ladder to climb structures • • Know your local, provincial and national grounding codes If you do not have the experience to perform these tasks, contact Shaw Direct for assistance. -
Page 3: Dish Kit Contents
You will need the following tools: Philips screwdriver • 3/8” hex or flat-head screwdriver • 7/16 hex wrench, open or combination end • Electric drill and bits • Carpenter’s level • Compass • Protractor • If you are installing a 75 cm dish, you will also require: 2 - 13 mm wrenches (one to hold and one to tighten) •... - Page 4 60 cm Hardware 75 cm Hardware Missing pieces? The Shaw Direct Self Install Kit contains many additional pieces to help you complete your installation, including: Screws to attach the Universal Mount to Silicone to seal the cable entry holes and •...
-
Page 5: Helpful Hints
The maximum allowable length for the RG-6 coaxial cable connecting the receiver to your • dish is 150 feet. Consult Shaw Direct if the cable will exceed this length. Use only RG-6 grade coaxial cable. Using lower grade RG-59 coaxial cable may result in •... -
Page 6: Dish Assembly
We do not recommend: Mounting the dish on a railing or fence • Installing the dish on aluminum or vinyl siding (these are unlikely to be structurally sound) • Mounting the dish on the roof unless absolutely necessary. • Keep grounding requirements in mind (see section 10 for additional information on grounding). Dish Assembly 60cm Dish FIGURE A-60... - Page 7 Step 3 – Attach the Clamp Mount FIGURE C-60 Assembly to the 60 cm Elliptical Dish (FIGURE C-60) Clamp Place the completed Clamp Mount Mount Assembly on the back of the 60cm Elliptical Carriage Head Bolt Assembly (painted head) Flat dish.
- Page 8 75cm Dish FIGURE A-75 Step 1 – Assemble Universal Mount Assembly NOTE: This step is not required if you will be installing your dish on a tripod. Insert the smallest Carriage Head bolt (1) as shown in FIGURE A-75, followed by the star washer (2), regular flat washer (3), and lock nut (4).
-
Page 9: Locating The Satellites
Secure each bolt with a skew lock clip, lock washer, and hex nut. Tighten just enough to hold in place – these will be used for Skew Adjustment. FIGURE F-75 Step 4 – Attach the Satellite Feed Support Arm to the 75 cm Elliptical Dish Attach the Satellite Feed Support Arm to the 75 cm Elliptical Dish using the remaining bolt, plastic spacer, flat washer, and hex nut, as... -
Page 10: Attaching The Dish
Step 2: At the dish install site, hold a compass FIGURE G level and still in the palm of your hand. When the needle stops rotating (dark half of the needle always points north), slowly rotate the body of the compass so that the “N˝ marking is aligned If you live in with the dark half of the needle. - Page 11 Step 3: Secure the Universal Mount with appropriate surface screws. Check the mount for movement. An improperly secured mount will affect signal reception. Step 4: Slide the Dish/Clamp Mount Assembly onto the mast by loosening the (2) Azimuth Clamp Bolts (see Figure B) and the Elevation Pivot Bolt just enough to slide the assembly until it makes contact with the Elevation Pivot Bolt (see Figure J).
-
Page 12: Connecting The Receiver And Dish
You are now at the point in the installation where one of the output ports of the xKu LNB needs to be connected to the Shaw Direct satellite receiver. Connect the receiver to a TV to see a relative scaled signal level meter that will assist you in obtaining maximum signal strength. -
Page 13: Aligning The Dish To Acquire Shaw Direct Signal
With the receiver on and your assistant ready to monitor signal strength on the TV, you are now ready to make adjustments to the dish to acquire the Shaw Direct satellite signal. If you are using a satellite finder, please refer to the instructions in Section 9. -
Page 14: Authorizing Receiver For Service
(azimuth), elevation and skew settings to maximize signal strength above 80. Authorizing Receiver for Service If your receiver installer menu displays signal strength above 80, you have successfully aligned the dish to the Shaw Direct satellite. You are now ready to authorize your receiver for programming. -
Page 15: Activation And Fine Tuning
Step 1: Call Shaw Direct at 1.888.554.7827 to authorize your receiver for programming. Shaw Direct will ensure the correct channel map is set for your receiver and verify the reception of each satellite. After your receiver has been activated, you can fine tune the dish to ensure maximum signal strength on all channels. -
Page 16: Alternate Tuning Method
You may prefer to locate the satellites using a SF-100 Satellite Finder (see Figure O), a standalone satellite signal finding meter which can be purchased separately from Shaw Direct or your Shaw Direct retailer. Step 1: Connect a short coaxial cable from the LNB terminal on the Satellite Finder to the xKu LNB. -
Page 17: Grounding The Coaxial Cable
Grounding the Coaxial Cable FIGURE P The Shaw Direct Self Install kit includes the following items to ground the outdoor coaxial cable: Dual Coax Cable Grounding Block • Grounding Wire • Outdoor coaxial cable that may be subject to static discharge or... -
Page 18: Satellite Locator Chart
The cable can be plugged into any of the four (4) available ports on the xKu LNB, but must be • plugged into the SAT IN port on the Shaw Direct receiver. If you have an HDPVR 630, two (2) cables must be connected to the SAT 1 and SAT 2 ports. - Page 19 Satellite A Satellite B Satellite A Satellite B Compass Dish Dish Compass Dish Dish Compass Dish Dish Compass Dish Dish Azimuth Elevation Skew Azimuth Elevation Skew Azimuth Elevation Skew Azimuth Elevation Skew Azimut – Azimut – Azimut – Azimut – Coord.
- Page 20 Satellite A Satellite B Satellite A Satellite B Compass Dish Dish Compass Dish Dish Compass Dish Dish Compass Dish Dish Azimuth Elevation Skew Azimuth Elevation Skew Azimuth Elevation Skew Azimuth Elevation Skew Azimut – Azimut – Azimut – Azimut – Coord.
- Page 21 Satellite A Satellite B Satellite A Satellite B Compass Dish Dish Compass Dish Dish Compass Dish Dish Compass Dish Dish Azimuth Elevation Skew Azimuth Elevation Skew Azimuth Elevation Skew Azimuth Elevation Skew Azimut – Azimut – Azimut – Azimut – Coord.
- Page 22 Satellite A Satellite B Satellite A Satellite B Compass Dish Dish Compass Dish Dish Compass Dish Dish Compass Dish Dish Azimuth Elevation Skew Azimuth Elevation Skew Azimuth Elevation Skew Azimuth Elevation Skew Azimut – Azimut – Azimut – Azimut – Coord.
Need help?
Do you have a question about the Satellite Antenna and is the answer not in the manual?
Questions and answers