
Summary of Contents for Myline Spa SATURN WM00177
- Page 1 SATURN USER’S GUIDE WM00177 SATURN SPA User’s manual _____________________ Version: 02.2014...
-
Page 2: Standard Specification
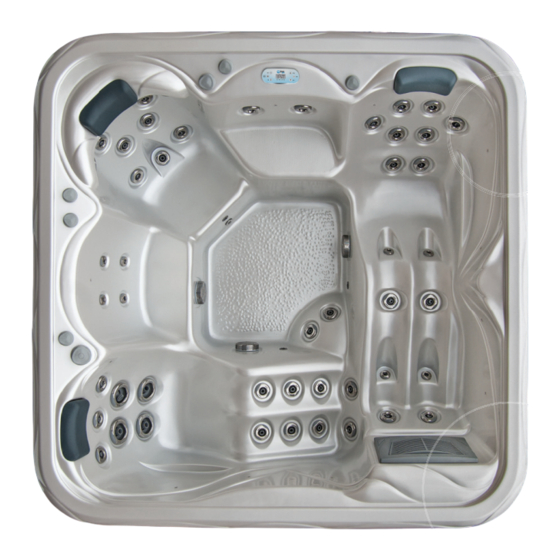
Standard Specification: 2300 × 2300 × 900 mm PU reinforced antimicrobial acrylic Shell material (6,3 mm) 5 Prs. Total number of bathers 2 Prs. Lounge beds 3 Prs. Seats 1400 l Water volume ~350 kg Net weight 1 ×32 A (230V/50Hz) optimum Power requirement 1 ×16 A (230V/50Hz) minimum Total number of jets... -
Page 3: Warranty Letter
Signature: Signature: (stamp) (stamp) 2014 MyLine Spa Limited Warranty WARRANTY FOR EXPORT Warranty; Limitations of Liability and Damages. Company offers a limited warranty comprised of replacement of faulty parts and offers no reimbursement for labour of repairs outside any abnormal failure rates to be determined by both parties. - Page 4 2 years on spa plumbing: Spa fittings and plumbing are warranted against leaks due to de- fects in materials or workmanship for two years from the original date of delivery. There is no labour coverage on internal jet parts replacement, cleaning or adjusting. 2 years on standard and optional spa equipment –...
- Page 5 WARRANTY PERFORMANCE This warranty does not cover cleaning or adjusting spa or for customer error in following correct procedures. WELLIS Magyarország Kft. reserves the right to substitute a spa or component of equiv- alent value, either new or factory reconditioned and any such repair or replacement shall assume as its warranty only the remaining portion of the warranty on the original product.
- Page 6 SPA WARRANTY COVERAGE WILL BE VOID UNDER THE FOLLOWING CONDITIONS If damages caused by inefficient maintenance of water and/or chemical dosage. Terms of water hardness (limits): between 6-10 German degrees. If the spa surface or equipment has been damaged or discoloured as a result of im- proper water chemistry maintenance, including sanitizers such as trichlor type chlorine, calcium hypochlorite, sodium hypochlorite, and any other chemicals or a chemical dispenser that may rest on the spa surface.
- Page 7 Magyarország Kft. or its agents will not be liable for any incidental or consequential loss or injury. Nor will WELLIS Magyarország Kft. be liable for costs associated with but not limited to building alterations or finishes and under no circumstances will be liable for greater expense than the amount paid for the product.
-
Page 8: Service Work
Service-work The announcement date of damage: _____________________________ Date of received goods/parts for repair: _____________________________ Date of the return of repaired goods/parts: _____________________________ Date of site service: _____________________________ STAMP Improved error: _____________________________ Mode of repair: _____________________________ Failed component: _____________________________ New deadline for the warranty: _____________________________ The announcement date of damage: _____________________________... -
Page 9: Safety Instructions
SAFETy INSTRUCTIONS ATTENTION: PLEASE READCAREFULLY AND FOLLOW THE INSTRUCTIONS AVOIDING THE RISK OF INJURy OF CHILDREN In order to reduce the risk of injury to children, do not allow children to use this spaalone unless they are carefully supervised at all the times. Lower water temperatures arerecommended for young children. -
Page 10: Installation Instructions
INSTALLATION INSTRUCTIONS SITE PREPARATION INDOOR/BASEMENT INSTALLATION If you take it place your spa indoors, be aware of some special requirements. Water willaccumulate around the spa, so the flooring materials must provide a good grip whenwet proper drainage is essential to prevent a build-up of water around the spa. When building a new room for the spa it is recommended that a floor drain isinstalled. -
Page 11: Operating Instructions
OPERATING INSTRUCTIONS Close the drain stub and fill the spa with water After closing the drain stub, and fill up the tub with soft water to theindicated line inside of the body. If you see any leak(orflood) anywhere, stop the filling procedure until it will be fixed. -
Page 12: General Information
CLEANING GENERAL INFORMATION: Water recirculation-filtering The basic conditions for keeping the water of the spa clean are the removal of mechanical dirt and the blending of the chemicals in the water with continuous water recirculation. In all our spa’s appliances comprising of a pump and a filter are used for this purpose. - The filter removes the dirt floating in the water or at the surface of the water. - Page 13 The chemical equilibrium of the water The water of the spa will be clean and clear if its chemical components are in equilibrium. pH-value: The first important indicator is the pH value of the water. pH is measured in a scale between 0-14 where 7 is the neutral value.
- Page 14 REPLACING UNDERWATER LIGHT 1. Turn off the power of the spa. 2. Remove plastic panel behind where the underwater light is situated. 3. There is a plug with two wires going into the back of the light. 4. Remove this plug by turning anticlockwise. 5.
-
Page 15: Troubleshooting
TROUBLESHOOTING Problem Probable causes Solutions Cloudy Water Dirty filters. Clean filters. Shock spa with sanitizer. Improper sanitization. Add sanitizer. Suspended particles/organic Adjust PH andl or alkalinity to recom- matter. mended range. Run jet pump(s) and clean filters. Overused water. Drain and refill the spa. Water Odor Excessive organics in water. - Page 16 Problem Probable causes Solutions Entire spa is inop- Power failure. Check power source. erative. GFCI tripped heater Reset GFCI, call for service if not reset. high-limit thermostat Disconnect power for at least thirty tripped. second to reset heater high limit. If it will not reset check for clogged filters.
-
Page 17: Tp600 Control Panel
TP600 Control Panel User Interface and Programming Reference – Standard Menus System Model: BP-Series Systems are BP5XX, BP6XX, BP1XXX, BP2XXX. Software Version: 7.0 and later Panel Model: TP600 Series Software Version: 2.3 or later... -
Page 18: Main Menus
Navigation Navigation Main Menus ressed and held when the temperature is flashing, the temperature will continue to change Navigating the entire menu structure is done with 2 or 3 buttons on the control panel. f only one temperature button is available and the limit of the Temperature Range is reached Navigating the entire menu structure is done with 2 or 3 buttons on the control panel. -
Page 19: Preparation And Filling
Fill it up! Preparation and Filling Fill the spa to its correct operating level. Be sure to open all valves and jets in the plumbing system before filling to allow as much air as possible to escape from the plumbing and the control system during the filling process. After turning the power on at the main power panel, the top-side panel display will go through specific sequences. -
Page 20: Spa Behavior
Spa Behavior Pumps Press the “Jets 1” button once to turn pump 1 on or o , and to shift between low- and high-speeds if equipped. If left running, the pump will turn o after a time-out period. The pump 1 low-speed will time out after 30 minutes. The high-speed will time out after 15 minutes. -
Page 21: Temperature And Temp Range
the LCD stops flashing, the spa will heat to the new set temperature when required. e to change in one direction (e.g. UP). After allowing the display to stop flashing, pressing se the temperature to flash and the next press will change the temperature in the opposite If the panel has a single temperature button, pressing the button will cause the temperature to again will cause the temperature to change in one direction (e.g. -
Page 22: Mode - Ready And Rest
Mode – Ready and Rest d-Hold In order for the spa to heat, a pump needs to circulate water through the heater. The pump that performs th Mode – Ready and Rest ture button is pressed and held when the temperature is flashing, the temperature will continue to change known as the “heater pump.”... -
Page 23: Flip (Invert Display)
Show and Set Time-of-Day erature Ranges orporates two temperature range settings with independent set temperatures. The High Range designated Show and Set Time-of-Day Be sure to set the Time-of-Day n “up” arrow, and the Low Range designated in the display by a “down” arrow. Show and Set Time-of-Day an be used for various reasons, with a common use being a “ready to use”... -
Page 24: Restricting Operation
The control can be restricted to prevent unwanted use or temperature adjustments. Restricting Operation perature Ranges Locking the panel prevents the controller from being used, but all automatic functions are still active. Restricting Operation Locking the Temperature allows Jets and other features to be used, but the Set Temperature and other corporates two temperature range settings with independent set temperatures. -
Page 25: Hold (Standby)
Hold e button is pressed and held when the temperature is flashing, the temperature will continue to change Hold (Standby) n is released. If only one temperature button is available and the limit of the Temperature Range is reached Hold (Standby) on is being held, the progression will reverse direction. -
Page 26: Adjusting Filtration
orporates two temperature range settings with independent set temperatures. The High Range designated n “up” arrow, and the Low Range designated in the display by a “down” arrow. Adjusting Filtration n be used for various reasons, with a common use being a “ready to use” setting vs. a “vacation” setting. Adjusting Filtration chosen using the menu structure below. - Page 27 Light Timer Programming Light Timer Option Indicates Flashing or Changing Segment If LITE TIMR does not appear in the Main Menu, the Light Timer Indicates Alternating or Progressive Message - every 1/2 second feature is not enabled by the manufacturer. A temperature button, used for “Action”...
- Page 28 Preferences F / C (Temp Display) Change the temperature between Fahrenheit and Celsius. 12 / 24 (Time Display) Change the clock between 12 hr and 24 hr display. RE-MIN-DERS (Reminders) Turn the reminder messages (like “Clean Filter”) On or O . CLN-UP (Cleanup) Cleanup Cycle Duration is not always enabled, so it may not appear.
- Page 29 sed for various reasons, with a common use being a “ready to use” setting vs. a “vacation” setting. using the menu structure below. Each range maintains its own set temperature as programmed by n a range is chosen, the spa will heat to the set temperature associated with that range. Preferences et between 80°F and 104°F.
- Page 30 Utilities and Information INFO (System Information sub-menu) The System Information Menu displays various settings and identification of the particular system. As each item in the menu is highlighted, the detail for that item is displayed at the bottom of the screen. SSID (Software ID) Displays the software ID number for the System.
-
Page 31: Additional Utilities
Additional Utilities Utilities In addition to INFO, The Utilities Menu contains the following: GFCI (GFCI Test) (Feature not available on CE rated systems.) GFCI Test is not always enabled, so it may not appear. This screen allows the GFCI to be tested manually from the panel and can be used to reset the automatic test feature. - Page 32 orates two temperature range settings with independent set temperatures. The High Range designated in up” arrow, and the Low Range designated in the display by a “down” arrow. e used for various reasons, with a common use being a “ready to use” setting vs. a “vacation” setting. Utilities sen using the menu structure below.
- Page 33 Utilities – GFCI Test Feature Utilities – GFCI Test Feature erature Ranges orporates two temperature range settings with independent set temperatures. The High Range designated i Not Available on CE Rated Systems. Not Available on CE Rated Systems. n “up” arrow, and the Low Range designated in the display by a “down” arrow. A GFCI is an important safety device and is required equipment on a hot tub installation.
- Page 34 Utilities – Fault Log A Little History can tell a lot The Fault Log stores up to 24 events in memory and they can be reviewed under the Fault Log Menu. Each event captures a Fault Message Code, how many days have passed since the fault, Time of the fault, Set Temperature during the fault, and Sensor A and B temperatures during the fault.
-
Page 35: General Messages
General Messages Priming Mode – M019 Each time the spa is powered up, it will enter Priming Mode. The purpose of Priming Mode is to allow the user to run each pump and manually verify that the pumps are primed (air is purged) and water is flowing. This typically requires observing the output of each pump separately, and is generally not possible in normal operation. -
Page 36: Heater-Related Messages
Heater-Related Messages Heater Flow is Reduced (HFL) – M016 There may not be enough water flow through the heater to carry the heat away from the heating element. Heater start up will begin again after about 1 min. See “Flow Related Checks” below. Heater Flow is Reduced (LF)* –... -
Page 37: Sensor-Related Messages
Sensor-Related Messages Sensor Balance is Poor – M015 The temperature sensors MAY be out of sync by 2°F or 3°F. Call for Service. Sensor Balance is Poor* – M026 The temperature sensors ARE out of sync. The Sensor Balance is Poor fault has been established for at least 1 hour. Call for Service. -
Page 38: System-Related Messages
System-Related Messages Memory Failure - Checksum Error* – M022 At Power-Up, the system has failed the Program Checksum Test. This indicates a problem with the firmware (operation program) and requires a service call. Memory Warning - Persistent Memory Reset* – M021 Appears after any system setup change. -
Page 39: Reminder Messages
Reminder Messages General maintenance helps. Reminder Messages can be suppressed by using the PREF Menu. See Page 11. Reminder Messages can be chosen individually by the Manufacturer. They may be disabled entirely, or there may be a limited number of reminders on a specific model. The frequency of each reminder (i.e. -
Page 40: Appears On A Regular Schedule, E.g. Every 90 Days
Reminder Messages Continued Alternates with temperature or normal display. Appears on a regular schedule, e.g. every 90 days. Change the water in the spa on regular basis to maintain proper chemical balance and sanitary conditions. Alternates with temperature or normal display. Appears on a regular schedule, e.g. -
Page 41: Basic Installation And Configuration Guidelines
Warning! Qualified Technician Required for Service and Installation Basic Installation and CSA Compliance/Conformité Configuration Guidelines Caution: Use minimum 6AWG copper co nductors only. each use of the spa. Torque field connections between 21 and 23 in lbs. Readily accessible disconnecting means to be provided at time of instal- lation. - Page 42 Piping instructions of SATURN spa 30mA safety relay is need to be installed! E: Electric hole ( 500 mm) to terminal facilities through spa cabinet. 3 m cabels are required! L : Drain connector ( 40 0 mm) In case of sinking just allowed to sinking part which is under the spa`s acrylic-flange.
- Page 43 1 Phase (Line) Connection to 1x16A (minimum) or 1 Phase (Line) Connection to 1x32A (optimum)
Need help?
Do you have a question about the SATURN WM00177 and is the answer not in the manual?
Questions and answers