Table of Contents
Advertisement
Advertisement
Table of Contents

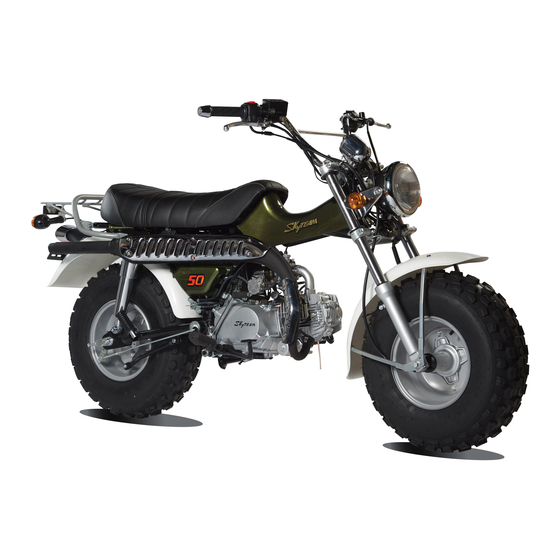
Summary of Contents for Sky Team T-Rex 50
-
Page 2: Table Of Contents
TABLE OF CONTENTS MAINTENANCE OPERATION Page Page Page Page MAINTENANCE Front Suspension Important Precautions Pre-ride Inspection The Importance of maintenance Rear Suspension Consumer Information Starting the Engine Maintenance Safety Side Stand Parts Location Running - in Safety Precautions MAJOR COMPONENTS Riding Maintenance Schedule CLEANING... -
Page 3: Important Precautions
CONSUMER INFORMATION IMPORTANT PRECAUTIONS ACCESSORY INSTALLATION AND BREAK-IN INFORMATION FOR YOUR WARNING: improper load will not hinder the idling,tunning SAFETY PRECAUTION TIPS MOTORCYCLE The personal safety of the rider may be involved, and other control actions. The first 1,600km is the most important in the disregarding this information could result in There are great varieties of accessories available (3)Fixing the accessories on handlebars or front... - Page 4 BE EXTRA SAFETY CONSCIOUS ON WEAR A HELMET CHECKS BEFORE RIDING existing electrical system.Severe overloads may BAD WEATHER DAYS damage the wiring harness or create a dangerous Motorcycle safety equipment starts with a Review thoroughly the instructions in the "PRE- Riding on bad weather days, especially wet ones, situation due to the loss of electrical power during quality safety helmet.One of the most serious...
-
Page 5: Parts Location
MODIFICATION PARTS LOCATION Modification of the motorcycle, or removal of original equipment may render the vehicle unsafe or illegal .Obey the local regulations for available equipment. Ignition switch Clutch lever Front brake lever Throttle grip Engine stop button... - Page 6 Choke lever (ST50-11) Kick starter Choke lever (ST125-11) Full fill cap Rear brake pedal Gearshift pedal Fuel cock Side stand Footpad Footpad...
-
Page 7: Major Components
MAJOR COMPONENTS FRONT BRAKE FLUID LEVEL BRAKE LINING WARINING > (Information you need to operate this limit mark Brake fluid may cause irritation. Avoid contact ==Check that the fluid level is above the lower motorcycle) with skin or eyes. In case of contact, flush level mark(1) with the motorcycle in an upright BRAKES thoroughly with water and call a doctor if your... -
Page 8: Clutch
The rear brake light switch CLUTCH 1.Pull back the rubber dust cover (2). NOTICE (1) is located at the lower part Clutch adjustment may be required if the 2.Loosen the lock nut (3) and turn the adjuster The high pressure brake is used by disc brake of right frame. -
Page 9: Fuel
4. Loosen the lock nut (6) at the lower end of the 5. Start the engine, pull in the clutch lever and FUEL Remember to check that the fuel valve is in the cable.Turn the adjusting nut (5) to obtain the shift into gear. - Page 10 Fuel Tank Use unleaded or low-lead petrol with a research NOTICE The fuel tank capacity including the reserve octane number of 90 or higher. We recommend If "spark knock" or "pinking" occurs at a steady supply is: that you use unleaded petrol because it produces engine speed under normal load, change brands 3.8L fewer engine and spark plug deposits and extends...
-
Page 11: Engine Oil
ENGINE OIL 5. Reinstall the oil filler cap/dipstick. Check for TIRES Air Pressure Engine Oil Level Check oil leaks. To safely operate your motorcycle, the tires must Properly inflated tires provide the best Check the engine oil level each day before be the proper type and size, in good condition combination of handling, tread life, and riding NOTICE... - Page 12 Always check air pressure when your tires are Inspection Tread Wear "cold." If you check air pressure when your tires Whenever you check the tire pressures, you Replace tires before tread depth at the center of are "warm"-even if your motorcycle has only should also examine the tire treads and sidewalls the tire reaches the following limit: been ridden for a few miles-the readings will be...
- Page 13 Tube Repair and Replacement Tire Replacement The recommended tires for your motorcycle are: If a tube is punctured or damaged,you should The tires that came on your motorcycle were replace it as soon as possible. A tube that is designed to match the performance capabilities Front: 21 X 7.00-10 repaired may not have the same reliability as a of your motorcycle and provide the best...
-
Page 14: Essential Individual Components
INSTRUMENT PANEL ESSENTIAL INDIVIDUAL COMPONENTS IGNITION SWITCH SPEEDOMETER(1) The ignition switch (1) is used to prevent The speedometer indicates the driving speed in unauthorized use of the motorcycle. kilometers per hour. Before riding,insert the key and turn it to the ON ODOMETER(2) position. -
Page 15: Left Handlebar
RIGHT HANDLEBAR LEFT HANDLEBAR Front Brake Lever(1) Grip the front break lever to break the front HORN BUTTON(1) wheel. Press the button and the horn will sounds. EMERGENCY ENGINE STOP SWITCH(2) TURN SIGNAL SWITCH(2) In case of emergency, move this switch to front When the switch in "... -
Page 16: Operation
12. Nuts, bolts, fasteners-check the front wheel or have it corrected by your SKY TEAM dealer. 4. Tires-check condition and pressure. to see that the axle nut and axle holder nuts are 5. -
Page 17: Starting The Engine
STARTING THE ENGINE Preparation Starting Procedure 2. Keep the throttle fully closed. Always follow the proper starting procedure Before starting, insert the key and turn the To restart a warm engine, follow the procedure 3. Push the electric starter button or operate the described below. -
Page 18: Running-In
High Air Temperature FLOODED ENGINE RUNNING-IN NOTICE ç ç F) or above If the engine fails to start after repeated attempts, Help assure your motorcycle's future reliability Extended use of the choke may impair piston 1. Do not use the choke. it may be flooded with excess fuel. -
Page 19: Riding
RIDING 3. Slowly release the clutch lever and at the same 5. Raise the pedal to shift to a higher gear and Do not downshift when traveling at a speed Review Motorcycle Safety before you ride. time gradually increase engine speed by opening depress the pedal to shift to a lower gear. -
Page 20: High Altitude Riding
HIGH ALTITUDE RIDING BRAKING When possible,reduce speed or brake before When operating this motorcycle at high altitude For normal braking,gradually apply both the entering a turn. Closing the throttle or braking the air-fuel mixture becomes overly rich. front and rear brakes while downshifting to suit in mid-turn may cause wheel slip.Wheel slip will Driveability and performance may be reduced your road speed. -
Page 21: Parking
PARKING ANTI-THEFT TIPS MAINTENANCE Frequent servicing of the air cleaner is especially 1.After stopping the motorcycle,shift the 1.Be sure the registration information for your THE IMPORTANCE OF MAINTENANCE important to help you avoid a possible costly transmission into neutral and turn the fuel valve motorcycle is accurate and current . -
Page 22: Maintenance Safety
MAINTENANCE SAFETY SAFETY PRECAUTIONS To reduce the possibility of a fire or WARINING > This section includes instructions on some Make sure the engine is off before you begin explosion, be careful when working around Failure to properly follow maintenance important maintenance tasks. -
Page 23: Maintenance Schedule
MAINTENANCE SCHEDULE WHICHEVER REGULAR INITIAL Perform the Pre-ride Inspection at each scheduled maintenance period. FREQUENCY COMES NAINT.INTERVAL MAINT. I: INSPECT AND CLEAN, ADJUST, LUBRICATE OR REPLACE IF NECESSARY FIRST 1,000 2,000 3,000 4,000 C: CLEAN R: REPLACE A: ADJUST L: LUBRECATE The following Maintenance Schedule specifies all maintenance required to keep your motorcycle in ITEMS 1,200... -
Page 24: Serial Number
SERIAL NUMBERS The frame number(1) is stamped on the left side WHICHEVER REGULAR INITIAL The frame and engine serial numbers are required of the steering head. FREQUENCY COMES NAINT.INTERVAL MAINT. when registering your motorcycle.They may also The engine number(2) is stamped on the left side FIRST 1,000 2,000... -
Page 25: Air Cleaner
AIR CLEANER 1.Wash the air cleaner in clean nonflammable ENGINGE OIL The air cleaner should be serviced at regular or high flash point solvent and let dry thoroughly. Refer to the Safety Precautions. intervals. Service more frequently when riding in unusually wet or dusty areas. Never use petrol or low flash point solvents for Engine Oil cleaning the air cleaner.A fire or explosion could... - Page 26 Engine oil If a torque wrench is not used for this installation, TRANSMISSION OIL (SHIFTING GEAR Remove the engine oil filler cap/dipstick Engine oil quality is the chief factor affecting see your SKYTEAM dealer as soon as possible OIL) then the drain cock to drain the oil fully. The engine service life.
-
Page 27: Spark Plug
SPARK PLUG 6.Check the spark plug gap(1)using a wire-type 7.Make sure the plug washer is in good condition. NOTICE Recommended plugs: feeler gauge. if adjustment is necessary,bend the 8.With the plug washer attached, thread the spark Never use a spark plug with an improper heat Standard:A7RTC(ST50-11) side electrode(2)carefully. -
Page 28: Idle Speed
IDLE SPEED 1.Warm up the engine and hold the motorcycle THROTTLE OPERATION Idle speed: upright. Cable Inspection: The engine must be at normal operating 2.Connect a tachometer to the engine. 1,Check for smooth rotation of the throttle grip t e m p e r a t u r e f o r a c c u r a t e i d l e s p e e d 3.Adjust idle speed with the throttle stop from the fully open to the fully closed position adjustment.Ten minutes of stop-and-go riding is... -
Page 29: Drive Chain
4.Adjust free play with the throttle cable adjuster DRIVE CHAIN 3.Roll the motorcycle forward, stop, and then (2).Measured in grip rotation,the standard The service life of the drive chain is dependent check the drive chain slack. Repeat this throttle grip free play is: upon proper lubrication and adjustment.Poor procedure several times.Drive chain slack should 2-6mm(0.1-0.2in) - Page 30 4.Measure a section of the drive chain to 6.Inspect the sprocket teeth for possible wear or Adjustment: determine whether the chain is worn beyond its damage. If the drive chain requires adjustment, the service limit.Remove the drive chain and procedure is as follows; measure the distance between a span of pins from 1.Place a support block under the engine to raise Damaged sprocket...
- Page 31 3.Turn the both the right and left chain adjuster If a torque wrench is not used for this installation, Removal and Cleaning: 5.Pass the chain over the sprockets and join the nuts(2) to keep the left and right indicator (3) at see your SKYTEAM dealer as soon as possible When the drive chain becomes dirty, it should ends of the chain with the master link.
-
Page 32: Wheel Rims And Spokes
WHEEL REMOVAL WHEEL RIMS AND SPOKES Installation Notes: 1.Inspect the wheel rims(1)and spokes (2)for To install the front wheel assembly reverse damage. the removal procedure. Front Wheel Removal 2.Tighten any loose spokes and rim locks(3) Be sure to tighten the axle nut to: 1.Raise the front wheel off the ground by placing 3.Check wheel rim runout. -
Page 33: Rear Wheel Removal
Rear Wheel Removal Installation Notes: 1.Raise the rear wheel off the ground by placing To install the rear wheel, reverse the removal a support block under the engine. procedure. Tighten the axle nut to: 2.Disassemble the cotter pin (3), unscrew the 45 N.m (4.6 kfg.m) axle nut (1) and nut(2), and then pull the axle. -
Page 34: Front Suspension
FRONT SUSPENSION Operating the motorcycle with loose, worn, or REAR SUSPENSION damaged steering or front suspension Check the fork operation by locking the front components may adversely affect vehicle Check the rear suspension periodically by careful brake and pumping the forks up and down handling and stability. -
Page 35: Side Stand
SIDE STAND CLEANING High pressure washer spray can damage certain Check the side stand spring for damage and loss Clean your motorcycle regularly to protect the parts of your motorcycle. If you use a high of tension,and the side stand assembly for surface finishes and inspect for damage, wear pressure washer, avoid spraying the following freedom of movement. - Page 36 Washing the motorcycle 6 . Te s t t h e b r a k e s b e f o r e r i d i n g t h e Finishing Touches 1.Rinse the motorcycle thoroughly with cool motorcycle.Several applications may be After washing your motorcycle,consider using water to remove loose dirt.
-
Page 37: Storage Guide
STORAGE GUIDE 4.Wash and dry the motorcycle.Wax all painted REMOVAL FROM STORAGE WARINING > Extended storage,such as for winter, requires that surfaces.Coat chrome with rust inhibiting oil. 1.Uncover and clean the motorcycle. Petrol is highly flammable and explosive, you you take certain steps to reduce the effects of 5.Lubricate the drive chain Change the engine oil if more than 4 months have can be burned or seriously injured when... -
Page 38: Specifications
SPECIFICATIONS CAPACITIES DIMENSIONS Fuel tank 3.8L Overall length 1880mm Passenger capacity 75kg Overall width8 875mm Overall height 1025mm ENGINE Wheelbase 1225mm ST50-11 ST125-11 Bore and stroke 39mm 41.4mm 52.4mm 57.0mm WEIGHT Compression ratio 8.8:1 Dry weight 93kg Displacement 49cm 124cm Spark plug A7RTC CR6HSA... - Page 39 Instrument indicator light 12V 3W, 12V 1.7W Horn 12V 1.5A 95 dB(A) Fuse CHASSIS AND SUSPENSION All information,illustration, photographs and Caster Tire size, front 7.00-10 specifications contained in this manual are based on the Tire size, rear 7.00-10 latest product information available at time of POWER TRANSMISSION publication.
Need help?
Do you have a question about the T-Rex 50 and is the answer not in the manual?
Questions and answers