Table of Contents
Advertisement
Check the 3M
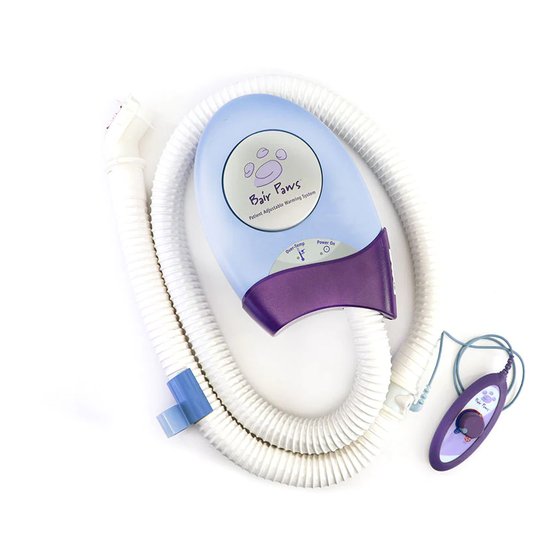
Bair Paws
system website to ensure you have the most recent version of this document.
TM
TM
Warning: Electrical Shock Hazard. There are electrically live parts within the
warming unit when it is connected to a power source, even when the handheld
temperature controller is in the OFF position.
Please forward to Biomedical Engineering Department
Avertissement : risque d'électrocution. Certaines pièces à l'intérieur de l'appareil
sont sous tension lorsque ce dernier est branché sur une source d'alimentation,
même si le régulateur de température manuel est à l'arrêt.
À transmettre au département d'ingénierie biomédicale
Warnhinweis: Es besteht Stromschlaggefahr. Wenn das Erwärmungsgerät an das
Stromnetz angeschlossen ist, stehen bestimmte elektrische Komponenten auch
dann unter Strom, wenn die Schalter auf AUS gestellt ist.
Bitte weiterleiten an medizintechnische Abteilung
3
Bair Paws
Model 875 Warming Unit
Service Manual
www.bairpaws.com reorder #202036A
™
Advertisement
Table of Contents

Summary of Contents for 3M Bair paws 875
- Page 1 Check the 3M Bair Paws system website to ensure you have the most recent version of this document. www.bairpaws.com reorder #202036A Bair Paws ™ Model 875 Warming Unit Service Manual Warning: Electrical Shock Hazard. There are electrically live parts within the warming unit when it is connected to a power source, even when the handheld temperature controller is in the OFF position.
- Page 2 Check the 3M Bair Paws system website to ensure you have the most recent version of this document. www.bairpaws.com reorder #202036A...
- Page 3 Check the 3M Bair Paws system website to ensure you have the most recent version of this document. www.bairpaws.com reorder #202036A Bair Paws Model 875 Warming Unit Service Manual 1 Model 875 Warming unit service manual 2 Appareil de réchauffement, modèle 875 Manuel d’entretien...
-
Page 4: Table Of Contents
#202036A Table of Contents Introduction to the 3M™ Bair Paws™ Patient Adjustable Warming System � � � � � � � � � � � � � � � � � � � � � � � � � � � � � � � � � � � � � � � � � � � � � � � � � � � � � � � � � � � � �... -
Page 5: Introduction To The 3M™ Bair Paws™ Patient Adjustable Warming System
Check the 3M Bair Paws system website to ensure you have the most recent version of this document. www.bairpaws.com reorder #202036A Introduction to the 3M™ Bair Paws™ Patient Adjustable Warming System The 3M Bair Paws patient adjustable warming system consists of the Model 875 forced- air warming unit and disposable warming gowns�... -
Page 6: Important Information About The Bair Paws Model 875 Warming Unit
Check the 3M Bair Paws system website to ensure you have the most recent version of this document. www.bairpaws.com reorder #202036A Important Information about the Bair Paws Model 875 Warming Unit Indications The Model 875 warming unit is indicated for patient warming� This warming unit has been designed for use with the Bair Paws warming gowns in all preoperative and postoperative settings for pediatric and adult patients�... -
Page 7: Explanation Of Signal Word Consequences
2� • Do not continue use of the unit if the yellow Over-temp indicator light illuminates or an audible alarm sounds; contact a biomedical technician or call 3M Patient Warming technical service� • Use only the Bair Paws warming gowns with this warming unit�... - Page 8 1-800-733-7775� • Examine the warming unit for damage before each use� Never operate the equipment if the warming unit, power cord, plug, or any component is visibly damaged� Contact 3M Patient Warming Technical Support at 1-800-733-7775� • Keep power cord visible and accessible at all times� The plug on the power cord serves as the disconnect device�...
- Page 9 Check the 3M Bair Paws system website to ensure you have the most recent version of this document. www.bairpaws.com reorder #202036A To reduce the risks associated with fire: 7� • Always follow standard safety protocols when using high intensity heat sources near a Bair Paws gown�...
-
Page 10: Proper Use And Maintenance
If the warming unit does not require the manufacturer’s attention, 3M Patient Warming will ship replacement parts to your location� Perform all repairs and maintenance in accordance with the instructions provided with the replacement parts�... -
Page 11: Installing The Wall-Mount Bracket
A wall-mount bracket is shipped with every warming unit; the brackets for mounting the warming unit to an IV pole or a bedrail are available separately� Please contact your local sales representative or call 3M Patient Warming Customer Service at 1-800-228-3957 for more information about ordering mounting brackets�... -
Page 12: Placing The Warming Unit On The Wall-Mount Bracket
Check the 3M Bair Paws system website to ensure you have the most recent version of this document. www.bairpaws.com reorder #202036A Placing the Warming Unit on the Wall-mount Bracket 1� Snap the warming unit into position by sliding the clip on the back of the warming unit into the groove of the wall-mount bracket�... -
Page 13: Mounting The Warming Unit On An Iv Pole
Check the 3M Bair Paws system website to ensure you have the most recent version of this document. www.bairpaws.com reorder #202036A Mounting the Warming Unit on an IV Pole CAUTION: To prevent tipping, mount the Model 875 warming unit on an IV pole at a height that ensures stability�... -
Page 14: Mounting The Warming Unit On A Bedrail
Check the 3M Bair Paws system website to ensure you have the most recent version of this document. www.bairpaws.com reorder #202036A Mounting the Warming Unit on a Bedrail 1� Slide the clip on the back of the warming unit into the groove of the rail-mount bracket�... -
Page 15: Mounting The Warming Unit With A Rail-Mount To The Wall
Check the 3M Bair Paws system website to ensure you have the most recent version of this document. www.bairpaws.com reorder #202036A Mounting the Warming Unit with a Rail-mount to the Wall CAUTION: The rail-to-wall bracket is intended for use only with a Bair Paws 800 series warming unit�... -
Page 16: Mounting The Warming Unit With A Suction Wall Mount Adapter
WARNING: To prevent pinching, only hold the front of the adapter when increasing decreasing the expander� Slide the Bair Paws 875 warming unit into the 3� suction wall mount adapter� Figure 6� Mounting the warming unit with a suction wall mount adapter�... -
Page 17: Using The Handheld Temperature Controller
Check the 3M Bair Paws system website to ensure you have the most recent version of this document. www.bairpaws.com reorder #202036A Using the Handheld Temperature Controller After the hose has been connected to the Bair Paws gown, the patient can adjust the air temperature and airflow by turning the knob on the temperature controller�... -
Page 18: Service Procedures
Be certain to observe polarity� 3M Patient Warming assumes no responsibility for the reliability, safety, or performance of the Model 875 warming unit if calibration tests or adjustments are made in any manner other than those described here�... - Page 19 Check the 3M Bair Paws system website to ensure you have the most recent version of this document. www.bairpaws.com reorder #202036A Method 1� Turn the warming unit ON and select the maximum airflow and temperature by turning the temperature controller completely clockwise (refer to position C in Figure 6)�...
-
Page 20: Testing The Over-Temperature (Ot) Circuit
Check the 3M Bair Paws system website to ensure you have the most recent version of this document. www.bairpaws.com reorder #202036A 6� Insert a flat-headed, 2-mm screwdriver into the calibration access hole to a depth of approximately 1/2 inch (see Figure 10)� Turn the pot very slowly until the steady state temperature reading is 43°C�... - Page 21 #202036A Method Note: The OT threshold temperature cannot be adjusted� If problems occur, contact 3M Patient Warming customer service� 1� If continuing from Calibrating the Operating Temperatures, skip to step 6; otherwise, proceed to the next step�...
-
Page 22: Replacing The Filter
Every six months� Tools/Equipment Needed Medium Phillips screwdriver • Replacement filters (available from 3M Patient Warming Customer Service) • Method 1� Disconnect the warming unit from the power source� 2� Remove the two screws that attach the case bottom (dark purple) to the warming unit�... -
Page 23: Replacing The Temperature Controller And/Or Hose
Check the 3M Bair Paws system website to ensure you have the most recent version of this document. www.bairpaws.com reorder #202036A Replacing the Temperature Controller and/or Hose Tools/Equipment Needed Small Phillips screwdriver� • Medium Phillips screwdriver� • Method 1� Disconnect the warming unit from the power source�... - Page 24 Check the 3M Bair Paws system website to ensure you have the most recent version of this document. www.bairpaws.com reorder #202036A 7� To replace the hose or controller remove the two screws that connect the wire collar to the mid-hose coupler and pull the wire out through the dedicated hole (see Figure 14)�...
-
Page 25: Replacing The Fuses
Check the 3M Bair Paws system website to ensure you have the most recent version of this document. www.bairpaws.com reorder #202036A Replacing the Fuses Tools/Equipment Needed Small Phillips screwdriver • Medium Phillips screwdriver • Method 1� Disconnect the warming unit from the power source�... -
Page 26: Replacing The Power Cord
Check the 3M Bair Paws system website to ensure you have the most recent version of this document. www.bairpaws.com reorder #202036A Figure 17� Replacing the Power Cord View of a fully Tools/Equipment Needed installed cord Medium Phillips screwdriver� retainer� •... -
Page 27: General Maintenance
Replace the filter every six months or sooner if necessary� To order a replacement filter, contact 3M Patient Warming customer service using either of the telephone numbers listed on page 22� Instructions for replacing the filter will be included with the replacement filter�... -
Page 28: Technical Support And Customer Service
Paws warming unit� The serial number is located on the back of the unit� Repair and Exchange Call 3M Patient Warming customer service if your Model 875 warming unit requires service� A customer service representative will give you a Return Authorization (RA) number� Please use this RA number on all correspondence concerning your warming unit�... -
Page 29: Technical Specifications
Check the 3M Bair Paws system website to ensure you have the most recent version of this document. www.bairpaws.com reorder #202036A Technical Specifications Physical Characteristics dimensions of warming unit 13 in� high x 4 in� deep x 7�7 in� wide 33 cm high x 10�2 cm deep x 19�6 cm wide... - Page 30 Check the 3M Bair Paws system website to ensure you have the most recent version of this document. www.bairpaws.com reorder #202036A Safety System Characteristics thermostat Independent electronic and heater (electromechanical) overcurrent protection Dual input fused line� safety feature Over-temperature protection: color indicator light illuminates, audible alarm sounds, and heater shuts down (blower continues to run)�...
-
Page 31: Maintenance Log
Check the 3M Bair Paws system website to ensure you have the most recent version of this document. www.bairpaws.com reorder #202036A Maintenance Log Date Maintenance Action Performed English 202036A... - Page 32 Check the 3M Bair Paws system website to ensure you have the most recent version of this document. www.bairpaws.com reorder #202036A Maintenance Log Date Maintenance Action Performed Bair Paws Model 875 Warming Unit Service Manual...
- Page 33 Made in the USA of globally sourced material by 3M Health Care. 3M is a trademark of 3M Company, used under license in Canada. BAIR HUGGER, BAIR PAWS and the BAIR PAWS logo are trademarks of Arizant Healthcare Inc., used under license in Canada. ©2013 Arizant Healthcare Inc. All rights reserved.
Need help?
Do you have a question about the Bair paws 875 and is the answer not in the manual?
Questions and answers