
Summary of Contents for Radium EMS
- Page 1 INSTRUCTION MANUAL PLUG AND PLAY EMS KIT LOTUS ELISE/EXIGE/2-ELEVEN 2004+ with 2ZZ-GE ENGINE DOCUMENT 19-0046 Radium Engineering LLC ©2012, All right reserved...
-
Page 2: Table Of Contents
Table of Contents 1. Introduction 2. Warnings and Cautions 3. Before Getting Started 4. 2004-2005 EMS Mounting 5. 2006+ EMS Mounting 6. Installation of Accessories 7. Before Initial Start-Up 8. Engine Tuning 9. Tables and Pinouts... -
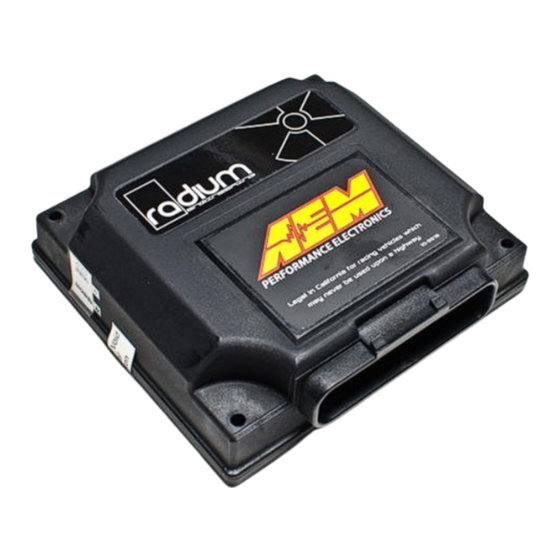
Page 3: Introduction
The Radium EMS itself is a highly modified AEM EMS-4. The stock ECU is retained to run the CAN-BUS dashboard, electronic throttle (when equipped) and other secondary tasks. The EMS gives the user full control over fueling, ignition timing and VVTi-L (cam position and lift). -
Page 4: Before Getting Started
Familiarize yourself with the location of engine control related components. If installing gauges, a mounting location must be determined. Access to the area behind the LH seat is required for the EMS installation. Removal of the speaker panel is necessary. - Page 5 The model specific main wiring harness is included and links the jumper box to all other components in the system including the Radium EMS. This harness is custom engineered for the Lotus application by Radium Engineering and makes installation plug and play.
- Page 6 Understanding how both of these connectors work will make installation easier. Experiment with these connectors and the Radium jumper box to see how they work before the system is installed in the car. Familiarity with both connector styles is required for all installations.
- Page 7 4. 2004-2005 EMS SYSTEM MOUNTING Follow the instructions below if installing the Radium Plug and Play EMS kit on a 2004-2005 Lotus with a cable actuated throttle body. 1. Disconnect battery negative cable. 2. Locate the factory engine control unit (ECU) on the firewall, near the engine intake manifold.
- Page 8 Using a 13mm socket, remove the other mounting nut on the bottom RH side of the ECU. Leave ECU in place and do not remove from firewall. In the EMS kit, locate the two hex standoffs. Thread these onto the aforementioned studs. They have different thread pitches to correspond with the threaded studs (green = M8x1.25, black = M6x1.0).
- Page 9 Plug these into the top two headers of the Radium jumper box. The plugs are keyed to work in the correct headers and are color coded black and brown. Be careful not to use the incorrect header socket.
- Page 10 Four rivets are located on the vertical face (shown) and two are located on the top face hidden by the carpet. Insert the included M5 button head Allen screws into the holes as place holders until the EMS bracket is installed inside at a later step.
- Page 11 Gently pull and unstick the immobilizer control unit from the bulkhead wall, as shown. Using the included hook and loop tape (Velcro), relocate the immobilizer to another spot out of the way of the EMS bracket and wiring.
- Page 12 13. Feed the Radium main wiring harness through the factory bulkhead wall hole and into the cabin. Start with the EMS connector first then carefully feed the other leads through the hole. Once the harness is fed through, snap the grommet back into the hole.
- Page 13 15. Slide the EMS bracket behind the roll bar and align the four holes to the drilled holes from the earlier step. Screw the four button head Allen screws from step 10 into the four rivet nuts in the bracket and tighten.
-
Page 14: Ems Mounting
5. 2006+ EMS SYSTEM MOUNTING Follow the instructions below if you are installing the Radium Plug and Play EMS kit on a 2006+ Lotus with electronic throttle control. 1. Disconnect battery negative cable 2. Remove the speaker panel behind the seats on the interior of the car. - Page 15 6. Locate the ECU connectors removed in step 4 and plug them into the Radium ECU jumper box. Fully lock the latches in the connectors. Place the ECU jumper box onto the mounting studs on the bulkhead wall. 7. Use the factory M6 nuts and secure the jumper box to the bulkhead wall.
- Page 16 8. Using the ECU mounting bracket included in the Radium EMS kit, mount the Radium EMS using the 3 long included screws. Use 4 of the included M5 screws to mount the factory ECU, as shown above. Note the orientation of each component.
- Page 17 10. Place the EMS bracket into the cavity behind the LH roll bar support on the interior of the vehicle. Line up the four holes around the RA logo with the four drilled out rivet holes from step 9. Insert the included M5 screws from the engine bay side and tighten down.
- Page 18 12. Locate the Radium main ECU harness and find the end with the 2005 style ECU connectors. Feed this end through the bulkhead wall pass-through first. Start with the largest connector. 13. From the engine bay side, gently tug and ease the harness through the hole.
- Page 19 14. Keep feeding the harness through until the lead for the 12-pin auxiliary harness is fully in the engine bay. 15. Make sure the two 2005-style connectors are in the unlock position and plug them into the top side of the jumper box. Make sure connectors are fully engaged and slide-locks are closed.
- Page 20 16. Inside the cabin, plug the large connector into the EMS as shown. 17. Plug the other two stock ECU connectors into the stock ECU. Make sure the latches fully close and lock the connectors in place. Plug the remaining connector into the relay mounted to the bracket (not shown).
-
Page 21: Installation Of Accessories
Gently tug these two wires from the protective loom. They will easily slide out. These are the EMS wires for the wideband oxygen sensor input. Pin 4 is the signal (Analog+) and pin 11 is sensor ground (Analog-). Note: Many aftermarket wideband kits will not require the Analog-. Check the wideband manufacturer for more details. - Page 22 AEMTuner software. However, the aux harness is wired for an AEM MAP sensor (or equivalent). Radium sells AEM 3Bar MAP sensor p/n: 30-2130-50. The MAP sensor should be mounted securely and receive a pressure signal from the intake manifold plenum. This can be accomplished by drilling and tapping a 1/8NPT hole in the intake plenum, or remotely mounting the sensor and running a vacuum line from a port on the intake manifold to the sensor.
- Page 23 Spare Output In the standard EMS kit, the output GPIO#6 is used to activate the Lotus Air Box Valve which is used to increase induction sound at high engine speeds. If the optional auxiliary harness was purchased, an integrated fuse and relay comes prewired and can be used for just about anything. The integrated white 2-pin connector will plug into a Spal fan, if needed.
-
Page 24: Before Initial Start-Up
8. Engine Tuning There is a low RPM rev limiter in ALL of the Radium startup calibrations. This limits the engine revs for pre-tune liability. It is found in: Setup Tab | Main Rev Limits | Fuel Cut. This can be raised when the vehicle is put on a dynamometer and ready to be tuned. -
Page 25: Tables And Pinouts
10. Tables and Pinouts The table below illustrates the AEM general purpose input/output that is preset in the Radium EMS kit. GPIO Name Notes Preset to activate the Toyota variable valve lift VVL Solenoid Output solenoid. Preset for the optional Radium power select switch. - Page 26 Shown below are the 04-05 Lotus 2ZZ-GE ECU pinout chart and pin numbering for the 04-05 ECU header. 2004-2005 LOTUS 2ZZ-GE 2004-2005 LOTUS 2ZZ-GE Pre O2 Sensor Heater Ground AC Control Module Compressor Relay Chassis Ground Main Relay Post O2 Sensor Signal Vap Pressure/Fuel Tank Sender/VTC 5V Ref Crank Sensor Signal Trinary Switch AC Request...
- Page 27 Shown below are the 2006+ Lotus 2ZZ-GE ECU pinout chart and pin numbering for the 06+ ECU header. 2006+ BROWN (L) CONNECTOR BLACK (R) CONNECTOR Diagnostic Connector CAN High TMAP Sensor Temp Signal (Supercharged Only) TPMS R1 (Specific Models Only) Oil Pressure Switch Pre O2 Sensor Signal ABS Unit Left Front...
Need help?
Do you have a question about the EMS and is the answer not in the manual?
Questions and answers