Table of Contents
Advertisement
Quick Links
Advertisement
Table of Contents

Summary of Contents for Invisua VSKTV102 Mk II
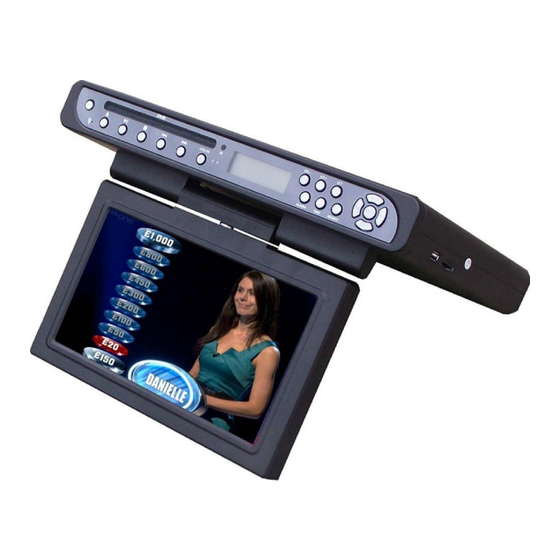
- Page 1 Flip down Kitchen TV / DVD VSKTV102 Mk II Instruction Manual...
-
Page 2: Tv (Front View)
Note: The package will contain the English language manual only – this manual is also available in French and German and can be downloaded from www.invisua.co.uk Note: If mounting below a pelmet, 100mm extra-long screws and additional spacers are available (Product code VSKTV100X) please contact your retailer. -
Page 3: Control Buttons
Control Buttons 1. Power On/Off (This is a touch sensitive button do not press hard on this) 2. DVD/CD Eject 3. Play / Pause (DVD Mode) 4. Stop (DVD Mode) 5. Last Chapter (DVD Mode) 6. Next Chapter (DVD Mode) 7. -
Page 4: Remote Control
Remote Control The design of the remote control can vary, here are the key functions; Power Switch Power on / Standby Source Switch between Modes TV/DTV/Media/AV/PC etc Sleep Switch the TV off after a certain period Mute Turn off the sound USB/SD Switch between the SD Card slot and USB Slot. -
Page 5: Input Source Selection
Input Source Selection Press the source button to display the input source menu. Pressing the up and down buttons will scroll through the menu. Press OK to select the source you require or EXIT to quit. The Menu System Press the Menu button in any mode (Except Media) to display the menu, the first menu will be the channel menu with the following options;... -
Page 6: Menu Options
Menu Options Channel Menu Auto Tuning The option automatically tunes both Analogue (ATV) and digital channels (DTV). First select the country and press OK. Tuning takes a few minutes to complete. See the Quick Setup Guide for full tuning instructions. DTV Manual Tuning Use this option to manually search for DTV channels. - Page 7 Sound Menu Sound Mode There are four pre-set sound modes Standard, Music, Movie & Sports. Use the up/down arrows to select the mode you require and press OK. There is also a fifth mode “Personal” which needs to be select if you wish to manually set the Treble &...
- Page 8 Setup Menu OSD Language Change the language of the On Screen Display (i.e. Menus) TT Language Not Supported by this TV Audio Language Audio Language setting (if supported by broadcaster) Subtitle Language Subtitle Language (if supported by broadcaster) Hearing Impaired Not Supported by this TV PVR File System Checks the PVR (Personal Video Recorder) file system.
-
Page 9: The Dvd Menu System
The DVD Menu System The unit has a separate menu system to set up the DVD playback. When in DVD Mode, press the key D.SETUP on the remote control to enter the main menu of the system setup. Note that to play a DVD, you need to switch to DVD mode first using the source menu. - Page 10 Preference Menu Note that the settings on this menu can only be changes when the TV is not currently playing a DVD or CD. Also, note that these effect of these changes will depend on if the DVD disc supports the language selected. OSD Language Set the Language of the On screen Display Audio Language...
-
Page 11: Dvd Operation
DVD Operation Press the source button on the remote control or the front panel and use the up and down arrows to highlight DVD – then press OK to switch to DVD Mode. When the screen displays the DVD logo, put the disc in the slot loader, or put the SD card or Memory Stick into the appropriate slot. -
Page 12: Setting The Clock
Setting the Clock To set the clock press and hold the TIME button on the front of the unit for a few seconds. 12H/24H will Blink. Press SEL+/SEL- to select the mode required and press TIME once to confirm. Press SEL+/SEL- to select the hour and press TIME to confirm Press SEL+/SEL- to select the minutes and press TIME to confirm The clock has now been set. - Page 13 Visua is a Trademark of In21 Limited Unit 1, Runway Business Park Moor Farm Road West Ashbourne Derbyshire DE6 1HD Sales@in21now.co.uk www.invisua.co.uk...
Need help?
Do you have a question about the VSKTV102 Mk II and is the answer not in the manual?
Questions and answers
My remote control is broken can I get a replacement, my tv is the same as the one in the picture but it's about ****years old now. The metal connection under the battery has broken off, I hope you can help.
The manual does not mention the availability of a replacement remote control. Please contact your retailer or the manufacturer for further assistance.
This answer is automatically generated