Table of Contents
Advertisement
© 2002 VICTOR COMPANY OF JAPAN, LIMITED
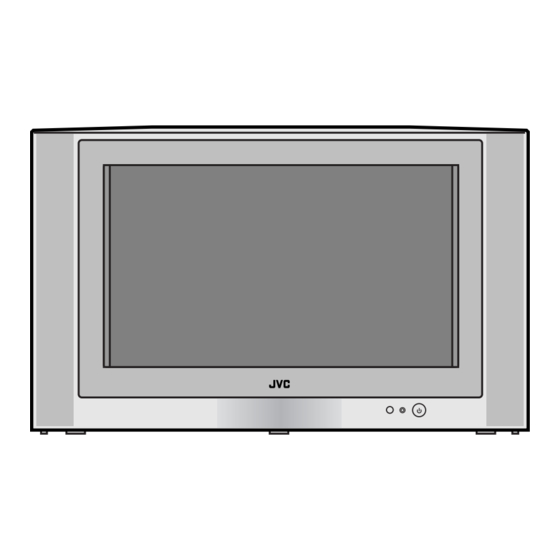
Colour Television
HV-32D25EJ
INSTRUCTIONS
LCT1271-001A-U
1002-T-CR-JMUK
Contents
Setting up your TV . . . . . . . . . . . . . . . . . 5
TV buttons and functions . . . . . . . . . . . 10
Teletext function . . . . . . . . . . . . . . . . . 19
Using the TV's menu . . . . . . . . . . . . . . 22
Additional menu operations . . . . . . . . . 47
Additional preparation . . . . . . . . . . . . . 50
Troubleshooting . . . . . . . . . . . . . . . . . . 55
Specifications . . . . . . . . . . . . . . . . . . . 57
Advertisement
Table of Contents

Related Manuals for JVC D.I.S.T. 1250i InteriArt HV-32D25EJ


Summary of Contents for JVC D.I.S.T. 1250i InteriArt HV-32D25EJ
-
Page 1: Table Of Contents
© 2002 VICTOR COMPANY OF JAPAN, LIMITED Colour Television HV-32D25EJ INSTRUCTIONS LCT1271-001A-U 1002-T-CR-JMUK Contents Setting up your TV ....5 TV buttons and functions ... 10 Remote control buttons and functions. -
Page 2: Remote Control
Thank you for buying this JVC colour television. To make sure you understand how to use your new TV, please read this manual thoroughly before you begin. WARNING: TO PREVENT FIRE OR SHOCK HAZARD, DO NOT EXPOSE THIS APPLIANCE TO RAIN OR MOISTURE. - Page 3 Warning DO NOT cut off the mains plug from this equipment. If the plug fitted is not suitable for the power points in your home or the cable is too short to reach a power point, then obtain an appropriate safety approved extension lead or adaptor or consult your dealer.
- Page 4 • Never obstruct the ventilation of this equipment. Doing so may cause overheating and result in a malfunction or damage. • Never use makeshift stands or attempt to affix legs with wood screws. When using a manufacturer’s approved stand or legs, use only the fixtures provided and follow the installation instructions.
-
Page 5: Setting Up Your Tv
Setting up your TV Caution • Turn off all the equipment including the TV before connecting anything. Connecting the aerial and video cassette recorder (VCR) • The connecting cables are not provided. • For further details, refer to the manuals provided with the devices to be connected. If you are connecting a VCR, follow A A A A →... -
Page 6: Initial Settings
JVC logo. Follow the instructions on the screen display to make the initial settings. 1 Press the Main power button on the The Power lamp lights red (for power on), then green (for TV on) and the JVC logo appears. Power lamp Main power... - Page 7 TV is in the standby mode. Press the # (standby) button on the remote control to turn your TV on. • If the JVC logo does not appear this is because your TV has already been turned on for the first time: use the “LANGUAGE”...
- Page 8 To use T-V LINK functions: A “T-V LINK compatible VCR” means a JVC video cassette recorder with the T-V LINK logo, or with one of the following logos. However, these VCRs may support some or all of the features described earlier.
- Page 9 Pre-set download The VCR will automatically download the registered data on the TV channels from the TV. This means you do not need to set up the program channels on your VCR manually. The preset download function automatically begins when the initial setting is complete or whenever you carry out the AUTO PROGRAM or EDIT/MANUAL functions.
-
Page 10: Tv Buttons And Functions
TV buttons and functions Refer to the pages in brackets for details. 1 Remote control sensor 2 Power lamp (6, 10) 3 Main power button (6, 10) 4 Headphone jack (mini jack) (50) 5 P p buttons/ q buttons (11) 6 r (Volume) button (10) 7 EXT-5 terminal (36, 50) Turn the main power on... -
Page 11: Remote Control Buttons And Functions
Remote control buttons and functions 1 Muting button 2 Number buttons 3 c button 4 3 sound button 5 Information button 6 b button 7 5 buttons 8 Standby button 9 Colour buttons 0 a button - 6 buttons = VCR/DVD/Teletext control button ~ VCR P DVD switch ! g (Text) button @ P button... -
Page 12: Muting The Sound
Remote control buttons and functions Use the PR LIST: 1 Press the h (Information) button to display the PR LIST Pressing the h (information) button changes the display as follows: 2 Press the 5 and 6 buttons to choose a programme number (PR). Then press the a button •... - Page 13 • You can choose a video input signal from the S-VIDEO signal (Y/C signal) and regular video signal (composite signal). For details, see “S-IN (S- VIDEO input)” on page 36. • If you do not have a clear picture or no colour appears, change the colour system manually.
- Page 14 Remote control buttons and functions 16:9 ZOOM: This zooms up the wide picture (16:9 aspect ratio) to the full screen. 16:9 ZOOM SUBTITLE: This zooms up the wide picture (16:9 aspect ratio) with subtitles to the full screen. FULL: This uniformly stretches the left and right sides of a normal picture (4:3 aspect ratio) to fill the wide TV screen.
-
Page 15: Displaying The Current Time
3D-PHONIC function Dolby Surround Pro Logic surround sound and Dolby Digital surround sound can be easily enjoyed without additional surround speakers. You can turn the 3D-PHONIC function on or off by one-touch operation. Press the 3 3 button Pressing the 3 button changes the function as follows: 3D-PHONIC SURROUND OFF... - Page 16 Remote control buttons and functions Using the PIP (picture-in- picture) function You can view two pictures (main-picture and sub-picture). Two different TV programmes can be watched at the same time, or a TV programme and a video programme from an external device can be watched at the same time.
- Page 17 • You cannot view a scrambled channel in the sub-picture. If the S button is pressed when viewing a scrambled channel in the main-picture using an external decoder, the channel you have been viewing in the sub-picture will appear in both the main-picture and sub-picture.
-
Page 18: Dvd Player
P (Text) position. 2 Press the VCR/DVD control button to control your VCR or DVD player • If your device is not made by JVC, these buttons will not work. • Even if your device is made by JVC, some of these buttons may not work, depending on the device you are using. -
Page 19: Teletext Function
Teletext function Basic operation You can view three types of teletext broadcasts on the TV: FLOF (Fastext), TOP and WST. • TOP is not available when the COUNTRY setting is UNITED KINGDOM. 1 Choose a TV channel with a teletext broadcast 2 Set the VCR P DVD switch to the P (Text) position... - Page 20 Teletext function 3 Press and hold down the P button The four page numbers blink white to show that they are stored in memory. To call up a stored page: 1 Press the M button to enter the List mode The page stored with the red button (c) is displayed.
- Page 21 Size You can double the height of the teletext display. Press the R button Index You can return to the index page instantly. Press the T button Returns to page 100 or a previously specified page. Cancel You can search for a teletext page while watching TV.
-
Page 22: Using The Tv's Menu
Using the TV’s menu This TV has a number of functions you can operate using menus. To use all your TV’s functions, you need to understand the basic menu operating techniques fully. Basic operation 1 Press the a button to display the MENU (main menu) •... -
Page 23: Picture Setting
PICTURE SETTING PICTURE MODE You can choose one of three PICTURE MODEs to adjust the picture settings automatically. BRIGHT: Heightens contrast and sharpness. STANDARD: Standardizes picture adjustment. SOFT: Softens contrast and sharpness. Picture Adjustment You can change the picture settings of each PICTURE MODE mode as you like. -
Page 24: Super Digipure
Using the TV’s menu PICTURE FEATURES DIGITAL VNR The DIGITAL VNR function cuts down the amount of ‘noise’ (‘snow’ or interference) in the original picture. You can choose from the three DIGITAL VNR function settings of AUTO, MIN and MAX. AUTO: The TV will automatically adjust the level of the DIGITAL VNR effect to match the... -
Page 25: Colour System
MIN: The level of DigiPure effect is set to the minimum. When you set the Super DigiPure function to AUTO and notice some noise, change the setting from AUTO to MIN. • The MIN setting is not suitable for high- quality pictures which contain very little noise. - Page 26 Using the TV’s menu 4:3 AUTO ASPECT You can choose one of three ZOOM modes, REGULAR, PANORAMIC or 14:9 ZOOM, as the ZOOM mode for the normal picture (4:3 aspect ratio). 1 Choose 4:3 AUTO ASPECT then press the a button 2 Press the 6 buttons to choose a ZOOM mode PICTURE TILT...
-
Page 27: Sound Setting
SOUND SETTING • “BALANCE”, “SPEAKER” and “SUBWOOFER” are not displayed when using the 3D-PHONIC function or DOLBY SURROUND function. STEREO / I • II When you are viewing a bilingual broadcast programme, you can choose the sound from Bilingual I (Sub I) or Bilingual II (Sub II). If you have poor reception on a stereo broadcast, you can change from stereo to mono sound so that you can hear the... - Page 28 Using the TV’s menu HEADPHONE You need to use the HEADPHONE menu to adjust the volume of the headphones. The HEADPHONE menu can also be used to set whether or not sound comes from the TV speakers when the headphones are being used and to perform the settings for the sound coming from the headphones.
- Page 29 SURROUND FEATURES • “SURROUND FEATURES” may not be displayed in the MENU (main menu) when the headphones are connected. Disconnect the headphones before using the “SURROUND FEATURES” menu. 3D-PHONIC Dolby Surround Pro Logic surround sound and Dolby Digital surround sound can be easily enjoyed without additional surround speakers.
- Page 30 Using the TV’s menu When viewing Dolby Surround encoded programmes, you can enjoy Dolby Surround Pro Logic surround sound. • When Dolby Digital surround sound is being used, “DOLBY DIGITAL” is displayed at the top right of the screen for a few seconds.
- Page 31 OFF: Choose when using an external front speaker. Sound does not come from the TV speaker. • The DOLBY SURROUND TV SPEAKER and SOUND SETTING menu SPEAKER settings are changed when the TV SPEAKER setting is changed. SUBWOOFER: INT.: Choose to use the TV woofer for the bass sound.
- Page 32 Using the TV’s menu Setting for using an external front speaker and subwoofer, and using the TV speaker as the centre speaker TV SPEAKER: CENTRE SUBWOOFER: EXT. LEVEL: Adjust the volume. VOLUME (LEFT/CENTRE/RIGHT/ SUBWOOFER): Adjust the balance of the speakers. Hint: When only using an external front speaker which is large enough for the bass sound, and...
- Page 33 REAR SPEAKER: Choose when surround speakers are connected. OFF: Choose when surround speakers are not connected. SUBWOOFER: INT.: Choose to use the TV woofer for the bass sound. • Bass sound does not come from the other speakers. EXT.: Choose when using an external subwoofer.
- Page 34 Using the TV’s menu Setting for using surround speakers connected to the TV For details of how to connect and place the surround speakers, see “Using additional audio equipment” on page 52. TV SPEAKER: L/C/R REAR SPEAKER: ON SUBWOOFER: INT. VOLUME (LEFT/CENTRE/RIGHT/LS/RS/ SUBWOOFER): Adjust the balance of the speakers.
- Page 35 Adjusting the volume balance with the TEST MODE Use the test signal to adjust the volume level of each speaker so that they are all the same. Preparation: • The TV volume cannot be adjusted after the menu is displayed. Increase the TV volume level to about 10 before displaying the menu.
-
Page 36: Ext Setting
Using the TV’s menu EXT SETTING S-IN (S-VIDEO input) You can connect a device (such as an S-VHS VCR) to enjoy the high-quality picture of the S-VIDEO signal (Y/C signal). Preparation: • First read the device’s instruction manual and “Additional preparation” on page 50 to connect the device to the TV properly. - Page 37 2 Press the green button to set the DIGITAL-IN Press the green button repeatedly until the mark which is the same as the type of cable connected to the DIGITAL AUDIO IN terminal is selected. : Select this mark when connected with coaxial cable.
-
Page 38: Sleep Timer
Using the TV’s menu The picture and sound of the TV channel you are currently viewing are output from the EXT-2 terminal. • During dubbing, you cannot turn off the TV. Turning off the TV also turns off the output from the EXT-2 terminal. -
Page 39: Blue Back
BLUE BACK You can set the TV to automatically change to a blue screen and mute the sound if the signal is weak or absent, or when there is no input from an external device. This function is turned on. OFF: This function is turned off. - Page 40 Using the TV’s menu 2 Press the h (Information) button to display “ID NO.” (ID No. input screen) 3 Press the number buttons to enter the ID number The lock is temporarily released so you can view the TV channel. If you have forgotten the ID number: Perform step 1 of “To set the CHILD...
-
Page 41: Auto Program
INSTALL LANGUAGE You can choose the language you want to use for the on-screen display from the language list in a menu. 1 Choose LANGUAGE, then press the a button A sub-menu of the LANGUAGE function appears. 2 Press the 5 and 6 buttons to choose a language. - Page 42 Using the TV’s menu If “ACI START/ACI SKIP” appears in the AUTO PROGRAM menu: You can use the ACI (Automatic Channel Installation) function to decode the ACI data and complete the registration of all the TV channels quickly. For details of the ACI function and how to use it, see “Using the ACI function”...
- Page 43 • For programme number PR 0, “AV” appears in the programme numbers (PR) list. • An EXT terminal number does not appear in the programme numbers (PR) list. • The CH/CC number is a number unique to the TV and corresponds to the channel number of a TV channel.
- Page 44 Using the TV’s menu 1 Press the 6 buttons to choose a TV channel Every time you press the 6 buttons, the programme number (PR) changes and the picture of the TV channel stored in the programme number (PR) appears on the screen.
- Page 45 3 When the COUNTRY setting is UNITED KINGDOM: Press the number buttons to enter the remaining CH number • You cannot enter CC numbers. When the COUNTRY setting is IRELAND: Press the 6 6 buttons to choose “CH” or “CC”, then enter the remaining CH or CC number The TV shifts to registration mode.
- Page 46 Using the TV’s menu 5 Press the green or red button repeatedly until the TV channel you want appears If the TV channel reception is poor: Press the blue or yellow button to fine- tune the TV channel. 6 Press the a a button and register the TV channel to a Programme number (PR)
-
Page 47: Additional Menu Operations
Additional menu operations Using the ACI function This TV has an ACI function which decodes the ACI (Automatic Channel Installation) data. Using the ACI function allows all TV channels transmitted from the cable TV station to be properly registered quickly according to the data from the cable TV station. -
Page 48: Downloading Data To A Vcr
Additional menu operations Downloading data to a VCR You can send the latest programme numbers (PR) data to a VCR with the T-V LINK function. • You can only do this when a T-V LINK compatible VCR is connected to the EXT-2 terminal. - Page 49 7 Follow “Downloading data to a VCR” on page 48 to transmit the programme number (PR) data to the VCR 8 If you have another TV channel you want to unscramble using a decoder, repeat steps 2 to 7 If the DECODER (EXT-2) function has been set to “ON”...
-
Page 50: Additional Preparation
Additional preparation Connecting external equipment Connect the equipment to the TV, making the correct rear panel and front panel connections. Before connecting anything: • Read the manuals that came with the equipment. Depending on the equipment, the connection method may be different from the diagram. -
Page 51: Connecting Headphones
Equipment which can output the S-VIDEO signal (Y/C signal) such as an S-VHS VCR Connect the equipment to an EXT terminal (but not the EXT-1 terminal). You can choose between an S-VIDEO signal (Y/C signal) and a regular video signal (composite signal). - Page 52 Additional preparation Listening to Dolby Digital audio To listen to Dolby Digital audio which is recorded as a Dolby Digital programme source (such as a DVD-video disc), connect the device and set the DIGITAL-IN as described below. Preparation: • A device (such as DVD player) with a digital output terminal (coaxial or optical) for Dolby Digital is necessary.
- Page 53 Surround speakers 1: Connect surround speakers to the TV when you want to use the DOLBY SURROUND function to enjoy surround sound. • Even without surround speakers, you can easily enjoy surround sound by using the 3D-PHONIC function. • Use 8-ohm impedance type speakers. •...
-
Page 54: Removing And Fitting The Woofer Unit
Additional preparation • By using the 5 buttons on the TV remote control or the buttons on the TV, the volume of all the speakers including those of the additional audio equipments can be adjusted simultaneously. • If the volume of the TV speakers is different to the volume of the front speaker system or subwoofer system, adjust the volumes of each amplifier to... -
Page 55: Troubleshooting
Troubleshooting If a problem arises while you are using the TV, please read this troubleshooting guide carefully before you ask to have the TV repaired. You may be able to fix it easily by yourself. For example, if the mains plug is disconnected from the mains outlet, or the TV aerial has problems, you may think there is a problem with the TV itself. -
Page 56: Poor Sound
Troubleshooting Poor sound • Have you adjusted BASS or TREBLE properly? If not, follow the description “Sound Adjustment” on page 27. • When TV channel reception is poor, it can be hard to hear stereo or bilingual sound. In this case, follow the description “STEREO / I •... -
Page 57: Specifications
Specifications Model COUNTRY setting Broadcasting systems CCIR I Colour systems • The EXT terminals also support the NTSC 3.58/4.43 MHz system. Channels and frequencies E21-E69 Sound-multiplex systems NICAM (I) system Teletext systems FLOF (Fastext), WST (World Standard System) Power requirements 220 - 240 V AC, 50 Hz Power consumption Maximum: 310 W, Average: 169 W, Standby: 2.5 W...